No-bake chocolate caramel slices

Chocolate Caramel Slice

 Welcome to this special blog post! Today I would like to introduce one of my best foodie friends Zoe! She will tell you a bit about herself and share a delicious treat (chocolate caramel slices) with you in the end!

A wild blend 

Zoe and I met on Instagram actually and are planning on meeting up in February when Zoe comes to visit her parents in Graz. She is originally from Austria, but moved to Australia a long while ago where she married and had the most wonderful wedding. I keep melting away every time she posts one of her wedding photos.
I connect with Zoe on multiple levels. She also really loves to work out and lift weights, has a sweet tooth like me and adores all kinds of natural food. I love her mantra of eating wild, natural foods that nourish the body and soul. She created her label Wildblend which transmits the love for everything that is wild & natural. Zoe’s recipes are focused on fresh seasonal ingredients, and celebrate unprocessed, healthy whole foods with a dash of superfoods. Sounds amazing, right? Thats why I love to follow this girl and her recipes on Instagram 🙂

Zoe_WildBlend

But her blog topics go well beyond the love for fitness food. Zoe also talks about a balanced lifestyle in her blog posts, shares her photography knowledge and foodie travel tips. I especially love her food guides for Hong Kong and Shanghai!

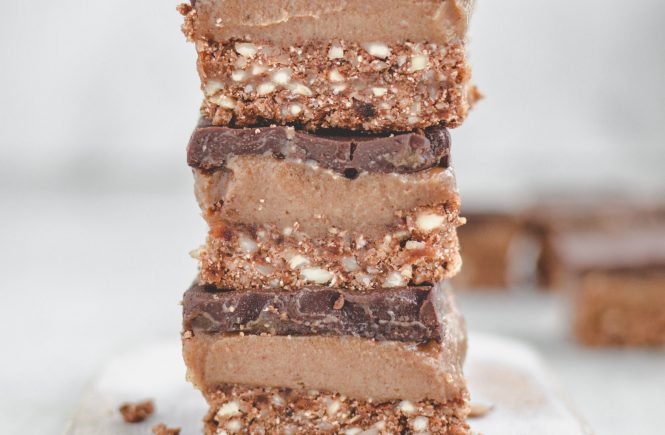
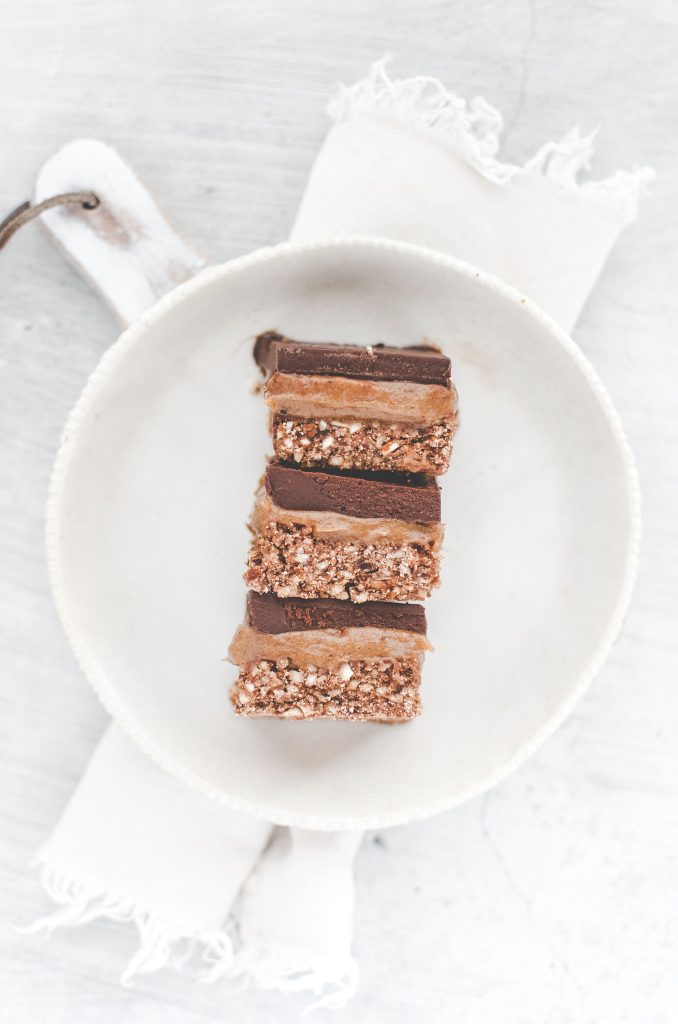
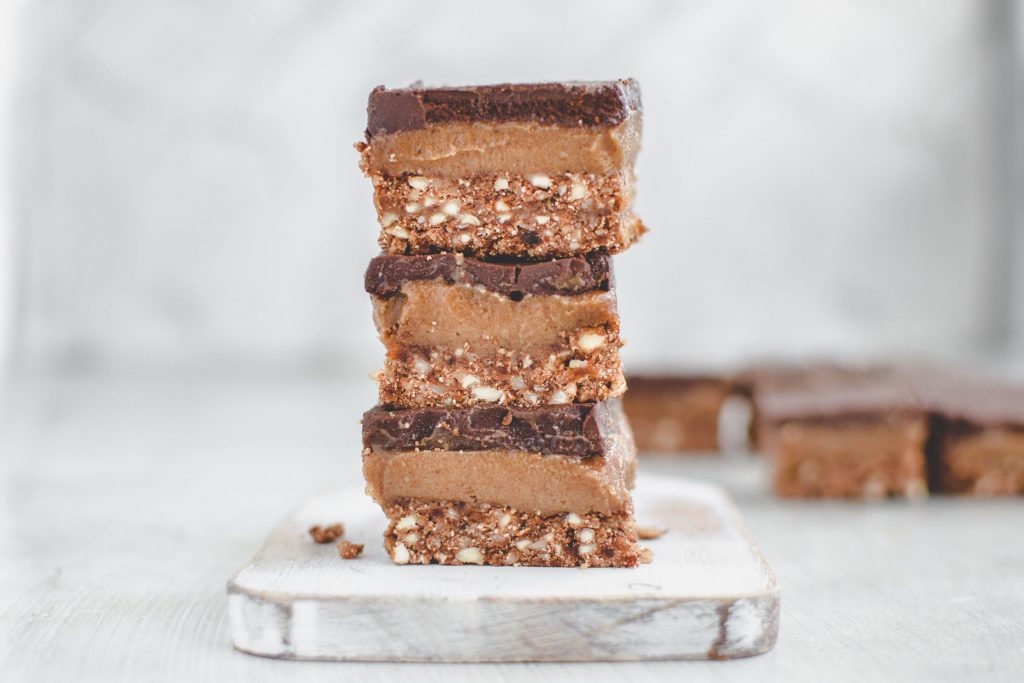
Today Zoe is sharing one of her most popular recipes on my blog. Her healthy no-bake chocolate caramel slices. Delicious caramel sandwiched between a healthy chocolate and gluten-free biscuit layers will rock your taste buds. This recipe is totally guilt free since it is vegan, paleo, no bake and refined sugar free!

So lets hand it over to Zoe to guide you through the recipe:

Let’s get to know Zoe

Hi there,

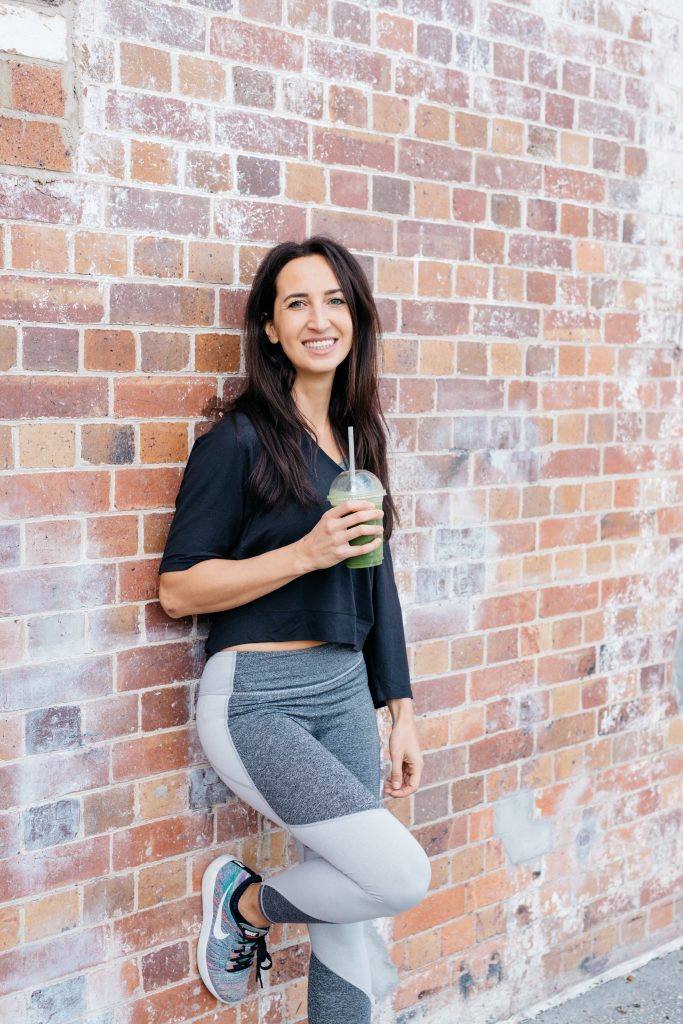
My name is Zoe and I’m a blogger, recipe writer and food photographer from Brisbane, Australia. My label Wildblend is here to inspire people to create healthy dream foods that taste amazing, look amazing and are also really good for you. If looking at my Instagram feed makes you smile then I’ve accomplished my mission. I love sharing my passion for fresh seasonal ingredients, natural food colours, and unprocessed, healthy whole foods. Growing up, my mum taught me how to cook from scratch and since then I’ve been curious about turning just about every recipe I loved as a child into a healthy gluten-free and dairy-free version that anyone can enjoy.Zoe_WildBlend

On my blog wildblend.co I focus on simple recipes with minimal ingredients. Most of my creations are also Paleo and Vegan-friendly. I host food photography workshops in Australia and hopefully also in other places around the world during my travels next year. Moreover, I love teaching and sharing my passion just as much as I love cooking. Therefore, I hope that my journey will inspire someone else to follow their passion and turn their dream into their day-to-day job. If I can do it, then you can do it too. Instagram has enabled me to collaborate with amazing human beings such as Carina and it’s such a wonderful platform to make friends online and offline.

As I’m writing this, I’m sitting in an Airbnb in Melbourne to apply for my US visa. My husband and I are planning to go on a 12-month honeymoon/work-and-travel adventure around the world and hopefully I’ll get to catch up with Carina along the way. Today, I’m sharing an all-time blog favourite, my Healthy No-Bake Chocolate Caramel Slices. It’s a fan favourite and a huge hit in my household. The secret of this slice are the three layers, nutty base, caramel-y middle, and a chocolatey topping! Trust me, you won’t want to miss out—this is the perfect Christmas holiday treat the whole family will love. Enjoy!

chocolate caramel slices

No-Bake Chocolate Caramel Slices

These no-bake caramel chocolate slices is a healthy twist on classic caramel slice. The caramel made from gooey Medjool dates, soaked cashews and almond butter—is much healthier and easier to make than conventional caramel. Medjool dates have a rich, almost caramel-like taste and a soft, chewy texture. They are bigger, softer and gooier than regular dried dates. If you can’t get them, use dried dates, but be sure to soak them in water to soften them before blending.

This date caramel is so silky, rich, and sweet (everything you’d ever expect from caramel), that you’d never know it’s vegan, dairy-free, and Paleo, with zero added sugar! It’s sandwiched between a 3-ingredient chocolate layer and a crunchy almond and coconut base. I recommend using raw organic cacao powder (over baking cacao) for the chocolate layer to reap the full benefits of it. Raw cacao has more calcium than cow’s milk, over 40 times the antioxidants of blueberries, and is the highest plant-based source of iron. In other words, it’s a true superfood perfect for Vegans. I’m a huge fan of no-bake dessert because you don’t have to turn on the oven to make them. All you need is a freezer and a little bit of patience. I guarantee these decadent treats are worth the wait.

chocolate caramel slices

The recipe

Here is Zoe’s incredible recipe for her chocolate caramel slices:

Ingredients
(makes 16 slices)

Base

  • 1 cups raw almonds
  • ½ cup coconut flour
  • ¾ cup Medjool dates (soaked and pitted)
  • 1 Tbsp raw cacao powder

Caramel

  • 1 cup Medjool dates (pitted)
  • ½ cup cashews (soaked & pitted)
  • 2 Tbsp rice malt syrup
  • 2 Tbsp almond butter
  • 4 Tbsp coconut oil
  • 4 Tbsp coconut milk
  • 1 tsp vanilla extract

Chocolate Layer

  • 1/3 cup raw cacao powder
  • ½ cup coconut oil
  • ¼ cup maple syrup

Instructions:

  1. For the base, add all ingredients to a high-speed blender and blend until a sticky cookie dough forms.
  2. Press base into a lined (20 x 20cm) baking pan until firmly packed. Set aside.
  3. For the caramel add all ingredients to a high-speed blender and blend until creamy and smooth.
  4. Spread the caramel evenly onto the base and place in freezer to set.
  5. For the chocolate top, whisk together the ingredients until smooth.
  6. Once the caramel has set, spread the chocolate sauce evenly on top the caramel layer and smooth it with a silicone spatula.
  7. Place it back in the freezer for 2 hours or until set.
  8. Carefully remove from the pan, slice it up and store in an airtight container in the fridge and ready are your chocolate caramel slices.

Chocolate Caramel Slices

I hope you enjoyed learning how to make these wonderful chocolate caramel slices by Zoe and will check her out on social media, she is a wonderful soul and a great friend! 

If you end up making the caramel slices  make sure to tag us on Instagram @carina_berry & @wilblend we would love to see your creations 🙂 
For more caramel yumminess you can look up my protein caramel cheesecake

xoxo, 

Carina & Zoe 

Save this to your favorite Pinterest board:

Chocolate Caramel Slices

Weiterlesen

Avocado cheesecake – delicious raw and vegan recipe!

Raw Vegan Avocado Cheesecake

Avocado cheesecake for dessert? Definitely something new to try, right? 
I promise you will love the creamy and smooth texture of the avocado. Lime zest and just add that extra tang that makes this dessert so interesting. 

Recipe Inspiration

I just recently came up with this dessert traveling through central America since we eat so many delicious avocados here. The other day we went to a local farmers market and bought three avocados. As luck had it they became ripe all at the same time and I had to find a way to quickly use as much avocado as possible. That’s by the way also how my stuffed avocado recipe came along. Yes – we were eating a lot of avocado that day 😀 Well anyways, so I had a bunch of limes laying around and I needed to make something green for my Instagram feed. Put those factors together and you get avocado cheesecake! All of a sudden it just made so much sense since the buttery avocado and zesty lime just go together so well. 

Raw Vegan Avocado Cheesecake

Fitness Food

This recipe is free from all the bad stuff you can imagine. My avocado cheese cake is a raw, dairy-free, gluten-free, refined sugar-free dessert. Say what? Yes its possible and you will see! What  I also really love about this avocado cheesecake is that it it is loaded with healthy fats. Avocado has a lot of unsaturated fats which are so good for your body! Since this is a no bake avocado cheesecake recipe you will preserve all the healthy vitamins inside the cake. 

Furthermore this cake is super low carb actually. My boyfriend is currently on a very strict diet, as he is training for the Mr.World competition in January. So all the recipes I am currently making need to be 100% clean. If you might remember my Instastory from that day – he ate half of the cake at once! 

Raw Vegan Avocado Cheesecake

How to make it avocado cheesecake

Its is a really easy avocado cheesecake recipe as most of it comes together quickly in a blender or food processor. Its a no-bake cake so it also won’t take you a long time to make it. 
You will start by making the crust. Combine all ingredients and then press them onto the bottom of a silicon mold. After that you will be blending all the ingredients for the filling in a food processor and simply pour it over the crust. Next you will want to freeze your cake for 2 hours and its ready to be enjoyed. Yes, its as easy as that! 

Raw Vegan Avocado Cheesecake

Decoration Tips

You might want to decorate your avocado cheesecake a bit. I sliced some limes and lemons and put them on the cake. It also looks super beautiful if you grate some lime zest and sprinkle that over your cake. Since kiwis also have a really nice green color I used them for decoration as well. If you have tiny little cookie cutters you can cut out stars or hearts from an avocado and place that on top of the cake as well. 

Raw Vegan Avocado Cheesecake

The recipe

Raw Vegan Avocado Cheesecake
Serves 3
A raw, dairy-free, gluten-free, refined sugar-free dessert.
Write a review
Print
Total Time
20 min
Total Time
20 min
Ingredients
  1. 2 large avocado (ripe)
  2. 1 tsp lime zest
  3. Juice of 2 limes
  4. 30g of Xylit or Erythrit or a couple Flavdrops
  5. 2 tbsp full fat coconut cream
Crust
  1. 100g fine oats
  2. 3 tbsp peanut butter
  3. 1 tbsp honey
  4. 1 tsp cinnamon
  5. 50 ml water
Instructions
  1. For the crust, mix all ingredients into a crumbly mixture.
  2. Press on the bottom of a small silicon mold.
  3. In a blender, finely puree all the ingredients for the filling.
  4. Fill the mass in the silicone mold and place in the freezer for 2 hours.
  5. Remove the frozen cake from the mold and decorate with lime slices, zest and kiwis.
Notes
  1. I made this recipe with a SMALL silicon mold. If you only have a big one I recommend you double to ingredients. You can also make the same recipe in little muffin molds.
carinaberry.com https://carinaberry.com/

Looking for more inspirations? 

If you are looking for more vegan cakes I can really recommend my raw vegan cashew cheesecake. It is one of my all time favorite recipes!  Another interesting dessert idea are my vegan pineapple cups. Maybe also worth a try. 
Also you can head over to my YouTube for more recipe videos or my food blogging online course for more foodie tips and tricks. 

Free Fitness Cookbook

Today I would also love to share my Clean & Lean E-book with you! It’s my own E-book which I published last year filled with delicious, healthy recipes. Sign up for my fit food tribe and receive it for free! 


Did you make this recipe? 

Did you make this recipe?

Tag  @carina_berry and use the Hashtag #carinaberry to get the possibility for a shoutout on my Instagram! 

Finally, I always love to see your wonderful creations and it makes me so happy to see you guys actually making my recipes. 

xoxo,

Pin this raw avocado cheesecake recipe:

Raw vegan avocado cheesecake


Weiterlesen

Try This Raw Vegan Cashew Cheesecake

Raw_Vegan_Cashew_Cheesecake

Have you ever tried raw vegan cheesecake? Most people think that raw food can’t possibly taste great. Raw and vegan?! Well that has to be horrible than right?! This is absolutely not the case with this delicious, creamy and tasty raw vegan cashew cheesecake!

Raw_Vegan_Cashew_Cheesecake

Why do I share a raw vegan recipe this time?

I took part in a blogger event this week and learnt that on August 2nd 2018 we had the Earth Overshoot Day. This is the day that we have used up more resources than the planet can regenerate in one year. This really made me realize how terrible we are treating our environment. Each year this day is coming earlier and we are already using 1.7 Earths right now! I believe we ALL need to do something against this. I think it can already be small steps that all of us take that will make a big difference. These could be better choices regarding the food you eat, the way you live, the waste you produce and the way you care about the environment. 

Personally, I decided to introduce one vegan day of the week! Most carbone dioxide emissions come from animal production. By giving up meat and dairy products for a day I can already reduce my personal animal product consumption. To be honest, I am yet not totally able to give up meat and dairy completely, but already one day of the week will make a difference! 
And that is why I am especially sharing a raw vegan recipe this time!

Raw_Vegan_Cashew_Cheesecake

Raw Vegan Cashew Cheesecake Recipe 

The recipe itself is super easy, like most of the recipes I share here. It basically consists of throwing stuff into a blender. So no cooking skills needed here 🙂 

The crust recipe is actually from my lovely food blogging friend @foodie.yuki , who I definitely need to give credits here for her AMAZING crust recipe! 

The filling I made up myself and you wont need more than 3 ingredients to make it and trust me you will fall in love with the marvelous creamy texture it has <3 

I recommend you already soak the cashews overnight to have them ready in the morning for your raw vegan cheesecake. The whole recipe will take around 30 min. So lets jump right in: 

Raw Vegan Cashew Cheesecake
Serves 1
A delicious, creamy recipe without any sugar, dairy or flour!
Write a review
Print
Total Time
30 min
Total Time
30 min
Ingredients
  1. Crust
  2. 340g chopped almonds
  3. 170g oats
  4. 1 TBSP almond butter
  5. 9 dates, pitted and chopped
  6. 1 TBSP water
  7. Filling
  8. 200g cashew nuts (soaked overnight)
  9. 200ml coconut milk
  10. 70g Xylit
  11. zest of half a lemon
Instructions
  1. Starting with the crust put all the ingredients into a food processor and mix well. Press the sticky mixture onto a tart form and put it into the refrigerator while working on the filling.
  2. For the filling put all the ingredients again in the food processor and mix until well combined. Then transfer the batter into the tart form and brush out evenly to the edges.
  3. Put the cheesecake back into the refrigerator for another 2 hours.
Notes
  1. Best when served cold.
Adapted from Crust by @foodie.yuki
carinaberry.com https://carinaberry.com/
Raw_Vegan_Cashew_Cheesecake

If you are interested in more vegan cheesecake recipes? Check out my vegan rhubarb summer cake here

If you make this recipe and want to share it on your Instagram make sure to tag me in the photo and use the #carinaberry. I am always featuring posts on my story!

xoxo,

Weiterlesen

Wrapped Rhubarb Cake

Wrapped Rhubarb Cheesecake

The first sunny days brightened up the country and summer is almost in sight. This week I discovered how fast the rhubarb in my garden had grown and was super motivated to create the first summer recipe of the season. That is why I am sharing a wonderful wrapped rhubarb cake recipe with you today!

I have a soft spot for rhubarb. It’s just like asparagus such a seasonal speciality. It barely has any calories and simply such a unique and awesome taste. I love that it grows right in my garden – fully organic. 

I wanted to create something extremely special to celebrate the start into my favorite season of the year. Since I love rhubarb and also cheesecake I thought why not combine both of my addictions into one explosion of deliciousness and therefore created a wrapped rhubarb cheesecake. 


What I love about this special cake is that it looks so beautiful with its subtle pink colors. Almost too beautiful to cut and eat. The rhubarb stalks give the wrapped rhubarb cake almost a bit of an ombré effect which is simply breathtaking. 

This was the first time I made a more difficult recipe and it actually took me quite some time to prepare it.  It is by no means a difficult recipe, but there are simply many different steps with a lot of waiting time in between. However, if you have time on the weekend this could be a super fun project for one of your mornings. 

Wrapped Rhubarb Cheesecake

Most of the recipe consists of only mixing things together in a food processor. However there is one tricky part which is boiling the rhubarb stalks. The only super important thing is to not let them cook for too long or otherwise you will have rhubarb noodles 😀 

http://www.sprinklebakes.com/

Once you have the cake ready you need to make sure to slowly let it thaw in the fridge. Stil serve it cold and impress everyone at your summer party with this easy to make delicious and sugar-free cake! 

Tip: Make sure you use a very sharp knife for cutting.

Wrapped Rhubarb Cheesecake

Let’s jump into the wrapped rhubarb cake recipe. You will see, it is easier than it looks! This recipe is adapted from Sprinklesbakes 

Wrapped Rhubarb Cheesecake
Serves 12
A sugar-free summer cake
Write a review
Print
Ingredients
  1. Crust
  2. 1 cup packed pitted dates*
  3. 1 cup raw walnuts
  4. Filling
  5. 2 1/2 cups raw cashews (covered with water and soaked for 8 hours)
  6. 1 tbsp vanilla bean paste
  7. 1/2 cup pure maple syrup
  8. 1/4 cup melted virgin coconut oil
  9. 1/2 cup lemon juice
  10. 1/4 cup water
  11. pinch of salt
  12. Rhubarb Coating
  13. 1 cup water
  14. 1/2 cup sugar
  15. 6-7 long rhubarb stalks
Instructions
  1. In a food processor mix the dates until well blended. Put them into a bowl and set aside.
  2. Now blend the raw walnuts until you also have a very smooth mixture.
  3. Mix both parts together and press into the bottom of a silicone form. The crust should be around half an inch.
  4. Drain your cashews that have been soaking for at least 8 hours and combine them with all the other ingredients for the filling in a food processor. Make sure to mix them until you get a very smooth blend.
  5. Pour into the silicone form and freeze for 3 hours
  6. Now moving on to the rhubarb coating use a vegetable peeler and shave the rhubarb stalks into paper thin strips.
  7. Take a pot and let the sugar and water boil together. Don’t place more than three stalks in the water at the same time and only let them cook for about 20-30 seconds.
  8. Let the cooked rhubarb strips drain on a paper towel.
  9. To decorate the cake, lay the strips on top of the cake first until the whole surface is covered completely. Trim away the excess with kitchen scissors. Since the cake is frozen the stalks will stick perfectly onto the cake.
  10. Now wrap the remaining stalks around the cake. If your rhubarb has different shades of pink you can even create an ombre look.
  11. Place the cake in the fridge and let thaw. Cut with a very sharp knife.
Notes
  1. Don't cook rhubarb for too long.
carinaberry.com https://carinaberry.com/


I hope you enjoyed this wrapped rhubarb cake recipe and will try it yourself someday. In case you are looking for another vegan recipe I can recommend you check out my vegan waffles without sugar or my vegan avocado cheesecake

DID YOU MAKE THIS WRAPPE RHUBARB CAKE?

Tag @carinaberry on Instagram and hashtag it #carinaberry

I’ll always be giving shoutouts on my Instastory for those who are making my recipes. <3

xoxo

Weiterlesen

Vegan Blueberry Cheesecake

Vegan Blueberry Cheesecake – doesnt that sound delicious?!?


Ever since I lived in America Cheesecake definitely is one of my favouite desserts to eat. Not sure if someone has ever been to the Cheesecake Factory in the US, but it is one of those places I like to spend a lot of time in when I’m there. 

They have all kinds of magical cheesecake varieties you could only have imagined in your wildest dreams there. 


However, since normal cheesecake unfortunately is not very fitness approved or healthy I wanted to develop a recipe that still tastes amazing, but is way better for you than the sugary stuff you get to buy elsewhere. 


How I sweeten the cheesecake


Since I am also super fond of vegan recipes I took on the challenge to make a vegan cheesecake with delicious blueberries. I used Xylit as a sweetener which has 40% less calories than regular sugar. Also there is no kind of flour, oil or butter in this recipe, which makes it extra fitness approved! 🙂 

This recipe is really easy to make. All you need is a good blender. Since this is a raw cake you won’t even have to bake it. The cashew blueberry filling tastes so incredibly good – you will see! I would pick this cheesecake anytime over a regular one. 

The Recipe

Vegan Blueberry Cheesecake
Serves 6
Write a review
Print
Prep Time
30 min
Cook Time
30 min
Total Time
1 hr
Prep Time
30 min
Cook Time
30 min
Total Time
1 hr
Filling
  1. 400g cashews
  2. 200g frozen blueberries
  3. 40g xylitol
Crust
  1. 250g dates
  2. 50g grated almonds
  3. cinnamon
Topping
  1. 100 fresh blueberries as decoration
  2. Low Sugar Blueberry Fruit Spread
Instructions
  1. Soak cashews in water overnight. The next day drain the cashews and blend them well with the frozen blueberries in a mixer. Stir in the xylit sugar.
  2. For the crust mix the dates with the grated almonds. Take a little pie form and press the crust gently onto the bottom until it covers the whole surface. Now layer the cashew-blueberry "dough" over it. Put the cake into the fridge for an hour and allow it to harden.
  3. Now take out the cheesecake and evenly cover it with sugarfree blueberry jam.
  4. To decorate the pretty cheesecake place some blueberries on top of it and sprinkle some coconut flakes over it.
Notes
  1. Make sure to keep this pie cold.
carinaberry.com https://carinaberry.com/

DID YOU MAKE THIS RECIPE?

Tag @carinaberry on Instagram and hashtag it #carinaberry

I’ll always be giving shoutouts on my Instastory for those who are making my recipes. <3

xoxo

Weiterlesen