How to grow on TikTok in 2021 – tips from a 1 million follower influencer!

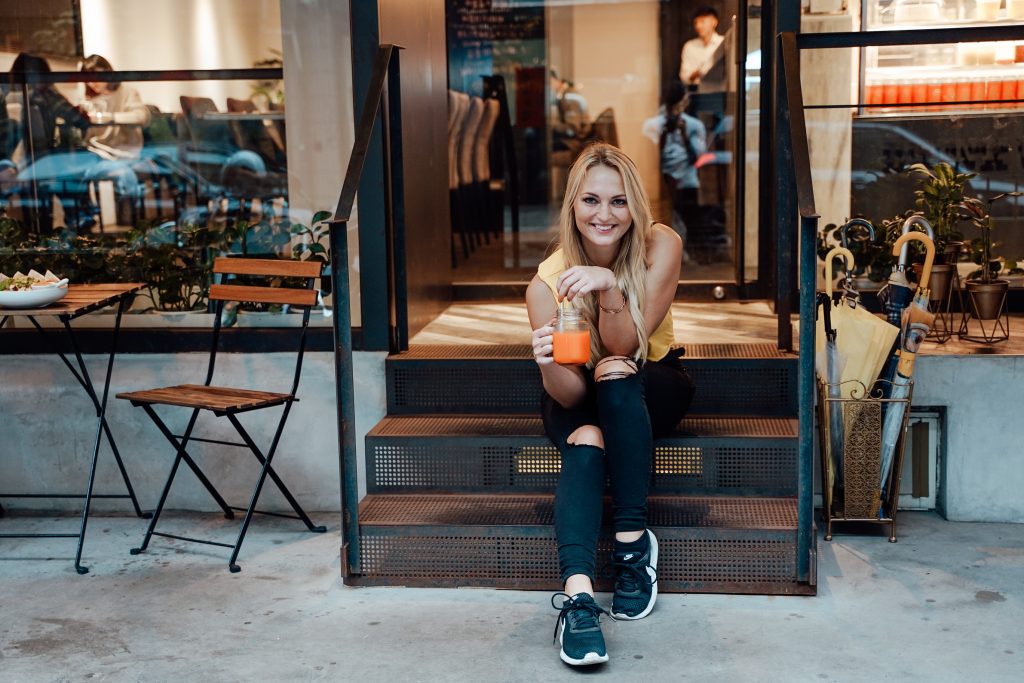
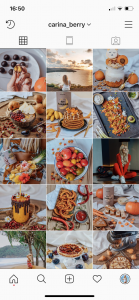
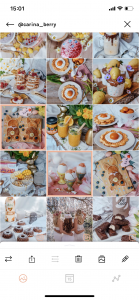
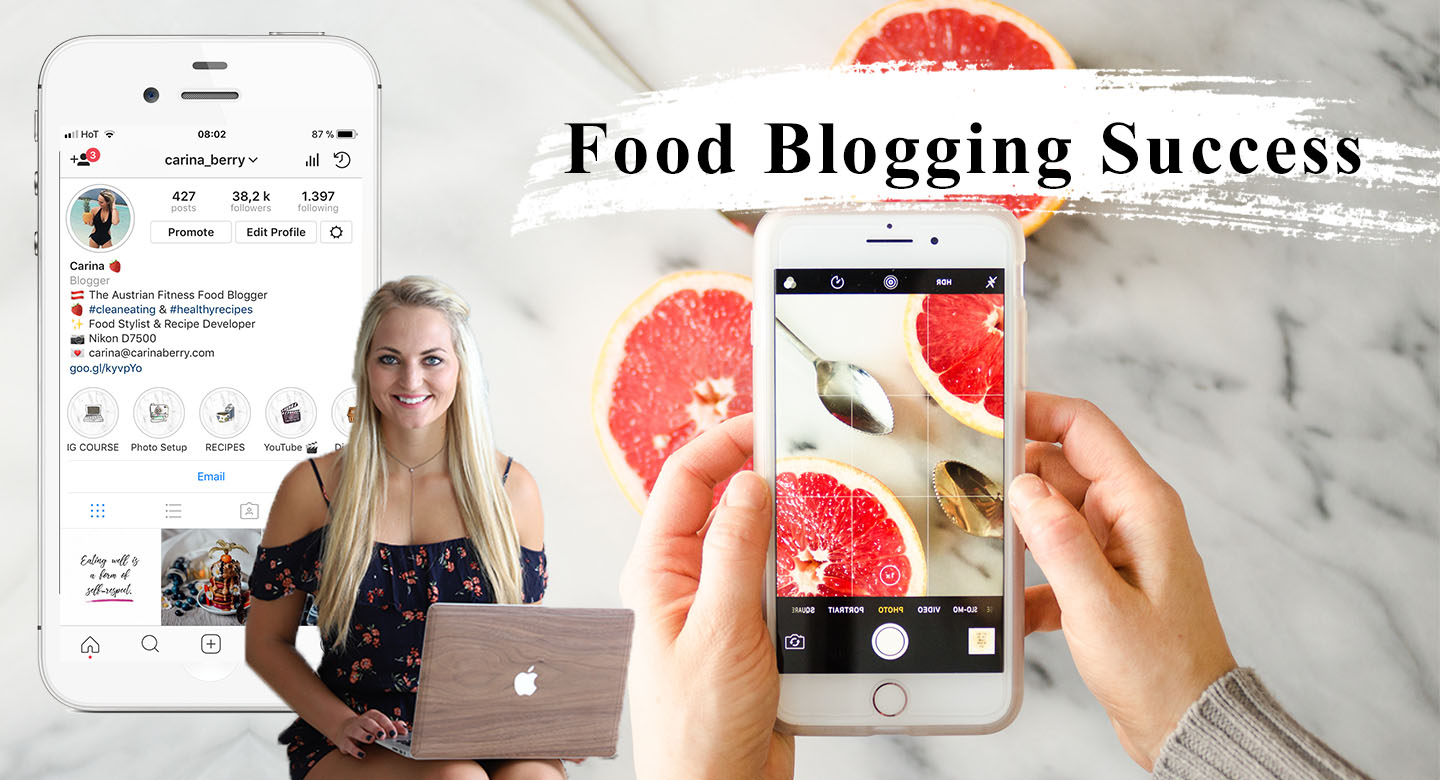
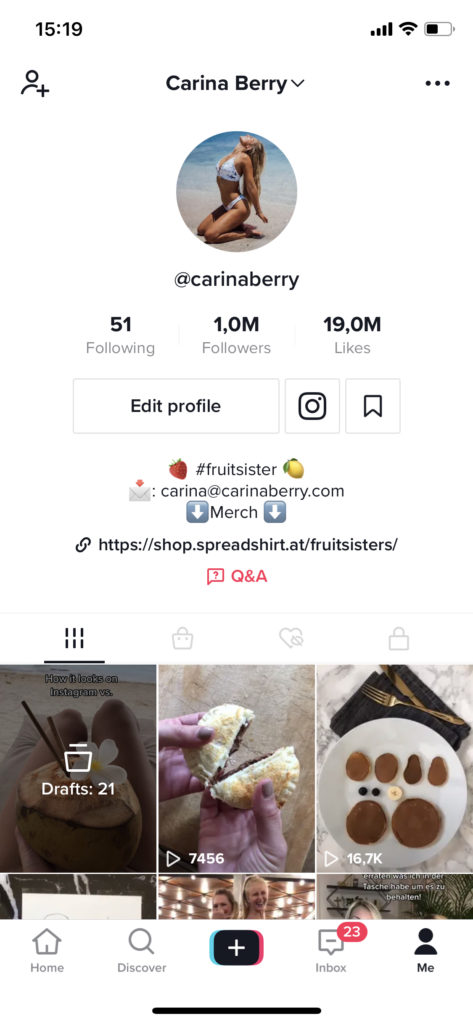
Welcome to this blog post on how to grow on TikTok in 2021. My name is Carina and I just hit one million followers on TikTok. I’m super excited to share my TikTok growth wisdom with you today. I myself had an extremely viral video last year (check out my Youtube video here). I grew from 700 followers to 250,000 overnight. And I want to share with you today how to keep getting those viral videos and how to keep growing your account, because getting one viral video anybody can do, but then building up on that and consistently delivering high-quality videos that will convert into followers is the real challenge. 

one million follower on tiktok

7 tips on how to grow on TikTok

Today I’m going to give you my best TikTok growth tips in order for you to grow your account as well. So let’s get started.

It’s a numbers game

Post often and post regularly. The more you post, the more and the higher the chances of your video going viral. I post between one to three times a day. I know that sounds like a lot- which it actually is, but if you want to become serious about growing on TikTok you definitely have to deliver content constantly.

How to grow on TikTok

Consistency is the key. So don’t just post one video, then nothing for four days, and then another video. That wont be enough. You definitely need a lot of videos in order to get higher chances of one of them going viral. So I recommend at least posting one video a day. Obviously that should also be well thought out content and not just any random video. 

Cater to your audience

Don’t just recycle content you use for Instagram or for a different platform, and repost it on TikTok. It most certainly won’t work.
TikTok doesn’t like high polished, edited content. It doesn’t like the selfie view that Instagram stories will usually have. So you really have to produce content specifically for TikTok. That’s really important. You also have to understand the creativity of TikTok. TikTok works very different than Instagram or YouTube does. So on TikTok it’s important that it’s real and spontaneous content. It has to be unedited, unfiltered, quick, fast or entertaining. Don’t just use something you created for another platform and recycle it on TikTok, hoping it will go to go viral.

Provide value

Good content is king. I think that goes for any content on any social media channel out there. It has to be beneficial for the viewer somehow. You either have to provide information, entertainment, education, or deliver some kind of other value. So before creating a video think of the main message you want to deliver and what it should provoke in the viewer. 

Use trends, but don’t copy

When you want to know how to grow on TikTok you should definitely use trends. Trends are a great way for your videos to be super pushed and searched for on TikTok. But don’t just take a trend and straight up copy it. Don’t just copy and paste something that somebody else has already done. That rarely ever works. It is good to use video trends or the trendy music, but always with your own twist.

Get creative, take the trend, twist it a little bit, and then make something even more awesome out of it. When making any kind of video, make it short and sweet. People on TikTok don’t have a long attention span. If the first one, two, three seconds, seconds, of your video are not catching you will lose that viewer. So definitely make sure that especially the beginning of your video you show something captivating. The longer somebody is going to watch your video the higher are the chances of it going viral.

Call to action

Also, make sure to include some kind of call to action, because the higher engagement you get in the beginning, when you post a video, the more it will go up to more people and more people. That’s how the algorithm works, actually. A little detour here. So when you post a video, it’s going to be shown to a small audience, a small circle of people, and if they interact and engage with your video, TikTok will show it to more people. And if they interact, they will show it to more people. And that’s how your video keeps growing and growing.

So you need to make sure that in the beginning, your followers are interacting with your video in order for it to grow faster and faster. You can add a call to action in the caption but also at the end of your video. 

Behind-the-scenes content

People love behind-the-scenes content. So if you film a video, put up a second camera and just film what you’re doing and then cut a video with it and make a making of video. I can guarantee you it’s going to go really well, sometimes even better than the actual video. It has happened to me so many times before.

Here is one example of the behind-the-scenes video performing better than the actual video itself. 

People just want to see how the video is made and what the behind-the-scenes situation looks like.

Explore different styles

Last but not least, you just have to try a lot of different things until you find that one thing that works for your account. Don’t get discouraged by the first couple of videos completely flopping. For example, I have a million followers right now and sometimes I have videos that get barely 10,000 views.

Each video fights for itself. It doesn’t mean if you have a certain amount of followers that every video is going to go viral. Because still every single video you put out there needs to be amazing and good for people to interact with to make it go viral. So it’s a struggle every single time. So it really is necessary to put work and effort as well as planning into your videos, and then I’m sure something amazing will come out.

Don’t be shy to try different things, everything from cooking to travel content, to voiceovers, to vlog style. You can make TikTok anything you would want it to be. It doesn’t necessarily have to be lip syncing and dancing. So just play around with the app and have fun! I really hope this blog post on how to grow on TikTok was helpful and I wish you the best of luck.

Also if you want this blog post in video, check it out on my Youtube channel: 

If you are also interested in learning more about Instagram growth you should take a look at these blog posts: 

  • 5 Tools to Become an Established Instagram Blogger
  • 10 best food blog tips for Instagram growth

xoxo, 

Carina

Weiterlesen

Instagram Story Sticker – Food Elemente für iOS

Instagram Story Sticker

Lust deine Stories kreativer und schöner zu gestalten? Liebevoll gestaltet Stories stechen einfach aus der Menge hervor und fallen auf. Instagram Story Sticker sind eine wunderbare Möglichkeit seine eigenen Stories aufzupeppen. Mit meinen neuen Food Elementen kannst du dich von anderen Content Creatoren absetzen und deiner Community zeigen wie harmonisch Stories sein können. 


Heutzutage ist es gar nicht mehr so einfach in der Instagram Welt herauszustechen. So viele Menschen bringen mittlerweile so viel guten Content heraus. Man wird überflutet von Stories und Postings. Wie hebt man sich also nun von anderen ab? Der große Unterschied liegt in der Liebe zum Detail! 

Instagram Story Sticker

Was ist alles im Paket enthalten? 

Du erhältst in diesem Paket eine große Auswahl von 29 FOOD Elementen für iOS!

4 animierte Food GIF’s, 9 Schriftzüge, 16 süße Food Elemente und eine Rezeptkarte  werden deine Story ab jetzt herausstechen lassen! 

Die Sticker sind in wunderschönen Pastellfarben gestaltet und wurden in enger Zusammenarbeit mit einem Grafikdesigner extra für dich entwickelt. Ich wollte die süßen Beerenelemente immer wieder einfließen lassen und einfach meinen eigenen Style mit in die Sticker bringen. Ich hoffe du wirst sie so sehr lieben wie ich. 

Hier eine Auflistung der einzelnen Elemente: 

  • Gifs: Baking time, Eat the rainbow, Like button, I’m hungy
  • Schriftzüge: Essen gut – alles gut, Food heaven, #foodporn, Essen ist fertig!, mhmmm…, 100% fitness approved – by me!, veggie, low carb, healthy
  • Designs: Avocado & toast, Berry nice, breakfast time, Einkaufsliste, frisches Obst & Gemüse, Heißgetränk, Kochbuch, Rezeptkarte, Kochhaube, Küchenhandschuh, Mixer, Müslischale, Picknickkorb mit Decke, Rührgerät, Spritztüte, Schneebesen

Die Sticker lassen sich ganz schnell am Handy installieren und in der Galerie abspeichern – so hast du sie innerhalb von Sekunden immer griffbereit. 

Wie funktionieren die Instagram Story Sticker? 

Die Installation der Instagram Story Sticker ist wirklich wahnsinnig einfach. Im Moment funktionieren sie aber leider nur über iOS und nicht mit Android! 

Hier die Schritte erklärt:

  1. Nach dem Kauf kannst du dir die Datei herunterladen. Speichere dir den ZIP Ordner am Handy ab. 
  2. Lade die App Unzip im App Store herunter. 
  3. Öffne die Datei mit Unzip am Handy. Du findest die Elemente nun in deiner Galerie. 
  4. Speichere die Sticker zusammen in einen neuen Ordner ab damit du sie immer griffbereit hast. 
  5. Um die einzelnen Instagram story sticker zu verwenden klickst du einfach beim Element nach Wahl auf „kopieren“ und fügst es danach in deiner Instagram Story wieder ein. 
  6. Du kannst mehrere Sticker auf einmal in deine Story einfügen und am ganzen Bildschirm platzieren. 

Die Sticker sind für dich wenn du: 

  ein iPhone verwendest
  deine Story kreativer gestalten möchtest
  deine Story von anderen abheben möchtest
  nicht immer nach neuen Gifs in der Instagram Datenbank suchen möchtest
  gerne kochst oder öfters Essen in deiner Story zeigst

Hier gehts zum Download der Food Collection für iOS:


Zum Start der Sticker gibt es ein reduziertes Angebot, was du unbedingt nützen solltest bevor der Originalpreis wieder kommt!

Ich freue mich schon wahnsinnig darauf zu sehen wie du die Sticker in deinen Stories einsetzen wirst! Du kannst mich gerne darin markieren. Ich reposte immer wieder Content von euch 🙂 

Möchtest du die Food Sticker gleich anwenden und bei coolen Rezepten verwenden? Dann hol dir doch Inspiration in meinem Fitness Kochbuch! Hier findest du 35 geniale, cleane Frühstückrezepte für den perfekten Start in den Tag! 

xoxo, 

Weiterlesen

5 Tools to Become an Established Instagram Blogger (2020)

With roughly 1 billion monthly users, Instagram’s powerful platform carries massive value for brands. If you’re looking to turn your Instagram influence into a side hustle or rather a full-time business, keep reading to learn five tools for Instagram bloggers to help you become an established influencer yourself. 

Kicksta

It’s extremely difficult to become an established Instagram blogger without a solid following. The key, especially for micro-influencers, is to get more followers who have a genuine interest in your niche aka will actually want to read your blogs and engage with your posts. 

Gaining followers on Instagram can be a time-consuming and tedious process. Instagram growth services, like Kicksta, use specific methods such as liking photos posted by people in your target audience, following users in your audience or auto-commenting, to name a few, to get you more organic Instagram followers. Practices like this will avoid gaining robot followers and have you on your way to reaching your goal of an esteemed Instagram blogger. Check out Kicksta now.

Lightroom

Gone are the days of posting any old unfiltered photo on Instagram. Prospective and current followers expect your account to maintain a certain look, theme, or color palette. Today, the importance of upholding an Instagram aesthetic is key when striving to become an established Instagram blogger. 

So how does one create an aesthetic? Editing softwares like Lightroom were originally intended for professional photographers, but now are accessible to everyone. 

For new bloggers or for those with limited time, presets aid in speeding up the process. Presets are editing actions saved into a file, so you can categorize projects, batch edit quickly and produce a consistent look for your Instagram feed. Popular influencers now sell their presets to help other inspiring bloggers edit their photos. So whether you’re editing yourself or turning to your favorite bloggers for help, Lightroom is the perfect outlet to ensure your aesthetic is on point. 

This is the before and after of a photo I edited in Lightroom: 

Tools for Instagram bloggers

LinkTree

Linktree allows you to get the most out of your Instagram bio link. This tool creates a custom link for your Instagram profile that houses multiple links like newsletter signups, blog posts and links to promotional products. 

Linktree maximizes your Instagram bio and takes away the hassle of constantly switching out the link if you have more than one blog live or simultaneous collabs going on at once. If you’re searching for tools to become an established Instagram blogger, this solo link in your bio is extremely powerful. It is definitely one of the best tools for Instagram bloggers! 

Canva 

Creating graphics is essential for your blog and social media platforms. Thankfully, if you’re no photoshop wizard, Canva is the best solution. Canva is incredible for creating graphics of all shapes and sizes. This tool is your new best friend to create branded images. 

Canva offers a wide range of templates whether it be for social media, blog graphics or headers. No matter the use, Canva captures your social following’s attention and allows you to create like a pro. You can upload images, edit, filter, choose from hundreds of fonts and change the templates’ colors to make one of a kind creations. Did I mention it’s free?

When it comes to social media and becoming an established Instagram blogger, Canva is the graphic design tool you need to create better-branded images, pinnable posts, and engaging Instagram stories. 

This is for example a graphic I made for my Pinterest board in order to link to this blog post:

5 tools for Instagram Bloggers

UNUM

When we are taking about tools for Instagram bloggers this last one can’t be missing. This free app is my favorite tool for scheduling my posts and planning out my gallery. I usually sit down once a week and prepare all my posts for the upcoming days. 

UNUM not only saves users time but also helps influencers and brands design a visually appealing feed. By scheduling posts, you can actively plan how your feed will look ahead of time to match the aesthetic you’re aiming to create. 

Additionally, UNUM aims to help users get more engagement and views by providing optimal times to post. While you can do this manually by reviewing audience metrics through Instagram Insights, UNUM does this work for you. 

Here is a screenshot of what my UNUM gallery planning looks like at the moment:

5 tools to become an established Instagram Blogger

Everything over after the blue line is what I have scheduled for the upcoming days. It is so helpful to see the posts next to each other and helps me to color code my feed. 

It’s a wrap on my favorite tools for Instagram bloggers

Now that you’re equipped with an arsenal of various social media marketing softwares, find your niche and get working. Nothing will make you an overnight success. However with patience, determination and these programs under your belt, you’re guaranteed to see results and become the established influencer of your dreams. 

Here are some more blog posts on Instagram growth if you are interested in learning more about this topic: 

You can also sign up for my free food blogging success email list to get important blogging info delivered straight to your inbox:

I hope you enjoyed this blog post on my favorite tools for Instagram bloggers. Let’s talk soon!

xoxo,

Weiterlesen

Best Instagram photo spots on the Amalfi coast

best photography spots on the Amalfi coast 

A helpful guide for the best Instagram photo spots on the Amalfi coast.

I recently visited one of Italy’s most beautiful coast line. The so called Amalfi coast. Beautiful little cliff villages and small winding roads along the rough shore with lemon trees and authentic Italian stores along the way. Visiting this beautiful part of Italy is the perfect opportunity to take some new Instagram photos and in this blog post I will be sharing some insider tips for the best photography views you will find on the Amalfi coast.

Best Instagram photo spots on the Amalfi coast

Let me show you the most Insta worthy photo spots on the Amalfi coast: 

Photospots in Positano 

You can’t leave the Amalfi coast without stopping in Positano for the obligatory beach photo with the breathtaking cliff village in the background. I think this is the most instagrammed spot on the entire coast and definitely worth a picture. 

Marina Grande Beach Shot 

Parking in Positano can be quite the hassle. We always parked our car in a paid garage since it is almost impossible to find street parking. You can go down to the lowest parking house and pay 7€ per hour to be as close to the beach as possible. If you park further up you will have to walk for about half an hour down to the beach, which can be a nice walk as well as you will get a good view as you walk down. Once you are at the beach I recommend you walk all the way till the end of the beach to get the best shot with most of the village in the background. 

best photography spots on the Amalfi coast 

Changing Rooms Marina Grande 

You will find the cutest little changing rooms right in front of the Marina Grande. We had to be quick to take these shots there though because its usually just for people who are also paying for the sun chairs on the beach. They look so cute and I love the blue and white contrast with the little sailor signs on the doors. 

best photography spots on the Amalfi coast 

The pier on a windy day

One of the days we visited Positano we some rough weather and sea conditions. There was a red flag on the beach an no one was allowed to go swimming because of the huge waves coming in. This was perfect though to be on the pier and watch the waves crash against the stone walls, splashing up water like a geysir. Here is a really nice Insta photo I took of my boyfriend Alberto:

best photography spots on the Amalfi coast 

Hidden small beach 

One of our more adventurous travel friend found this little hidden beach a couple minutes away from the main Spiagga Grande. Pass the hotel Covo dei Sarenci and walk up the little trail called Via Positanese d“America until you see the little beach. There are tiny steps you can take to get down to the beach. We took some great shots there as well because there were absolutely no people. Here is a photo I took of my boyfriend: 

best photography spots on the Amalfi coast 

Lookout point at Via Cristoforo Colombo 

Another epic view over the old town of Positano will be a little further up the hill. Walk up the via Cristoforo Colombo. You will pass some nice hotels. One of them is le Sirenuse – a 5 star hotel as I believe. You can ask to see the terrace, where you also find a nice view over town. I recommend however walking further up the hill until you get to a nice little lookout point for another perfect Amalfi coast photo! 

best Insta worthy photo spots on the Amalfi coast 

Best photo spots in Sorrento 

There are many great locations to take photos in Sorrento. Since we were already shooting a lot of content the other days in Positano we only took one really awesome shot in Sorrento. This spot is perfect because it is just around the corner of the parking house in downtown Sorentto. Park at the garage on Via Correale and then continue walking down the street until you find yourself in little California. Tall palm trees, a relatively big street for Italian understandings and nice houses. We took a walking shot on the street there and it looked fantastic. 
I can also recommend visiting one of the many lemon gardens in the city for an epic lemon tree photo. 

street photo Instagram shot Sorentto

Atrani photo spot 

Another nice photo location is in Atrani. It has a small little beach were we spent the afternoon sunbathing. Next to the beach is an Italian restaurant with yummy pizza. Get a table close to the beach and you will have a nice view onto the church and center of Atrani. 

two blonde girls eating pizza in Atrani on the amalfi coast

Maiori photo spot

One day we went to the town of Maiori. The beach is much bigger compared to the other ones on the coast. If you stroll down the beach you can find some great Instagram photo spots on the Amalfi coast! I especially liked the awesome castle at the end of the beach which was a real eye-catcher on the photo! 

best photography spots on the Amalfi coast  best photography spots on the Amalfi coast 

Conca dei Marini photo spot 

Last but not least I have another epic Instagram photo spot on the Amalfi coast for you! At one point I am sure you will be driving somewhere between Sorentto and Salerno down the coast and will probably pass the small town of Conca dei Marini. There is an incredible 5 star hotel there called Monastero de Santa Rosa. We went there for drinks and took some stunning photos along the way. 

The gardens

On the little patio where they serve the drinks for the guests there are beautiful lemon trees. There is even this perfect little swing placed between two lush lemon trees. This is absolutely the perfect Instagram photo spot on the Amalfi coast and you should definitely sit down for a photo. 

best photography spots on the Amalfi coast 

The terrace 

Our waiter Stefano was so kind and friendly and asked us if we wanted to see the terrace. Honestly I must say it was the most stunning place I have seen on the entire Amalfi coast trip. Simply stunning and mind blowing. The view you will get up there is out of this world. You are so high up and will be overlooking everything. The hotel has a beautiful infinity pool that looks unreal together with the blue ocean and the rough cliffs in the background. On the other side of the terrace you will see all the way down the other side of the Amalfi coast. 

best photography spots on the Amalfi coast 

I hope this little photo guide for the best Instagram photo spots on the Amalfi coast was helpful for you. I really enjoyed my time there even though it was really crowded and there were so many people everywhere. In general I would recommend going everywhere super early or later, just before sunset. This way you will have less people and better light for photos. 

Have fun exploring the Amalfi coast! If you look for more travel guides you should check out these food guides: 

Do you want to learn more about blogging? Then subscribe to my food blogging list!

xoxo,

Pin this to your travel Pinterest board: 

Best photo spots Positano and Amalfi Best photography views on the Amalfi coast Best Instagram spots amalfi coast

Weiterlesen

Improve your Insta feed with Instagram Aesthetics

Instagram Aesthetics for a cohesive Insta feed
Instagram aesthetics for beginners! This helpful guide will show you how to get a cohesive Instagram feed that will convert to more followers than before. Having a beautiful gallery will set yourself apart from so many other bloggers and will look way more professional. 
 
So you came here to learn about how to make your feed look more cohesive and structured, right?! I think having a unique feed is super important and gives a personal touch that will be remembered. I started color coding my posts about a year ago. Every couple weeks I change the color theme of my feed, which results in a rainbow of colors if you scroll down my gallery. This really helped me to stand out from different bloggers because I was doing something different. Today I will be sharing my Instagram aesthetics insights with you! I will be structuring this post into different sections, each focusing on one specific Instagram aesthetic tip. So let’s get started!
 
Blonde blogger checking her phone workin on Instagram

1. Content is king

First of all I want to mention that without good content it will be hard to have a truly outstanding feed. Content is king – no matter which social platform you look at. That’s why you need to make sure that you upload only high quality content. Use a good camera. Don’t take photos with your phone. I personally only shoot with my DSLR camera. The difference in image quality is huge. Ever since I started taking photos with my Nikon I saw a big increase in engagement and followers. 
 

2. Find a niche 

When someone comes to your feed for the first time it should be clear right away what you and your blog stand for. If you come to my Insta feed you will most likely know right away that I am a food blogger. Why? Because most photos I post are food pics. Let’s say I would post one food pic, one travel photo, one picture of a building, one of my cat, one detail shot of my make up bag and one more of my grandma eating cake you will most likely be confused about what my blog topic is about.

I highly recommend picking one niche and sticking with it. There are already way too many people out there that do everything. I’m personally not the biggest fan of so called „lifestyle“ blogs. Simply because they don’t cater to a specific niche and the content is way too confusing for my opinion. That’s why I also don’t follow many lifestyle bloggers. I rather follow some people that are on top of their game in different niches than following a couple lifestyle blogs that are just mediocre in everything they post. You know what I mean? 

Food Blogging online course

3. Have a posting strategy

Gaining new followers also goes hand in hand with creating new content. Make sure you have a posting strategy of what content you are going to create on a regular basis. Some questions you should be able to answer: How many times a week will I post? Whats the target group I am creating my content for? When are they online and when should I post? Will I post in a specific order? (e.g: food, food, me) Staying consistent in you posting strategy can help you improve your account a lot. 

4. Editing and filters for a cohesive Insta feed

If you want a cohesive Instagram feed one thing you really need to take into consideration is editing your photos. Having the same filter or the same presets on every photo will massively increase the overall look and feel of your Insta gallery. It took me quite a while to find an edit that works for my food photos. I made my own preset which I copy and paste onto my food pics now. Of course I have to go back and fine tune each pic individually again, but the editing style stays more or less the same. That’s how I get a congruent look on my gallery. 

Some big influencers sell their presets. I bought some of them already and it’s a great way to start out if you are not so experienced with editing photos. I edit my photos always in Lightroom. Free options are apps like VSCO cam, Facetune or Snapseed. 

Instagram Aesthetics

5. Stick to a certain color scheme to improve Instagram aesthetics

Stand out and increase your followers by doing something different than everyone else! I highly recommend picking a certain color scheme and sticking with it. Adapt all your posts according to that color. It makes a huge difference in your profile’s appearance. Check out my account @carina_berry to see what I mean with sticking to one color. As you can see I always pick one focus color and create content according to that. Since I couldn’t decide on one color because food itself can be so colorful and I felt I was limiting myself too much if I would just pick one, I decided to always change my main color every couple weeks. So I am going from red to green to blue to orange for example. 

Below you find some screenshots of my feed. 

Instagram Aesthetics Instagram Aesthetics Instagram Aesthetics Instagram Aesthetics  

Here are some examples of other bloggers I like to follow with awesome color palettes: lenasaibel,@frauherzblut,@vanelja

6. Planning your feed Cohesive Instagram Feed

A plan focuses scattered thinking and improves performance. That’s why you should definitely plan what and when you are going to post!

You can instantly improve your Instagram feed by planning ahead your gallery. This is something that made all the difference for me. My favorite planning app that I always use is UNUM. My cohesive Instagram feed would probably not exist without it. It is so helpful to plan, layout and schedule your postings. You can move posts around within the app to see what photos look best next to each other. It gives you a preview of how your feed will look like in the future. I usually plan my feed about 2 weeks ahead, which saves me a lot of stressful moments and keeps me organized. UNUM is completely free and I highly recommend you download it asap 🙂 

Bonus tip: Mood boards

Last but not least I want to share another useful tip of how to get inspiration for your gallery. I like to collect inspiration for my future posts and group them together on a so called „mood board“. For this I create a special board on Pinterest where I can simply pin all the posts I see from other people or on other pages that I like. On Instagram itself I also have specific mood boards for different topics. I like to save photos that would also fit into my portfolio so I can refer to them later when I want to create similar content. Having these mood boards can help you to collect your ideas and make them more visual. 

Cohesive Instagram Feed Cohesive Instagram Feed

I hope you enjoyed this post on how to create a better and more cohesive Instagram feed. Feel free to check out more of my Instagram Growth content, like my top 10 tips on Insta Growth, Food styling tips or how to calculate your engagement rate

Head over to my YouTube video on my Instagram Top Tips as well! 

If you are here to learn more about blogging and want to receive awesome blogger tips and trick from me, make sure to sign up for my blogging list!

I’m sure you will soon create your own amazingly beautiful feeds. Let me know which tip was the most helpful in the comments or if you have any additional questions! 🙂

xoxo, 

Weiterlesen

10 best food blog tips for Instagram growth (2020)

Dojo Coworking Space

Do you have a food blog and want to grow on Instagram? Well then this blogpost is perfect for you. In this blogpost I will share my best 10 food blogging tips with you here in order to help you kickstart your own food blog channel! 

I have been a food blogger for over 3 years now. Today I can proudly say that I am Austrias biggest fitness food blogger and am grateful enough to be able to inspire thousands of people every day with my healthy recipes and active lifestyle. 
Since the beginning of this year I am doing it full time, having made my hobby into my dream job! Now in this blogpost I would like to share my knowledge with you to become a top food blogger as well! 

How to start a food blog successfully?

Below I will show you 10 hands on tips for stepping up your food blog game! Because of that, I will also link you products that I am personally using at home. 

Please note that some of the links below are affiliate links and at no additional cost to you, I may earn a commission. Know that I only recommend products, tools, services and learning resources I’ve personally used and believe are genuinely helpful. This is not because of the small commissions I make if you decide to purchase them. Most of all, I would never advocate for buying something that you can’t afford or that you’re not yet ready to implement. The products are simply the ones I use at home and where I thought you might find the direct Amazon link helpful as well 🙂 

Food Blogging Top Tips for Instagram Growth

1. Find the right light

Taking a good picture will greatly depend on the light situation in the room. Hence, make sure to find a spot where you get good lighting. My tips: shoot with natural light, avoid straight sunlight and use a reflector. 

  • Natural light: I like to shoot at daytime. You get the worst photos when trying to shoot at night with your kitchen lights on. Oh and by the way – never use a flash for your photos. That is just straight up going to kill the photo! I usually place my food right next to a big window, so I get good light from one side. The best time to shoot when you have a slightly cloudy sky. This gives you nice diffuse light. 
  • Avoid sunlight: When you try to shoot under direct sunlight you will get a lot of very hard shadows in your photos. Also, the colors will come out in a very different way. When its sunny and you must shoot a photo I can recommend getting a diffuser. You can put that in front of your dish to shield it from the sunlight and get nice diffuse light. 
  • Use a reflector: I usually put a reflector on the other side of my dish, so light gets reflected back onto the dish. You can get a really cheap reflector on Amazon. This is the one I use daily at home. It really makes a huge difference, since you will get a brighter photo with less shadows! 

2. Find the right angle when shooting

What I learnt is that not every dish can be shot from the same angle. If you are shooting a nice smoothie bowl you most probably want to shoot it straight on and not from the side because you would loose a lot of that nice decoration on the bowl. 
However when taking a photo of a pancake tower you definitely want to shoot that from the side to see the stacked up pancakes. Therefore, don’t be shy to move around with your camera and try out different angles. 

3. Get social

How to become a food blogger on Instagram? Very simple – start by engaging with a ton of other people in your niche! After all Instagram is a social platform. When I started I spent hours commenting and liking other peoples posts. Giving is living! If you give a lot you will soon notice that you will get a lot of engagement back. 

But don’t just write mundane sentences like „nice pic“ or „looks awesome“. Thats so unpersonal. Read the captions and actually say something meaningful. Start real conversations. Moreover, make sure to watch and reply peoples Instastories. This is a great way to really get to know the people behind the accounts. 

4. DSLR cameras making top food bloggers 

What do top food bloggers have in common? They all shoot with a DSLR camera. You won’t hardly find a food blogger who doesn’t use a professional camera for their food photography. It simply makes a big difference. Phones can take really good pictures and are very practical for on the go. However, a DSLR camera simply differentiates the hobby bloggers from the professional ones. 

I personally use a Nikon D7500. In my opinion, it is a great camera also for beginners. Regarding lenses I can recommend using either a 35mm. 1.8 (thats the one I am using at the moment) or a 50mm 1.8. With these lenses you get a beautiful depth effect and can shoot pretty close to your image. 

5. Join a party 

If you are already highly engaged in the foodie niche you might have seen other food bloggers throwing a party and inviting everyone to join with a dish. Usually these parties have some kind of theme. I recently had an autumfoodparty and in the summer a summer closing party. Some people throw parties when they hit 10k, 20k, or something similar to celebrate the occasion.  You might wonder now why people do this. It is actually a huge advantage for the people throwing the party and those participating as both parties will grow their reach and get more exposure. 
When you enter the party you have to tag the person in the caption and the photo, like this your followers might become aware of the account and go follow. On the other hand if the big host account will feature your post, usually in stories and the winners on the feed, you will get a lot of exposure back. It is also a great way to start building a relationship with the bigger food influencers out there. 

6. Build a network

When starting out it is important to build your own network of people who will be supporting you on Instagram. These are going to be your loyal followers who will comment and like all your posts. This is what will determine also your engagement rate. Because of this make sure to find likeminded people that you can connect with. I suggest you find other food bloggers in the same niche who have about the same following size as you do in the beginning. Like this it will become easier to start a conversation and build a relationship. Once you have a good network you can start asking your other foodie friends for shoutouts on their stories. Mutual IG story shoutouts are a great way to grow and get more exposure for your account. 

7. Tag curation pages

When you post your content make sure to tag it correctly. There are hundreds of great curation pages out there that are looking for viral content daily to post on their galleries. Those pages can take your photo and repost it on their account, often reaching ten thousands of people giving you an incredible amount of exposure. If you manage to get reposted on a consistent basis by many big accounts I guarantee your account will grow immensely. 
What I like to do is to write those curation pages a personal message and asking them directly if they would be interested in sharing my piece of content. They are always looking for new talent and you might be the next big star on their profile <3 

8. Consistent posting schedule

Moving on to the next tip. Have a consistent posting schedule. I believe it is important to stick to a clear schedule regarding how many times a week you are posting. Like this your followers will know when and how often to expect your content. Don’t post nothing for a week and then throw out three pics in a row. This will seem super confusing to anyone following you. If you can’t manage to post every day then try to commit to every other day or at least four times a week. 

9. Food Styling

Next, lets talk about food styling. This is something I have neglected for the longest time. It is so powerful though! Because of this simple trick I was able to improve my food pics by a lot. Things like little flowers, tiny cookies, sprinkles, fruit and nicely cut veggies can make or break your dish. The most boring chia pudding can look absolutely fascinating with the right kind of decoration. A basic trick I use for so many of my dishes is cutting out little stars or hearts from bananas and place them on the bowl, cake or parfait. Makes it look so much better instantly. I actually have a separate blog post about this whole topic here
Therefore, I recommend you get yourself a couple of cute little cookie cutters and learn the art of decorating your dishes! These are the ones I use a lot for my recipes. 

10. Photo Setup  

Last but not least let’s look at food props. Back in the days I used to place my dish on a simple blanked on the floor. Looking back now this makes my laugh so hard. When wanting to take great food pics your photo setup is super important. In addition, you will want to make sure to have a nice background you can place your dish on. Something I can recommend is going to the local hardware store and asking them for samples of marble or wooden floor. I got all my backdrops for free just by asking them for a sample to take home. Worked really well! Furthermore, I can recommend using a nice loose fabric that you can put in the background to blur out your photo smoothly. 
Besides that you should acquire a nice collection of glasses, jars, spoons and plates to switch up your food photos. 

Bonus tip

Finally, I have an extra food blog tip for you. Nowadays it has gotten quite difficult with the new algorithm to grow a solid following. Building a strong audience is part of becoming a successful influencer. There is actually a very powerful organic growth tool for Instagram called Kicksta. The tool doesn’t spam, bring you fake followers or is a bot – it simply brings you pure organic growth through a highly developed artificial intelligence technology. You provide the tool with a couple accounts that have followers you would like to attract and then the tool will like a couple of photos of the followers from those target accounts under your name helping you to boost organic growth. Gaining followers on Instagram can be a time-consuming and tedious process and Kicksta makes this so much easier. Check it out now!

Food blogging online course

If you are really serious about your food blog and want to take it to the next level, I can really recommend my food blogging success online course. 

You can check it out here

Food Blogging Course

Do you want to have your first company cooperations? Want to start making money with your food blog? Or even want to become a full time food blogger?

This course will teach you all of it. I have been through the process and want to give all my knowledge to you now. This course is an extremely valuable source of information. Basically I put everything I’ve learnt in the past year about food blogging and how I made it into my full time job into this online course.

The course is structured into 6 chapters. After the introduction you will find the food blogging chapter, where you will learn how to find your vibe and voice, develop great content and a content policy, learn how to set up a blog and I will also be touching on legal requirements.

The third chapter is dedicated to food photography, where I will share my camera equipment with you, tips on how to prop and style your food, how to find the right light, how to edit your pics with and without photoshop and some more tricks along the way.

The next chapter is dedicated to Instagram growth. You will learn how to make use of the Instagram algorithm and make the features of the app work for you. Learn how to get reposts and post content the right way, join the right parties and create your own Insta highlights.

Before the final send off I dedicated a whole chapter to the topic of monetization. I’ll be sharing with you how to find your pricing rates and put together your media kit with great examples. We will talk about how to reach out to companies, negotiate prices and the important topic of disclosing a partnership.

You will see this is a well rounded course giving you all the insights you need. Head over to the course now

More resources

Here is also a short video summarizing this topic for you:

Are you interested in more tips on becoming a food blogger? Head over to my YouTube to watch videos on how to make money as a food blogger and how I got started a couple years ago. Finally, you can also check out my blog post on the art of food styling, which might be helpful for you as well!

xoxo,

Weiterlesen

How to calculate Instagram engagement rate

Have you ever calculated your Instagram engagement rate? It is a very important number that shows you how active your audience is! The easiest form of engagement is a like, followed by a comment.

Engagement rates

Engagement varies as your account grows, but generally you can say that anything between 2-4% is acceptable engagement. Anything above 5% is excellent. I noticed that accounts under 10k usually have a much higher engagement somewhere around 8%. I also know many micro-influencers who have less than 10k but 10-20% engagement and are often getting more likes than accounts with 50k! Calculate Instagram engagement rate

This is a weird phenomenon I still haven’t quite figured out yet. It seems like the more follower you have the less engagement you get. Some accounts with millions of followers only get 1-2% engagement.
Crazy right?! 

I did some research and found some interesting insights from the influencer marketing platform Markerly who reported that accounts with less than one thousand followers have a like rate of about 8 percent.

This drops increasingly as influencers become more popular. Between 1.000 and 10.000 followers the influencer can record a like rate of about 4%. The like rate keeps decreasing within the range of 10.000 to 100.000 followers to only 2,4%. Once reaching the 1 million followers mark the rate drops to 1.7%. According to Markerly the rates for comments follow a similar pattern. 

I wanted to show you the graphic here where you can see the decrease of likes and comments compared to increasing followers. 

I also found a super interesting fact in a book called „influencer marketing“ where the authors established a 90-9-1 rule regarding user engagement. They looked at social communities and found out that 90% of all followers are people who view information but never or rarely take part in the conversation. The next 9% of followers contribute a little and the final 1% are those that create almost all the engagement and conversations.

I have to say this something I totally notice on my own account as well. I always have those couple super engaged followers who comment and like every single one of my posts, then I have a couple who occasionally will write a comment and then a big amount of people who just look at the content, but won’t take any action. 

 So now finally how do you actually calculate Instagram engagement rate?  

You can calculate your engagement rate by dividing the number of likes you get by the number of followers times 100. (E.g.: 1.500likes : 34.000followers x 100 = 4.4%)

Make it your little assignment today to calculate that number, it is a very interesting info into your accounts health 🙂 

If you don’t want to calculate the engagement rate yourself I have a great tip for you. There is a free tool called Kicksta that will calculate the engagement rate for you. 

I hope this article was helpful and I simply wanted to show you that you don’t have to start getting worried if you notice a decrease in engagement once your account starts growing. Even the statistics show that it is a normal thing that happens. Check out my other Instagram growth blog post for more info: 

Sources: (Brown/Fiorella (2013), p. 7.) & (https://digiday.com/marketing/micro-influencers/) 

Lots of love, 


Weiterlesen

Instagram Algorithm Update 2018 – Tips how to use the new algorithm

Yet again Instagram has changed its algorithm at the beginning of this year and staying on top of the loop is harder than ever. 
It becomes continually more difficult for content creators that their followers actually see their posts.  Right now it can happen that only 10% of your followers actually see your posts. Myself and a lot of my blogger friends have seen a huge decrease in likes over the past weeks.
However, with this blogpost I wanted to summarize some important changes for you so your photos wont get buried and unseen. You can increase your exposure by using these useful insights. I have done a lot of research on this in the past weeks and I hope this will be helpful for you.  🙂

Hashtags

So this is how hashtags generally work: The more likes you have on your pictures, the bigger hashtags you will be ranked in.

  • Hashtag Size: Before you were allowed to use up to 30 hashtags per post. Pull away from using the maximum number of hashtags. Now it is recommended to only use 5 hashtags, because otherwise Instagram will see you as a spammer if you max the hashtags all the time. Other people say it is still okay to use between 25-27 hashtags, but I would not recommend that. Less hashtags will be getting more engagement. So, use hashtags that are specific for your niche and have less than 1 million posts within their own hashtag!
  • Hashtag Use: Also, don’t use the same hashtags over and over for each post. Instagram will notice that as well. So, it is important to find new unique hashtags each time.
  • Hashtag Location: Another important thing: Don’t put the hashtags in the comments. From now on Instagram won’t show hashtags in the comments in the search results. Therefore, the hashtags go into the caption.

Caption

This brings me to my next point which is your Instagram photo caption.

Here we have an update as well.

  • Changes to the caption: Prepare your caption really well because once you have posted it no changes should be made. Don’t repost or change anything once you post. The more you try to tweak your caption once it is uploaded it, the more your visibility will drop. So, post your photo with your description and your five hashtags and then just leave it.  

To summarize this review your caption well before you post and don’t change anything within the first 24 hours.

Comments 

There have also been updates on how Instagram notices comment interaction.

  • Timeline: When you post a photo you will need to respond to the comments within 60 minutes or your posts visibility will gradually decrease. So, you have to be actively engaged as a real person. The more comments you will get in a short amount of time will make Instagram think that your post is worth sharing to all of your audience.

These are the most important changes I wanted to share with you. If you want access to all algorithm changes and learn how to new update affects your stories, comment groups, follow strategies, comment lengths and story hashtags you can check out my new online course here

Disclaimer: The information provided here has been gathered through miscellaneous sources and my own experiences on the platform. Some information may differ slightly. I cannot guarantee the validity to this information, but did my best to cross check my sources thoroughly. 

Learn how to work with the algorithm and set up a successful account in our online course.

Weiterlesen