Tape-in Extensions von Klipp – Rezension mit allen Infos

Tape-in Extensions Klipp

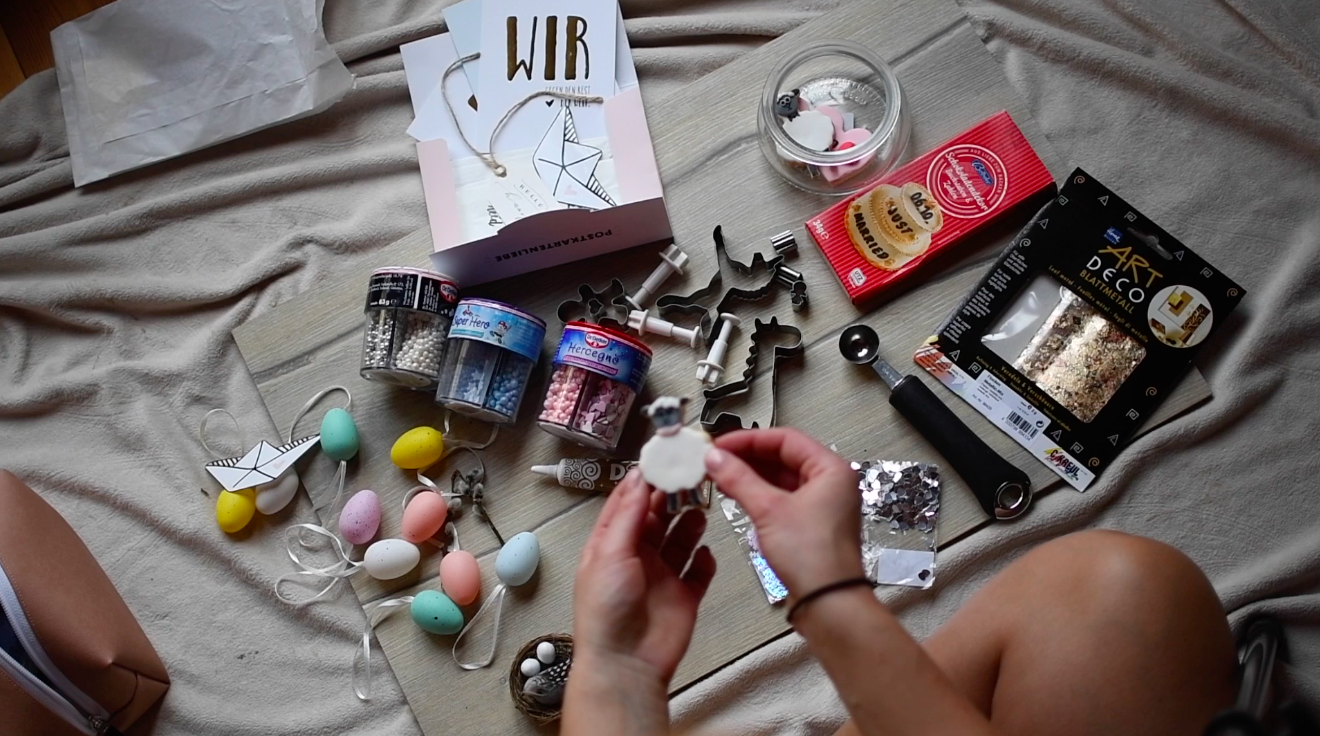
Seit fast einem Jahr trage ich nun die Tape-in Extensions von KLIPP Frisör. Da ich nun wirklich sagen kann die Haarverlängerung lange und intensiv getestet zu haben und ich immer wieder viele interessierte Fragen von euch bekomme, wollte ich nun meine Erfahrung in Form eines Blogposts mit euch teilen.

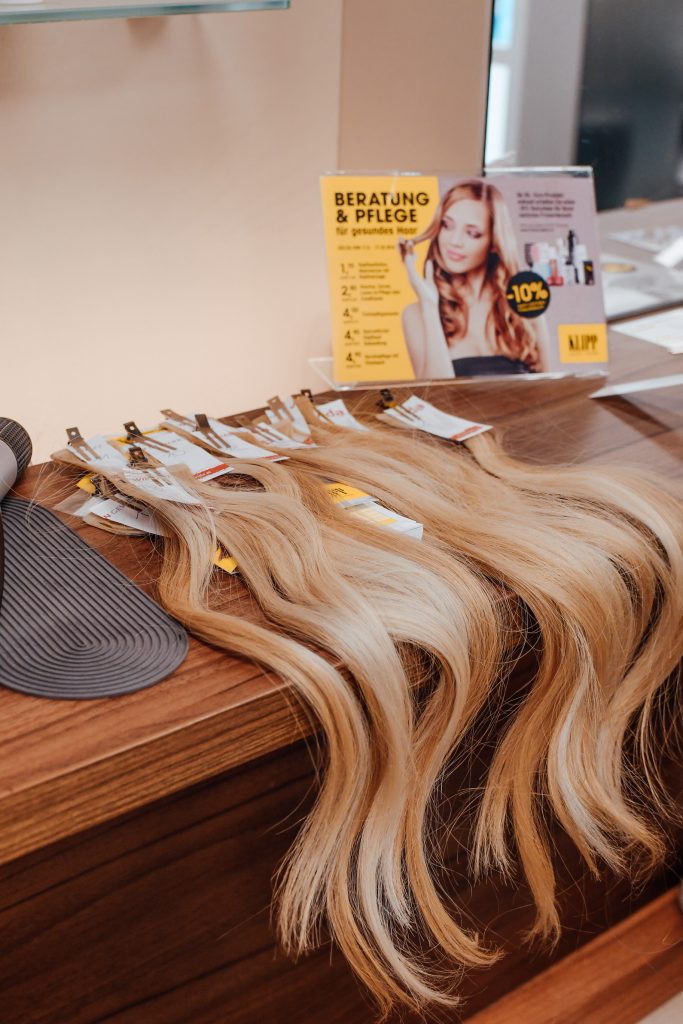
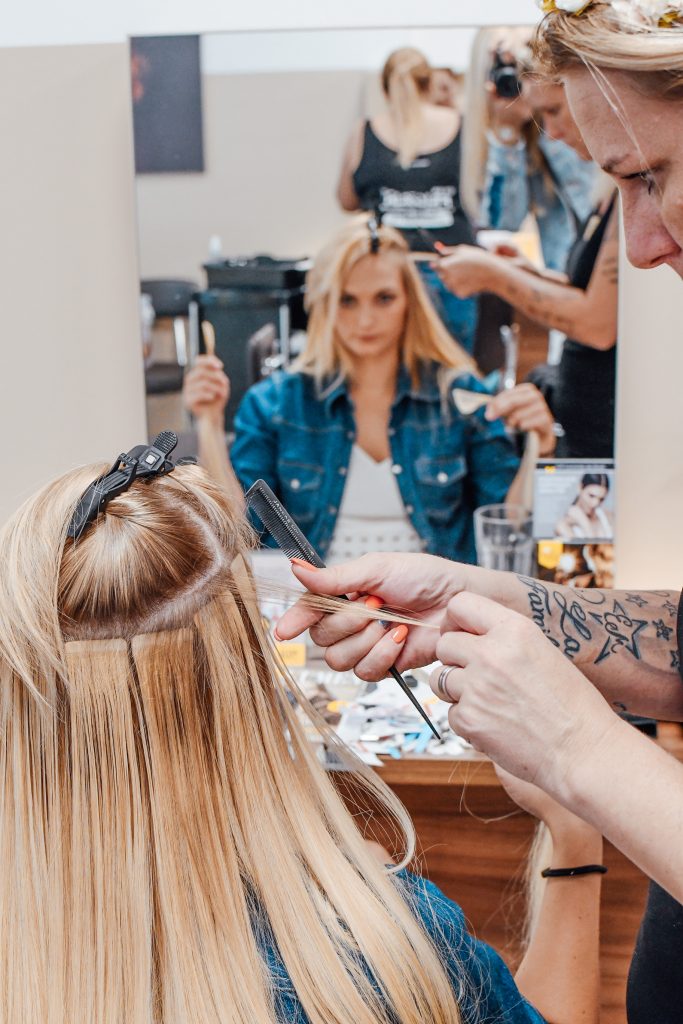
Ich bekam die erste Haarverlängerung bei KLIPP  im Juni 2018. Hier wurden 2 Sets von 60cm Extensions in zwei verschiedenen Farbtönen bestellt. Insgesamt wurden mir dann 24 Tapes eingesetzt, da ich sehr dünnes Haar habe und mehr Volumen haben wollte.

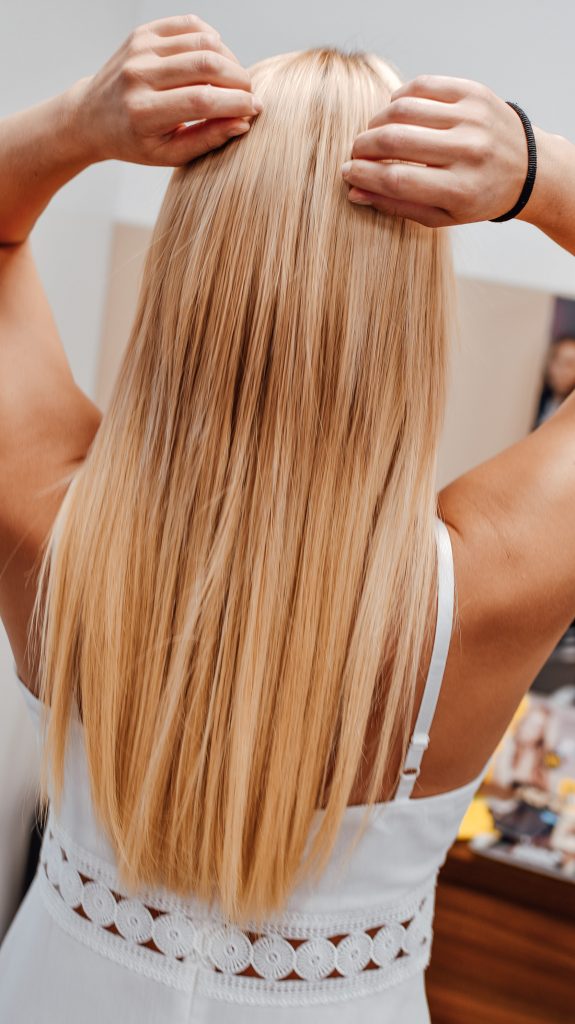
Ich sage euch ganz ehrlich – diese Haare sind ein Traum und die Tape-ins zu machen war die beste Entscheidung! Die Qualität ist einfach unfassbar gut und ich bin immer noch fasziniert wie schonend diese Variante der Haarverlängerung für die eigenen Haare ist.

Im letzten halben Jahr war ich wirklich sehr viel unterwegs. Bin durch Costa Rica, Panama, Mexiko, Taiwan und die Philippinen gereist. Die Haare mussten schwüle Tropfenluft mitmachen, der heißen mexikanischen Hitze standhalten und auch mit ins salzige Meerwasser kommen! Mir ist kein einziges Mal ein Tape herausgefallen oder eine Verbindungsstelle aufgegangen. Die Haare sitzen wirklich super fest und machten alle meine Abenteuer mit.

Beim letzten Nachsetzen konntet ihr mir auf meiner Instastory Fragen zu dem Thema stellen, welche ich nun beantworten möchte:

Wieviele Tapes brauchst du?

Das kommt etwas auf die Dichte eures Eigenhaars an. Ich habe sehr feine, dünne und brüchige Haare und brauchte deshalb mehr Tapes. Außerdem wollte ich von wirklich sehr kurzen, wenigen Haaren zu ganz langen, vollen Haaren. Mit 24 Tapes sind wir schon am oberen Limit angekommen.

Tape-in Extensions Klipp 

Spürt man die Extensions im Alltag?

Ja und nein. Hier muss ich ganz ehrlich mit euch sein. Die erste Nacht nach dem Nachsetzen ist ein bisschen unangenehm. Da die Tape-ins hier ganz nah an der Kopfhaut liegen und diese vom Prozess des Einsetzens noch etwas schmerzt tut es ganz schön weh darauf zu liegen. Dieses Problem hatte ich interessanterweise immer nur in der ersten Nacht. Danach geht das weg und man spürt sie wirklich gar nicht mehr. Man vergisst sogar, dass man die Haarverlängerung drinnen hat. Das Einzige, wobei ihr aufpassen müsst, ist beim Kämmen. Hier muss man natürlich anders bürsten und ich habe mir eine eigene Extensionsbürste mit weichen Borsten gekauft. So bleibt man nicht hängen.
Man kann sich auch nicht so wie ohne Extensions durch die Haare von vorne bis hinten fahren. Aber daran gewöhnt man sich recht schnell.

Sieht man die Stellen an denen das Haar angebracht ist?

Man sieht die Verbindungsstellen nur, wenn ihr das Deckhaar hochhebt. Ansonsten ist die Haarverlängerung zu 100% unsichtbar, wenn die Haare offen getragen werden.

Tape-in Extensions Klipp

Könntest du dir einen Zopf/Pferdeschwanz damit machen? Sieht man das?

Einen Zopf könnt ihr euch problemlos machen und man sieht dann auch nichts von den Extensions. Ein hoher Pferdeschwanz ist etwas schwieriger. Den kann ich mir immer nur in den ersten zwei Wochen nach dem Nachsetzen machen ohne, dass die Verbindungsstellen durchscheinen. Hier sind sie noch so nah an der Kopfhaut, dass man nichts sieht. Danach mache ich mir zwar auch immer noch einen hohen Pferdeschwanz, aber dann scheint eben die eine oder andere Verbindungsstelle durch. Mich stört das aber nicht, da ich super offen zu meinen Tape-ins stehe.

Kennst du Frisuren-Tipps für die Extensions?

Ich habe die schönen langen Haare wirklich sehr gerne offen getragen. Sehr oft habe ich sie auch gelockt, was ich genial fand. Hier lockt ihr nämlich nur die Extensions und nicht die eigenen Haare. Das heißt die eigenen bleiben verschont von der Hitzeeinwirkung! Was ich auch wirklich toll fand ist, wie lange die Locken halten. Ich habe sie mir einmal gelockt und hatte sie dann 5 Tage lockig bis ich mir wieder die Haare gewaschen habe.

Da es ja etwas schwieriger ist die Haare hoch zu tragen habe ich mir oft die Stirnfransen seitlich aus dem Gesicht geflochten und dann auf den Seiten mit Haarschiebern festgesteckt.

Wie oft hast du sie schon hochsetzen lassen?

Ich habe die Haare nun insgesamt 4x hochsetzen lassen und sie sind immer noch in einem Top-Zustand. Zwar sind die Spitzen durch meine verschiedensten Tropenabenteuer etwas spröde geworden, aber wir haben sie dann beim Nachsetzen immer wieder ein bisschen nachgeschnitten. KLIPP empfiehlt die Haare nach 5x Nachsetzen auszutauschen.

Tape-in Extensions Klipp

Wie viel bezahlt man dafür? Beim 1x Mal und beim Nachsetzen?

Gleich vorweg. Haarverlängerungen muss man sich leisten wollen. Es ist auf jeden Fall eine teure Angelegenheit, wobei ich sagen muss, dass bei KLIPP das Preis-Leistungsverhältnis wirklich fantastisch ist.

Es wird bei KLIPP pro Tape abgerechnet. Ein Tape kostet € 29,50. Nun kommt es darauf an wieviele Tapes ihr benötigt. Dies kann von Person zu Person unterschiedlich sein. Ich hatte 24 Tapes. Die sind zu 100% Echthaar. Beim Nachsetzen zahlt man dann pro Tape € 11,20. Will man die Extensions herausnehmen lassen wird das mit € 1,5 verrechnet.

Muss ich eine besondere Pflege beachten?

Beim ersten Termin bekam ich alles zur richtigen Pflege erklärt und habe mich am Anfang auf richtig streng daran gehalten, da ich natürlich wollte, dass die Haare so schön wie möglich bleiben. Ich sollte keine Shampoos mit Öl, Silikone und Parabene verwenden und habe dann immer mit PH-neutralem Shampoo gewaschen, da mir erklärt wurde, dass sonst die Verbindungsstellen aufgehen können.

Die Haare sind nach wie vor super schön und nach einer Pflege mit einer Haarkur auch richtig geschmeidig wie zu Beginn!
Generell empfehle ich euch aber die Haare, nicht mehr kopfüber zu waschen und erst zu bürsten, wenn sie trocken sind. Solltet ihr ins Meerwasser gehen, dann immer gleich mit Wasser ausspülen. Manchmal wenn die Tapes schon länger nachgewachsen waren, habe ich so kleine Knötchen an manchen Verbindungsstellen bekommen. Das konnte ich aber mit meiner Extensionbürste ganz einfach wieder ausbürsten.

Tape-in Extensions Klipp

Werden meine eigenen Haare dadurch beschädigt?

Nach einem Jahr kann ich euch hier wirklich eine fundierte Meinung geben. Ich denke, dass Tape-ins wirklich eine geniale Methode sind um die natürlichen Haare schonend nachwachsen zu lassen. Natürlich fallen einem wahrscheinlich proportional etwas mehr Haare aus, als ohne Extensions, aber ich denke das ist verschmerzbar. Den eigenen Haaren passiert wirklich gar nichts. Die Tapes werden angeklebt und dann einfach wieder aufgemacht, hochgesetzt und wieder neu angeklebt. Alles ohne Hitzeeinfluss und Schmerzen!

Haarverlängerung von Klipp

Mein Resümee

Alles in allem bin ich wirklich total zufrieden mit den Tape-in Extensions von KLIPP und würde es sofort wieder machen. Es ist die perfekte Möglichkeit, um seine eigenen Haare darunter unbeschädigt nachwachsen zu lassen und der schnellste Weg zu langen Haaren.

Das Personal bei KLIPP ist auch super nett und hilfsbereit. Macht euch dort einfach mal einen Termin aus und lasst euch zu dem Thema beraten. Ich weiß, es ist eine teure Angelegenheit, aber für mich das Geld auf jeden Fall wert, da ich mich dann einfach so viel wohler fühle. So kann ich die Länge und das Volumen erzielen, was ich mit meinen eigenen, feinen und brüchigen Haaren niemals schaffen würde!

Ich muss auch ehrlich sagen, dass ich mich seitdem ich die Haarverlängerung habe viel weiblicher, schöner und wohler fühle. Früher musste ich immer so lange meine Haare stylen bis sie halbwegs brauchbar aussahen. Nun stehe ich auf und habe sofort einen schönen Grundlook! Deshalb lautet mein Testergebnis der Tape-in Haarverlängerung bei KLIPP: sehr gut und ich würde es sofort jedem weiterempfehlen!

Schaut auch bei meinem Blogpost vom letzten Jahr vorbei. Hier bekommt ihr noch mehr Infos zu den Tape-in Extensions von KLIPP. Ich habe auch ein YouTube Video dazu gemacht! 

xoxo, 

Weiterlesen

Blogging while traveling – a how to guide

Blogging while traveling

Over the last half a year I have been all around the world, food blogging while traveling at the same time. I love how my job as a food blogger gives me so much freedom and flexibility and combining my two biggest passions: the love for healthy food and my excitement for seeing new countries makes me feel like I created my own dream job. In this blog post I would love to show you and explain how you can travel and still keep up the quality of your food pics along the way. 

My story of blogging while traveling

I became a self-employed food blogger in February 2018 and couldn’t be happier ever since. Turning your hobby into your profession is something extremely special and I am grateful every single day to be able to do this kind of work. Since I am very flexible with my working hours and do mostly everything online I decided last year to travel the world while still working and creating content like I would in Austria. I figured it shouldn’t really matter if I sit at home in Austria or work from a beach in Panama. Simpler thought as done – this I can tell you already. Obviously there are quite some challenges when you want to travel and still produce the same quality results for your clients as you would at home in your familiar surroundings. In this blog post I would like to share some important food blogging travel tips. 

In the fall of 2018 I planned my first big international working trip. I set out together with my boyfriend to travel through Costa Rica, Panama and Mexico, both working full time. For our first trip we were gone for almost three months. After that we came back home for Christmas and left again for our trip to Asia, visiting Taiwan and the Philippines. The second time we were gone for one month, creating content and doing company promotions just like I would have at home. By now I would say I have gotten pretty good at knowing what things are essential when blogging while traveling and would love to share these insights with you in this blog post. 

Blogging while traveling

Challenges you will face

On your trips there are quite some challenges you will face at some point. Especially when you travel to developing countries like I did. The infrastructure simply isn’t the same as you would find it in Europe, America or Australia. You simply can’t expect to find internet everywhere, good lighting or a quality working place. Here are some challenges I ran into on my trips:

  • Time difference 
  • Shipping difficulties of products
  • Non availability of certain ingredients
  • Poor internet connection 
  • Terrible lightning situations 
  • Broken props (plates, bowls) due to rough airport handling 

Blogging while traveling

Food blogging travel tips

Here are my major tips for food blogging while traveling that will help you to smoothly create content on your trips without frustrations. Please note that some of the links below are affiliate links and at no additional cost to you, I may earn a commission. Know that I only recommend products, tools, services and learning resources I’ve personally used and believe are genuinely helpful. This is not because of the small commissions I make if you decide to purchase them. Most of all, I would never advocate for buying something that you can’t afford or that you’re not yet ready to implement. The products are simply the ones I use when blogging while traveling and where I thought you might find the direct Amazon link helpful as well ?  

  • Use waiting time: Especially in countries with polychronic tendencies, meaning they don’t really value the concept of punctuality you will run into a lot of unnecessary waiting time. There will be a lot of time lost waiting for planes, buses or being stuck in traffic. Especially in the Philippines I had to learn the hard way to use my waiting time wisely for work projects. Literally every plane, bus or taxi was delayed and it always took us twice the time than expected. That is why I recommend you always save some work you can do offline. For me that was usually editing my pictures, planing my gallery or like right now – just sitting on a flight to Coron island right now actually – writing a blog post. This way you will use otherwise dead time super efficiently and will have more time for yourself once you arrive at your destination. 

Blogging while traveling

  • Always have your charging devices with you: This is a mistake I kept making for a long time. I would charge my laptop and phone thinking it would last for our traveling days. Each time we had another airport delay or spent another hour in traffic I ran out of battery not being able to charge my devices. Blogging while traveling means keeping your batteries charged! I would also recommend buying a strong power bank so you always have a charging opportunity. This is the one from Anker that I have and can greatly recommend. Another tip I can give you regarding managing your device compatibility is buying an charge-all-in-one device. Like this you only need to bring one cable and can charge all your devices. This is the one from VONMÄHLEN that I use and can recommend. 
  • Schedule in enough working time: When blogging while traveling make sure to schedule in dedicated working time every day. I was better with this on my Central America trip than now on my Asia trip. I simply had too many things planned changing location almost everyday leaving very little time to work. In Panama and Costa Rica I defined a pretty fixed working schedule for me. Work from 6am-12am then time for beach or activities until 6pm and back to work from 6pm-8pm. Since the sun set at 5pm I really wanted some daytime to enjoy and scheduled in that long lunch break. Now in the Philippines I tried to travel more, see more places and I really noticed how much it reduced my quality working time. Now on this trip I did the bare minimum. So my take-away is definitely to schedule in definite working days where you have no trips or excursions planned or like I did in Central America go to one location for longer (at least 7 days) work from Monday to Friday with a fixed schedule and do day trips on the weekends. 

Blogging while traveling

  • Thoroughly screen your accommodation:
    • Kitchen: This will be one of the most important things to consider before leaving for your trip. When you work and travel at the same time you simply won’t be as flexible as the average backpacker booking the accommodation one night before and rearranging the entire trip from one day to the next. When food blogging while traveling you must consider a couple of things: you need a kitchen, good lightning and at least a supermarket close by. From experience I can tell you that hotels are generally a really bad idea because it is quite impossible to prepare your own dishes. I recommend booking an Airbnb with a full kitchen. Inquire about the kitchen appliances. Do you need a baking dish and a stove? What about a blender? 
    • Lightning: Besides the kitchen inspect the lightning situation on the photos of the Airbnb listing. Is there enough natural light coming into the apartment? I have gotten quite creative here, also shot outside in front of the door because sometimes the actual accommodation ends up looking different than you imagined on the photos.  
    • Internet: Last but not least, make sure the apartment has a good internet connection. I always ask them for a speed test. I can recommend this one by Ookla showing you the exact download and upload speeds. The results of the upload speed should be somewhere around 3mb and the for the download around 2mb. Having good internet is really the most vital thing for a productive work day. Especially when traveling to developing countries the connection can be unstable. We had internet blackouts because of Typhoons, earthquakes and over-usage already. So make sure you always have a back up plan like a close by Café with Wifi. I think this point is the most crucial one when blogging while traveling. One time I was stuck on an island without internet for 8 days and wasn’t able to do anything which created quite some problems for me. So make sure you always check the internet situation before you go somewhere!
  • Find a co-working space: When we stayed in big cities we were usually looking for co-working spaces. This is a great way to get out of the apartment and mingle with other like minded people. Internet is usually fantastic there and it’s great to switch up the work atmosphere. Co-working spaces provide you with great infrastructure and are designed to give you the best working experience possible. I always found myself super focused there and having the most productive work days. 

blogging while traveling

  • Be aware of time difference when blogging while traveling: My tip is to write emails at least one day earlier than you would have done at home. Since you won’t have the entire day to monitor your inbox the email conversation will just take longer than it usually would if you were in the same time zone. Try to work at least 2-3 hours overlapping your home country’s time zone or the time zone where most of your clients are. When I was in Costa Rica and had an 8 hour time difference I was always working from 6am-9am so I would still reach them in Austria for their last 2-3 working hours of the day. In the Philippines I was mostly working at night time because of the 7 hour time difference in the other direction. I was usually working from 5pm-8pm to reach the Europeans in their first working hours of the morning. 
  • Plan your gallery/blog posts ahead: This is something that has help me tremendously on my trips. When I know I have a big trip coming up I usually already take a lot of photos before. So when I leave I have a buffer of about 10-15 recipe photos that I can post without having to produce anything in between. I also already pre-take all the photos for my long term cooperations. So in case I won’t have good photo opportunities on my trips I can at least go back to these photos I took beforehand. Like this it is also much less stressful because you already know you have got your „posting to-dos“ covered for the trip. I schedule my posts with an app called UNUM, which I can highly recommend you to use as well to plan your IG gallery ahead. 
  • Preorder products for promotion: When I know a long trip is coming up I give my cooperation partners a heads up and get the products I need to promote during my time abroad shipped to me in advance. I made the experience that companies don’t want to ship overseas because it is simply too expensive for them. That is why my suitcase is usually pretty full when I travel. I would say 1/3 of the space is taken simply by the products I need for my cooperations. Plan ahead of what you are going to promote on the trip and then just bring the essential things for those posts or IG hauls. 

Blogging while traveling

  • Get a local SIM card: Blogging while traveling means you will probably need internet on the go. If you want to make your life a lot easier I recommend getting a local SIM card. You usually already find little SIM card stands at the airport and the prepaid plans are really affordable connecting you to the internet without a problem. This can also be super useful if you need taxi services like Uber or Grab. I however decided against a local SIM card because I consciously wanted to force myself to some internet free time when away from the hotel or restaurant. 
  • Bring the right props: Being gone from your save home set-up can be quite challenging. At home its quite easy to get a good photo because if you are like me you will probably have various plates, kitchen towels, decoration items and other fancy props to choose from. On your trip however you can only bring the essentials. This is what I brought with me on my trip: 3 of my best plates (neutral but unique), 1 white background fabric I could always use for a nice blurred out background, my favorite little spoons, a golden knife and fork, my mini cookie cutters for decoration and one coconut bowl. Like this I could create a wide array of different settings. It might also be a good idea to ask the Airbnb host about the color of plates and silverware. Another insider tip is to buy plastic backdrop paper. In Austria I usually use wooden backdrops which are bulky and quite heavy. Before my trips I bought this marble backdrop paper that I can simply roll up and is super light! 
  • Bring the right equipment:  When you are gone for a longer period of time you surely still want to keep producing amazing content but simply can’t take all your inventory with you. Photo equipment can get really heavy and your suitcase is usually limited to 23kg per flight. This is what I had with me: A super light travel tripod, my reflector, my favorite 35mm 1.8 lens together with my Nikon D7500. Since I travelled together with my boyfriend it was a bit easier to bring more equipment because he also had some suitcase space. Therefore, we brought also the drone and the gimbal. 

Blogging while travelilng

Blogging while traveling and still keeping up the quality of your content can be a challenge at first, but also presents amazing new opportunities for different content and unexpected shooting possibilities. I hope this blog post was helpful. If you have any unanswered questions feel free to put them in the comments. I will make sure to answer them all. You can also always reach out to me on Instagram. You might also be interested in my online food blogging course that will teach you some more about the art of food blogging. 

If you want, you can also sign up for free food blogging tips and tricks here: 

I recommend you also check out my top food blogging tips as this blog post is teaching the essentials of amazing food pics and could be super helpful for you as well! If you are interested in how to make money as a food blogger you might want to watch this YouTube video on different ways to monetize your blog. 

xoxo,


Weiterlesen

Smoothie Detox – meine kleine Entgiftungskur

Smoothie Detox

Dieses Jahr wollte ich gleich mal mit einem Smoothie Detox startet um meinen Körper zu entgiften und neue Energien zu sammeln!
In diesem Blogpost möchte ich meine Erfahrungen mit euch teilen und euch auch meine Smoothie Rezepte, welche ich mir so gemacht habe weitergeben. 

Mein Fasten Hintergrund 

Seitdem ich 19 Jahre bin mache ich eigentlich jedes Jahr einmal eine Heilfasten Kur. Ich habe das schon immer bei meinen Eltern gesehen, die machen auch jedes Jahr so eine Entgiftungskur. Nur ein bisschen extremer als ich, da die dann meistens 10-14 Tage wirklich nichts essen und nur Wasser + Tee trinken. Ich mache das Heilfasten immer nur 5 Tage. Hier übrigens der Blog Post dazu vom letzten Jahr. 
Auf jeden Fall wollte ich zu Beginn des Jahres auch mal wieder meinen Körper entgiften, da die letzte Fastenkur schon sehr lange her war. Komplettes Heilfasten war mir dann aber doch etwas zu viel und so habe ich mich für einen Smoothie Detox entschieden. Diesen wollte ich schon immer ausprobieren. 

Ich habe mich in den letzten Tagen also ganz viel damit beschäftigt und viel darüber gelesen und möchte euch nun meine Erfahrungen weitergeben und ein paar Rezept teilen, welche ihr vielleicht auch bei eurem Smoothie Detox einmal ausprobieren könnt. 

Generell möchte ich auch noch kurz dazu sagen, dass ich nun nach dem Vergleich zum Heilfasten sagen kann, dass ein Smoothie Detox wirklich viel VIEL einfacher ist als 5 Tage gar nichts zu essen. Es ist quasi die Einsteigerversion und perfekt für alle die zum ersten Mal  eine Art „Fastenkur“ ausprobieren möchten. 

Wie funktioniert ein Smoothie Detox?

Im Prinzip war meine einzige Regel nur flüßige Nahrung zu mir zu nehmen. Ich habe meist bis Mittags wirklich gefastet und nur Tee getrunken. In der Früh habe ich immer mit einem kleinen Morning Mineral Cocktail gestartet. Das war kaltes Wasser mit frischem Zitronensaft und Himalayasalz. Ein Tip vom bekannten Personal Trainer Aubrey Marcus.
Mittags machte ich mir dann den ersten Smoothie. Ein zweiter folgte dann gegen 15.00. Abends machte ich mir dann immer Suppe, da ich gerne einmal am Tag etwas warmes hatte. Zwischendurch nahm ich noch von Ringana täglich ein Cleansing Pack für die Verdauung und einen Detox Shot. Dies ist aber wirklich kein muss, ich hatte nur die Produkte gerade zu Hause und sie passten gut in die Entgiftungskurs mit rein. Generell ist es einfach super wichtig, dass ihr wirklich viel trinkt. Vor allem ganz viel Wasser und Tee zwischen den Smoothies 🙂

Für meine Smoothies lies ich mir auch sehr viel Freiraum und mixte zusammen auf was ich gerade Lust hatte, immer mit dem Hintergedanken Zutaten zu verwenden, welche positive & reinigende Eigenschaften auf den Körper hatten. So nahm ich zum Beispiel Grüntee als Base der auch die Fettverbrennung unterstützt, mischte Leinsamen hinein die über super gesunde Fette verfügen oder verwendete Spirulina und Moringa aufgrund des hohen Anteils an Vitalstoffen. 

Ich habe euch nun untenstehend einen kleinen Smoothie Baukasten zusammen gestellt. Dieser soll euch helfen eigene Smoothies zusammen zu stellen, falls ihr auch mal einen Smoothie Detox plant! 

Smoothie Baukasten

  • Basis: Kokoswasser, Grüntee, Fruchtsaft, Pflanzendrinks, Wasser
  • Früchte für die Süße: Banane, Apfel, Birne, Ananas, Mango, Kiwi, Beeren, Granatapfel, Melone,…
  • Gemüse für extra Chlorophyl: Spinat, Broccoli, Gurke, Salat, Avocado,…
  • Zum Verdicken: Mandelbutter, Haferflocken, Kokosfleisch, Chia Samen, Leinsamen 
  • Für den Power Boost: Spirulina, Matcha, Moringa, Protein Pulver, Kurkuma, Ingwer

Einfach von jeder Kategorie eine oder mehr Zutaten wählen und ihr habt den perfekten super clean detox smoothie!

Hat man Hunger während des Smoothie Detox?

Viele von euch haben mich gefragt wie hungrig man während der drei Tage fasten ist. Hier kann ich euch wirklich beruhigen. Da man ja eigentlich ständig am trinken ist und durch die Smoothies auch einiges über den Tag verteilt zu sich nimmt ist es mit dem Hunger wirklich nicht so schlimm. 
Hier und da verspürt man zwar so einen Hungerschwall, aber dann trinkt man einfach ganz schnell einen Tee oder den nächsten Smoothie und dann geht das auch gleich wieder weg. 
Jedoch gehört eine gute Portion Disziplin und Durchhaltevermögen zu solchen Fastenkuren dazu. Man muss mehr als einmal stark bleiben um nicht irgendwo etwas zu essen was man nicht sollte. 

Rezepte

Hier nun ein Auszug aus meinen Smoothie Rezepten, welche ich in den letzten Tagen getrunken habe. Mega hilfreich bei so einer Smoothie Kur ist natürlich ein guter Blender. Ein Pürierstab geht natürlich auch, aber ich würde euch einen Standmixer sehr empfehlen weil er einfach leistungsstärker ist. Während meiner Detox Kur habe ich den KMix von Kenwood verwendet, welcher einfach der Wahnsinn war! (PR-Sample) 

Morning Mineral Cocktail – gleich nach dem Aufstehen

1 Glas kaltes Wasser
3g Himalaya Salz
1/4 frisch gepresste Zitrone

Grüner Smoothie – Mittags 

Hier ein Smoothie Rezept vom zweiten Tag: 

1 Kiwi
1 Minigurke
3 Erdbeeren
1/4 Mango
40g Broccoli 
1/4 Honigmelone
1 TL Moringa, Matcha oder Spirulina 
200ml Kokoswasser

Smoothie Detox

Protein Smoothie – Nachmittags

1 TL Mandelbutter (gesundes Fett)
1/2 Banane (Energy Booster)
1 EL Proteinpulver (Eweißquelle)
200ml Mandelmilch (Mandeln helfen gegen Herzkrankheiten)
1 TL Flohsamen (Ballaststoffquelle, gut für die Verdauung)
1 TL Matcha (hoch an Antioxidantien)

Optional auch noch mit Avocado und Rohkakao. 

Smoothie Detox-

Granatapfel Spirulina Smoothie – dazwischen 

1/5 Zitrone (für das Immunsystem)
250ml Grüntee (hilft bei Fettverbrennung)
100g Granatapfelkerne (soll vor Krebs und vorzeitiger Hautalterung schützen)
1 EL Leinsamen (Omega 3 & Ballaststoffe)
1 TL Spirulina (entzündungshemmend und entgiftend, vorsicht – Geschmack ist nicht gerade lecker)

Smoothie Detox-

Warme Tomatensuppe – „Abendessen“

Einmal am Tag wollte ich meist was warmes essen. Deshalb habe ich mir einen Gemüse Smoothie namens Suppe gemacht 😀 
Hier ein tolles Rezept meiner Lieblingssuppe währen der Detox Kur! 

Zutaten: 
300g Wurzelgemüse (Knollensellerie, Karotten, Lauch)
1 Kartoffel
Kräuter
Bio-Suppenwürfel 
3 EL Tomatenmark 

Zubereitung: 

Das Gemüse in kleine Stücke schneiden und in einem Suppentopf mit Wasser kochen. Tomatenmark und Suppenwürfel unterrühren. Gekochtes Gemüse aus der Suppe abseihen und für die Aufbautage im Kühlschrank aufbewahren. Frische Kräuter hacken und als Topping auf die Suppe geben. 

Smoothie Detox

Ich hoffe ihr habt dieses Blogpost spannend gefunden und ich konnte euch auf für eine zukünftige Smoothie Detox Kur begeistern. Es ist wirklich toll so etwas mal auszuprobieren. Falls ihr noch genauere Fragen habe könnt ihr mir sie gerne in die Kommentare schreiben. 

xoxo, 

Weiterlesen

Puebla Food Guide – top 12 best restaurants and food spots

Puebla Food Guide

So excited to share this Puebla food guide with you all. Puebla is in my opinion the heart of gastronomy in Mexico. It is super well known for its incredible cuisine and extravagant restaurants. After having lived here twice I feel like I know my way around the best food spots in town pretty well and would love to share them with you now. 

The amount of cool, unique trendy places is really astonishing in Puebla. It was something I certainly didn’t expect when I came here the fist time. I can honestly say our restaurants & cafés in Austria don’t even come close to the awesome food spots you will find here! 

Gastronomy is super important for the city of Puebla. In almost every university you will find a gastronomy major, which is also what I studied during my exchange semester here. It is the soul and beating heart of the Mexican haute cuisine. The food is really so unbelievably good here and in this Puebla food guide I want to present you my top food choices of the city!

Puebla Food Guide

Breakfast

Here a list of my favorite breakfast spots in Puebla:

1. Olivia

I adore this place and therefore it is on top of my list for my Puebla food guide. The vibe, the atmosphere, the healthy food and the fair prices. When I go I always get the „Dejalo Fluir“ Detox shot at Olivia, which is a mix of apple vinagre, himalayan salt, honey, cinnamon and cardamon. A perfect start into the day! The matcha pancakes, smoothies and Açai bowl are my top choices there. They have a good internet connection as well and I love to work from there every once in a while. 

Puebla Food Guide

2. Mama Elena

I love this place because of the beautiful view onto the cathedral of Cholula. Its a super cute restaurant and they have a couple of healthy options. I unfortunately couldn’t make it there this year, but I remember from last year I loved their chia pudding and the fresh pressed juice is also really good. Check for special events there. Last year we went for a five course Valentines dinner with a view onto the cathedral. Mama Elena is really a magical place!

3. Tonico 12 

This place is definitely on top of my food list here in Puebla. What ever you order will guarantee an explosion of color on your plate. Everything is homemade and super high quality ingredients are used. Tonico 12 has many vegan and vegetarian options and uses a lot of superfood for the dishes. I had characol pancakes and a characol smoothie which tasted amazing! What I also really liked was how they decorate the dishes.  Tonico 12 is on my list for breakfast places, but I also recommend it for a healthy lunch or dinner option! 

Puebla Food Guide

4. La Cupula 

This is a restaurant downtown in the center of Puebla. Its a rooftop restaurant so you have an amazing  360 degree view over the entire city. We went there for breakfast which I can highly recommend. It is a buffet and only costs 150 pesos (like 8 euros) and you have a huge selection and can also get fresh Chilaquiles, Enchiladas and Omlettes from the kitchen. Highly recommend checking out la Cupula!

5. La Chula 

This is a tiny little juice bar in Cholula. Everything is made right there in front of you. The ingredients are super fresh and the choice of healthy juices are amazing! They also offer a small breakfast menu including omlettes (which were incredible) and bowls (even better). We had the crazy monkey bowl which included peanut butter and banana! 

6. Soul Vali

Tulum vibes coming right up with this one. A visit at Soul Vali feels like a short term vacation. The tropical and chill atmosphere makes eating there super enjoyable. It is situated in a little garden with beautiful white hammock chairs and wooden tables. They have a huge selection of healthy bowls and decorate them like top food bloggers! I think we spent like three hours there soaking in the atmosphere. Soul Vali also has Wifi so its a good place for a little work session as well. 

Puebla Food Guide

Lunch & Dinner

7. Casona de los Sapos

I am putting this place first on my Puebla food guide regarding dinner & lunch choices.  Out of all the places we went to it definitely impressed me the most with their dishes and quality of food. Casona de los Sapos is a small boutique hotel with only 19 super luxury rooms hosting three restaurants and one French bakery.

We had dinner at Osteria del Rospo and were stunned by professional service and haute cuisine sent from the kitchen. We treated ourself to a three course meal there and were so happy about all the healthy low carb options that can be found in the menu. The combination of flavor we found in all dishes were so well balanced, but also challenged your senses at the same time. This is really what I call a unique food experience. The next morning we had breakfast in their French restaurant. We were offered some of the fresh pastries from the bakery and ordered some main dishes.  I rarely ate such a good salmon omelette. 

Puebla Food Guide

8. Textileria

This place is simply so cool. Honestly I wish we had a restaurant like that in my city at home. The interior is super stylish and has a modern/vintage twist. The service is world class and the waiters make you feel like the most important person in the room. Although I consider Textileria quite fancy the prices are absolutely affordable for any European. As a starter they bring you this fantastic bread with different kinds of sauces to try. I was feeling a bit adventurous when we went there and ordered the grasshopper tacos. I also had salmon there one time which was incredible and needs to mentioned on my Puebla food guide. 

9. Intro 

This is probably one of the higher priced restaurants in Puebla and has made quite a name for itself. My host sister is managing the bar so I simply had to come and check it out and go for a drink there. After a super delicious non-alcoholic matcha cocktail at Intro we got some food there as well.  I ordered the cauliflower with feta cheese, which was really yummy and my friends had octopus and ceviche. Expect to pay a bit more here than in other places, but also expect top class food and amazing service. When we sat down the chef send a little greeting fro the kitchen with was also super yummy! I loved the interior and classy style of the place.

10. La Berejena

You might not expect to find good pizza in Mexico, but la Berejena will prove you wrong. They have a super creative pizza menu, offering different combinations of flavors you have never tried before on a pizza. The place is usually packed, but after a short while waiting we got a table. The decoration of the restaurant is super hip & trendy. I ordered a salad because it just sounded so amazing. It was with caramelized pecans, goat cheese, apple slices and jamón serrano. I also shared a pizza with my boyfriend which was delicious. 

Puebla Food Guide

11. The Ocho30 

Another hipster food spot in Puebla that needs to be mentioned in my Puebla food guide.  There are a couple Ocho30 restaurants in Puebla, each one specializing in one specific meal (paninis, pizza,…) What I really love about 80.30 is the interior decoration. It is just so cool! My two favorite ones are in Cholula and in Lomas de Angelopolis. I ate lasagne there last time, which was great. The prices are super affordable, but don’t expect huge portions. Perfect for not gaining weight though 😉 

12. Sushi-iito

Okay I simply had to put this one on my Puebla food guide list because I went there so many times. This is not the traditional high end restaurant you would expect. It is a pretty basic sushi chain with an AMAZING offer I simply was not able to resist. So, I absolutely love sushi and Sushi-iito has this offer from Monday to Thursday where you order one roll and get the second one for free! Whaaat?! Yes you heard correctly!

The best thing, one roll costs like 100 pesos (4 euros) and it is actually really good sushi. Totally recommend you to check it out when you are here. We loved going to the one in Lomas de Angelopolis because it has a nice atmosphere as well. Oh and by the way don’t go to Shirushi. OMG I absolutely hated that place. That was my worst food experience in Puebla. So if you are on the lookout for sushi go to Sushi-iito instead! 

Top chefs in Puebla 

Since I studied here for half a year in the field of gastronomy & mixology I was also able to get to know a lot of people working in this area here. Many of my friends are top chefs and bartenders here who are also being flown around internationally to cook in different countries. The Puebla food guide would not be complete if you didn’t get to know some of the chefs behind the scenes. Here I would like to present two of my favorite talents of the city. 

Elena Centeno

Puebla Food GuideThis sweet girl is actually my host sister. Elena has an incredible talent for creating the most amazing cocktails and is head of bar at Intro, one of the finest restaurants in the city. She has entered various mixology competitions and impressed the judges more than once! 
Since I don’t really drink alcohol she made me a super special „healthy“ matcha cocktail. I was really impressed by the taste and creativity of the drink. 
Her signature drink Green Velvet is also super healthy. Its with avocado, egg white and matcha! Sounds like a pure fitness drink, right?! 

Daniel Nantes

Puebla Food GuideThis guy has some real skills! Daniel is of the uprising stars in Pueblas gastronomy world who was just recently flown to Russia to cook for the Mexican embassy in Moscow! His skill to innovate new dishes and combine all kinds of ingredients into a firework of flavors is unique. During the time I was here I was lucky enough to have tasted a three course meal he and Elena put together (they are dating by the way – what a power couple in the kitchen).

Make sure to check out their Insta for some real high class food inspo! 


My love for Puebla

I hope you enjoyed this Puebla food guide and will check some of these places out if you ever get to the city! I promise you will be stunned the by the high quality and unique restaurants & cafés you find in the city. If you are looking for more food tips in Mexico I recommend you check out my Tulum food guide

Puebla Food Guide

I honestly really love Puebla and I have a close connection to this city because I lived here for quite a while and have made tons of friends here. It has such a charm and besides the food there are also so many things to see and do. They have this super cool VIP and 4Dx cinema that makes every movie experience so memorable. Also visiting the markets, taking a spin on the Estrella de Puebla and shopping at some of their fancy malls is a ton of fun.

Let me know if you still have any questions and I am happy to answer them in the comments! 

xoxo, 


Weiterlesen

Weihnachtsporridge mit dem Fly Wheel Cut Messer von Tyrolit

Fly Wheel Cut Messer Tyrolit

Werbung – Kooperation mit TYROLIT

Heute möchte ich euch mal eine weihnachtliche Geschenksinspiration geben. Als Food Blogger weiß ich wie wichtig gute Küchenutensilien sind und wie sehr man jemanden der gerne kocht damit Freude bereiten kann! 

Rezept + Produktvorstellung

Anhand eines leckeren Frühstücksrezeptes für die Weihnachtszeit möchte ich euch das Fly Wheel Cut Messer von TYROLIT vorstellen. Meiner Meinung nach gehört ein gutes Küchenmesser zur Standardausstattung und TYROLIT hat nun in der Adventszeit ein verführerisches Angebot für euch. 

Mein persönliches Küchenmesser

Mir selbst ist das Küchenmesser vor ein paar Wochen zugeschickt worden und ich bin immer noch fassungslos wie wahnsinnig gut es schneidet und wie sehr es meine Arbeit in der Küche vereinfacht. Was ich ganz besonders toll und einzigartig an dem Fly Wheel Cut Messer finde ist, dass man es mit seiner persönlichen Gravur bekommt. Ich habe mir somit meinen Blogger Namen „Carina Berry“ eingravieren lassen. 

Fly Wheel Cut Messer Tyrolit

Qualität aus Tirol 

Lasst mich euch ein bisschen etwas zum Fly Wheel Cut Messer erzählen bevor wir direkt rein ins Rezept starten. 

Das Familienunternehmen der Swarovski Gruppe hat seinen Stammsitz in Schwaz/Tirol. TYROLIT liefert seine Produkte rund um den Globus und ist bekannt für deren Funktionalität & Design. Das Fly Wheel Cut Messer gehört zu den TYROLIT life Produkten, welche mit unglaublich edlem Design und hochwertiger Verarbeitung überzeugen. Die Produkte zeichnen sich durch ihre Langlebigkeit und Premium Qualität aus, welche sie zu einem echten Statement im Haushalt machen. 

Fly Wheel Cut Messer Tyrolit

Das manufakturgefertigte TYROLIT life Fly Wheel Cut Messer  wir bei Tiroler Werkzeugexperten in 64 Arbeitsschritten hergestellt. Was ich sofort bemerkt habe ist die außergewöhnliche Schnittleistung und das edle Design in „All-Black“. Das Messer hat außerdem nur 155 Gramm – also ein echtes Leichtgewicht.
2018 wurde dieses Küchenmesser mit dem Prädikat „Winner“ in der Kategorie „Kitchen“ beim German Design Award ausgezeichnet. Die hohe und lange Klinge verringert die Verletzungsgefahr beim Schneiden, weil der Daumen und Zeigefinder das Ende der Klinge stabilisieren. Somit bleibt die Spitze des Messers immer auf dem Schneidebrett. Ein sauberer Schnitt also ohne abzurutschen. 🙂

Als Weihnachtsaktion ist das Fly Wheel Cut Messer im Moment zum vergünstigten Preis von € 219,90 (statt € 299,90) und mit persönlicher Gravur erhältlich. Wie ihr in den Fotos sehen könnt habe ich Carina Berry eingravieren lassen und bin so happy damit! 

Weihnachtsporridge mit TYROLIT 

Schritt für Schritt möchte ich euch nun durch das weihnachtliche Porridge Rezept führen und euch erklären wofür ich hier mein neues Messer verwendet habe. 

 Fly Wheel Cut Messer Tyrolit .   Fly Wheel Cut Messer Tyrolit

Der Porridge

Zu Beginn starten wir mit dem Porridge. Hier habe ich gleich zu Beginn das Fly Wheel Cut Messer verwendet um die Walnüsse für die Porridgemasse zu hacken. Schon beim Auspacken hat mich das Messer mit dem hochwertigen Klingenschutz aus Leder beeindruckt. Die Klingenlänge ist 20cm und lässt sich somit ziemlich gut für alle Rezepte verwenden. Im Gegensatz zu anderen Messern ist es wirklich sehr leicht und das merkt man auch beim Schneiden. Somit war es eine Leichtigkeit die Nüsse klein zu hacken. 

  • 150ml Mandelmilch
  • 20g Haferflocken
  • 1 TL Zimt
  • 20g Birkenzucker
  • 25g Walnüsse

Haferflocken und Mandeln zusammen kurz aufkochen lassen und immer gut umrühren. Gehackte Nüsse, Zimt und Birkenzucker unterrühren und vom Herd nehmen. Die Masse in einen Bowl füllen.
  Fly Wheel Cut Messer Tyrolit

Die Toppings

Im zweiten Schritt machen wir uns an die Dekoration des Bowls. Auch hier war mein neues Messer eine große Hilfe. 

  • 1 Pflaume
  • 4 Physalis
  • 3 EL griechisches Joghurt 
  • 15g gehackte Walnüsse

Fly Wheel Cut Messer Tyrolit

Zu Beginn das Joghurt am Bowl verteilen bis die gesamte Oberfläche bedeckt ist. Am Schneidebrett die dunkle Pflaume in feine, dünne Scheiben schneiden. Hier war ich zum Beispiel von der Präzision des Messers begeistert. Man weiß wie schwierig es sen kann glattes Obst und Gemüse normalerweise mit einem Messer zu schneiden, aber mit dem Fly Wheel Cut Messer war das gar kein Problem. Auch die Physalis konnte ich perfekt mit meinem neuen Messer verzieren und einkleines Muster in die Frucht mit der Spitze des Messers stechen. 

Fly Wheel Cut Messer Tyrolit

Die aufgeschnittene Pflaume, die Physalis und die gehackten Nüsse nun auf den Bowl legen und das leckere Weihnachtsrezept genießen! So schnell und einfach bekommt man ein gesundes, leckeres und weihnachtliches Frühstück! 

Fly Wheel Cut Messer Tyrolit

Ich hoffe euch hat der Blogpost gefallen und ihr habt vielleicht eine Inspiration für ein tolles Weihnachtsgeschenk bekommen ? Solltet ihr vielleicht nach noch mehr Dekorationsvorschläge für die Weihnachtszeit suchen könnt ihr euch meinen Food Styling Blogpost mit vielen Tips noch ansehen.

Merry Christmas!

Xoxo,


Weiterlesen

10 best food blog tips for Instagram growth (2020)

Dojo Coworking Space

Do you have a food blog and want to grow on Instagram? Well then this blogpost is perfect for you. In this blogpost I will share my best 10 food blogging tips with you here in order to help you kickstart your own food blog channel! 

I have been a food blogger for over 3 years now. Today I can proudly say that I am Austrias biggest fitness food blogger and am grateful enough to be able to inspire thousands of people every day with my healthy recipes and active lifestyle. 
Since the beginning of this year I am doing it full time, having made my hobby into my dream job! Now in this blogpost I would like to share my knowledge with you to become a top food blogger as well! 

How to start a food blog successfully?

Below I will show you 10 hands on tips for stepping up your food blog game! Because of that, I will also link you products that I am personally using at home. 

Please note that some of the links below are affiliate links and at no additional cost to you, I may earn a commission. Know that I only recommend products, tools, services and learning resources I’ve personally used and believe are genuinely helpful. This is not because of the small commissions I make if you decide to purchase them. Most of all, I would never advocate for buying something that you can’t afford or that you’re not yet ready to implement. The products are simply the ones I use at home and where I thought you might find the direct Amazon link helpful as well 🙂 

Food Blogging Top Tips for Instagram Growth

1. Find the right light

Taking a good picture will greatly depend on the light situation in the room. Hence, make sure to find a spot where you get good lighting. My tips: shoot with natural light, avoid straight sunlight and use a reflector. 

  • Natural light: I like to shoot at daytime. You get the worst photos when trying to shoot at night with your kitchen lights on. Oh and by the way – never use a flash for your photos. That is just straight up going to kill the photo! I usually place my food right next to a big window, so I get good light from one side. The best time to shoot when you have a slightly cloudy sky. This gives you nice diffuse light. 
  • Avoid sunlight: When you try to shoot under direct sunlight you will get a lot of very hard shadows in your photos. Also, the colors will come out in a very different way. When its sunny and you must shoot a photo I can recommend getting a diffuser. You can put that in front of your dish to shield it from the sunlight and get nice diffuse light. 
  • Use a reflector: I usually put a reflector on the other side of my dish, so light gets reflected back onto the dish. You can get a really cheap reflector on Amazon. This is the one I use daily at home. It really makes a huge difference, since you will get a brighter photo with less shadows! 

2. Find the right angle when shooting

What I learnt is that not every dish can be shot from the same angle. If you are shooting a nice smoothie bowl you most probably want to shoot it straight on and not from the side because you would loose a lot of that nice decoration on the bowl. 
However when taking a photo of a pancake tower you definitely want to shoot that from the side to see the stacked up pancakes. Therefore, don’t be shy to move around with your camera and try out different angles. 

3. Get social

How to become a food blogger on Instagram? Very simple – start by engaging with a ton of other people in your niche! After all Instagram is a social platform. When I started I spent hours commenting and liking other peoples posts. Giving is living! If you give a lot you will soon notice that you will get a lot of engagement back. 

But don’t just write mundane sentences like „nice pic“ or „looks awesome“. Thats so unpersonal. Read the captions and actually say something meaningful. Start real conversations. Moreover, make sure to watch and reply peoples Instastories. This is a great way to really get to know the people behind the accounts. 

4. DSLR cameras making top food bloggers 

What do top food bloggers have in common? They all shoot with a DSLR camera. You won’t hardly find a food blogger who doesn’t use a professional camera for their food photography. It simply makes a big difference. Phones can take really good pictures and are very practical for on the go. However, a DSLR camera simply differentiates the hobby bloggers from the professional ones. 

I personally use a Nikon D7500. In my opinion, it is a great camera also for beginners. Regarding lenses I can recommend using either a 35mm. 1.8 (thats the one I am using at the moment) or a 50mm 1.8. With these lenses you get a beautiful depth effect and can shoot pretty close to your image. 

5. Join a party 

If you are already highly engaged in the foodie niche you might have seen other food bloggers throwing a party and inviting everyone to join with a dish. Usually these parties have some kind of theme. I recently had an autumfoodparty and in the summer a summer closing party. Some people throw parties when they hit 10k, 20k, or something similar to celebrate the occasion.  You might wonder now why people do this. It is actually a huge advantage for the people throwing the party and those participating as both parties will grow their reach and get more exposure. 
When you enter the party you have to tag the person in the caption and the photo, like this your followers might become aware of the account and go follow. On the other hand if the big host account will feature your post, usually in stories and the winners on the feed, you will get a lot of exposure back. It is also a great way to start building a relationship with the bigger food influencers out there. 

6. Build a network

When starting out it is important to build your own network of people who will be supporting you on Instagram. These are going to be your loyal followers who will comment and like all your posts. This is what will determine also your engagement rate. Because of this make sure to find likeminded people that you can connect with. I suggest you find other food bloggers in the same niche who have about the same following size as you do in the beginning. Like this it will become easier to start a conversation and build a relationship. Once you have a good network you can start asking your other foodie friends for shoutouts on their stories. Mutual IG story shoutouts are a great way to grow and get more exposure for your account. 

7. Tag curation pages

When you post your content make sure to tag it correctly. There are hundreds of great curation pages out there that are looking for viral content daily to post on their galleries. Those pages can take your photo and repost it on their account, often reaching ten thousands of people giving you an incredible amount of exposure. If you manage to get reposted on a consistent basis by many big accounts I guarantee your account will grow immensely. 
What I like to do is to write those curation pages a personal message and asking them directly if they would be interested in sharing my piece of content. They are always looking for new talent and you might be the next big star on their profile <3 

8. Consistent posting schedule

Moving on to the next tip. Have a consistent posting schedule. I believe it is important to stick to a clear schedule regarding how many times a week you are posting. Like this your followers will know when and how often to expect your content. Don’t post nothing for a week and then throw out three pics in a row. This will seem super confusing to anyone following you. If you can’t manage to post every day then try to commit to every other day or at least four times a week. 

9. Food Styling

Next, lets talk about food styling. This is something I have neglected for the longest time. It is so powerful though! Because of this simple trick I was able to improve my food pics by a lot. Things like little flowers, tiny cookies, sprinkles, fruit and nicely cut veggies can make or break your dish. The most boring chia pudding can look absolutely fascinating with the right kind of decoration. A basic trick I use for so many of my dishes is cutting out little stars or hearts from bananas and place them on the bowl, cake or parfait. Makes it look so much better instantly. I actually have a separate blog post about this whole topic here
Therefore, I recommend you get yourself a couple of cute little cookie cutters and learn the art of decorating your dishes! These are the ones I use a lot for my recipes. 

10. Photo Setup  

Last but not least let’s look at food props. Back in the days I used to place my dish on a simple blanked on the floor. Looking back now this makes my laugh so hard. When wanting to take great food pics your photo setup is super important. In addition, you will want to make sure to have a nice background you can place your dish on. Something I can recommend is going to the local hardware store and asking them for samples of marble or wooden floor. I got all my backdrops for free just by asking them for a sample to take home. Worked really well! Furthermore, I can recommend using a nice loose fabric that you can put in the background to blur out your photo smoothly. 
Besides that you should acquire a nice collection of glasses, jars, spoons and plates to switch up your food photos. 

Bonus tip

Finally, I have an extra food blog tip for you. Nowadays it has gotten quite difficult with the new algorithm to grow a solid following. Building a strong audience is part of becoming a successful influencer. There is actually a very powerful organic growth tool for Instagram called Kicksta. The tool doesn’t spam, bring you fake followers or is a bot – it simply brings you pure organic growth through a highly developed artificial intelligence technology. You provide the tool with a couple accounts that have followers you would like to attract and then the tool will like a couple of photos of the followers from those target accounts under your name helping you to boost organic growth. Gaining followers on Instagram can be a time-consuming and tedious process and Kicksta makes this so much easier. Check it out now!

Food blogging online course

If you are really serious about your food blog and want to take it to the next level, I can really recommend my food blogging success online course. 

You can check it out here

Food Blogging Course

Do you want to have your first company cooperations? Want to start making money with your food blog? Or even want to become a full time food blogger?

This course will teach you all of it. I have been through the process and want to give all my knowledge to you now. This course is an extremely valuable source of information. Basically I put everything I’ve learnt in the past year about food blogging and how I made it into my full time job into this online course.

The course is structured into 6 chapters. After the introduction you will find the food blogging chapter, where you will learn how to find your vibe and voice, develop great content and a content policy, learn how to set up a blog and I will also be touching on legal requirements.

The third chapter is dedicated to food photography, where I will share my camera equipment with you, tips on how to prop and style your food, how to find the right light, how to edit your pics with and without photoshop and some more tricks along the way.

The next chapter is dedicated to Instagram growth. You will learn how to make use of the Instagram algorithm and make the features of the app work for you. Learn how to get reposts and post content the right way, join the right parties and create your own Insta highlights.

Before the final send off I dedicated a whole chapter to the topic of monetization. I’ll be sharing with you how to find your pricing rates and put together your media kit with great examples. We will talk about how to reach out to companies, negotiate prices and the important topic of disclosing a partnership.

You will see this is a well rounded course giving you all the insights you need. Head over to the course now

More resources

Here is also a short video summarizing this topic for you:

Are you interested in more tips on becoming a food blogger? Head over to my YouTube to watch videos on how to make money as a food blogger and how I got started a couple years ago. Finally, you can also check out my blog post on the art of food styling, which might be helpful for you as well!

xoxo,

Weiterlesen

EF Sprachreise in Costa Rica

Werbung in Kooperation mit EF Österreich.

Anfang Oktober ging es für mich ab nach Costa Rica, Playa Tamarindo für eine Woche EF Sprachreise um Spanisch zu lernen. In diesem Blogpost möchte ich euch kurz meine Eindrücke dieser unvergesslichen Woche zusammenfassen.

Organisation vorm Abflug

Schon von Anfang an war ich von der Organisation der Sprachreise begeistert. Schon im Vorhinein bekommt man Zugang zu seinem EF Konto wo man Einsicht in alle wichtigen Dinge der bevorstehenden Sprachreise hat. So sieht man zum Beispiel alle Details der Sprachschule, seine Flugzeiten, kann einen Transfer buchen und so weiter. Es gibt auch eine EF App, welche ich während der Woche sehr oft gebraucht habe. Hier sieht man in seinen Stundenplan ein und kann sich für die täglichen Aktivitäten anmelden. Man kann auch Credits hochladen mit denen man dann an bezahlten Ausflügen teilnehmen kann.

Eine Woche vor Abflug habe ich dann auch noch meine Endunterlagen mit letzten Infos zugeschickt bekommen. Hier waren noch einmal alle wichtigen Infos zusammengefasst und alle Notfallnummern vermerkt. Dies machte die Anreise zum Kinderspiel. Als ich aus dem Flughafen ging begrüßte mich schon ein netter Mann mit einem “Hola” in seinem rosa EF T-Shirt und brachte mich zur Sprachschule.

Stundenplan / Sprachniveau / Einstufung

Am ersten Tag machte ich gemeinsam mit allen anderen Schülern, welche über das Wochenende neu dazugekommen sind, einen Einstufungstest. Schriftlich und mündlich. Somit wurde mein Sprachniveau festgestellt. Ich wurde dann der Gruppe B1 zugeteilt und mir wurde demnach mein persönlicher Stundenplan erstellt.
B1 ist fortgeschritten und mir war vor allem wichtig noch einmal die Grammatik zu wiederholen, da ich nie formalen Spanischunterricht gehabt hatte sondern alles eigentlich nur vom Zuhören gelernt hatte. Ich hatte auch wirklich eine hervorragende Lehrerin, welcher man die Begeisterung des Unterrichtens richtig anmerkte.

Unterricht

Ich hatte jeden Tag Unterricht. Manchmal nur am Vormittag, manchmal am Nachmittag und auch einmal zu beiden Zeiten. Ich hatte einen General Course. Man kann aber auch Intensivkurse buchen. Hier hat man dann natürlich dementsprechend mehr Stunden. Der Stundenplan ergibt sich aus den normalen Grammatik und Spracheinheiten sowie einer Multimedia Stunde und den SPIN Kursen. SPIN Kurse sind special interest courses. Hier kann man aus verschiedenen Kategorien wie Kultur, Grammatik, Konversation, Tourismus, ect. wählen. Ich hatte mich für Kultur und Tourismus eingetragen und so waren wir für meine SPIN Klasse auf einer Bootstour und haben Wildtiere beobachtet.

Gemeinschaftsbereich der Sprachschule

Aufenthaltsdauer

Ich habe während meines Aufenthalts mit sehr vielen anderen Schülern gesprochen und der Durchschnitt verbrachte zwischen 6 Wochen und drei Monaten in der Sprachschule. Jedoch gab es auch einige die neun Monate blieben oder alle drei Monate das Land wechselten. Das fand ich besonders cool. So waren manche 3 Monate in Costa Rica und haben Spanisch gelernt, sind dann weiter gegangen nach Kanada oder Amerika um ihr Englisch aufzubessern und haben dann noch 3 Monate in Italien verbracht um mit Italienisch zu beginnen. So kann man in kurzer Zeit unglaublich viele Eindrücke eines Landes gewinnen und noch dazu die Sprache lernen!

Wunderschöne smaragdgrüne Landschaft wohin das Auge reicht

Housing

Gastfamilien

Die meisten Schüler haben bei Gastfamilien gewohnt. Das bietet sich natürlich an, um noch besser die Sprache zu lernen und einen noch engeren Kontakt zu den Einheimischen aufzubauen. Bei den Gastfamilien wurde gefrühstückt und zu Abend gegessen. Am Wochenende waren alle drei Mahlzeiten inkludiert. Da die Gastfamilien aber alle in den umliegenden Dörfern wohnten war es für ein paar Schüler schwer oft zu späterer Stunde nach Hause zu kommen. Es gab zwar ein Shuttle von der Schule, aber der fuhr immer nur einmal Morgens und einmal Abends um die Schüler zur Schule zu bringen und nach Hause zu fahren. Hatte man dazwischen Freistunden oder erst später Unterricht musste man trotzdem diesen Shuttle nehmen oder sonst einfach ein Taxi. Zum Glück hatte die Sprachschule einen tollen Gemeinschaftsbereich mit Pool, Billardtisch, kleinem Kino, Bibliothek und anderen Dingen mit welchen man seine freie Zeit verbringen konnte. 

Wohnheim

Für einen Aufpreis konnte man auch in den verschiedenen Wohnheimen wohnen. Diese waren absolut fantastisch, immer mit eigenen Pool und sehr modern. Da ich nur eine Woche in der EF Sprachschule war wohnte ich in Casa Eleri, allein in einem wunderschönen Apartment mit großer Küche und tollem Ausblick. Wer etwas mehr Privatsphäre wichtig ist kann ich diese Option ans Herz legen.

EF Campus Wohneheim

Das Team vor Ort

Schon nach ein paar Tagen hatte man einen guten Überblick über das Staff Team und wusste wer für was zuständig ist. So was es ja doch ein recht klein, aber feines Team. Am ersten Tag hat uns der Direktor persönlich begrüßt und jedes Department hat sich kurz vorgestellt. Im Allgemeinen muss ich sagen, dass ich total begeistert von der Freundlichkeit und Hilfsbereitschaft des Lehrerteams war. Man sah eine richtige Begeisterung welche sie für ihren Job und den Umgang mit den Schülern aus aller Welt hatten.

Social Activities

Die Sprachschule vor Ort hat jeden Tag Aktivitäten für die Schüler organisiert für welche man sich anmelden konnte. Diese waren zum Teil gratis und für andere musste man einen kleinen Betrag zahlen. So waren wir zum Beispiel am Montag auf einen Welcome Drink eingeladen, gingen am Dienstag zusammen auf einem Berg den Sonnenuntergang ansehen und am Freitag hatte ich mich für Surfen angemeldet. Es gab aber auch Volleyball, Fußball und andere Dinge welche ich in der kurzen Zeit in Playa Tamarindo nicht wahrgenommen habe.
Am Wochenende organisiert die Sprachschule immer eine Reise. Das ist total praktisch, da alles für einen geplant wird. Vom Transport, zur Verpflegung und Übernachtung. Auf diese Weise hat man wirklich auf eine sehr unkomplizierte Weise die Möglichkeit sehr viel vom Land zu sehen. Jedes Monat gibt es sogar eine internationale Reise. In der Woche bevor ich kam waren sie in Mexiko und im nächsten Monat gibt es einen Trip nach Panama. Langeweile ist hier also fehl am Platz!

Sonnenuntergang in Costa Rica

EF hat für mich dann auch andere Aktivitäten abseits von den wöchentlich geplanten organisiert. Die Schüler können einfach in das Activity Office gehen und bekommen hier super Infos was es in der Umgebung zu machen gibt. So erfüllte ich mir zum Beispiel den Traum von einem Ausritt am Strand.

Darüber hinaus habe ich auch bei einer Quad Tour mitgemacht, wo wir für 2 Stunden durch den Regenwald gebraust sind. Wir sind durch richtig große Wasserlacken gefahren, haben Affen gesehen und waren auf einem wunderschönen verlassenen Strand.

Quad Tour durch den Dschungel

Costa Rica

Generell würde ich euch raten nicht in der Regenzeit nach Costa Rica für eine Sprachreise zu fahren. Oktober und November sind hier die meisten Regentage und bei mir wurden leider einige Aktivitäten abgesagt aufgrund der starken Regenfälle. 
Das Land an sich ist wirklich wunderschön. Die Landschaft einfach tropisch traumhaft. Smaragdgrüne Regenwälder soweit das Auge reicht. Die Menschen sind unglaublich freundlich und ganz anders als in Mexiko habe ich mich hier auch total sicher gefühlt. 
Wer die Natur lieb ist hier auch richtig aufgehoben. Es gibt so viele atemberaubende Möglichkeiten die Regenwälder, Strände und Vulkane zu besichtigen. 
Was mich etwas überrascht hat waren allerdings die Preise. Hier ist doch vieles deutlich teurer als in Österreich. Als günstige Reisedestination sollte Costa Rica also nicht gesehen werden. 

Ausreiten am Strand

Resumé

Eine Sprachreise mit EF ist wirklich eine außergewöhnlich gute Möglichkeit das Land und die Sprache auf einmal kennen zu lernen.Durch verschiedenste Aktivitäten findet man auch total schnell Anschluss zu den anderen Schülern und lernt somit Freunde von der ganzen Welt kennen.

Glaubt mir ich habe mittlerweile schon in 6 verschiedenen Ländern für eine längere Zeit gelebt und gemerkt wie sehr einem solche Aufenthalte prägen, stärken machen und sich die eigenen Persönlichkeit weiterentwickelt. Für mich sind das Erfahrung und Erlebnisse die so unglaublich viel wert sind und die einem niemand wieder wegnehmen kann. 

Wer nun Lust auf eine Sprachreise mit EF bekommen hat kann gerne hier auf der Webseite noch nach mehr detaillierten Infos suchen. 

Hier noch ein paar FAQ für euch:

Wie alt muss man sein?

Eigentlich kann man die EF Sprachreisen Reisen ab 10 Jahren machen. Da ist man dann in einer Gruppe mit Kursleiter unterwegs. Eine Reise wie alleine in ein Sprachcamp ist ab 16 Jahren möglich.

Kann man auch ohne Vorkenntnisse eine Sprachreise bei EF machen?

Ja natürlich. Ganz viele Mitschüler die ich kennen gelernt habe sind ohne jegliche Sprachkenntnisse ins Land gekommen. Man startet dann im Anfängerlevel und sieht schon nach kurzer Zeit einen großen Lernfortschritt. 

Wie viel kostet eine Sprachreise nach Costa Rica?

Das kommt darauf an wie lange man verreisen möchte. Ab 1000€ (2 Wochen Kurs inklusive Unterkunft, Verpflegung und Unterricht) Weitere Infos unter: www.ef.com/ils/destinations/costa-rica/playa-tamarindo/

Wie lange dauert eine Sprachreise?

Das kommt ganz auf dich selber an. Ich habe Leute kennen gelernt die blieben nur 4 Wochen und andere 9 Monate. Man kann den Zeitraum selbst bestimmten. Je länger man bleibt desto größer natürlich der Lernerfolg. Ich denke aber dass es erst ab 4 Wochen Sinn macht. Bei mir war eine Woche natürlich nur zum hinein schnuppern, aber eindeutig zu kurz.  

Wann kann ich mit der Sprachreise beginnen?

An jedem Montag – das ganze Jahr 🙂

An welchen Destinationen gibt es EF Sprachschulen?

Also EF hat Destination überall auf der Welt verstreut. Das heißt für euch natürlich eine super Auswahl um das richtige Land zu finden. Ganz genau sind es 50 Sprachschulen in 16 Ländern.  

Ich bin kein Schüler oder Student mehr, kann ich trotzdem einen Sprachkurs mit EF machen?

Aber natürlich. Ich bin selbst auch weder Schüler noch Student, sondern arbeite schon. EF bietet auch für Erwachsene (ab 25 Jahren), Berufstätige und Führungskräfte unterschiedliche Sprachkurse an – am besten ihr informiert euch dazu hier.

Wie viele Schüler sind in einem Kurs?

Ich fand es wirklich toll wie klein die Gruppen waren. In meiner Klasse waren vielleicht 15 Leute. So bekam wirklich jeder genug Zeit seinen Betrag in der Klasse zu teilen, auf Fragen antworten zu können und oft auf Spanisch zu kommunizieren. 

Wie lerne ich in der fremden Stadt Leute kennen?

Man findet aufgrund der vielen von EF organisierten Aktivitäten super schnell neue Freunde. Auch im Wohnheim ist immer etwas los und man sitzt Abends zusammen, kocht oder chillt beim Pool. Ich habe sogar schon beim Flughafentransfer zum Sprachcamp andere Mitschüler kennen gelernt. 

Gibt es Unterkünfte, die von EF in den Städten zur Verfügung gestellt werden?

Ja, EF hat bei jeder Destination Wohnheime, Gastfamilien oder Hotels.

Falls ihr noch ganz spezielle Fragen zu meiner Sprachreise nach Costa Rica, Playa Tamarindo habt könnt ihr mir jederzeit einfach eine Email oder DM auf Instagram schreiben! 

xoxo, 

Weiterlesen

Easy full body workout routine – no equipment

Easy full body workout routine

I know how busy life can get and sometimes there is simply not enough time for a full body workout in the gym. That is why I am showing you in this blogpost four easy exercises for a full body workout routine. The best thing? You don’t even need any equipment. Just your wonderful self! 

This easy full body workout routine can be done literally anywhere. In your room, in the city, in a park. It won’t take up much of your time, but still work different muscle groups in your body and you will even get some cardio in. 

How long does this full body workout routine take? 

This is a perfect quick workout you can get in between meetings, lunch breaks or simply if you don’t have a lot of time to work out on a specific day. The entire workout only takes you 12 minutes. However you will be taking breaks between each set. Depending on how long you will need for your breaks the full body workout will be done within 14 – 20 minutes. So very fast, but also effective at the same time! 

How does the full body workout routine work? 

This routine is a circuit. Which means that you will go through the exercises in a loop doing one after the other. Finally, after 5 different exercises you will be taking a break before going back to the first exercise and doing it all over again. It will be a workout of 5 exercises and 4 sets. This means you will do the whole circuit 4 times. One circuit takes 3 minutes. So, if you do it 4 times it will be 12 minutes of exercising.
Sounds quite short, but you will see once you are in the workout it will be challenging! 

How long is the rest between each set? 

You will want to take a break between the circuits. I recommend anything from 30 seconds to 2 minutes. Take as much time as you need, but make sure to also push yourself a bit. You might need less rest after the first round and more rest in the following rounds. Just listen to your body and start with the new round once you have caught your breath. 

Exercise #1 – High Intensity 

For a warm up exercise we will do a set of four times 30 repetitions of high knees. That means you will be running on the spot always trying to pull up your knees as far as possible. Also, try to run as fast as you can on the spot with your knees up high. Like this we will get your heart rate up. This helps to burn fat along the workout. 

Full Body Workout Routine

Exercise #2 – Planking for those abs

After getting your heart rate up with some cardio, the second exercise will target the abdominal muscles. Place the forearms on the ground with the elbows aligned below the shoulders. If you have a matt, that is fantastic but you can also just do it without it. Make sure that your arms are parallel to the body at about the shoulder-width distance. Hold this position for 30 seconds. 

   full body workout routine

Exercise #3 – Side plank

Lie on your right side with your legs straight. Lift yourself up with your forearm so your body forms a diagonal line. Rest your other hand on your hip or at a more advanced level up into the air. Tighten your abs and hold for 30 seconds.  Make sure your hips and knees stay off the floor.

Switch to the other side and do it again for 30 seconds. 

Easy full body workout routine

Exercise #4 – Triceps Dips

After getting up the heart rate and challenging the abdominal muscles it is time to work our upper body. With this exercise you will be working your triceps hardcore. 

Position your hands shoulder-width apart on a secured bench or stable chair. Extend your legs and arms.  Now bend down your elbows to keep tension on your triceps and off your elbow joints. Lift up again. Do this for 30 seconds. 

      Full Body Workout Routine Full Body Workout Routine


Exercise #5 – Wall sits for the legs 

The final exercise will target your legs and hamstrings. Lean with your back against a wall and place your feed shoulder width apart. Your knees should be in a right angle with your upper legs. Hold this posture for 30 seconds. 

I really love this exercise and it is a great way to really strengthen your leg muscles. I do this for example very often before our skiing vacation in the winter to build up muscle before hitting the slopes and being sore all day.Full Body Workout Routine

How often should you do this?

I personally work out 4-5 times a week. If you really want to see results I would recommend you to do the same. High intensity workouts like this one are perfect to help you with fat loss since it increases your heart rate by a lot and you will be burning a lot of calories during the workout and even after. 
I recommend you to do this short workout either as a warm up when you are in the gym or a fast workout alternative if you do not have time to go to the gym that day. Anything is better than nothing 😉 

Once you feel comfortable with this workout you can switch up exercises and look for different ones that will challenge you more. You can either exchange exercises or add them to the workout to make it longer. There are really a lot of possibilites with these kinds of circuit workouts. You can customize them until you find the perfect workout for you targeting all the muscles you want to focus on, bringing you great results within a short time. 

I hope you will see great results with this super easy and fast workout and get a step closer to your personal fitness goal!
Keep in mind though that consistency is the key and such workouts have to be done on a regular basis in order to be effective. 

If you are looking for a healthy meal after your workout. I can suggest the delicious zucchini linguine. Simply click here and you will find the recipe. 

Lots of love,

Weiterlesen

5 Days Without Food – My Fasting Experience

Heilfasten 5 Tage Kur

5 days no food – just water and tea

Fasting – a complete abandonment of solid food. During the fasting days you only drink clear liquids. 

The last couple days have been an incredible experience, which I would like to share with you here now. Fasting is definitely not something most people do – which they maybe should because it is such a great way to detox and cleanse your body. 
Fasting kind of runs in the family if you will. My parents are doing it for decades and the longest they have gone without food was 10 days. My aunt and uncle did it for 14 days one time. Everyone around me loves to fast one time a year and I see how it benefits them all the time. That is why I started fasting once a year as well three years ago. So this is the third time I did it. 

My motivation for fasting 

Some of you were asking me why I am fasting. My main motivation to fast was to really give my body and digestion a break and totally cleanse my body. I wanted a couple days to slow down and focus on myself. I feel like we focus way to much on what we eat, how much we eat and sometimes even obsess about it. Especially being a food blogger a lot of my time evolves around food. I wanted to take a step back from my daily nutrition and let my body step forward. 
You should never do a fasting cure because you simply want to loose weight. I believe this is the completely wrong motivation and won’t get you very far. 

How it works

This is by no means a guide to fasting, I am just sharing my personal experience here. There are many different types of fasting out there. I am sure you have heard of juice fasting before where you only drink juice for a couple of days. I don’t like this type of fasting because in my opinion your body still needs to work and digest and you will be so hungry all the time. The way I fast is simply by drinking pure, clear liquids. Mostly water and tea and once a day for lunch or dinner a clear soup. On day two and day four I took bitter salt. This is a laxative which helps you to completely cleanse everything out 😀 It has the most horrible taste ever, but is a key element of this fasting cure and its effectiveness. 

Aren’t you so hungry all the time?

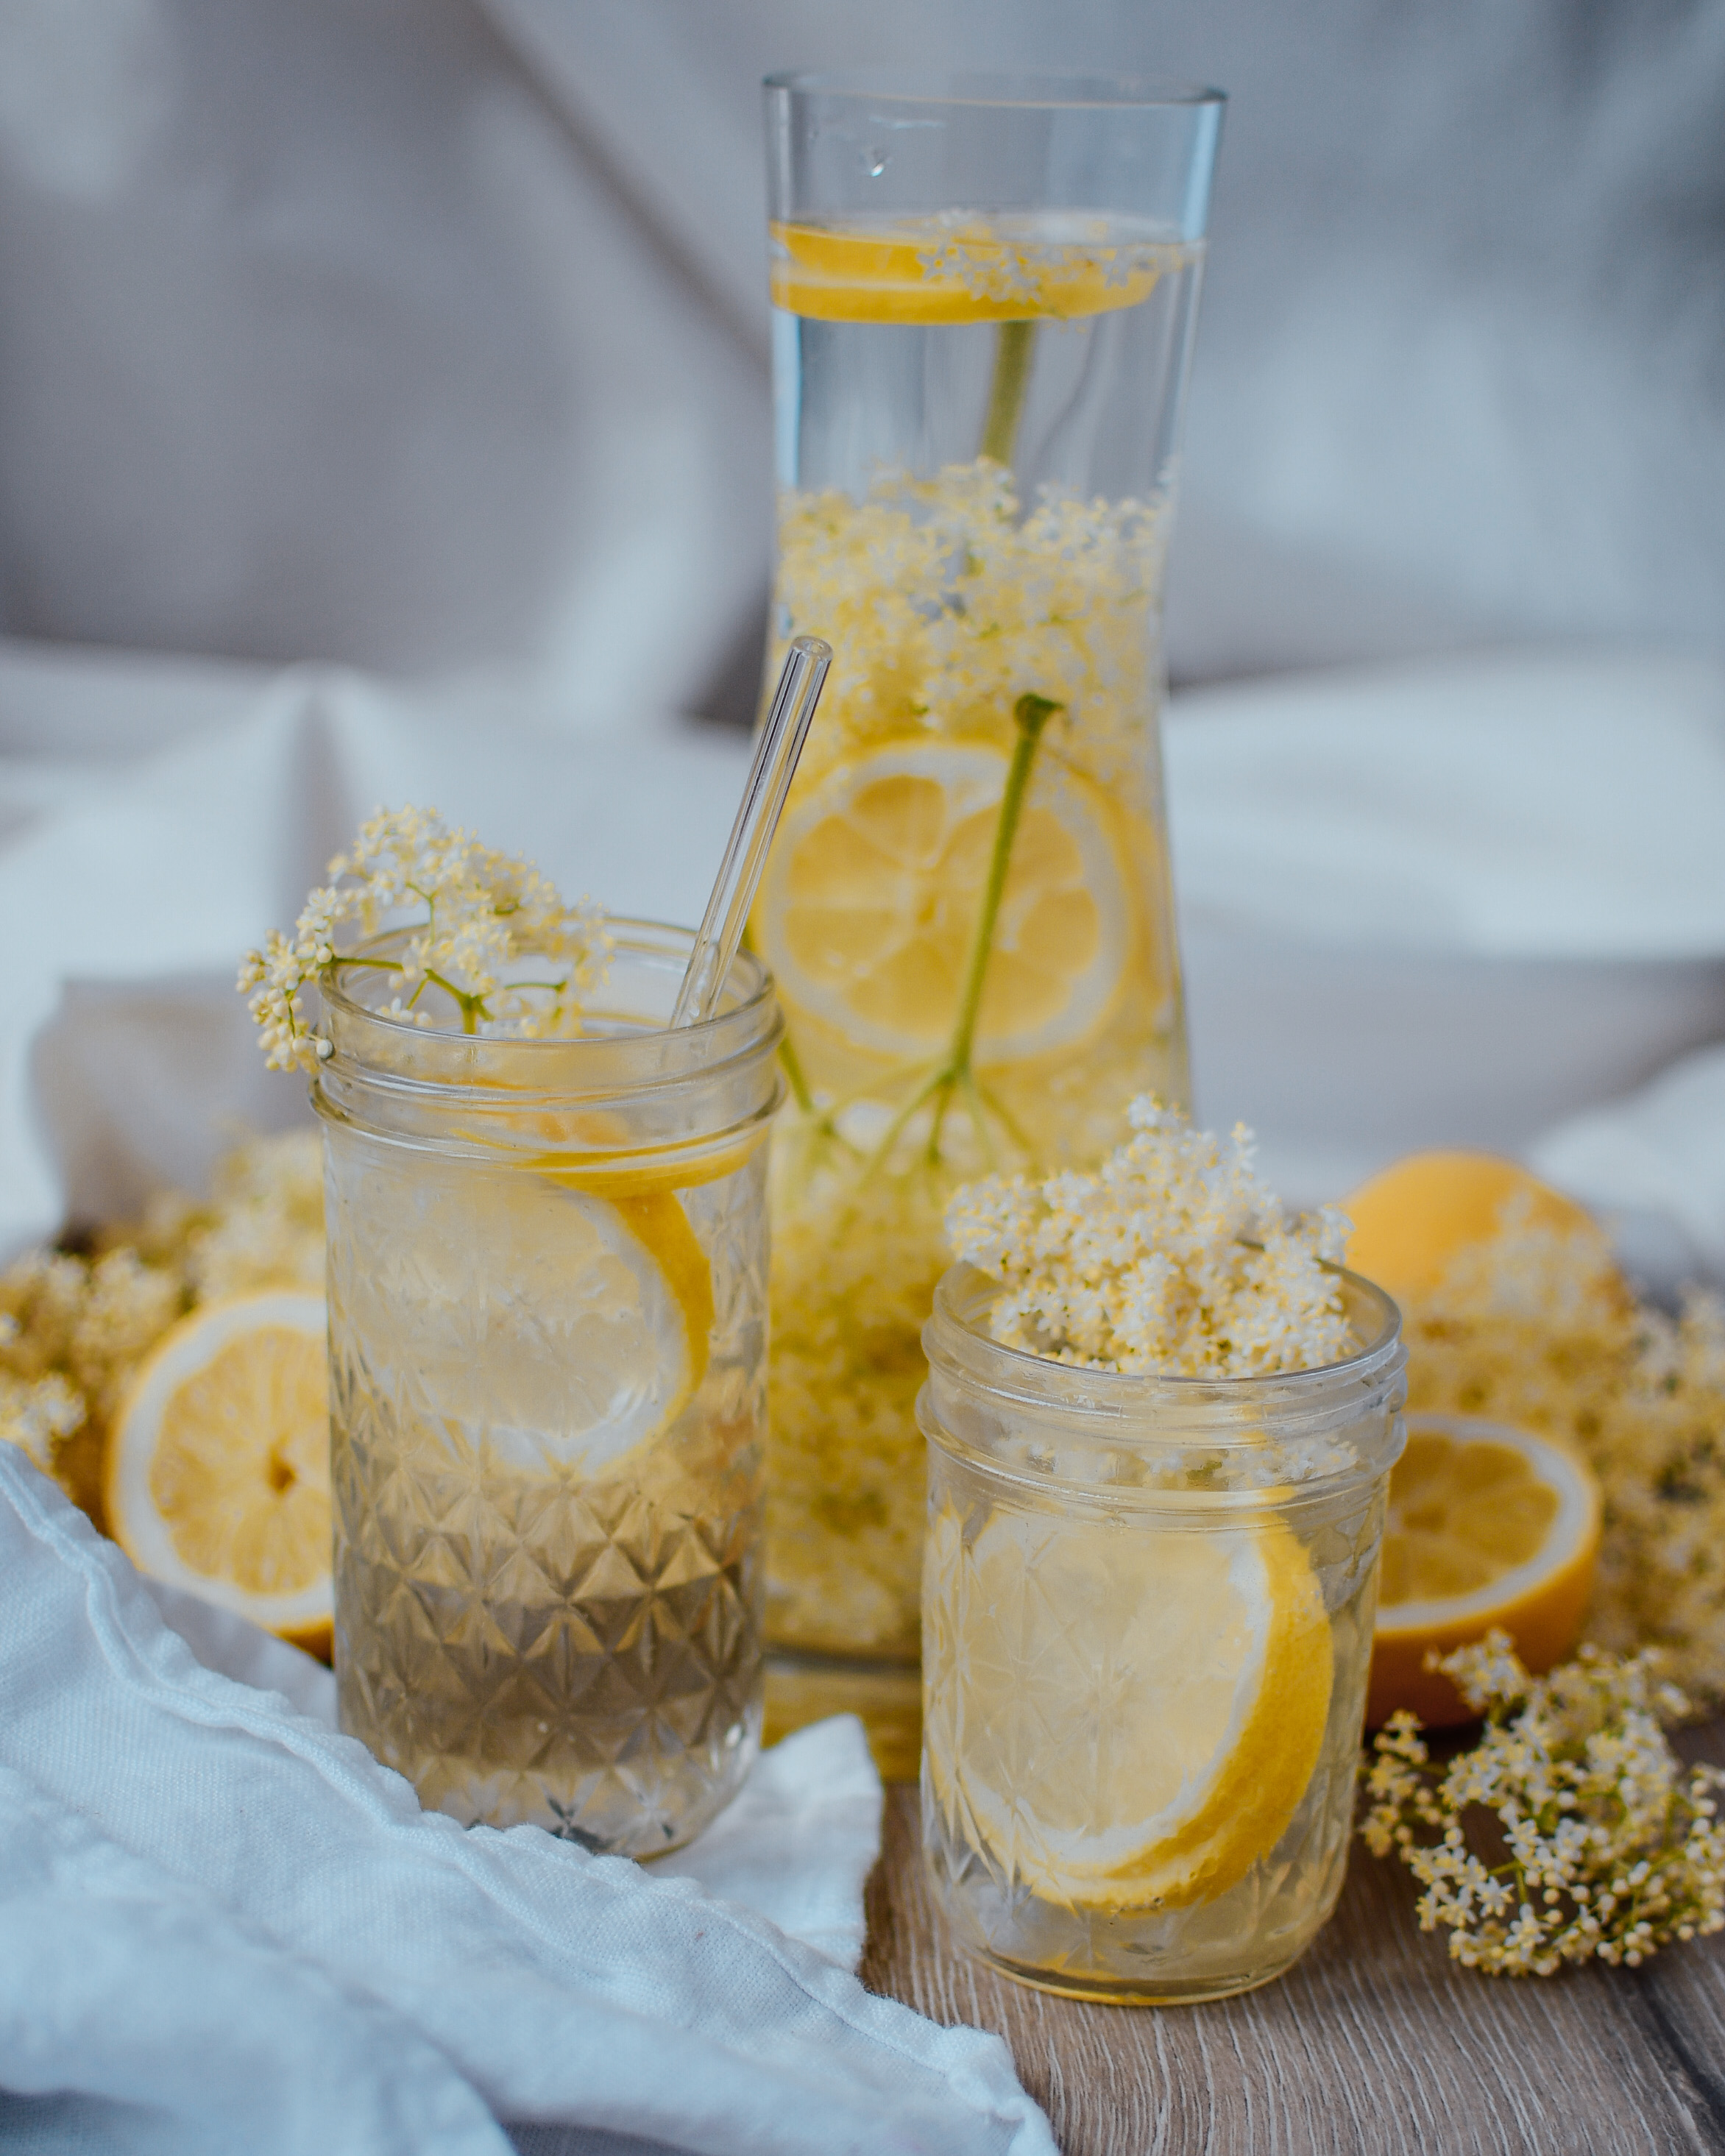
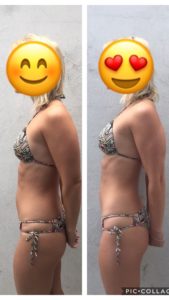
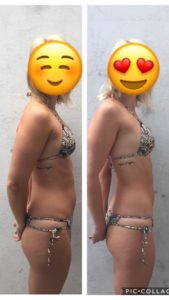
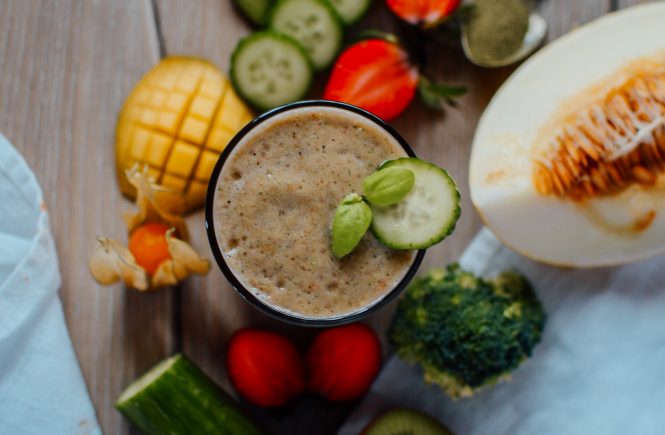
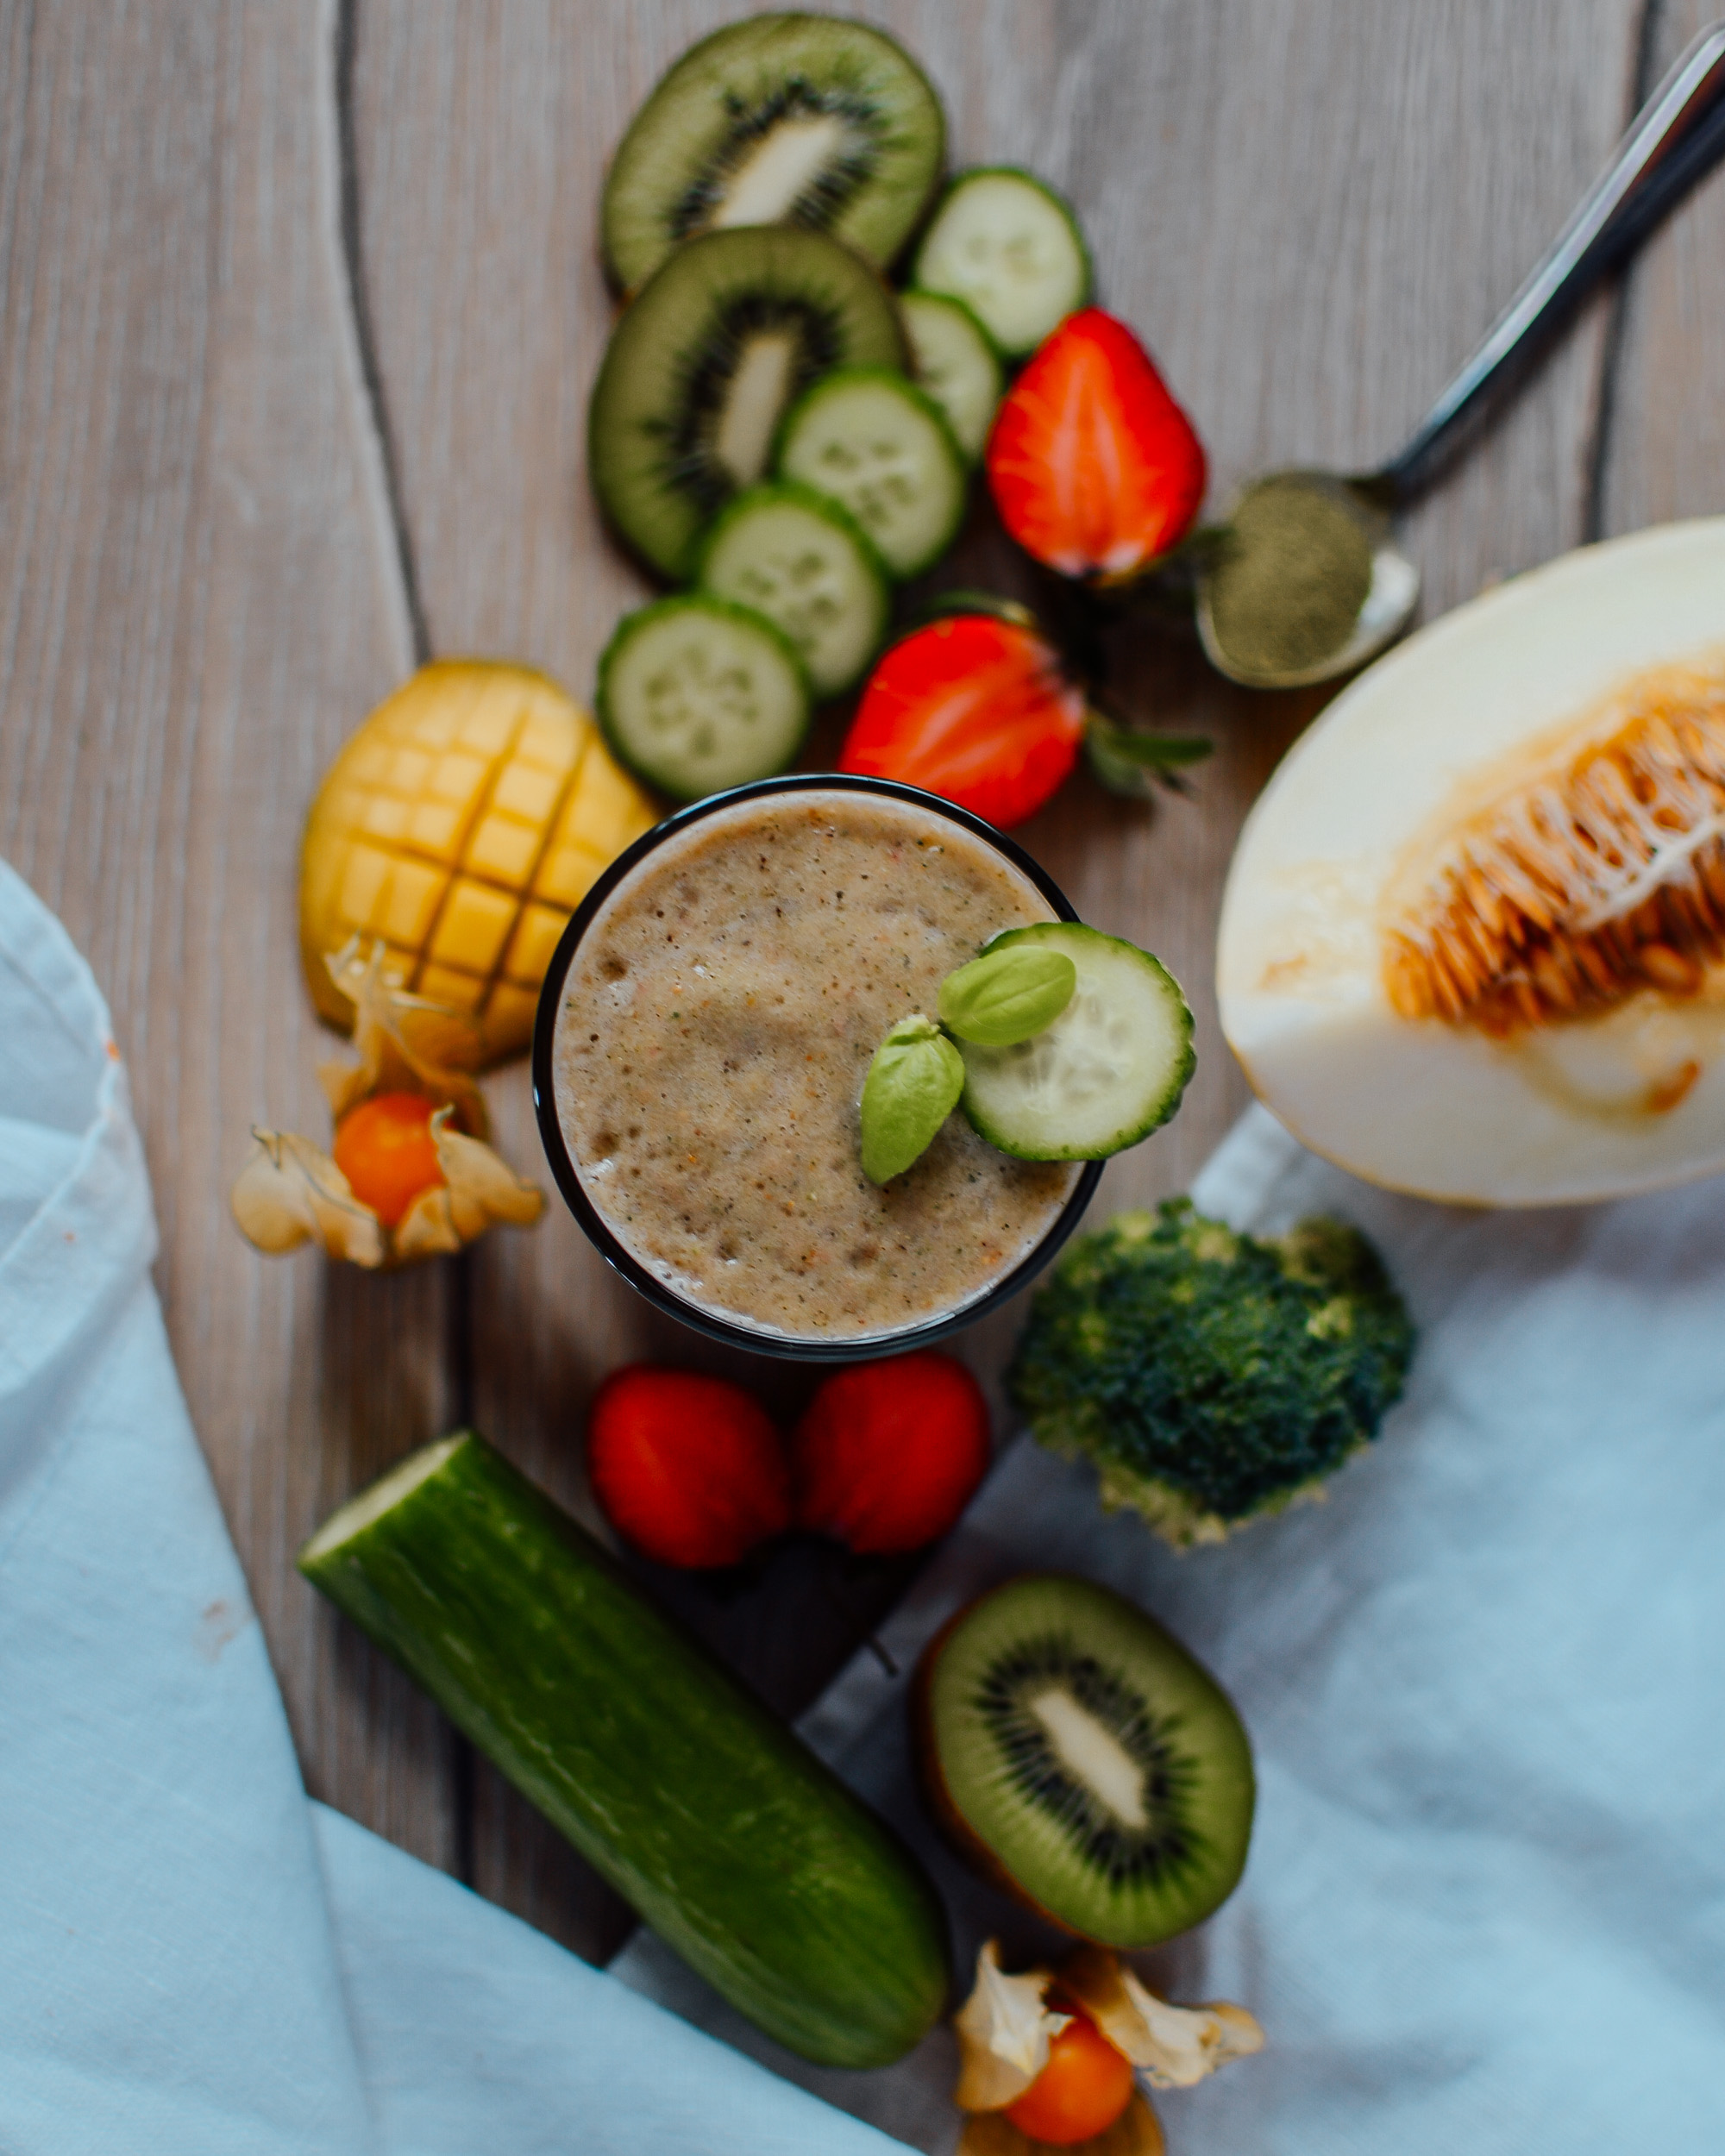
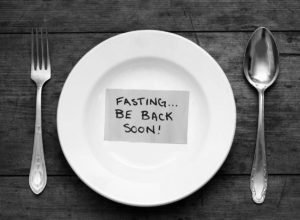
Most of you asked me this question. The funny thing is after the second day all signs of hunger completely vanish. You feel like you have just eaten the perfect amount of food and are totally satisfied. No grumbling stomach or feeling hungry. Every once in a while a notion of hunger would come along. But then I would simply drink something and it was gone. Especially on day 4,5 and 6 I didn’t feel any hunger anymore. Just the first days are hard. 

My fasting tips 

When fasting try to plan the days well. Pick a week where you are not invited to any events or dinners. This will just make it harder on you when you see everyone else eating. When it was really hard I would allow myself a tiny teaspoon of honey. And for the first three days I bought unsweetened almond milk (13kcal per 100ml) to add to my water for a bit of taste. 
Also try to flavor your water. I liked to put elderberry flowers and lemons into my water. It is just nice to have your water taste a little bit different. The same goes with tea. I bought a multitude of different teas to not get bored of the same taste. Make sure to buy a detox or fasting tea with nettle leaves. Chewing gum was also helpful every once in a while to keep me distracted.

Hollunderblüten Detox Wasser

My positive sides of fasting 

Fasting results in a reduction of toxic and superfluous substances and detoxifies the metabolism and connective tissue. Blood lipid levels are reduced, elevated blood sugar levels are decreasing and you will see a discharge of the gastrointestinal tract, biliary tract and pancreas. All of which are huge reliefs and well deserved breaks for your body! Perfect for regeneration. 
I noticed that I needed so much less sleep than usual. I was completely fine with 5 hours every day. I always woke up way before I had set my alarm. Since my body wasn’t digesting anything at night I also needed less time to recover at night and had more energy available in the morning. 
Another very positive  benefit is that you have so much more time on your hands. All the time you usually spend on grocery shopping, cooking food 3 times a day, preparing snacks is available for you to use now. 
What I love about doing the fasting cure once a year is to prove to myself how strong my will power is and my dedication. It is such a rewarding and powerful feeling when you have achieved something as hard as not eating for five days. 
Also I feel like my skin is just perfect at the moment and when I look in the mirror I kinda see myself glowing. 🙂 
And almost forgot to mention the weight loss part. I lost 3kg within 5 days – half of it will probably be right back on simply because my whole digestive system is empty right now. When my parents fast they usually loose up to 8 kg within a week. Usually half of the weight you lost will stay 🙂 

                                                                           
                                                                                before – after                        before – after

My negative sides of fasting 

Especially in the first two days I still felt hungry and even had a headache on the first day. This is perfectly normal as your blood sugar levels are simply super low and your body is not used to that. Occasionally I would feel weak and on the first day in the afternoon I had a real energy low. Besides that I have to honestly say I felt super fit and strong. I even went for a run one day. 
What I really noticed is how cold I got. As soon as the sun was gone I started freezing. Since my body wasn’t digesting anything I produced less body heat. 
Another negative side effect was the mood swings. I noticed how jumpy and bitchy I could be in the last couple of days. I would simply snip at people without much reason. I was definitely not the easiest person to be around with the last week 😀 Thankfully I have such a supportive boyfriend <3 
Okay not sure how open you want me to be about ALL negative side effects 😀 BUT you will need to go to the bathroom a lot. Not only because you are drinking so much liquid (up to 4l a day) but also because you are taking bitter salt which helps you empty out your digestive system.

The days after the fasting – SO IMPORTANT

Okay you NEED to get this right when you are fasting. The days you build back up to your normal nutrition are so crucial and important. Much more important and way harder than the actual fasting. If you do this wrong all of it was in vain. When you are fasting your body goes into starvation mode. This means it will store every little piece of nutrition it gets. So once you start eating again you have to start bit by bit and gradually increase your calories. When you fast for 5 days you should at least do 4 build up days (Aufbautage – sagt man das so auf Englisch? :D) Here you can find special eating plans on the internet for the first days after breaking your fast. 
Getting this right and not starting to eat everything you couldn’t during your fasting period is so important, otherwise you will have a huge JoJo effect! For example when my sister fasted for 5 days she started to eat so much after that she gained more weight within a short period of time than she lost during her fasting cure!! 

Quick rundown of my fasting cure 

Full Fasting Days:
  • Day #1: The hardest one. I felt very hungry, had an energy low and a headache. Water, tea, clear soup. 
  • Day #2: Still a bit hungry. Headache was gone. Felt weak and very cold in the evening. Water, tea, clear soup, a bit of honey and unsweetened almond milk. Went for a run. First round of bitter salt. 
  • Day #3: Not hungry anymore. Felt very cold at night. Water, tea, clear soup, bit of honey, matcha powder and almond milk. 
  • Day #4: Felt perfectly fine, satisfied and fit. No feelings of hunger. Less cold. Water, tea, clear soup, second round of bitter salt.
  • Day #5: Felt absolutely great. No signs of hunger. Not cold. water, tea, clear soup, a bit of grape juice with a lot of water. 
Breaking the fast
  • Day #6: Felt so great that I decided to fast until lunch for exactly 5.5 days of fasting. Oat soup, steamed apple 
  • Day #7: Small porridge, Oat soup, potato with greek yoghurt and salt 
  • Day #8: Joghurt with oats and fruit, Spinach and potatoes, light salad
  • Day #9: Joghurt with flax seeds and fruit, couscous salad, potato soup 

Summary 

I hope you enjoyed this article and my personal insights and experiences. I am sharing all of this with you because I truly think it is a fantastic experience everyone should make at least one time in their lives. It makes you realize how strong your body and your mind is and you give your body a well deserved break for regeneration. 

Let me know in the comments if you have enjoyed this article and you are ever planning on fasting as well! 🙂 

xoxo,

Weiterlesen