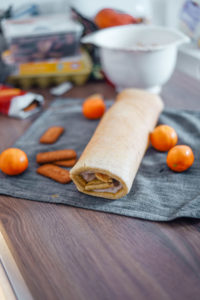
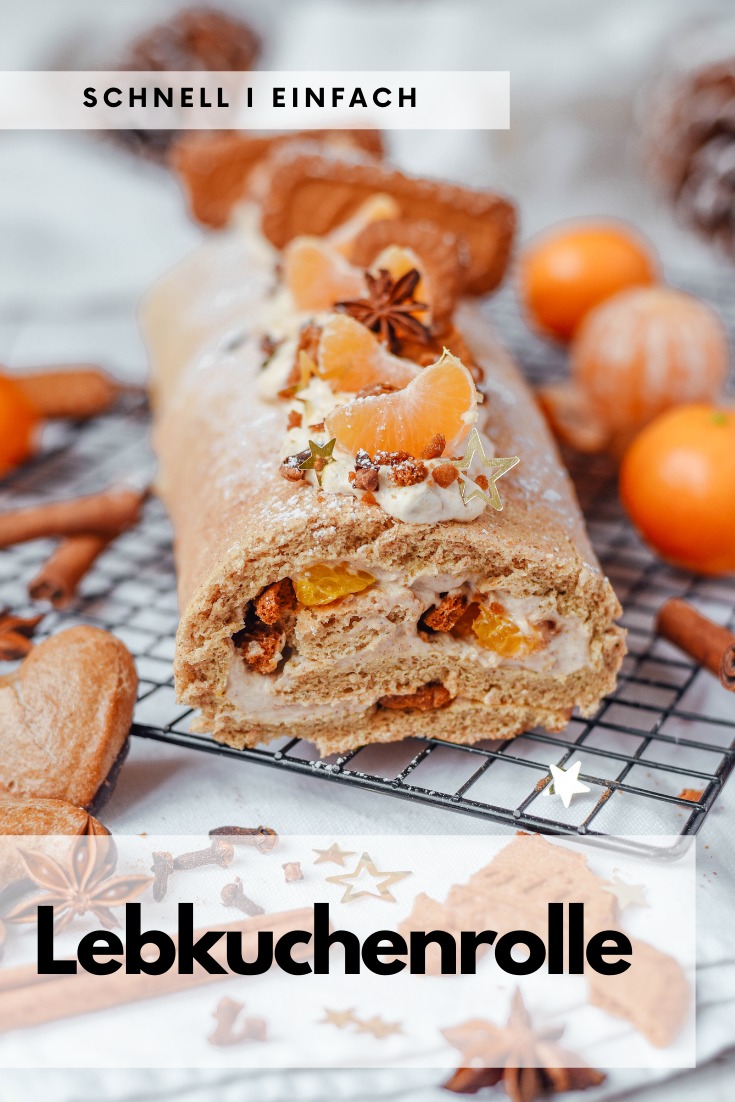
Die beste weihnachtliche Lebkuchen Biskuitrolle

weihnachtliche Lebkuchen Biskuitrolle

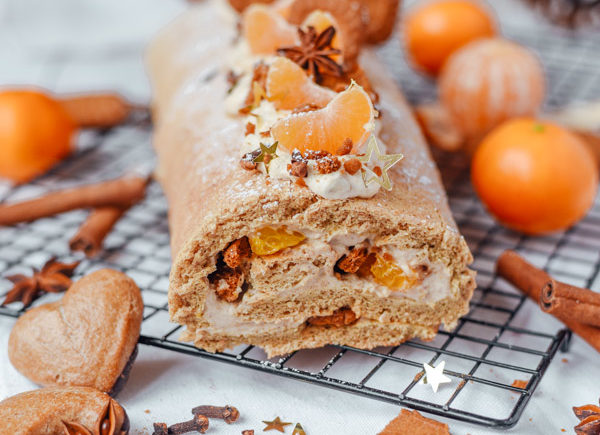
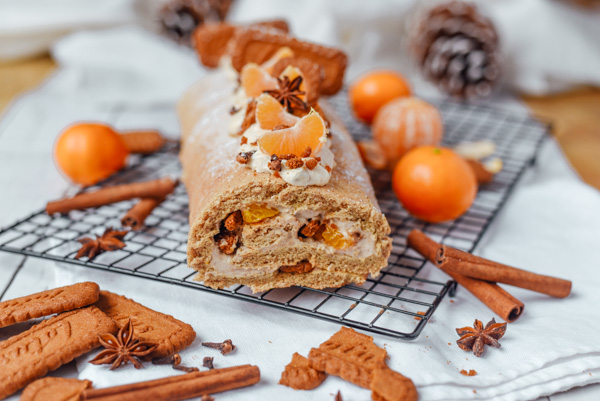
Diese flaumige Lebkuchen Biskuitrolle bringt diesen Dezember Weihnachtsstimmung auf den Tisch! Die feinen Mandarinennoten und der angenehme Lebkuchengeschmack verleihen dieser Roulade das gewisse Etwas und machen sie zum perfekten Weihnachtsdessert an Heiligabend. Diese leckere weihnachtliche Lebkuchen Biskuitrolle bringt wirklich jeden in Weihnachtsstimmung! 

Springe zu Rezept

Auf der Suche nach dem perfekten Dessert für die Festtage? Probier doch mal diese harmonisch, fluffige Kombination an Weihnachtsnoten gepackt in eine leckere Lebkuchen Biskuitrolle. Dieses Weihnachtsleckerli wird eine Liebsten bestimmt hellauf begeistern und das beste dran: sie ist wahnsinnig schnell zubereitet! 

weihnachtliche Lebkuchen Biskuitrolle

Diese weihnachtliche Lebkuchen Biskuitrolle ist eine Abwandlung von meiner leckeren Erdbeerroulade, die ich bereits im Sommer mit euch geteilt habe. Auch die Heidelbeerrolle die ihr unten sehen könnt ist diesem neuen Weihnachtsrezept sehr ähnlich.

Ich liebe das Grundrezept vom Biskuitteig einfach. Es hat keinen Zucker und ist eigentlich ziemlich gesund. Für Weihnachten kann man die Teigmasse dann super abwandeln und mit Lebkuchengewürz versehen. Für die cremige Füllung habe ich dann anstelle von den Erdbeeren mit Spekulatiuskeksen und Mandarinen der Jahreszeit angepasst. So entsteht praktisch ein komplett neues Rezept. 


Weihnachtliche Biskuitrolle Rezept

Süße Mandarinen, harmonische Lebkuchennoten, und der Duft feiner Weihnachtsgewürze – diese Lebkuchen Biskuitrolle wird das kulinarische Highlight deiner Weihnachtszeit! 

Das Rezept an sich ist wirklich wahnsinnig einfach, weshalb ich es so toll finde. Es ist übrigens das Biskuitrouladenrezept von meiner Oma, welches ich einfach zu einer gesundheitsbewussteren Alternative ohne Zucker abgewandelt habe.

Lebkuchen Biskuitrolle

Ich verwende Eryhtrit als Süßungsmittel weil es keine Kalorien hat. Solltest du das nicht zu Hause haben kannst du natürlich auch normalen Zucker verwenden. Ich verwende meine liebsten Spekulatiuskekse für die Füllung. Du kannst aber auch einfach selbstgemachten oder gekauften Lebkuchen verwenden und in die Füllung schneiden. Bei den Mandarinen verwende ich geschälte und eingelegte Mandarinen aus der Dose. Das ist wichtig weil frische Mandarinen zu viel Säure hätten und die Joghurtfüllung kaputt machen würden! 

Lebkuchen Biskuitrolle für Weihnachten

Eine wundervolle Kombination an weihnachtlichen Noten
Gericht Dessert
Keyword Lebkuchen Biskuitrolle, Weihnachtsdessert
Zubereitungszeit 30 Minuten
Backzeit 10 Minuten
Portionen 15 Stück

Zutaten

Biskuitmasse

  • 6 Stk Eier
  • 100 g Erythrit oder Xylit alternativ 80g Zucker
  • 100 g Bio-Dinkelvollkornmehl
  • 6 EL Milch
  • 1 TL Lebkuchengewürz

Füllung

  • 120 g Magertopfen
  • 150 g griechisches Joghurt
  • 1 Dose eingelegte Mandarinen keine frischen!
  • 10 Stk Spekulatiuskekse
  • 60 g Xylit oder Erythrit alternativ 50g Zucker

Anleitungen

  1. Das Backrohr auf 170 Grad vorheizen.
  2. Die sechs Eier trennen und das Eiklar steif schlagen. Danach Dotter mit Xylit und Milch schaumig rühren bis es cremig gelb aussieht.
  3. Das Dinkelvollkornmehl mit dem Lebkuchengewürz mischen. Dann nach und nach unterrühren. Danach den Eischnee unterheben.
  4. Den Teig nun auf ein mit Backpapier ausgelegten Backblech gießen und darauf rechteckig verteilen.
  5. Für 10 Minuten backen.
  6. In der Zwischenzeit die Spekulatiuskekse (ein paar als Deko aufheben) in kleine Stücke brechen und mit den anderen Zutaten für die Füllung in einer Schüssel vermischen.
  7. Den Teig aus dem Ofen nehmen und auf ein Geschirrtuch mit der Backpapierseite nach oben stürzen.
  8. Die Backpapierseite mit einem angefeuchteten Küchentuch/Schwamm kurz abwischen damit sich das Backpapier besser von der Biskuitmasse löst und es dann vorsichtig herunterziehen.

  9. Die Joghurtcreme auf der Biskuitmasse verteilen (die letzten 5 cm freilassen). Die eingelegten Mandarinen (keine frisch geschälten!) auf der Joghurtmasse auslegen. Mit Hilfe des Geschirrtuchs die Roulade zusammenrollen.

  10. Die Enden abschneiden und nach Bedarf dekorieren oder mit pulverisiertem Eryhtrit bestreuen.

Wichtige Tipps: 

  • Bevor du das Backpapier abziehst nimm ein feuchtes Tuch oder einen feuchten Schwamm und wische über das Backpapier damit es sich danach leichter abziehen lässt!
  • Wenn du auch Mandarinen für die Füllung verwenden möchtest ist es wichtig, dass du eingelegte Mandarinen und keine frisch geschälten nimmst. Diese haben zu viel Säure und würden die Füllung bitter machen! 
  • Die Lebkuchen-Biskuitrolle sollte relativ schnell verspeist werden, da der Teig relativ schnell außen hart wird. Also am besten direkt an dem Tag wo sie gegessen werden soll frisch zubereiten. Je frischer, desto besser 🙂 

Lebkuchen Biskuitroulade

Ausgleich in der Weihnachtszeit

Die Weihnachtszeit ist oft ziemlich stressig. Geschenke besorgen, Prüfungsphase, Kekse backen, Weihnachtsbaum aufstellen, das Weihnachtsmenü vorbereiten… Da fällt einem oft mal die Decke auf den Kopf. Damit dies heuer nicht passiert habe ich mich bewusst dazu entschieden einen Ausgleich zu suchen und bin dann auf Pilates gestoßen. Pilates eignet sich perfekt um vom stressigen Alltag abschalten zu können. Pilates ist nicht nur im Bereich Prävention und Rehabilitation vertreten, sondern dient auch als Grundlagentraining für einen gesunden und fitten Körper.

Yoga übung

Die Pilatesausbildung der Online Trainer Lizenz eignet sich perfekt um sich selbst Wissen zu Pilates anzueignen und dies anschließend gezielt an stressigen Tagen zum Ausgleich einzusetzen. Zusätzlich liegt der Fokus bei Pilates auf der Kräftigung der Körpermuskulatur, ohne die Gelenke zu belasten. Wodurch die Körperhaltung, die Beweglichkeit und auch die Konzentration verbessert wird. Nach dieser Ausbildung kannst dein Wissen in Kursen mit anderen Menschen teilen oder deine neuen Fähigkeiten und Kenntnisse für dich selbst anwenden. 

Hast du das Rezept nachgemacht?

Dann markiere mich mit @carina_berry auf Instagram oder verwende den Hashtag #carinaberry

Ich teile immer wieder nachgemachte Rezepte auf meiner Instastory  <3

xoxo,

Lebkuchen Biskuitroulade weihnachtliche Biskuitrolle Lebkuchenrolle

Weiterlesen

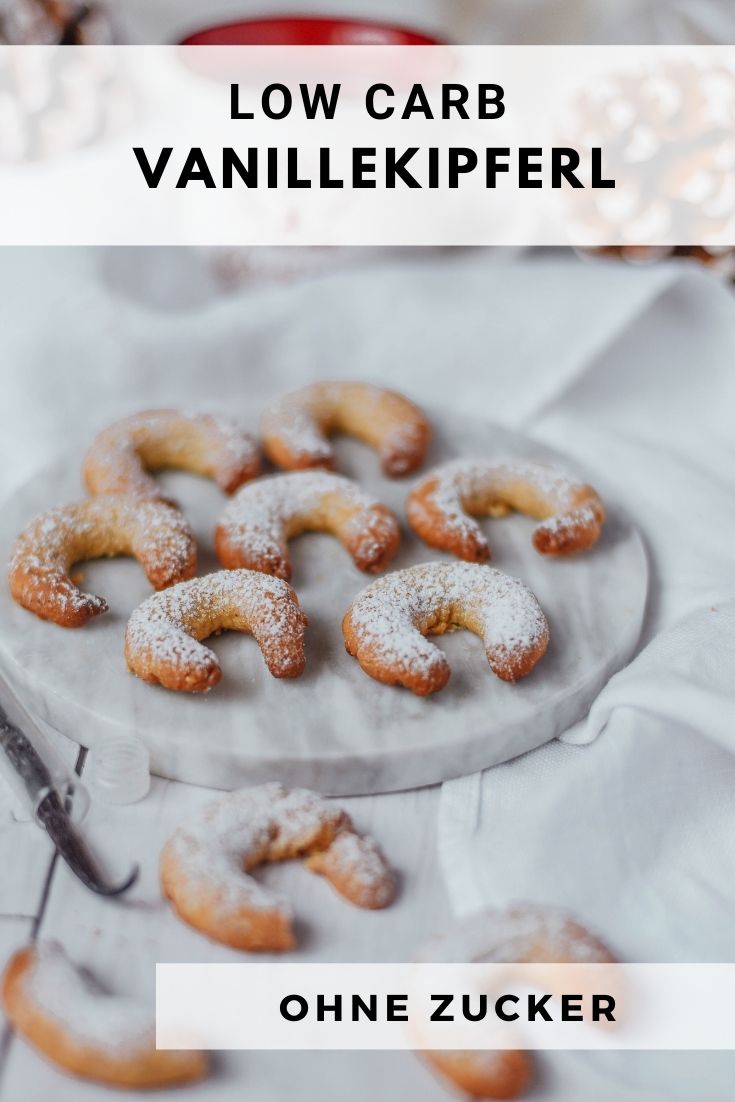
Vanillekipferl ohne Zucker & Mehl – low carb & keto!

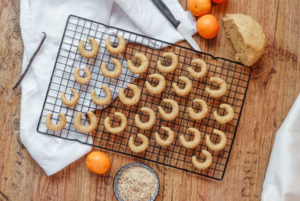
Low Carb Vanillekipferl ohne Zucker-6

Zart schmelzende Vanillekipferl ohne Zucker & Mehl sagen den üblichen Weihnachtskilos den Kampf an. Diese gesunden Weihnachtskekse sind low carb und keto! 

Springe zu Rezept

Dieses tolle Rezept ist aus den Wünschen meiner lieben Instagram Followern entstanden. Nach meiner Reha und 3 schweren Monate nach dem Unfall in welchen ich selbst nicht wirklich kochen konnte habe ich erst kürzlich eine Umfrage gemacht welche Contentwünsche meine Audience auf Instagram denn hätte. So viele haben sich dann gesunde Vanillekipferl ohne Zucker gewünscht. Das fand ich dann so eine tolle Idee, dass ich mich gleich an die Umsetzung machte! 

Dieses leckere low Carb Vanillekipferrezept ist dann relativ schnell entstanden, da ich einfach das klassische Rezept zu einer fitnessbewussteren Alternative umgewandelt habe. Mehl habe ich mit Mandelmehl getauscht und den Staubzucker mit Pulverisiertes Erythrit (komplett kalorienfrei). So konnte ich mir alle Kohlenhydrate und noch dazu die Kalorien vom Zucker sparen. 

Die Butter konnte ich in diesem Fall nicht wirklich substituieren, da sie dem Teig ihre Konsistenz gibt. Der Teig war übrigens so lecker, dass ich immer schon roh total viel davon naschen wollte! 

Keto ist nicht gleich low calorie

Apropos Kalorien: Hier muss ich schon ganz ehrlich mit euch sein. Auch wenn das hier keto Vanillekipferl ohne Zucker sind heißt das noch lange nicht dass sie nicht viele Kalorien haben. Da wir die Kohlenhydrate durch noch mehr Fett (Mandelmehl) ersetzt haben erhöht sich natürlich auch der Kaloriengehalt. Kohlenhydrate haben nur 4kcal auf 1g. Fett hat 9kcal auf die gleiche Menge.

Unsere lieben low carb Vanillekipferl hier sind wahre Fettbomben. Das ist in dem Sinn jetzt nichts schlechtes weil Fett auch super wichtig für den Körper ist und gerade die geriebenen Mandeln sowie das Mandelmehl viele ungesättigte Fettsäuren liefen. Die sind wichtig für viele Stoffwechselprozesse im Körper sowie für das Gehirn. Mir gehts ganz einfach darum, dass du weißt das diese kleinen leckeren Weihnachtskekse trotzdem einiges an Kalorien haben und du sie in Maßen genießen solltest! 

Das Low Carb Vanillekipferl Rezept zum Nachmachen

Low Carb Vanillekipferl ohne Zucker

Diese Rezept verzichtet auf Kohlenhydrate.

Gericht Dessert
Keyword Low Carb Vanillekipferl, Vanillekipferl ohne Zucker
Zubereitungszeit 30 Minuten
Rastzeit 1 Stunde
Portionen 60 Vanillekipferl

Zutaten

  • 200 g Butter kalt, in Stücke geschnitten
  • 80 g pulverisiertes Erythrit alternativ pulverisiertes Xylit
  • 250 g Mandelmehl
  • 100 g Mandeln gerieben
  • Vanille Flavdrops/ Vanilleextrakt/ Vanillepaste nach Geschmack

Anleitungen

  1. Alle Zutaten in einer Schüssel mit der Hand zu einem Teig verkneten.

  2. Für eine Stunde in Frischhaltefolie im Kühlschrank rasten lassen.

  3. Teig vierteln und in längliche Stränge rollen.

  4. Daumendicke Stücke abschneiden und zu Kipferl rollen.

  5. Auf einem Backblech mit Backpapier platzieren und für 10 Minuten bei 180 Grad backen.

  6. Mit pulverisiertem Eryhtrit/Xylit bestreuen und auskühlen lassen.

Wenn du schon fleißig am Backen bist musst du unbedingt auch bei meinem gesunden Lebkuchen vorbei schauen. Das Rezept ist einfach viel zu genial um es dieses Weihnachten nicht nachzumachen! Richtig festlich ist übrigens auch mein Weihnachtsjoghurt und der Bratapfelkuchen!

Hast du das Rezept nachgemacht?

Dann markiere mich mit @carina_berry auf Instagram oder verwende den Hashtag #carinaberry

Ich teile immer wieder nachgemachte Rezepte auf meiner Instastory  <3

xoxo,

Keto Vanillekipferl Keto Weihnachtskekse Vanillekipferl keto

Weiterlesen

Pumpkin Spice Latte ohne Zucker und low carb

Pumpkin Spice Latte

Der amerikanische Klassiker neu erfunden ganz ohne Zucker und fiesen Kohlenhydraten! Diese Fitness Pumpkin Spice Latte wird dir die kalten Herbst- und Wintertage aufhellen! 

Springe zu Rezept

Den ganzen Tag Kürbis essen

Wenn du dir die letzten Blog Posts auf ansiehst hast du bestimmt den momentanen Rezepttrend bei mir schon erkannt: KÜRBIS! 
Ich bin ein absoluter Kürbisliebhaber und könnte mich zurzeit eingraben in leckeren Kürbisrezepten. Ich könnte mich echt den ganzen Tag im Moment davon ernähren – wart mal das habe ich heute sogar 😀

Heute Morgen habe ich den Tag gleich mal mit dieser köstlichem Pumpkin Spice Latte gestartet und zwei meiner geliebten Kürbis Riegel verdrückt. Mittags gabs dann Kürbisschnitzel (kein Scherz – das Rezept findest du auf meinem Tiktok) und am Abend noch eine leckere Kürbissuppe. Tja ein ganzer Tag gefüllt mit leckeren Kürbiskreationen also! 

Das Rezept, welches ich heute mich euch teile, ist allerdings wirklich nur etwas für eingefleischte Kürbisfans. Kürbis trinken mag nicht jeder und man schmeckt den Kürbis einfach in der Latte doch recht dominant heraus – nur damit du vorgewarnt bist 😉

Pumpkin Spice Latt

Das amerikanische Kultrezept

Seitdem ich mit 16 ein Jahr in Amerika war bin ich ein großer Fan von Pumpkin Spice Latte! Ich kann mich erinnern ab September gab es das leckere Heißgetränk einfach überall zu kaufen. Sogar an Tankstellen. Ich weiß noch vor jedem Roadtrip mussten wir einfach einen cup to go mitnehmen für die langen Fahrten. In Amerika gibt es auch eigene Gewürzmischung die sie Pumpkin Spice nennen. Die kann man bei uns leider gar nicht kaufen, weshalb ich sie ganz einfach immer durch Lebkuchengewürz ersetze! 

Pumpkin Spice Latte ist normalerweise, wenn du sie im Café kaufst suuuuper zuckerhaltig! Die große Latte von Starbucks hat zum Beispiel ganze 470kcal. Das ist eine komplette Mahlzeit an Kalorien! Ich wollte dieses Rezept zu einer fitnessbewussteren Alternative ohne Zucker umwandeln. 

Pumpkin Spice Latt

Statt Zucker verwende ich für diese Rezept kalorienfreies Erythrit (meine Geheimwaffe in der Küche) und zuckerfreie weiße Schokolade. Bei der Milch achte ich auf eine Magermilch. Solltest du diese speziellen Fitnessprodukte nicht zu Hause haben kannst du die Pumpkin Spice Latte natürlich auch mit ganz normaler weißen Schoki, Honig oder wenns gar nicht anders geht auch mit Zucker machen. 

Wichtig ist bei diesem Rezept die Flüssigkeit nach dem pürieren durch ein feines Sieb zu drücken damit die kleinen Kürbisrückstände zurückbleiben! Ansonsten ist das Trinkgefühl einfach nicht so angenehm. 

Pumpkin Spice Latte

Pumpkin Spice Latte

Ein wärmendes Getränk für kalte Herbsttage!

Gericht Drinks
Länder & Regionen American
Keyword Chili mit Kürbis, christmas latte, kürbis latte, pumpkin spice latte
Zubereitungszeit 20 Minuten
Portionen 2

Zutaten

  • 400 ml Magermilch oder Milchalternative
  • 30 g weiße Schokolade zuckerfrei sonst normale weiße Schoki
  • 30 g Erythrit alternativ Xylit, Flavdrops, Honig oder Zucker
  • 100 g Kürbis
  • 1/2 TL Lebkuchengewürz alternativ Zimt

Anleitungen

  1. Kürbis in Wasser weichkochen und abseihen.

  2. Im Mixer Kürbis mit Milch pürieren. Die Flüssigkeit durch ein eher feineres Sieb in einen Topf drücken damit die Kürbisstückchen zurückbleiben können.

  3. Flüssigkeit auf mittlerer Hitze erwärmen und die weiße Schokolade darin schmelzen lassen.

  4. Erythrit (oder Zuckeralternative nach Wahl) sowie das Lebkuchengewürz unterrühren.

  5. In zwei Tassen füllen und mit Milchschaum servieren.

Latte Variation – weiße heiße Schoko

Als Variation kannst du auch nur eine weiße, heiße Schokolade draus machen und den Kürbis weglassen. Dann würde ich empfehlen auf 300ml Milch 30g weiße Schokolade (zuckerfrei) zu nehmen und bisschen Vanilleextrakt sowie kalorienfreien Süßstoff unterzurühren. Das Ganze sieht dann so aus:

White hot choco

Hast du das Rezept nachgemacht?

Dann markiere mich mit @carina_berry auf Instagram oder verwende den Hashtag #carinaberry

Ich teile immer wieder nachgemachte Rezepte auf meiner Instastory  <3

xoxo,

Pumpkin Spice Latte Pumpkin Spice Latte Pumpkin Spice Latte

Weiterlesen

How to start a food blog in 2021 (easy & fast)

Digital Detox how to use social media mindfully

It can be quite overwhelming to start a food blog in 2021. I remember when I started my blog, it was such a daunting task to begin! Since my technical understanding has always been quite limited I was afraid of not being able to pull it off myself and pushed the project out as long as I could. Once I finally tackled it I realised it wasn’t that hard after all and I am sure you will have the same experience. Starting is always the hardest part. 

With this blog post I want to make it a bit easier for you. I won’t give you a million different options that you can use or do. However, I will simply recommend and share what I have done or know what good blogging friends of mine are doing. I will only recommend the best of the best and easiest solutions for you to set up for food blog in 2021. 

I also wanted to keep this blog post as shot as possible and exclude all unnecessary information. We will only look at the things you absolutely need when starting a food blog. Before we start off let me introduce you to my personal food blogging online course: Food blogging success! As Austrias biggest fitness food blogger I will be sharing all my secrets on turning your hobby into your dream job. Kickstart your food blogging career with one single course!

Food Blogging Online Course

Where to host your food blog

Let’s start off with web hosting. Without a hosting provider you won’t have a website. So this is absolutely essential. I know of two hosting providers that are well known in the food blogging niche. One of them I am using myself and the other is was recommended to my highly from a lot my American food blogging friends. 

  • All-inkl. – If you come from a German speaking country this will be your goto hosting provider. I am using them myself and they have a free WordPress integration through their service, that make setting up your blog very easy. They have a killer customer service that will answer you no matter what time of day. Signing up is very easy and they have very fair pricing! On All-inkl. I have the private plan and it works really well for me. 


ALL-INKL.COM - Webhosting Server Hosting Domain Provider

  • Bluehost – This is an internationally renowned hosting provider. It also offers the 1-Click WordPress installation even gives you your domain for free for the first year! It has a 24/7 support team, which I have only heard good things about from my fellow blogging friends. Bluehost powers over 2 million websites world wide and they are very reliable. 
    How to start a food blog

Through the web host you will also receive your personal email address. This is something that will make you look way more professional than just using a .gmail or .hotmail address. 

Installing wordpress

Once you have found your web host Bluehost or All-inkl. you can install WordPress. Bluehost and All-inkl. both offer 1-click WordPress installations. Like this you can install it hassle-free on all accounts. Of course you can also code your own website, but since I am guessing you are like me and not the biggest tech-nerd I highly recommend you use WordPress. 

WordPress will be the home of your blog. This is the backend where you will be making changes to the design and layout of your website, write your blog posts and be installing plug-ins. 

This brings me to the next topic: finding the right theme for your blog. 

How to start a food blog

WordPress themes for food bloggers

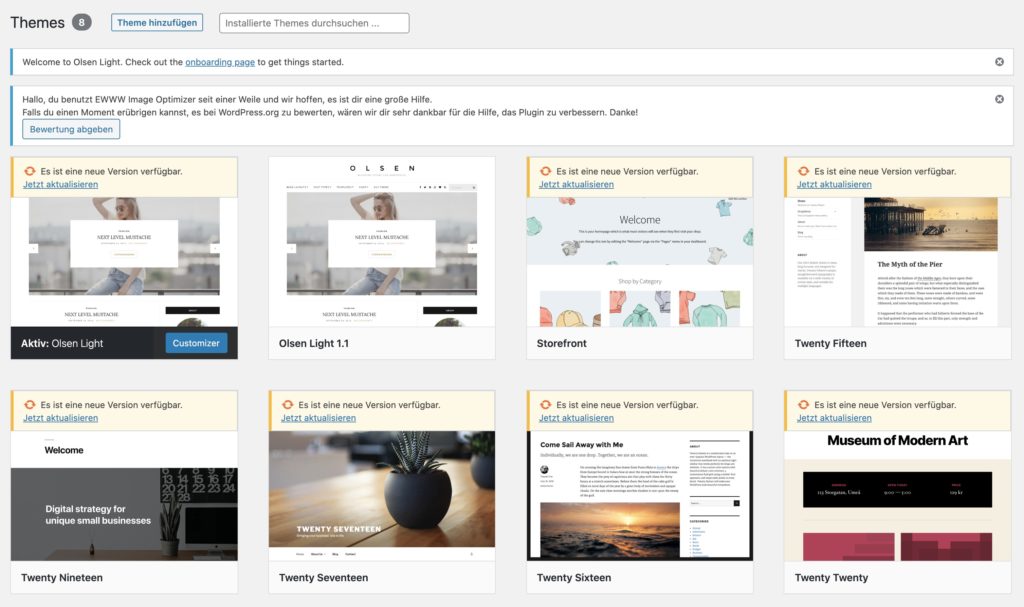
The most important choice you will want to make is finding the right theme for your blog. If you don’t want to or can’t code your own website design themes are an awesome solution to have a beautiful website without getting to techy! 

When you start a food blog you have to make sure that you choose a theme that reflects being a food blogger. You will want a theme with nice header pictures and blog post previews that already give a sneak peek into the recipe. 

In WordPress there are many different themes to choose from. Some are for free and some you need to pay for. I am currently using the Olsen theme, which is a free template. I am not particular happy with it though and had to make a lot of changes in the back-end. So I wouldn’t really recommend my theme for food bloggers. If it wouldn’t be so much work going back and changing everything now I would pick a different one. 

how to start a food blog

If I could choose again I would probably pick one of the beautiful, feminine WordPress templates you find on Blossom themes. These are all SEO friendly, features-rich and easy to use WordPress themes! They even have one very specific one for food bloggers! It’s called Blossom recipe Pro! It’s the perfect theme for food bloggers as it really showcases the recipes well. You can also book their installation and setup service where they set up the entire theme for you. All you need to do is lay back and relax while your blog is being created. Definitely check them out now

Plug-ins you need as a food blogger

Once you have set up your WordPress you will want to install the most important plug-ins to have your blog running smoothly and optimize for SEO. 
Plug-ins can really help to customize the blog experience and improve website speed and search results! 

Here is a list of my favourite three plug-ins for food bloggers on WordPress: 

  • Pin it Button – As a food blogger you will want to encourage your readers to pin your awesome recipe photos to their Pinterest boards. The plug-in will show a pin it button once someone hovers over the picture. This makes it easy and convenient for your readers to save your recipes. 
  • Yoast SEO – In order to achieve high blog traffic and a good google ranking it is important to optimize your blog posts for search engines. This plug-in will help you exactly with that. Yoast will analyse the blog text and will give you helpful information on what to improve. It’s an absolute must have plug-in!  
  • WP Recipe Maker – as a food blogger it is absolutely ESSENTIAL to install a recipe plug-in. Not only because it formats the recipe better, but it also helps your blog post to show up higher in search results. You can even add a „jump to recipe“ button in the beginning of the blog post to make it even easier for your readers to find the recipe. I am now using WP Recipe Maker, but I also used Recipe Card in the past which is a bit more simple. I wasn’t very happy though with the search results coming from the Recipe Card plug-in, which is why I changed! 

Here is an example of a recipe card I make with the WP Recipe maker: 

healthy pumpkin bars
5 von 1 Bewertung
Drucken

Pumpkin Bars

Healthy pumpkin bars that will melt on your tongue!
Gericht Snack
Keyword Kürbis Riegel, pumpkin bars, vegan raw bars
Zubereitungszeit 15 Minuten
Resting Time 1 Stunde
Portionen 8
Kalorien 193 kcal

Zutaten

  • 150 g pumpkin
  • 70 g coconut blossom sugar alternatively date sirup, Xylit or Erythrit
  • 1 tsp pumpkin or gingerbread spice
  • 200 g oat flour
  • 40 g coconut oil
  • 30 g protein powder optional
  • 70 g dark chocolate

Anleitungen

  1. Cook the pumpkin in a pot. Drain and blend in a mixer.

  2. Add the coconut oil to the hot pumpkin puree in a bowl and stir.

  3. Add the rest of the ingredients and mix well.

  4. Place saran wrap in a small plastic container and press the mixture evenly into the box. It should be around 1.5cm thick.

  5. Melt the chocolate and spread as a layer over the entire oat mixture.

  6. Place in the freezer for 1h and then cut into 8 or 16 bars.

  7. Keep in the fridge and eat cold.

Rezept-Anmerkungen

If you ommit protein powder or use date syrup you will have to use a bit more oat flour.

These are all plug-ins I have installed and find very helpful! Others that I also find very helpful, but that are not food blogging specific, are: Ajax Search Lite, GDPR Cookie Consent, W3 Total Cache, SEO Friendly Images.

More useful tips for food bloggers

Now that you are all set-up you can start writing your first blog posts!

Let me leave you with another word of caution regarding starting a food blog in 2021. As food bloggers we absolutely love our wonderful, colorful pictures. When you upload them onto your website tough make sure to compress the quality!! Uploading huge file sizes will only make your website slow and google doesn’t like slow websites. I recommend to keep your image size under 150kb per picture! 

Another helpful tip is to always use your „hero photo“ aka. your best photo from the recipe in the beginning as an eye catcher. Don’t start your blog post with a photo of the ingredients or preparation steps in the process. Start with an amazing photo of the finished dish that will make everyones mouth water! 

I hope you enjoyed this blog post and will start your own food blog soon! 
Make sure to sign up for my free food blogging email series:

Here are some other useful pieces on the topic of how to start a food blog in 2021 for you:

xoxo, 

Weiterlesen

Most useful tools for food bloggers – tips & tricks!

ools for food bloggers

It’s been a while since I wrote a piece on how to become a better food blogger which is why I wanted to go in a more detailed article today on the best tools for food bloggers. Over the years as a professional food blogger I have learnt so much and wanted to share my knowledge with you. Like this you will be able to work more efficiently, see better results and drive more traffic to your pages. 

I will share some of the best tools I use as a food blogger that help me plan, organise and schedule my content. Operating on multiple channels like I do (TikTok, Instagram, YouTube & my blog) can be very challenging at times and it is absolutely essential in my opinion to have tools that will make your daily tasks easier. 

Over time I discovered some extremely powerful tools for food bloggers that helped me tremendously. I use them every day. I basically couldn’t live without them anymore and that’s why I want to recommend them to you as well. 

ools for food bloggers

Unum – plan ahead

I could not live without this app! If you follow my Instagram you will certainly already know that I color code my feed. This means I always pick a main color and arrange my photos around that color scheme. Color coding your feed is definitely something that will make you stand out and this is only possible with preplanning your feed. You will need to know exactly which photos will look good next to each other in order to create the perfect „orange“ or „pink“ feed. 

Take a look at this blog post on how to improve your feed with my best tips for Instagram aesthetics

Unum helps you to do exactly that. You can switch photos around to see what looks best next to each other. You can also pre-write the caption. This will save you so much time during the week if you just sit down for one hour a week to plan your gallery and pre-write all your captions. You only have to press upload and add the hashtags in Instagram and you are good to go! 

Instagram Aesthetics for a cohesive Insta feed

Canva – make outstanding designs

Canva is definitely one of the most useful tools for food bloggers! If you don’t want to buy the Adobe inDesign or some other expensive design tool, this will be your go to program! The basic version is free and really all I am using. 

It’s perfect for creating any kind of designs you need to promote your content. I use it to create my YouTube thumbnails, Insta story swipe ups, Pinterest Pins, flyers or anything else that comes to my mind. You can chose among thousands of different designs and so many fonts. Canva is so user-friendly and fun. 

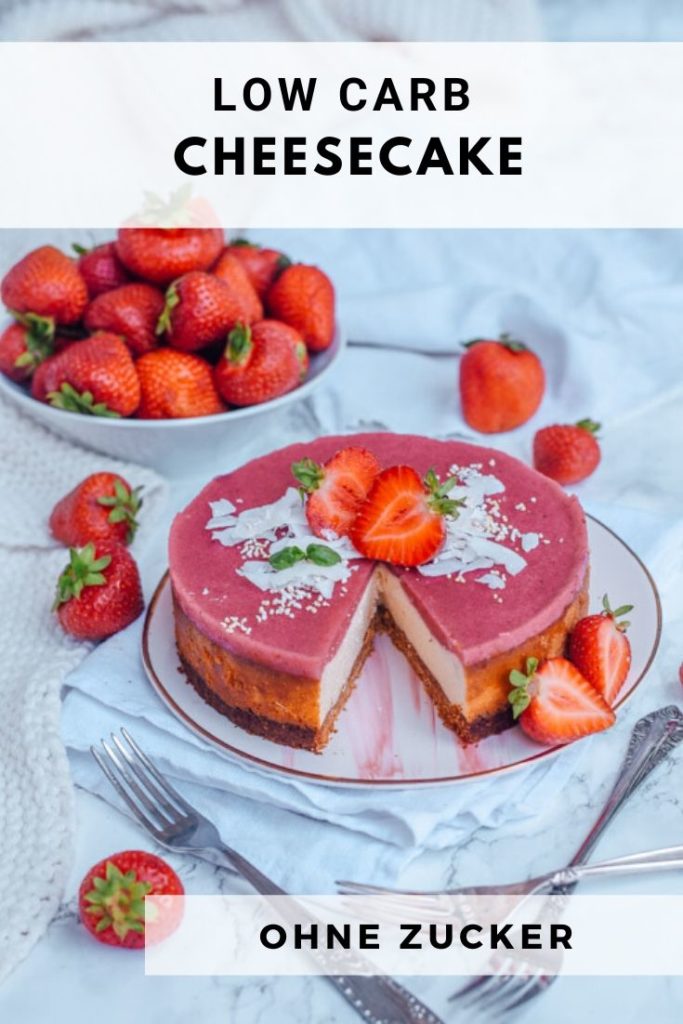
You will want to use Canva definitely to create your personal Pins for your recipes. I always put them at the end of the blog post so people can save them to their favourite board on Pinterest. Like this you are giving them an easy way to save a beautiful picture! It reminds them of making the recipe and brings them right back to your blog. 

Here are some examples of Pins I did with Canva:

Kicksta – maximize your Instagram growth

Gaining followers on Instagram can be a time-consuming and tedious process. Especially in the beginning you will need to spend a lot of time liking and commenting other peoples pictures. It’s a social network – you need to be social to receive likes and comments in return!

Instagram growth services, like Kicksta, use specific methods such as liking photos posted by people in your target audience, following users in your audience or auto-commenting, to name a few, to get you more organic Instagram followers. This obviously saves you a lot of time on a daily basis!
Using a high quality service like Kicksta will avoid gaining robot followers and have you on your way to reaching your goal of becoming a big Instagram blogger. 

Tailwind – Boost your Pinterest traffic 

As a food blogger you simply have to use Pinterest! For me its one of the tools for food bloggers that bring the most traffic onto my website. 
If you have been using Pinterest in the past you might think it’s a lot of work and time consuming! Usually you should pin 10-15 new pins a day! With Tailwind this will become so easy. 

All you need to do is sit down for one hour every week and prepare the posts for the upcoming days. Tailwind makes it so easy to schedule hundreds of pins within such a short amount of time. You can group your boards and then pin similar pins to those boards without having to manually type in each individual board.

For example if I want to pin one of my healthy fitness recipes I schedule it for my „fitness food“ group board which entails 4 different Pinterest boards (keto food, low carb, fitness food, easy & healthy recipes). Instead of pinning it 4 times its only one click! 
It also has so many functions like smart loops and tribes. You can have your favourite and most popular blog posts run in a loop and be rescheduled automatically. Tribes are active Tailwind groups that help each other out by reposting the groups content to their own boards. 

I usually try to schedule 2-3 weeks ahead of time because then I can set and forget it! Being consistent on Pinterest will make such a huge impact on growing your traffic and Tailwind is the perfect tool to make this as easy as possible for you. When you sign up you get a trial period to test the tool for yourself. After that you can decide if you want to continue the paid membership. 

Here is what my Tailwind schedule looks like currently: 
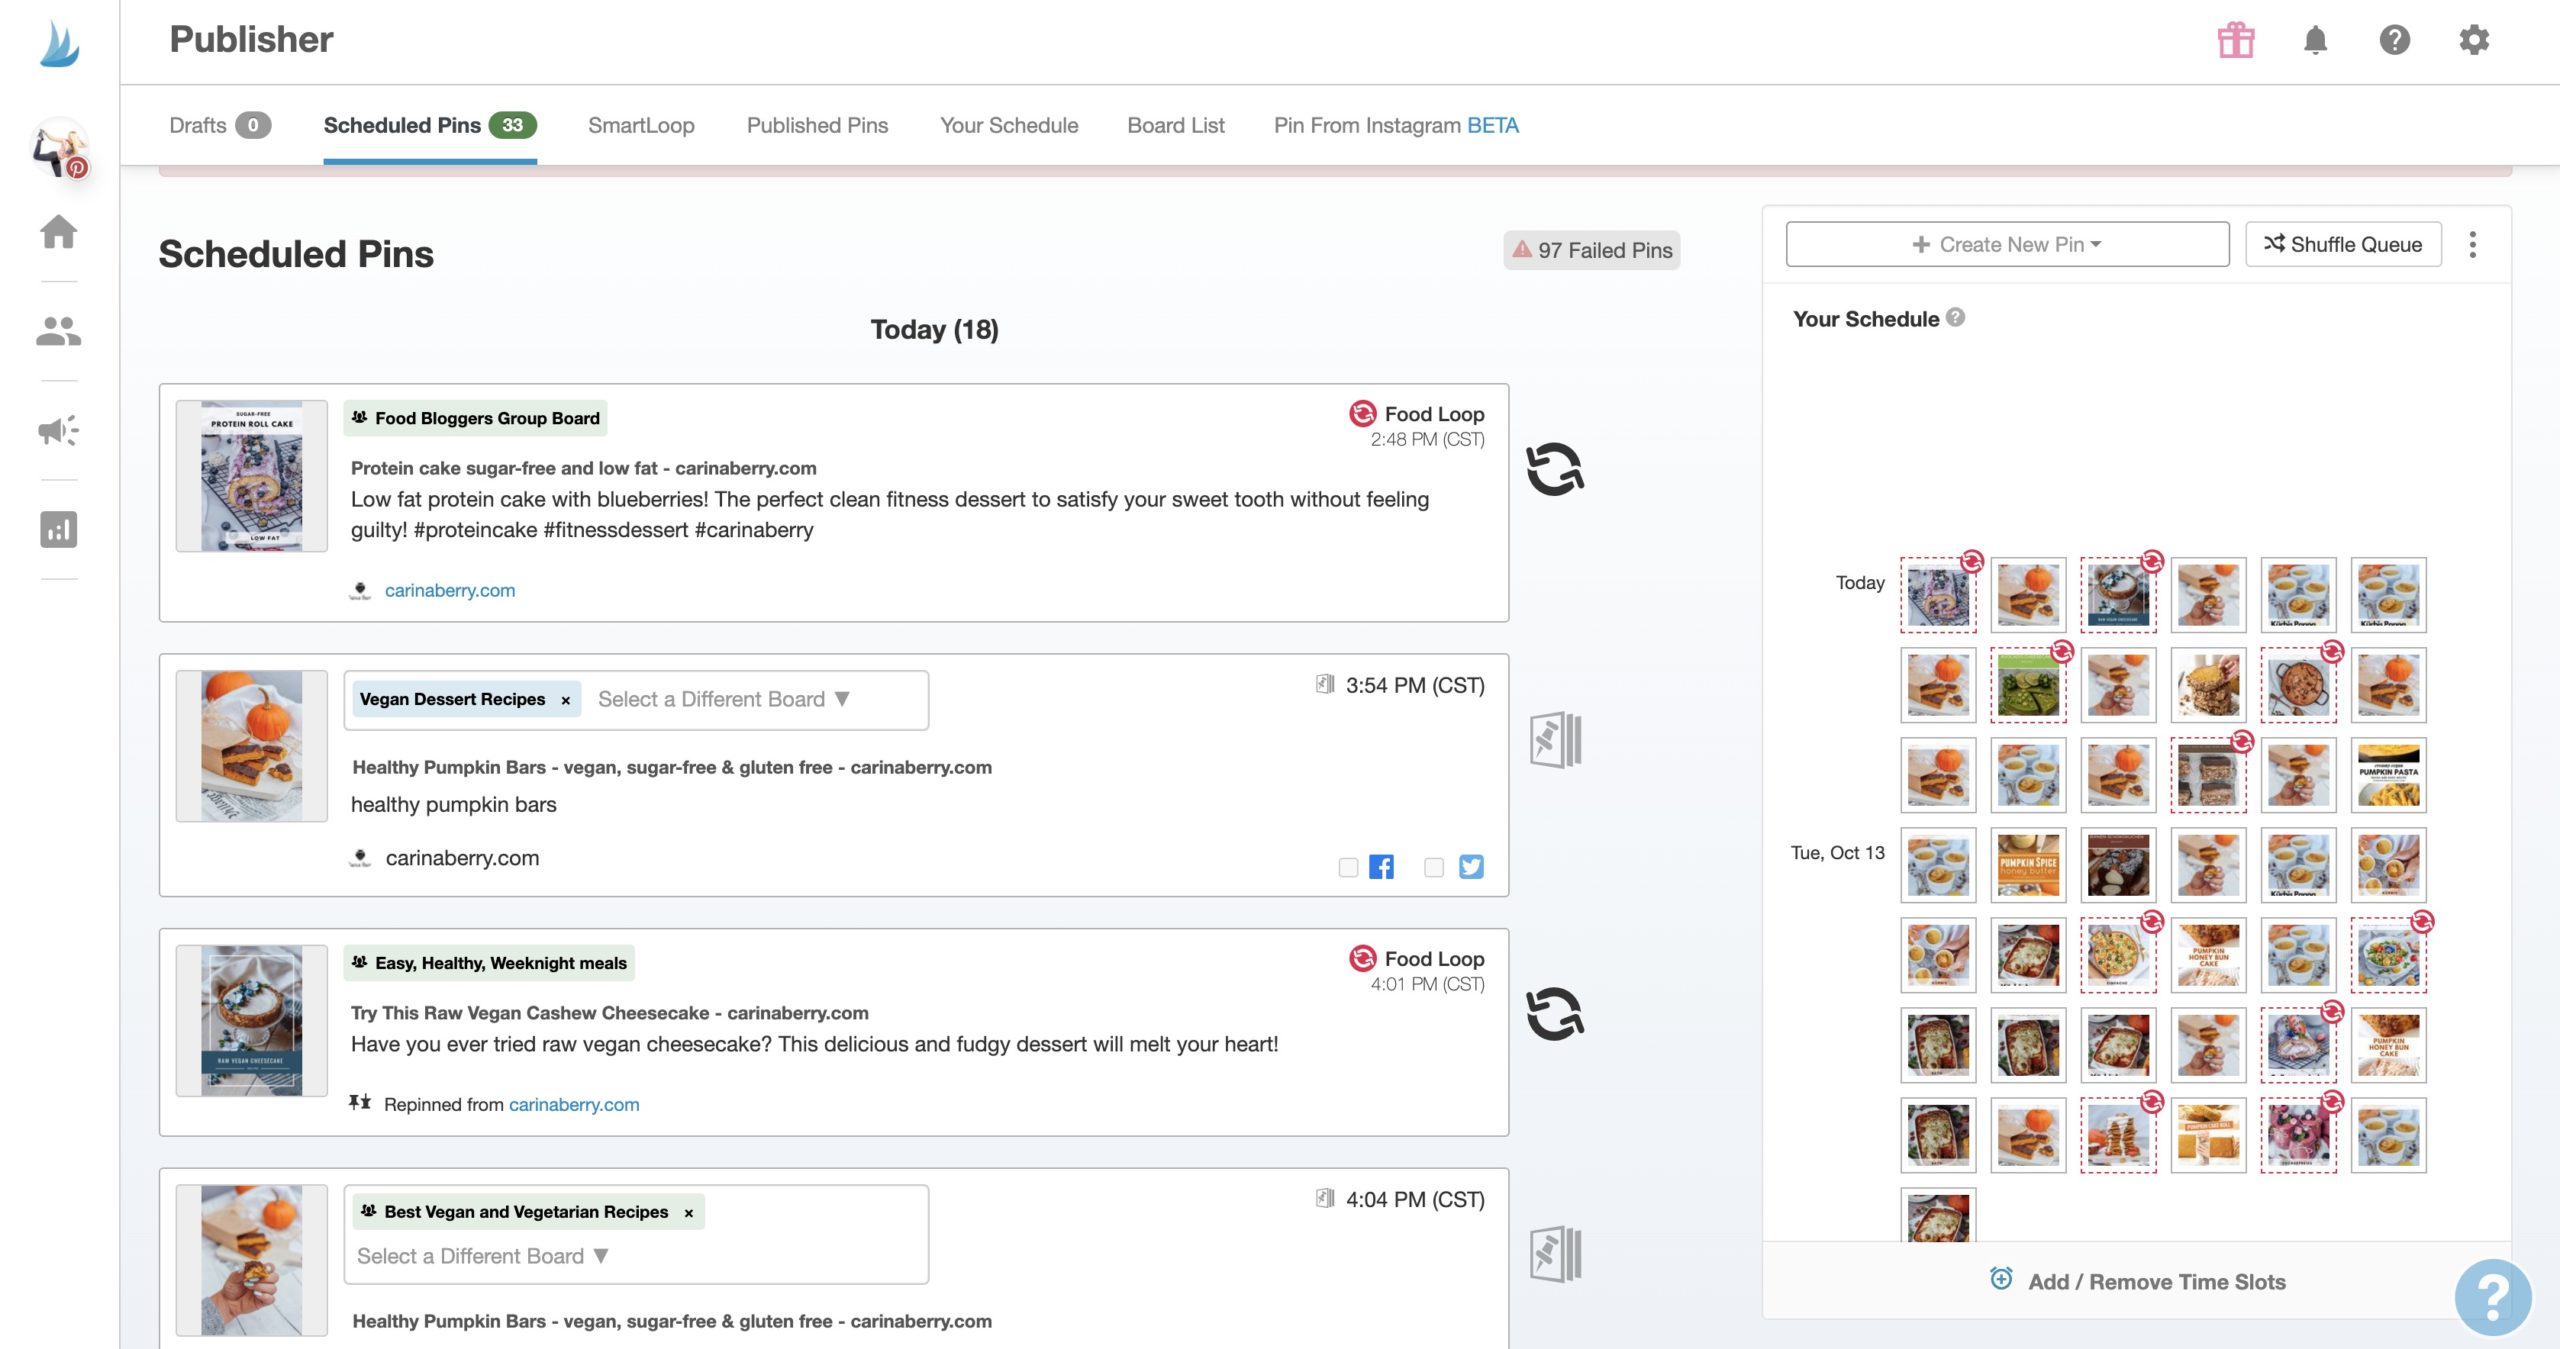
Tailwind schedule tools for bloggers

Trello – organise your day

Trello is super practical why I think it is one of the most helpful tools for bloggers to organise their daily tasks. If you are like me you will have hundreds of ideas swirling around in your head and it would be best to do everything right away. Trello can help you to bring structure into your tasks and prioritise them in different lists. You can create individual tasks and add notes, comments, photos and links to each of them. 

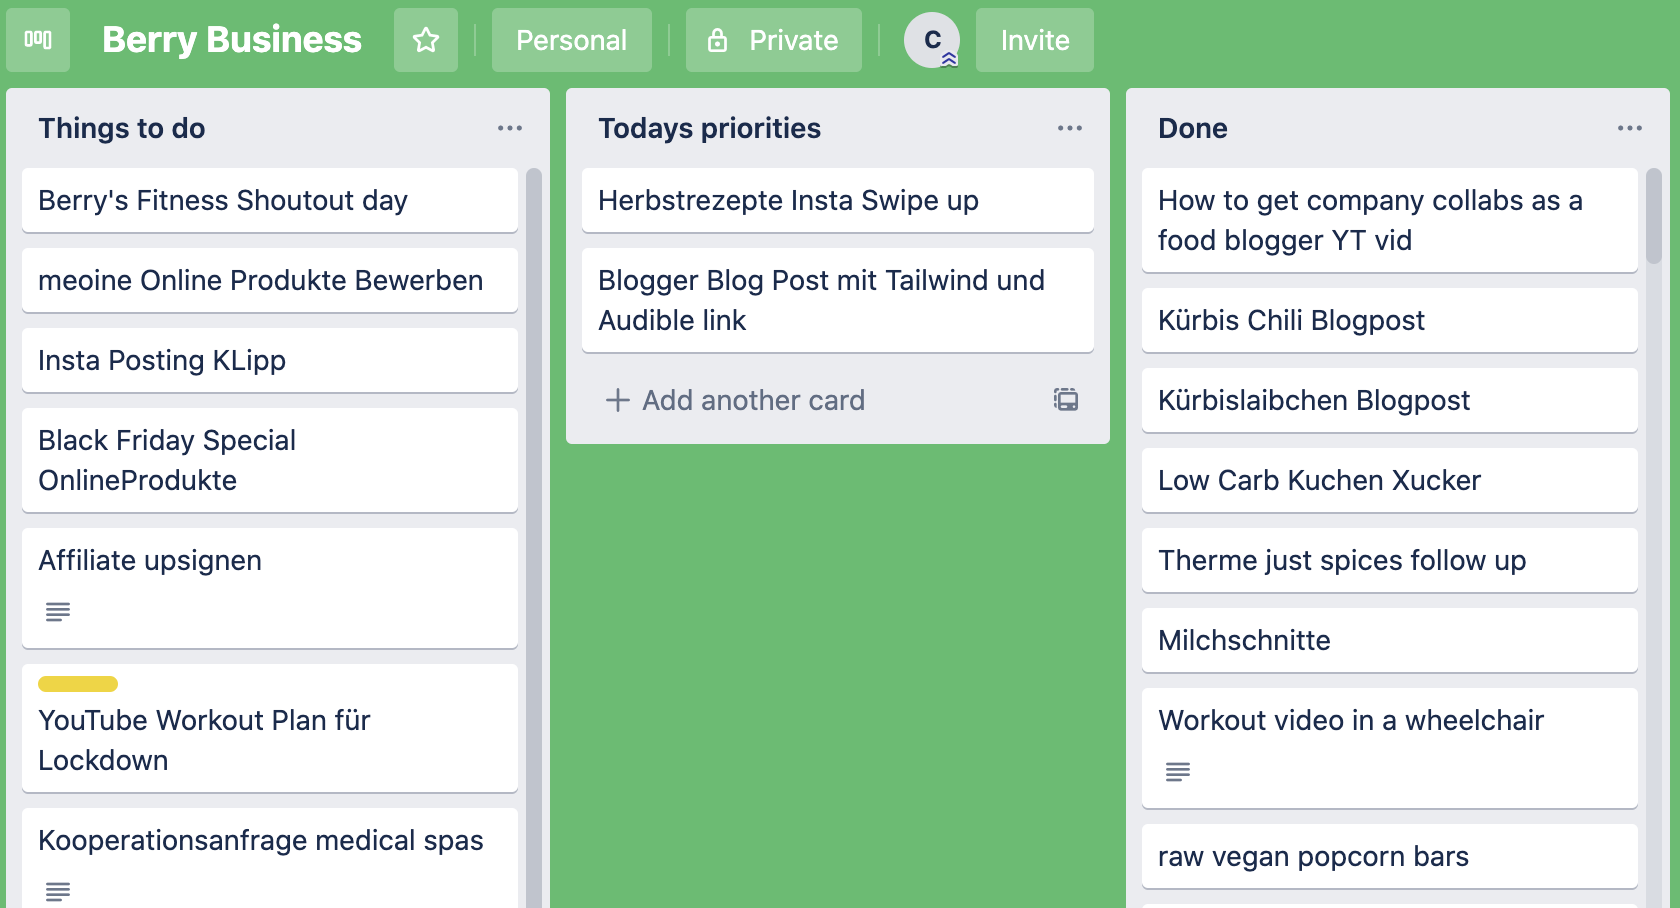
For example I have only three different lists on my Trello account:

-Things to-do: Here I write done everything that comes to my mind that I need to do sooner or later. Ideas I have for promoting my content, new business projects or general to-do stuff. This is basically where I collect all the ideas that come on. 

– Today’s priorities: Here I pick a couple of important things out of my first list that I need to accomplish today! If I finished the task I move it to done and if I didn’t finish it it stays there until the next day. Be careful to not have too many things in this list and really only focus on todays priorities! 

– Done: This list is a collection of all finished projects. I use it as a reference if I need to look something up or have repetitive projects I need to move from done to to-do again after a while. 

Whats awesome about Trello is that you can have it on your phone as an app and also as a desktop version. So wherever you are and an idea comes to your mind you can simply write it down or mark it as done. 

Here a little screenshot of what my Trello looks like:
Audible – get your mindset right

Audible is probably not so much of a tool. However,  it is still a very important app for your personal and professional development. I love listening to Audible audiobooks because its the perfect way to learn new things and grow as a person. Most people think it’s only for romance novel, thrillers and other entertaining books. 

Audible makes it so easy to get your daily dose of new knowledge in. You can listen to the audio books on your way to work or university, anytime you spend waiting around for someone or doing mundane tasks that don’t need a lot of attention.

Here is a list of my favourite entrepreneurial and motivational books I have listened to on Audible! I totally recommend them to you:

  • Superfans – The Easy Way to Stand Out, Grow Your Tribe, and Build a Successful Business

  • You Are a Badass – How to Stop Doubting Your Greatness and Start Living an Awesome Life

  • Influence – The Psychology of Persuasion

  • Unscripted – Life, Liberty, and the Pursuit of Entrepreneurship

When you sign up for Audible you even get a free book at the beginning and can cancel any time after that. So do yourself and your personality a favor and download one of those books which I recommended for free now! 

ools for food bloggers

More useful tools for food bloggers & resources

I hope these tools for food bloggers were helpful for you!

If you are really serious about becoming a food blogger you should definitely check out my food blogging success online course. It is such a wonderful, well-rounded course. It will be teaching you everything you need to know in order to become a successful food blogger yourself. It’s a location independent, self-study course!

Food Blogging Online Course

Let me link to some other very important articles I wrote about this topic: 

Especially on my YouTube I focus heavily on helping people to become better food bloggers. Please make sure to check out my channel if you are interested in this topic in more detail. It’s always easier to explain things in video than via blog posts! 

You can also sign up for my free food blogging email series! I will send you helpful content via email to you!

xoxo, 

Weiterlesen

Healthy Pumpkin Bars – vegan, sugar-free & gluten free

healthy pumpkin bars

These healthy pumpkin bars are moist, fudgy and sweet all the same time.  This vegan pumpkin bar version is fitness approved, free from refined sugar & gluten! They will turn into your favourite snack this autumn!

Springe zu Rezept

Packed with nutrients

If you are a regular visitor of my blog you know how much I love healthy recipes that taste amazing and are easy to make. This pumpkin bar recipe checks all those boxes. It will be ready within a 15-20 minutes with the maximum output of taste and deliciousness. 

healthy pumpkin bars

Here are some fitness approved ingredients I included in this recipe: 

Extra protein, healthy fat and complex carbs

The main ingredient is oat flour (blended oats). Oats have a high amount of complex, slow releasing carbs that supply your body with energy. I used coconut oil as a fat source since it is very low in cholesterol. Pumpkin has also a lot of healthy carbs and is filled with vitamins and nutrients. I added a scoop of protein to spice up the nutritional values of the dish as well. 

Dark chocolate for your health

These pumpkin bars have no frosting like similar recipes, but are covered with a beautiful layer of dark chocolate instead. Like this you are saving a ton of calories. Dark chocolate is actually super good for you because it contains loads of nutrients that can positively affect your health!

20g of dark chocolate is considered a healthy portion per day. Make sure you go as high as you feel comfortable with your dark chocolate. I would consider any chocolate above 70% as good dark chocolate. If you like bitter maybe try this recipe with 90% dark chocolate. Like this you will have the least amount of sugar in your chocolate and the highest amount of pure cocoa. 

If you cut the mass into 16 bars one serving will only have around 90kcal! Seriously, you need to try these to die for fudgy pumpkin bars.

healthy pumpkin bars

Healthy pumpkin bars recipe

These sheet pan pumpkin bars are easy to make. Here is the full recipe for these delicious healthy pumpkin bars:

healthy pumpkin bars
5 von 1 Bewertung
Drucken

Pumpkin Bars

Healthy pumpkin bars that will melt on your tongue!
Gericht Snack
Keyword Kürbis Riegel, pumpkin bars, vegan raw bars
Zubereitungszeit 15 Minuten
Resting Time 1 Stunde
Portionen 8
Kalorien 193 kcal

Zutaten

  • 150 g pumpkin
  • 70 g coconut blossom sugar alternatively date sirup, Xylit or Erythrit
  • 1 tsp pumpkin or gingerbread spice
  • 200 g oat flour
  • 40 g coconut oil
  • 30 g protein powder optional
  • 70 g dark chocolate

Anleitungen

  1. Cook the pumpkin in a pot. Drain and blend in a mixer.

  2. Add the coconut oil to the hot pumpkin puree in a bowl and stir.

  3. Add the rest of the ingredients and mix well.

  4. Place saran wrap in a small plastic container and press the mixture evenly into the box. It should be around 1.5cm thick.

  5. Melt the chocolate and spread as a layer over the entire oat mixture.

  6. Place in the freezer for 1h and then cut into 8 or 16 bars.

  7. Keep in the fridge and eat cold.

Rezept-Anmerkungen

If you ommit protein powder or use date syrup you will have to use a bit more oat flour.

More inspiration for healthy raw bars

I hope you will enjoy these delicious and healthy pumpkin bars! A very similar recipe I made a while ago are actually these yummy carrot cake bars. Since the recipe is in German I wanted to make something similar for my English readers.

There are actually quite a few delicious raw vegan recipes on my blog. In case you speak German check out my vegan snickers bars (most popular recipe on this blog) or the video version on YouTube for everyone who speaks English. 

Another great low carb snack recipe are my keto bounty bars. Perfect for all the coconut lovers!

Did you make this recipe?

Did you make this recipe?

Tag  @carina_berry and use the Hashtag #carinaberry to get the possibility for a shoutout on my Instagram! 

I always love to see your wonderful creations! It makes me so happy to see you guys actually making my recipes. 

xoxo,

Healthy pumpkin bars

Weiterlesen

Veganes Kürbis Chili für den Herbst

Veganes Kürbis Chili

Veganes Kürbis Chili schnell zubereitet in einem Topf. Diese fleischlose Alternative vom bekannten Klassiker wird dich begeistern und auch die größten Fleischesser bekehren! 

Springe zu Rezept

Dieses geniale Kürbis Chili ist ein so genanntes „one-pot“ Gericht. Man mischt also alle Zutaten ganz einfach in einem Topf in bestimmter Reihenfolge zusammen und lässt es gemeineinsam ziehen. Die richtige Reihenfolge ist dabei wichtig, da zum Beispiel der rohe Kürbis wesentlich länger braucht um gar zu werden als die gekochten Bohnen & der Mais aus der Dose. Zum Schluss zieht dann alles noch gemeinsam gut durch damit sich die Masse eindickt und die bekannte Chili Konsistenz bekommt.

Tipp: Bei Chili Rezepten ist es wirklich wichtig, dass man genug Zeit einplant um es ziehen zu lassen. Meistens ist das Chili auch am nächsten Tag erst viel besser, da es so über Nacht noch das Aroma aller Zutaten wirklich aufnehmen konnte! Man kann dieses leckere vegane Chili Rezept also durchwegs schon am Vortag zubereiten. 

Veganes Kürbis Chili

Anstatt von Fleisch habe ich in diesem pflanzenbasiertem Kürbis Chili Sojageschnetzeltes verwendet und eine ganz lustige Story dazu. Ich habe es fürs Abendessen mit meiner Familie gekocht und meinem Vater, welcher ein großer Fleischesser ist, gesagt dass ich ein Putenfaschiertes dafür verwendet habe. Er war total begeistert vom Geschmack und meinte es sei das Beste Chili welches er je gegessen hat. Erst nach diesem Kommentar habe ich ihn darüber aufgeklärt, dass es sich hierbei eigentlich um ein veganes Chili handelt. Ihr hättet sein Gesicht sehen sollen 😀

Veganes Chili mit Kürbis Rezept

Chili sin Carne ist echt ein herrliches Rezept um seinen Fleischkonsum zu reduzieren, ohne wirklich viel Unterschied zu merken. In dem Rezept fällt nämlich wirklich gar nicht auf ob es jetzt echtes Hackfleisch ist oder Sojageschnetzeltes! Mit dem Kürbis noch dazu ist dieses vegane Chili einfach der absolute Hammer. 

Veganes Chili mit Kürbis

Die fleischfreie Alternative zum beliebten Klassiker!
Gericht Main Course
Keyword Chili mit Kürbis, Chili sin Carne, Kürbis Chili, Veganes Chili
Zubereitungszeit 45 Minuten
Portionen 4

Zutaten

  • 1 Zwiebel
  • 2 Zehen Knoblauch
  • 1 Karotte
  • 500 g Hokaido Kürbis
  • 1 Dose Mais
  • 1 Dose Kidneybohnen
  • 150 g Soja geschnetzeltes
  • 3 EL Tomatenmark
  • 250 ml Tomatensoße
  • 500 ml Wasser
  • 1 EL Paprikapulver
  • 2 EL Suppenwürze
  • 1/4 TL Chiliflocken je nach Geschmack
  • Salz & Pfeffer, Kümmel gerieben (optional)

Anleitungen

  1. Zwiebel hacken und in einem hohen Topf mit Öl anschwitzen.

  2. Mit 400ml Wasser ablöschen. Gemüsebrühe untermengen.

  3. Karotten und Kürbis klein schneiden und in den Topf geben. Zum Kochen bringen.

  4. Tomatensoße und Mark dazugeben. Gewürze beimengen und gut umrühren. Das Soja Geschnetzelte in den Topf geben, Hitze reduzieren und für 10 Minuten ziehen lassen.

  5. Bohnen, Mais und gepressten Knoblauch hinzumengen und das Chili für weitere 15 Minuten auf kleines Flamme eindicken lassen.

Möchtest du nachhaltig gesund kochen lernen und wirklich selbst in der Küche kreativ zu werden, dann sieh dir doch mal meinen Fitness Food Online Kochkurs an: 

Fitness Food Online Kochkurs

Vegetarisches Chili und weitere vegane Alternativen

Ernährst du dich nicht vegan und möchtest als Topping fürs Kürbis Chili eine passende Joghurtsoße essen (wie ich das in meinen Bildern gemacht habe) geht das genauso. Einfach Joghurt gut salzen und würzen und mit etwas gepressten Knoblauch vermengen. Passt wirklich herrlich zum Chili. Ein Löffel Sauerrahm macht sich sonst auch recht gut als Topping. 

Solltest du kein großer Kürbisfan sein (wovon ich nicht ausgehe – da du sonst wahrscheinlich nicht auf diesem Rezept gelandet wärst) kannst du statt Kürbis auch Chili sin carne mit Tofu machen! Chili sin Carne mit Linsen statt Kürbis oder Tofu ist eine weitere leckere vegane Chili Variante. 

Veganes Kürbis Chili

Hier ein paar weitere Herbstrezepte: 

Hast du das Rezept nachgemacht?

Dann markiere mich mit @carina_berry auf Instagram oder verwende den Hashtag #carinaberry

Ich teile immer wieder nachgemachte Rezepte auf meiner Instastory  <3

xoxo,

Hier ein Pin für dein Pinterest Board: 

veganges Chili

Weiterlesen

Die besten Kürbis Puffer für den Herbst

Kürbis Laibchen

Noch Kürbis übrig in der Küche und auf der Suche nach einem schnellen Rezept? Dann sind diese einfachen Kürbis Puffer genau das Richtige für dich. 

Springe zu Rezept

Kürbis im Herbst ist ja wahrlich etwas herrliches. Man kann ihn einfach in alle möglichen Gerichte reinschneiden und sie damit aufpimpen. Es sei denn du magst keinen Kürbis? Aber von so etwas Unvorstellbaren möchte ich jetzt gar nicht ausgehen, sonst wärst du jetzt wohl auch nicht bei diesem Kürbisrezept gelandet. 😉 

Für uns Kürbis Liebhaber habe ich heute ein einfaches Gericht, welches man normalerweise nur mit Kartoffeln zubereitet. Ich habe einfach die Hälfte der Kartoffeln durch Kürbis getauscht und somit bekommt man wunderschön orange Kürbis Laibchen. Diese leckeren Puffer würde ich auch als optimales Kürbis Rezept für Kinder bezeichnen. Die Kinder können die Kürbis Puffer optimal in Ketchup oder Joghurtsoße tunken. Sie sind handlich und richtig lecker im Geschmack. 

Kürbis Puffer

Kürbis Puffer / Laibchen / Reibekuchen

Ich war mir ehrlich gesagt nicht sicher ob ich dieses Gericht jetzt als Laibchen, Puffer oder Reibekuchen bezeichnen soll. Wie würdest du dazu sagen? Hier in Österreich würden wir es ja Kürbis Puffer nennen, aber ich glaube in Deutschland ist der Begriff Reibekuchen viel bekannter. Kann das sein? 

Wie immer man auch dazu sagt, sie sind auf jeden Fall unglaublich lecker und machen sich perfekt fürs Mittagessen oder schnelles Abendessen.

Tipp für den Dip: Ich würde eine selbstgemachte Joghurt-Knoblauchsoße dazu empfehlen. Diese ist super rasch gemacht. Einfach ein paar Löffel Joghurt in eine Schüssel geben. Salzen, pfeffern und eine Zehe Knoblauch hineinpressen. Falls du frische Kräuter zu Hause hast kannst du die auch noch hacken und untermischen. Fertig ist die perfekte Soße für die Laibchen. 

Kürbis Puffer

Das Kürbis Puffer Rezept

Alles was du für dieses Rezept brauchst ist eine Gemüsereibe und dann gehts auch schon los: 

Kürbis Puffer

Ein einfache Kürbis Laibchen für den Herbst!
Gericht Main Course
Keyword Kürbis Laibchen, Kürbis Puffer, Kürbis Reibekuchen
Zubereitungszeit 15 Minuten
Portionen 3

Zutaten

  • 500 g Hokaido Kürbis
  • 2 große Kartoffel
  • 2 Eier
  • 50 g geriebener Käse optional
  • Salz & Pfeffer
  • 2 EL Mehl
  • 1/4 TL Muskatnuss

Anleitungen

  1. Kartoffel und Kürbis durch eine Gemüsereibe reiben.

  2. 
In einer Schüssel mit den restlichen Zutaten vermengen. 


  3. In einer eingefetteten Pfanne die Laibchen auf beiden Seiten heraustraten.

  4. Am besten mit einer Joghurt-Knoblauchsoße (siehe Notizen) oder Ketchup servieren.

Rezept-Anmerkungen

Tipp Joghurtsoße: 100g Joghurt + 1 Knoblauchzehe + Salz & Pfeffer

Hier noch ein paar weitere Kürbis Rezepte für dich: 

Hast du das Rezept nachgemacht?

Dann markiere mich mit @carina_berry auf Instagram oder verwende den Hashtag #carinaberry

Ich teile immer wieder nachgemachte Rezepte auf meiner Instastory  <3

xoxo,


Weiterlesen

Einfaches Kürbis Risotto mit Hokaido

Einfaches Kürbis Risotto

Auf der Suche nach einem passenden Herbstrezept mit Kürbis? Dieses schnelle und einfache Kürbis Risotto wird dich mit seiner Cremigkeit und Vollmundigkeit auf jeden Fall begeistern! 

Springe zu Rezept

Risotto ist doch etwas herrliches, nicht? Ich liebe den zarten Geschmack und die angenehme Note von Weißwein und Parmesan. Da ich im Herbst immer versuche in allen möglichen Gerichten mein Lieblingsgemüse – den Kürbis – zu integrieren habe ich ihn diesmal als Püree in den Risotto gemischt. Der Kürbis gibt dem Risotto eine wahnsinnig intensive orange Farbe. Das macht natürlich am Teller so richtig was her. 

Einfaches Kürbis Risotto

Muss es wirklich Risottoreis sein?

Für dieses Rezept würde ich dir empfehlen extra Risotto Reis zu kaufen und nicht Basmati oder anderen Reis zu verwenden. Wenn du Langkornreis verwendest ist zum Beispiel die Bindung nicht so gegeben und es wird nicht so cremig. Risotto Reis ist wirklich ideal um lange unter rühren gekocht zu werden. Das funktioniert einfach bei anderen Reissorten nicht so gut, weshalb es sich hier lohnt wirklich auf den Spezialreis zurückzugreifen! Rundkornreis gibt beim Kochen Stärke ab und macht deshalb einiges an der Risottokonsitenz aus! 

Risotto mit Kürbis

Vegetarisches Risotto mit Kürbis

Zu Beginn wollte ich das Rezept eigentlich mit „vegetarisches Kürbis Risotto“ betiteln, bis ich dann realisiert habe, dass es aufgrund der Wahl des Käses doch nicht vegetarisch ist. Ich habe nämlich vor kurzem erst gelernt, dass im Parmesam Lab verwendet wird – welches aus dem Labmagen junger Wiederkäuer im milchtrinkenden Alter gewonnen wird und bei der Herstellung von Käse genutzt wird. Somit sind viele Käsesorten eigentlich gar nicht vegetarisch!

Etwas was ich wirklich bis vor ein paar Wochen nicht wusste. Lab kann mittlerweile auch im Labor herstellt werden, somit werden viele Käsesorten dann extra als vegetarisch gekennzeichnet um dies klar zu stellen. Wer also ein wirklich vegetarisches Risotto möchte sollte bei der Wahl des Käses dann deutlich darauf achten, dass dieser kein Lab enthält! Das originale Risotto wird aber mit Parmesan gemacht, da dieser viel vom Geschmack ausmacht und ich ihn deshalb beibehalten wollte. 

Kürbis Risotto vegetarisch

Kürbis Risotto Rezept

Viel Spaß mit diesem Rezept: 

Kürbis Risotto

Ein super cremiges Herbstrezept!
Gericht Main Course
Keyword Kürbis, Kürbis risotto, Risotto
Zubereitungszeit 35 Minuten
Portionen 5

Zutaten

  • 2 EL Olivenöl
  • 500 g Kürbispüree
  • 1 Zwiebel
  • 300 g Risottoreis
  • 700 ml

    Wasser


  • 30 0 ml Weißwein
  • 3-4 EL Parmesan oder vegetarische Käsealternative
  • 4 EL Frischkäse
  • 30 g Butter
  • 1/2 TL Currygewürz optional
  • 1 x Salz, Pfeffer & Muskatnuss nach Geschmack
  • 2 EL Suppenwürze

Anleitungen

  1. Zwiebel fein hacken und in einem breiten Topf zusammen mit Olivenöl anschwitzen. 
Reis hinzufügen und glasig anlaufen lassen.
  2. Mit dem Weißwein ablöschen und die Hitze reduzieren. 
Wasser und Gemüsebrühe hinzufügen.
  3. Risottoreis unterrühren und etwa 18 Minuten bissfest garen lassen.
  4. Anschließend die Butter, das Kürbispüree, den Frischkäse sowie die Gewürze und den Käse unterrühren und den Reis auf reduzierter Hitze noch etwas garen lassen.

Da ja gerade Kürbiszeit ist wollte ich dir noch ein paar andere wirklich leckere Rezepte mit meinem Lieblingsgemüse verlinken!

Kennst du schon meinen personalisierten Ernährungsplan den du dir konfigurieren lassen kannst? Ernährungsplan

Hast du das Rezept nachgemacht?

Dann markiere mich mit @carina_berry auf Instagram oder verwende den Hashtag #carinaberry

Ich teile immer wieder nachgemachte Rezepte auf meiner Instastory  <3

xoxo,

Hier noch ein paar Grafiken für dein Pinterest Board:

Risotto Herbst Risotto Herbst Risotto mit Kürbis

Weiterlesen

Kürbis Panna Cotta – low carb, keto & zuckerfrei

Kürbis Panna Cotta

Cremig und würzig im Geschmack ist dieses Kürbis Panna Cotta das optimale Herbstdessert für alle fitnessbewussten low carb Fans! Das Rezept für diesen zuckerfreien Panna Cotta ist unglaublich einfach und passt perfekt zur kühlen Jahreszeit. Viel Spaß beim Ausprobieren.

Springe zu Rezept

Kürbisliebe

Okay, wo sind meine Kürbis Liebhaber?? Ich bin ja praktisch süchtig nach Kürbis und verwende ihn mehr oder weniger als Hauptzutat meiner Gerichte von September bis Dezember. Kürbis ist einfach so genial weil man so viele pikante, aber auch süße Rezepte daraus zaubern kann. Er ist einfach so unglaublich wandelbar und man kann richtig kreativ damit werden.

Noch dazu ist Kürbis extrem gesund. Das Fruchtfleisch und die Kerne von diesem Herbstgemüse enthalten viele wertvolle und nährreiche Inhaltsstoffe. Im Fruchtfleisch stecken reichlich Vitamine, Mineralien und Ballaststoffe und in den Kernen ebenso. Kürbis ist also inside out ein Superfood! 

Kürbis Panna Cotta ohne zucker

Panna Cotta zuckerfrei und saisonal

Diese Herbstsaison wollte ich ein Kürbisrezept entwickeln, welches an die Küche von tollen Restaurants erinnert aber gleichzeitig wirklich einfach in der Zubereitung ist und jeder ohne Kochkenntnisse es herstellen kann. 

Alle Rezepte auf meinem Blog sind ja ohne raffinierten Rohrzucker gemacht. Ich tausche diesen wahnsinnig gerne durch Xylit oder Erythrit (Affiliate Links) aus. Man kann diese Zuckeralternativen genauso verwenden, spart sich aber jede Menge an Kalorien und Kohlenhydraten. 

keto Panna Cotta


Die Nährwerte

Dieses Kürbis Panna Cotta ist zwar low carb, aber definitiv nicht ohne Fett. Der Hauptbestandteil dieses Rezeptes sind Schlagsahne und Kokosmilch. Es ist also wirklich sehr reichhaltig und deshalb auch kalorienintensiv. Aus diesem Grund sollte man nicht zu viel davon essen und eher bei einer low carb bzw. ketogenen Ernährung wo der Fettanteil generell höher ist. 

Fitness Food Online Kochkurs

Ein Kürbis Panna Cotta Schälchen hat 226 Kalorien, was als Nachspeise absolut vertretbar ist. Hier noch die detaillierten Makronährstoffe in der Nachspeise: Proteingehalt pro Schale sind 2.4 g, Fett 21 g und mit den Kohlenhydraten kommt man pro Portion auf 7,4 Gramm. Dieses Dessert ist also keto tauglich, da sich der Kohlenhydratanteil sehr in Grenzen hält. Danke dem hohen Fettanteil hat das low carb Panna Cotta auch eine wahnsinnig cremige Konsistenz und zerschmilzt regelrecht auf der Zunge!

Die ketogene Diät

Fragst du dich jetzt was denn genau eine ketogene Diät ist und was zur ketogenen Ernährung dazugehört? Bei dieser Ernährungsform bezieht der Körper seinen täglichen Kalorienbedarf ausschließlich durch Proteine und vor allem durch Fette! Dabei wird komplett auf Kohlenhydrate komplett verzichtet. Aus „low carb“ wird „no carb“! Ich verlinke dir hier einen super Artikel der dir alles genau über die ketogene Diät schlüssig und einfach erklärt! Im Video auf der Page findest du dann auch ein Expertenstatement von mir zu Lebensmitteln die man dann besser nicht konsumieren sollte! 🙂


low carb Panna Cotta

Kürbis Panna Cotta Rezept

Du wirst genau 10 Minuten brauchen bis du den Kürbis Panna Cotta bereits in die kleinen Auflaufförmchen füllen kannst. Es geht also wirklich wahnsinnig schnell. Falls du keine Soufflé oder Auflaufförmchen hast kannst du die Masse auch in schöne Gläser füllen, das sieht genauso toll aus. Als Topping kannst du dann Zimt oder geröstete Kürbiskerne verwenden! 

Kürbis Panna Cotta

Das low carb Kürbis Dessert ohne Zucker für den Herbst!
Gericht Dessert
Keyword Kürbis Panna Cotta, Kürbisdessert, Panna Cotta
Zubereitungszeit 10 Minuten
Kühlzeit 2 Stunden
Portionen 5
Kalorien 226 kcal

Zutaten

  • 200 ml

    Schlagsahne


  • 200 ml Kokosmilch
  • 160 g Kürbispüree
  • 70 g Xylit oder Erythrit
  • 1 Päckchen Gelatinepulver (17 g)
  • 1 TL Lebkuchengewürz oder Zimt

Anleitungen

  1. In einem Topf bei mittlerer Hitze Schlagobers, Kokosmilch, Kürbispüree, Lebkuchengewürz, Erythrit miteinander vermischen. Kurz aufkochen lassen und dann vom Herd nehmen.
  2. Gelantinepulver mit 6 EL kaltem Wasser auflösen und für 5 Minuten quellen lassen. Dann unter die warme (Vorsicht nich heiße!!) Flüssigkeit mischen.
  3. Flüssigkeit in kleine Auflaufförmchen füllen und für 2 Stunden im Kühlschrank erstarren lassen.

Rezept-Anmerkungen

Falls keine Aufflaufförmchen vorhanden sind kann man auch Gläser verwenden. 

Mehr gesunde Kürbisrezepte

Mittlerweile habe ich schon ein kleines Sammelsurium an tollen Kürbisrezepten auf meinem Blog. Ich verlinke sie dir alle hier mal: 

Viel Spaß mit allen Kürbisrezepten. Komm gern hier zurück und lass mich wissen wie dir dieses Rezept geschmeckt hat 🙂

Herbstdessert mit Kürbis

Hast du das Rezept nachgemacht?

Dann markiere mich mit @carina_berry auf Instagram oder verwende den Hashtag #carinaberry

Ich teile immer wieder nachgemachte Rezepte auf meiner Instastory  <3

xoxo,

Hier noch ein paar Grafiken für dein Pinterest Board:

Kürbis Panna Cotta Low carb Panna cotta keto panna cotta

Weiterlesen