I absolutely love summer for being able to eat the most amazing and creative salad creations. It is just so refreshing and healthy! Lately I have been experimenting with cucumbers, as I feel like their neutral taste lets them mix perfectly with all kinds of different things. Thats why I came up with this delicious cucumber summer salad!
In this blog post you will find two of my new and favorite cucumber salad creations. They are both so extremely easy and fast to make, look beautiful and taste delicious.
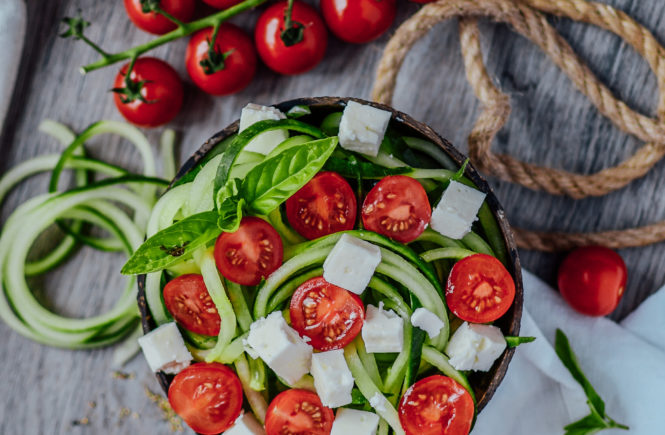
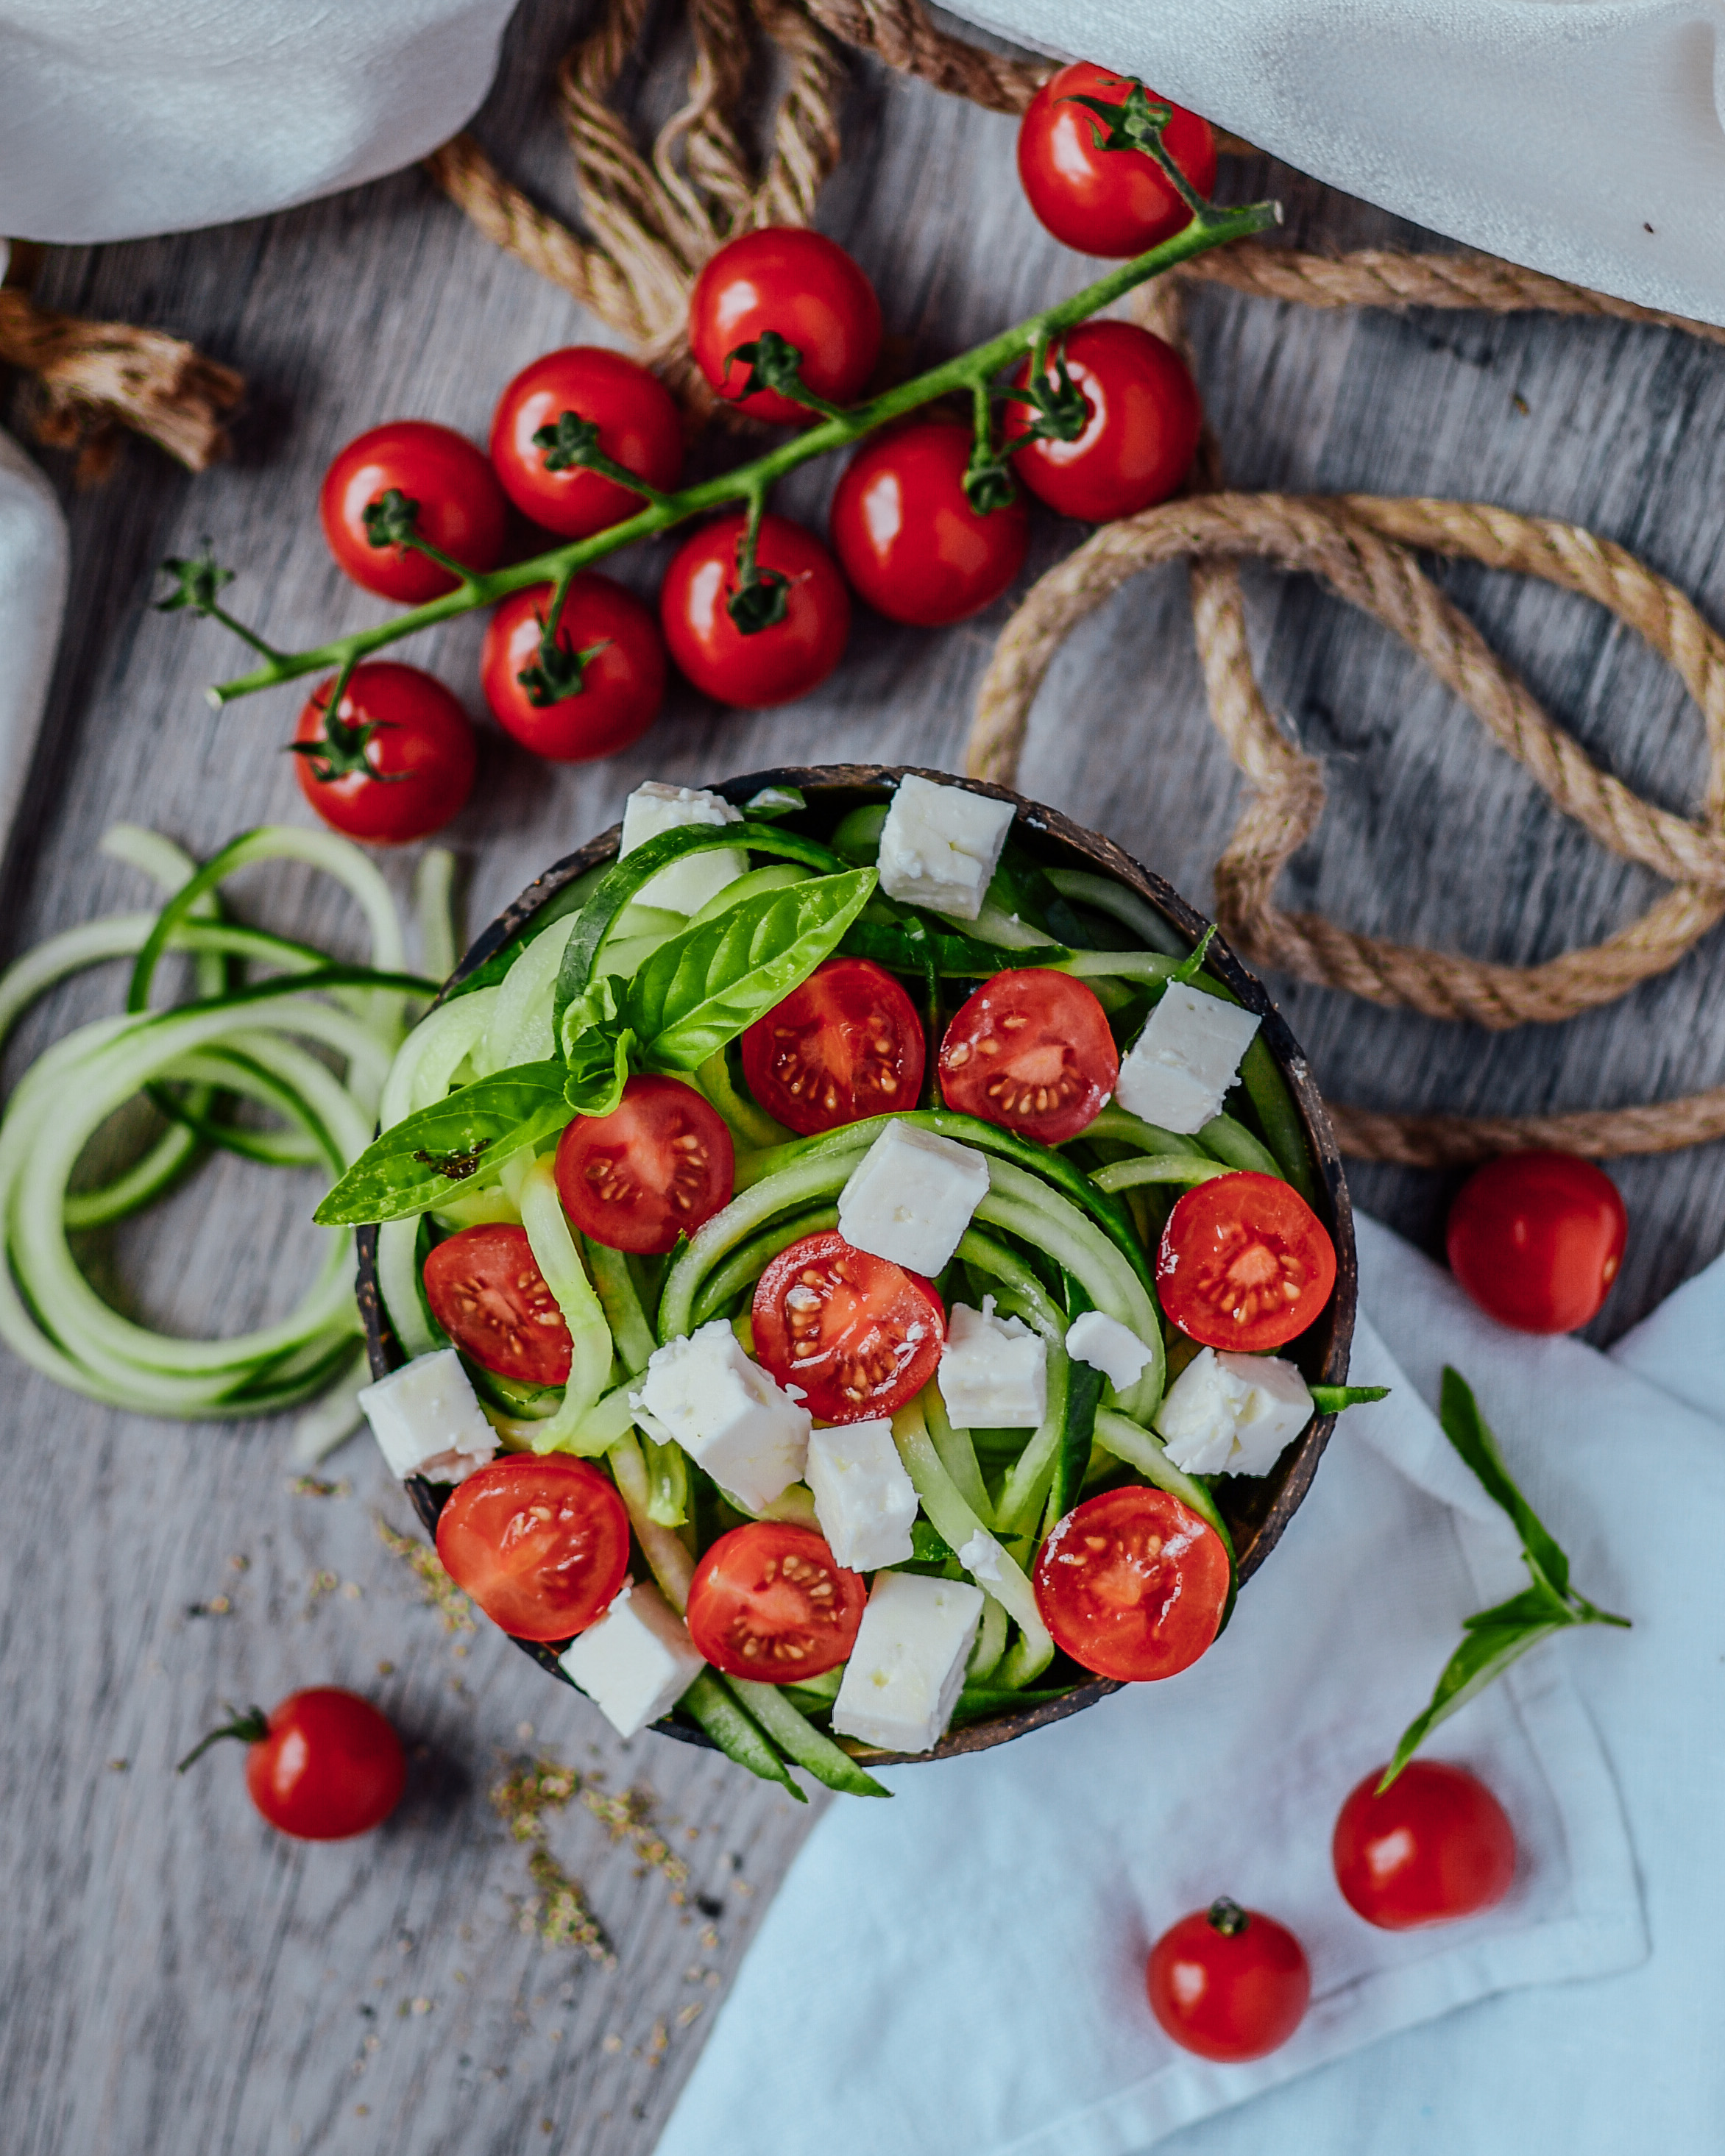
Cucumber Summer Salad
I found feta cheese to harmonize perfectly with the subtle sweet cucumber taste. This creation is the perfect summer salad and the perfect addition to every lunch and dinner meal. All you need is a cucumber, some feta and tomatoes. I used a spiralizer to make cucumber pasta – works amazingly well!
Make sure to let the cucumber noodles sit for 15 minutes because they will loose a lot of water. Drain the noodles and mix them with tomatoes and feta.
Regarding the dressing I always used simple balsamic vinegar, olive oil, salt and pepper.
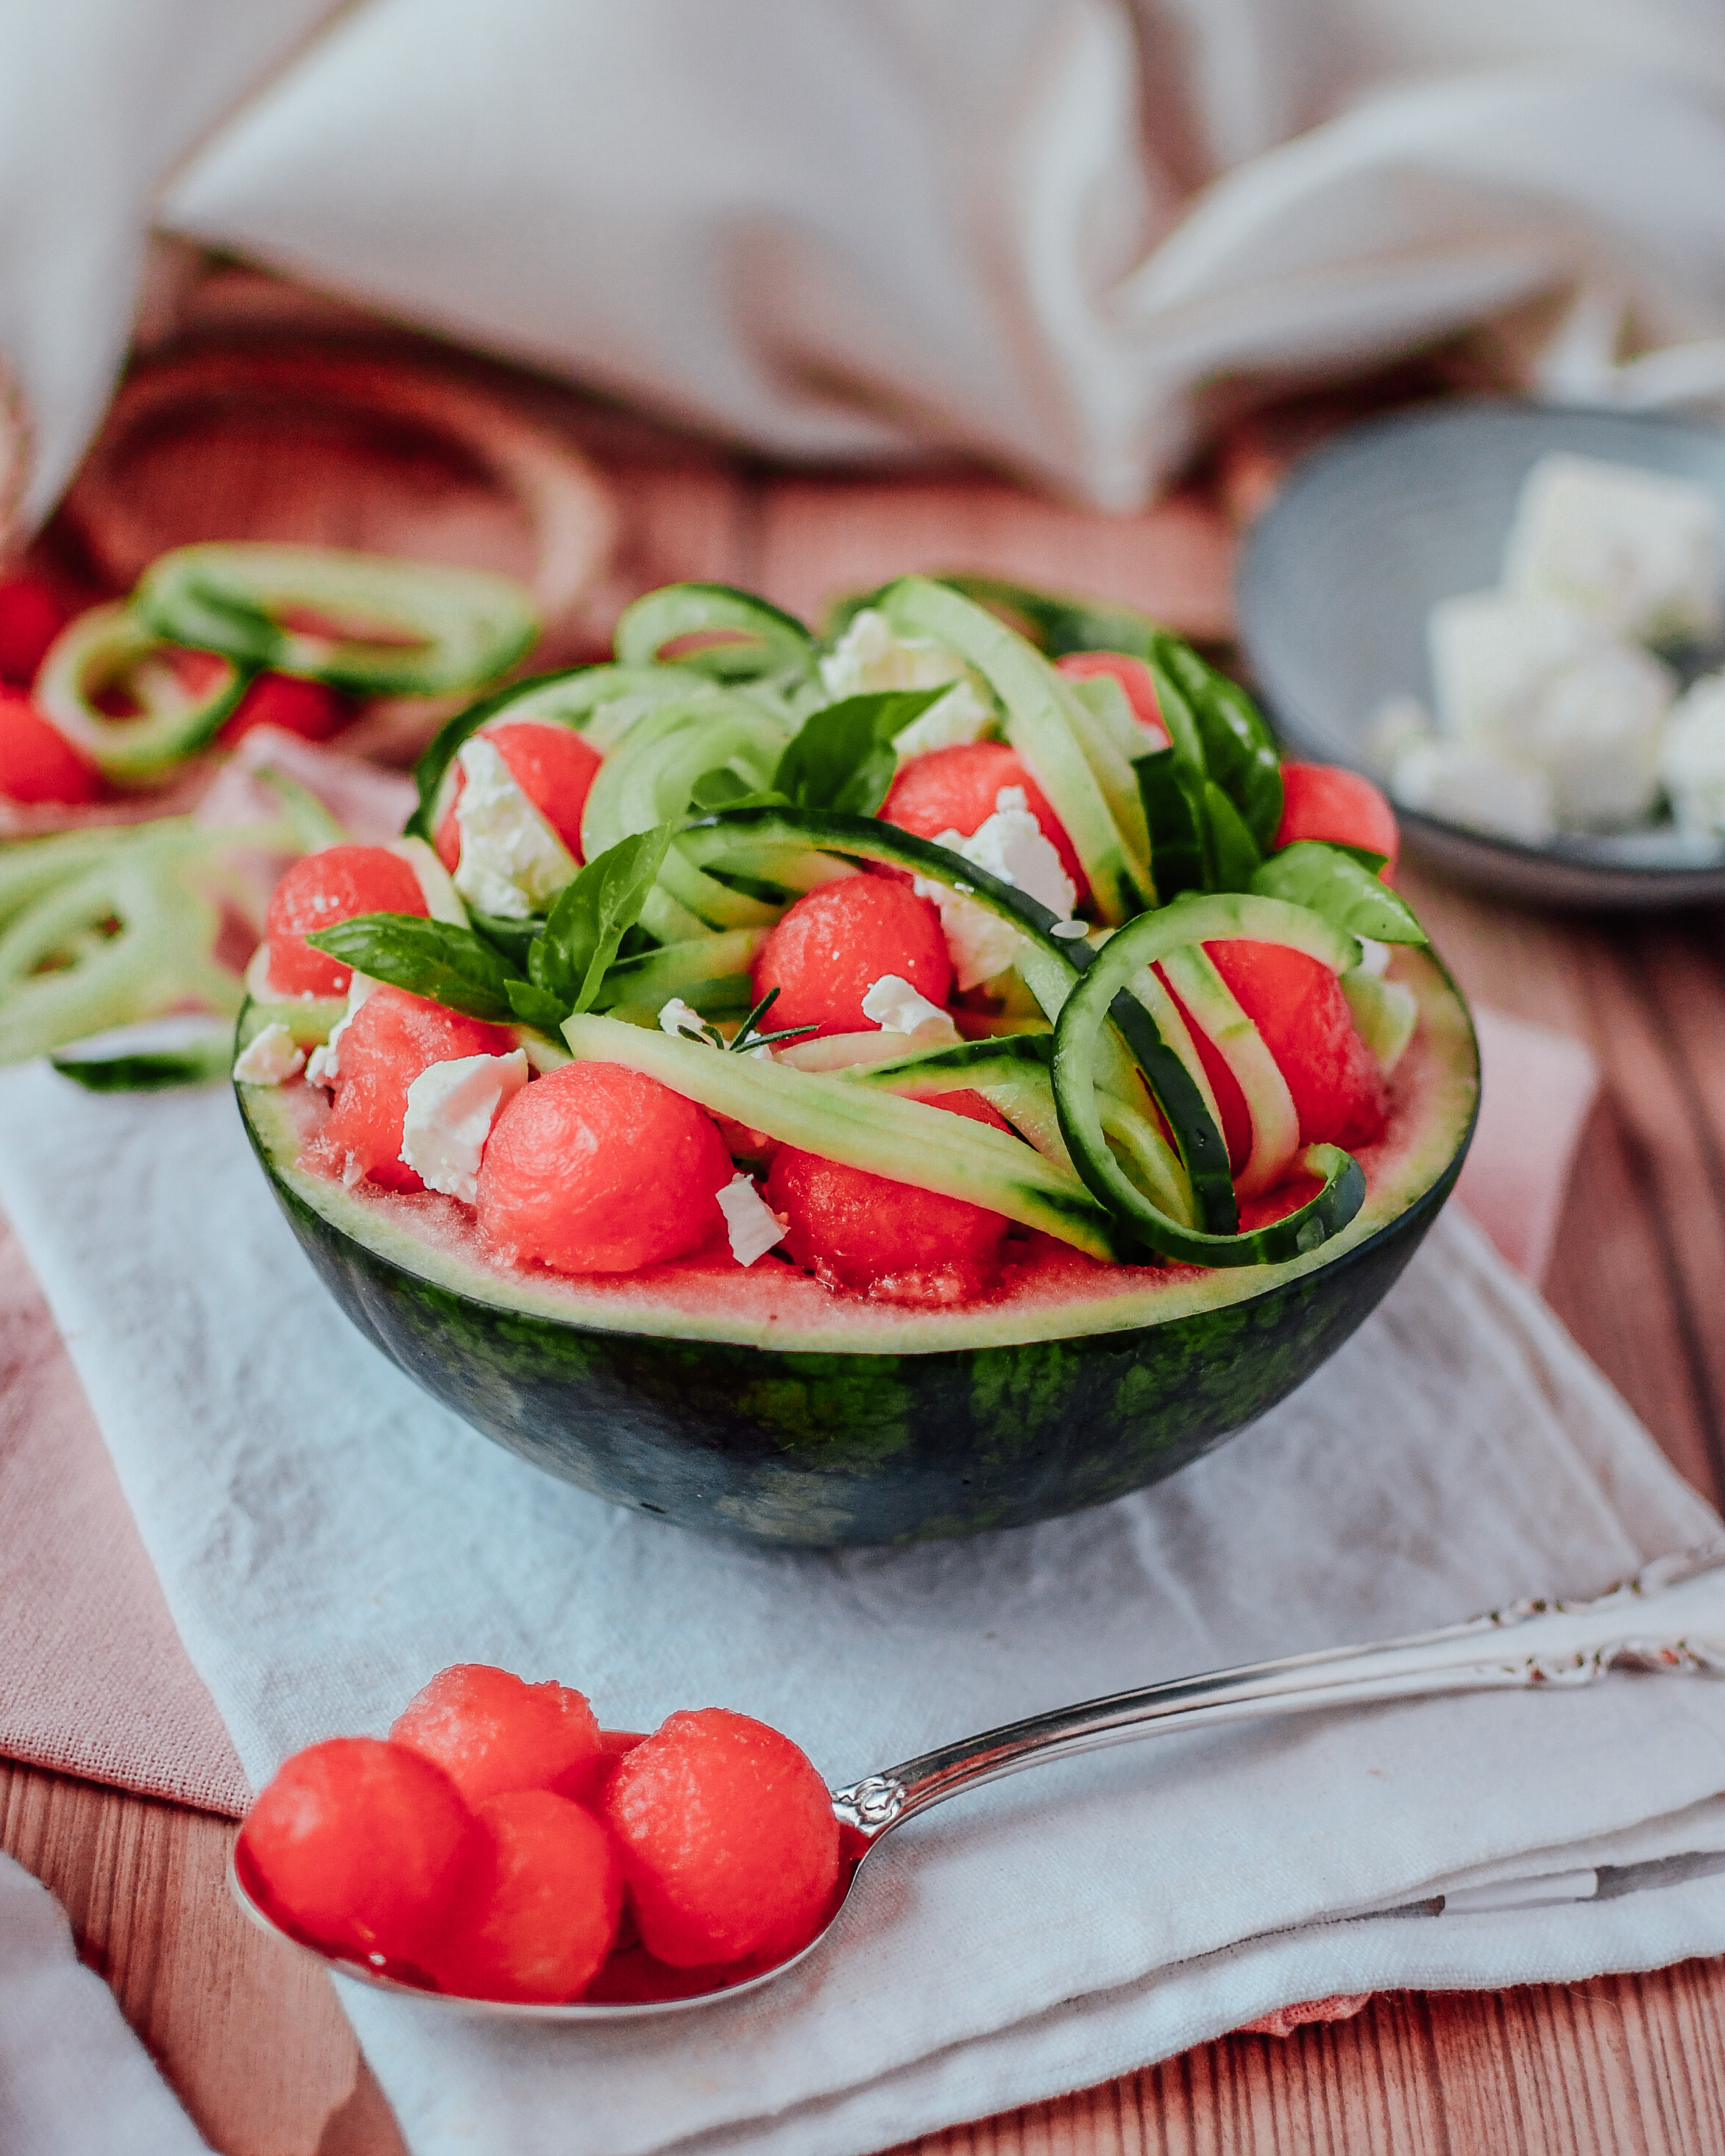
Cucumber Melon Salad
The second cucumber salad variation is very similar to the first one. The only difference this time is that I replaced the tomatoes with watermelon. I found this combination of sweet watermelon and tart feta cheese to taste extremely delicious. This is really the perfect summer salad with its tropical vibes and sweet taste.
Now with the barbecue season this is really the perfect side dish to impress your friends with! Definitely something different and I think they would love it. So make sure to give it a try!
Again all I did was mix 1 cucumber with 50g of Feta cheese and 100g of watermelon. Dressing was: white balsamic vinegar, olive oil, salt and pepper.
I hope you enjoyed these light summery cucumber creations and will try making them yourself soon.
Seit ich denken kann, träume ich davon, lange und schöne Haare zu haben. Leider ist das bei mir nicht immer so einfach. Da ich total feines Haar habe, brechen mir die Spitzen ab einer gewissen Länge immer ab. Aber nicht nur meine Haarstruktur macht es mir schwer. Über die Jahre hinweg habe ich sie auch oft gefärbt, geglättet und anderweitig schwer beschädigt, sodass es einfach unmöglich war, sie lang wachsen zu lassen.
Hier ein kleiner Ausschnitt aus meinen Frisuren der letzten 12 Monate:
Meine bisherige Extension Erfahrung
Mit 16 habe ich mir zum ersten Mal Extensions gekauft. Damals hat mir eine Freundin in Amerika Clip-in Extensions empfohlen. Diese habe ich auch wirklich bis heute immer wieder für besondere Events und Veranstaltungen getragen. Vielen Menschen ist es peinlich, zuzugeben, dass sie Extensions tragen, aber ich muss einfach ganz aufrichtig sagen, ich fühle mich mit langen Haaren viel wohler, selbstbewusster und weiblicher. Deshalb hier nun ein sehr ehrlicher Blogpost für euch 🙂
Da ich mich schon sehr früh mit Extensions beschäftigt habe, kenne ich mich damit auch ein bisschen aus und habe viel ausprobiert. Clip-ins sind toll, aber nach längerer Tragezeit einfach sehr unangenehm und nervig zum Raus- und Reingeben. Extensions mit Bondings schädigen die Haare einfach viel zu sehr und Haarteile halten oft nicht gut.
Als ich nun von den Tape-ins erfahren habe war mein Interesse natürlich sofort geweckt. Ich habe mich dann informiert, welche Frisörsalons in Österreich Tape-in Extensions anbieten und bin da sehr schnell auf KLIPP Frisör gestoßen. Mit KLIPP habe ich ja bereits letztes Jahr zusammengearbeitet und einen Traumlook Tag besuchen dürfen.
Jetzt wollten wir nun endlich meinen Traum von langen Haaren realisieren, da KLIPP seit diesem Jahr März Tape-ins im Sortiment hat.
Farbnuance-Bestimmung
Ich freute mich schon wie ein kleines Kind als ich vor zwei Wochen zur Farbnuance-Bestimmung den KLIPP Salon nach St.Pölten kam. Hier wurden genau die richtigen Farbnuancen der Extensions ausgesucht, damit sie perfekt zu meiner momentanen Haarfarbe passen. Wir haben uns für ein schönes Karamellblond entschieden und einen hellblonden Ton, um natürliche Highlights zu erzeugen. KLIPP arbeitet ausschließlich mit der Firma Verlocke in Bezug auf Extensions zusammen. Das ist 100% Echthaar und es fühlt sich einfach so kräftig und gesund an. Bei der Haarlänge hatte ich die Wahl zwischen 30, 40 50 und 60 Zentimetern. So kann man entscheiden, ob es nur eine dezente Haarverdichtung sein soll oder ob man sich den Traum von einer Hollywoodmähne erfüllen möchte. Ich habe mich natürlich für die längsten Extensions entschieden.
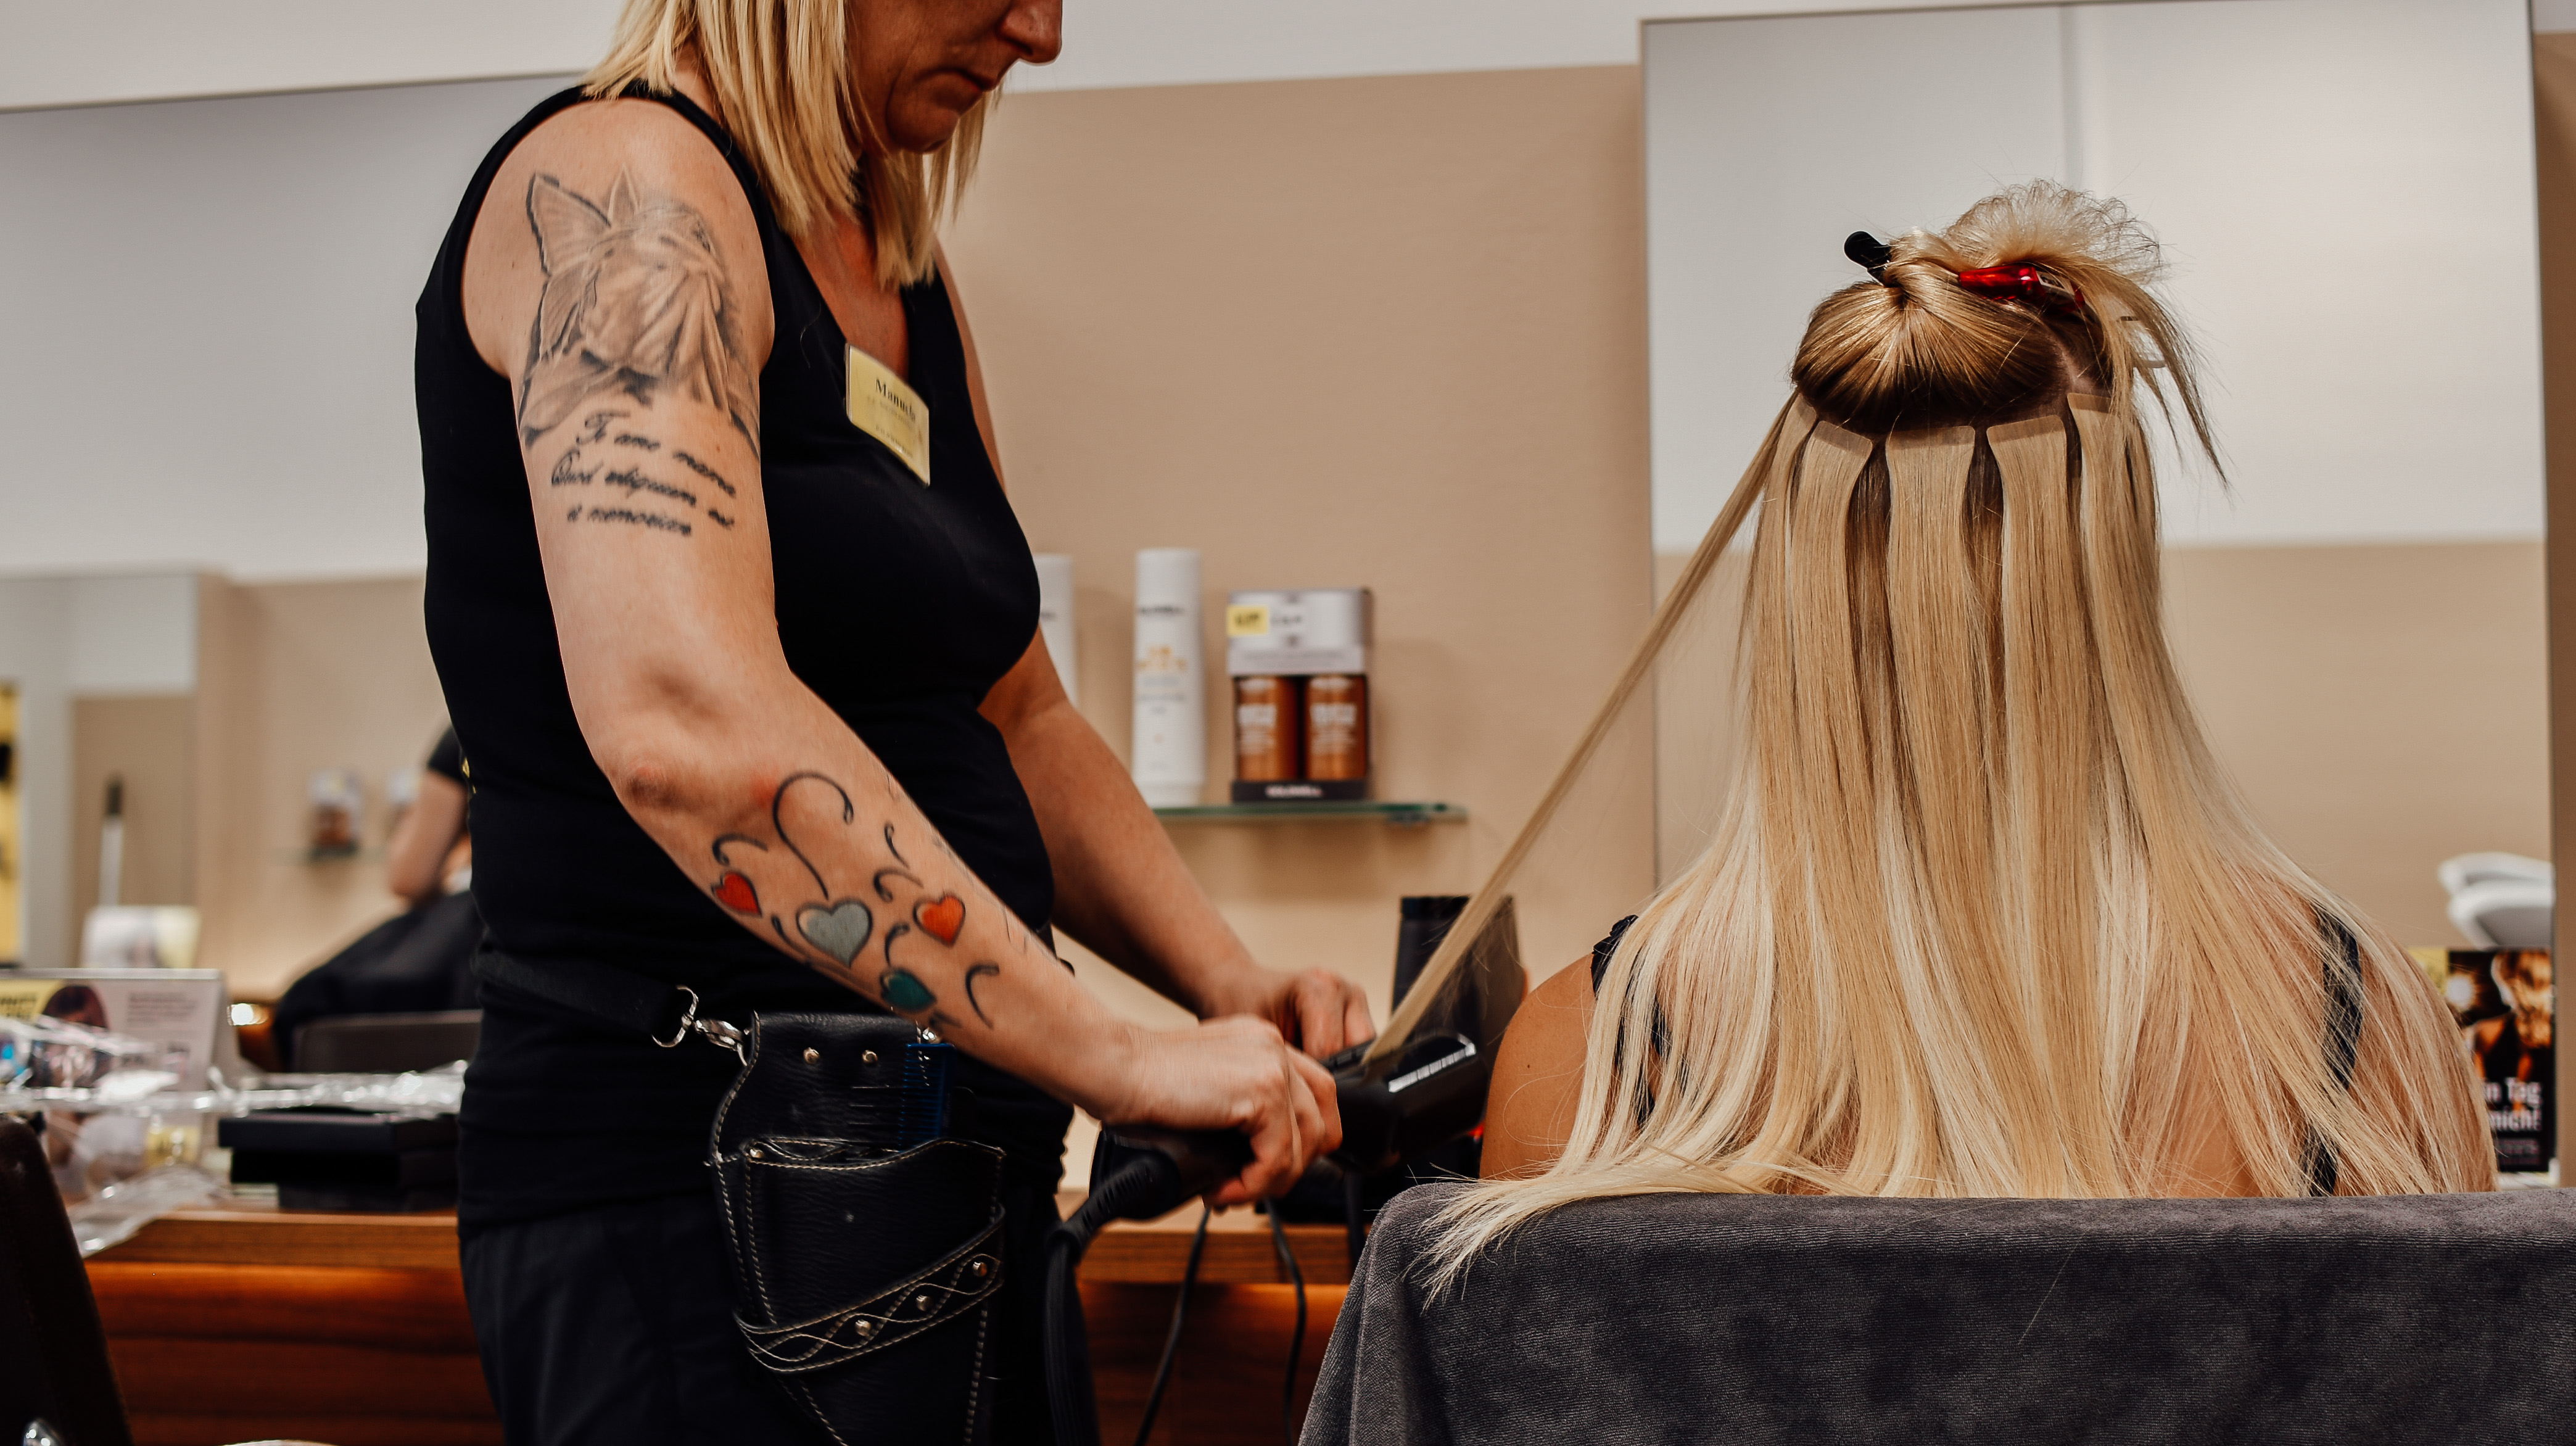
Vorbereitung
Eine Woche später hatte ich dann schon den Termin im Salon. Die Salonleitung Manuela nahm sich für mich Zeit und hat sie die Tape-ins wirklich fantastisch umgesetzt. Begonnen haben wir mit einer Haarwäsche. Das Besondere: mir wurden die Haare dreimal mit tiefenreinigendem Shampoo gewaschen, um wirklich alle Rückstände zu entfernen. Danach wurden meine Haare mit dem Hightech-Glätteisen „Steampod“ geglättet. Dies ist übrigens ein eigener Service den KLIPP Frisör anbietet. Das Glätten mit dem Steampod lagert Keratinteilchen ins Haar ein und stärkt es somit.
Anbringen der Tapes
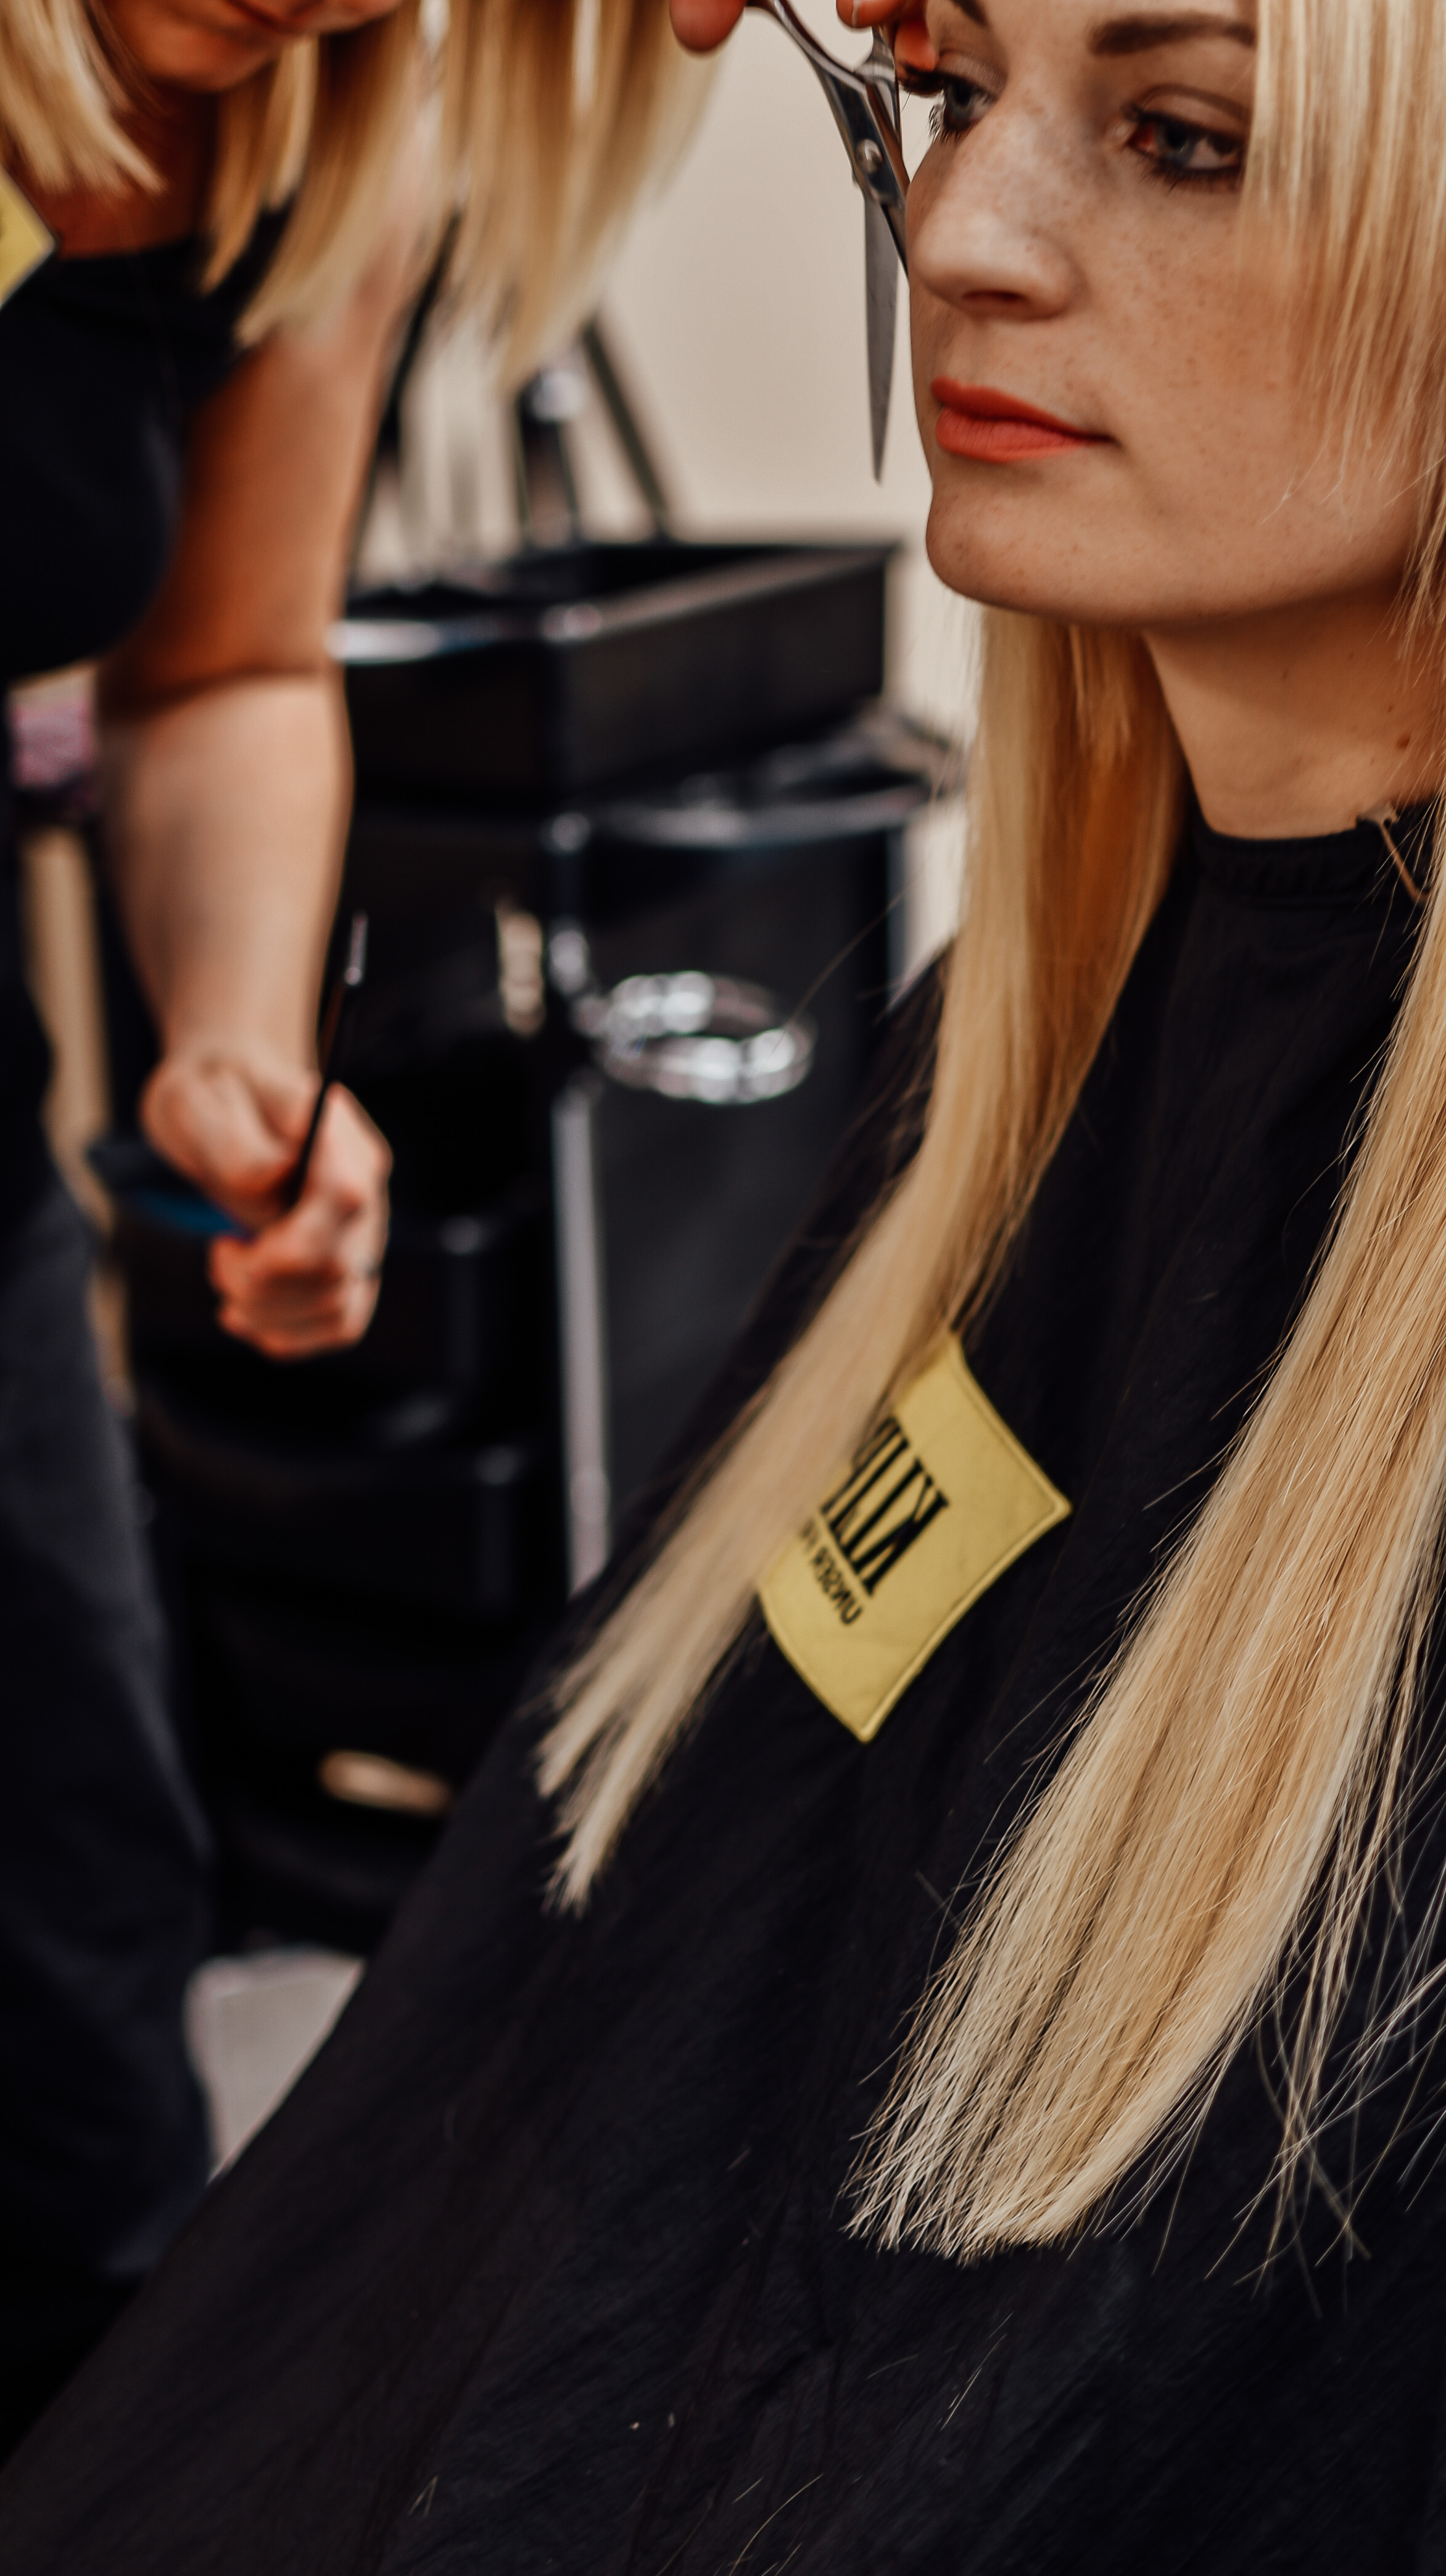
Dann ging es auch schon los mit den Tapes. Diese wurden mit der Sandwich-Methode eingearbeitet. Das Mittelstück war immer eine dünne Strähne meiner eigenen Haare, darunter und darüber wurde jeweils ein Tape mit einer speziellen Zange zusammengeklebt. Hier hat mich besonders fasziniert, dass keine Einwirkung von Hitze benötigt wurde. Es wurde auch absolut nichts verschweißt und somit auch das Haar nicht beschädigt. Demnach ging das ganze Verfahren auch sehr schnell. Innerhalb einer knappen Stunde hatte ich alle Extensions in meinen Haaren. Meine Friseurin verwendete immer ein dunkles Tape unten und ein helles Tape oben, damit sich ein schöner, natürlicher Highlight Effekt, wie von der Sonne geküsst, ergibt. Danach wurden die Extensions noch etwas geschnitten, damit der Übergang zu meinen eigenen Haaren schön verläuft. Zum Schluss bekam ich noch Traumlocken in Form von Beachwaves und etwas Spitzenöl in die Haare.
Pflegehinweise
Tape-ins benötigen natürlich besondere Pflege. Ich darf ab jetzt meine Haare nur mit öl- und silikonfreien Shampoos und Conditioner waschen. Man braucht auch eine eigene Extensionsbürste mit ganz feinen Borsten, damit man nicht bei den Verbindungsstellen hängen bleibt. Man darf auch die Haare nie im nassen Zustand durchkämen sondern muss diese vorher immer antrocknen lassen. Beim Schlafen soll man sich die Haare in einem Zopf zusammenbinden, damit sie in der Nacht nicht verfilzen.
Kosten
Das besondere an Tape-in Extensions ist, dass man sie 2 bis 3 Mal wiederverwenden kann. Alle 5-6 Wochen sollte man sie nachsetzen lassen. Ihr fragt euch jetzt bestimmt,wieviel das nun alles kostet. Alles das kommt ein bisschen darauf an, was ihr wollt und, wieviele Haare ihr jetzt schon habt und wie lang die Extensions sein sollen. Im Grunde wird nach Tape verrechnet. Ein Sandwich (jeweils 2 Tapes) kostet bei KLIPP Frisör 29 Euro. Bei mir wurden zum Beispiel 24 Sandwiches (also 48 Tapes) verwendet. Wobei ich sagen muss, dass ich auch wirklich viele Tapes bekommen habe und noch dazu die maximale Länge. Das hat natürlich seinen Preis. Man muss halt bedenken, dass es sich hier um Echthaar handelt und man sie wiederverwenden kann. Das Nachsetzen ist dann schon etwas günstiger. Hier kommt man pro Strähne auf 11 Euro. Ich sehe Tape-in Extensions einfach als eine Art Luxus, den man sich leistet, um sich einen Traum zu erfüllen.
Für mich ist es ein total neues Lebensgefühl und einfach nur durch die Straßen zu gehen, fühlt sich anders an und macht mich selbstbewusster.
Hier für euch nun meine Vorher/Nachher Bilder:
Video
Für mehr Infos habe ich auch noch ein Video gemacht, damit ihr genau sehen könnt, wie das Anbringen der Extensions funktioniert. Ich führte auch ein Interview mit der Salonleitung Manuela, welche mir viele wichtige Fragen beantwortet hat.
Ich hoffe, ich konnte euch durch diesen Blogpost das Thema Tape-in Extensions etwas näher bringen und falls ihr noch irgendwelche Fragen dazu habt, hinterlasst mir einfach einen Kommentar.
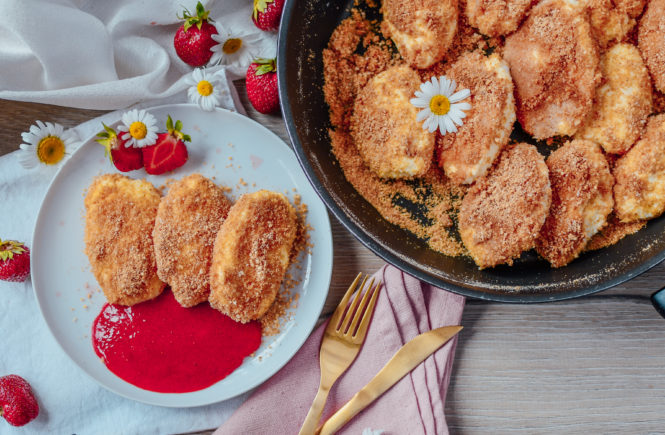
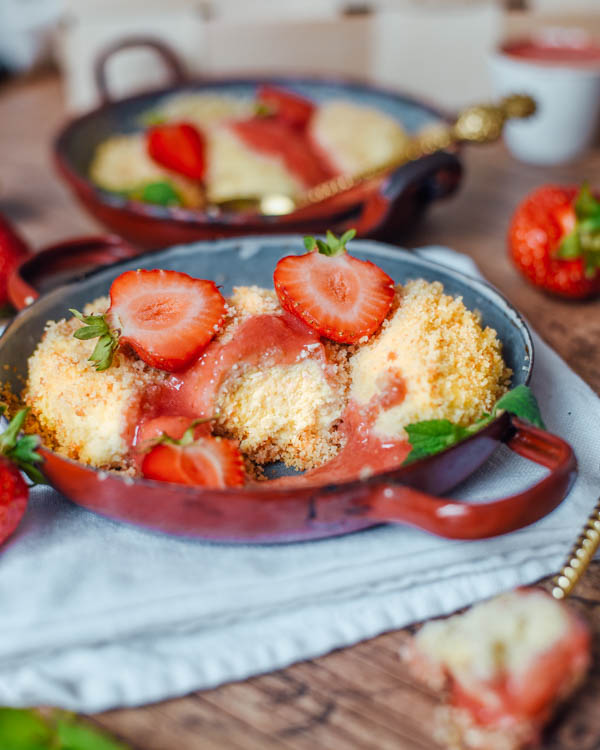
Leichte, flaumige Topfennockerl mit Erdbeersoße lassen die Herzen während der Erdbeerzeit höher schlagen. Dieses etwas leicht abgewandelte Rezept vom beliebten Klassiker ist reduziert in Kohlenhydraten dafür aber umso mehr reich an Protein.
Heute möchte ich mit euch mein absolutes Lieblingsrezept teilen! Meine low carb Fitness Topfennockerl!
Als Food Bloggerin wird man oft gefragt was denn sein Lieblingsgericht sei. Hier lautet meine Antwort immer: Topfennockerl mit Erdbeersoße. Ihr müsst wissen, dass ich einfach so ein Strawberry Addict bin. Gerade im Juni verbringe ich den Großteil meiner Zeit am Erdbeerfeld und der Name Carina Berry kommt auch nicht von ungefähr 😉
Meine Erdbeerliebe
Ich liebe Erdbeeren einfach weil sie so unglaublich gesund und gut für den Körper sind. Die kleine Frucht hat so viele Nährstoffe und Vitamine. Sie haben sogar mehr Vitamin C als Orangen. Da sie aus 90% Wasser bestehen sind sie auch super kalorienarm. Ich esse meistens fast ein halbes Kilo am Erdbeerfeld und das sind gerade mal 160kcal. Erdbeeren enthalten krebsvorbeugende sekundäre Pflanzenstoffe was sie auch zu einem super Krankheitsvorbeuger macht.
Wie normale Topfennockerl zu Fitnessnockerl werden
Okay wieder zurück zum Rezept. Also normalerweise werden Topfennockerl ja mit 20% Topfen, Brösel und Gries gemacht.
Jedoch nicht bei mir. Ich konnte natürlich nicht anders und habe diese Zutaten durch bessere Alternativen ersetzt. Mit dem Magertopfen spart man einiges an Fett und Kalorien ein. Statt Brösel und Gries verwende ich Proteinpulver und Kokosmehl. Hier habt ihr einen erhöhten Proteingehalt und spart euch einiges an Kohlenhydraten. Zucker habe ich natürlich auch keinen verwendet. Stattdessen arbeite ich bei diesem Rezept mit Erythrit – ein natürlicher Zuckeralkohol. Falls ihr das nicht zu Hause habt, könnt ihr auch Xylit (Birkenzucker) nehmen. Der hat auch schon 40% weniger Kalorien als normaler Zucker.
Auch die Erdbeersoße mache ich ganz natürlich. Oft wird hier ja nochmal extra Zucker dazugegeben. Ich mixen einfach nur die ganzen Erdbeeren und fertig. Die schmecken schon ganz natürlich einfach so wundervoll, da braucht man nicht noch extra Zucker. Übrigens mache ich dieses Rezept im Juli dann auch oft mit Himbeeren. Schmeckt genauso gut 🙂
Die low carb Topfennockerl mit Erdbeersoße macht ihr am besten mit zwei Löffeln. Das Wasser muss hierfür unbedingt schon kochen und gebt nie mehr als 3-4 Nockerl gleichzeitig in den Kochtopf. Wenn sie oben schwimmen sind sie fertig. Wenn ihr sie länger kochen lässt werden sie etwas fester und größer.
Das Rezeptvideo
Das diese Fitness Topfennockerl mein absolutes Lieblingsrezept sind, konnte ich es mir nicht nehmen lassen und hab es sogar für euch abgefilmt, damit wirklich nichts schief gehen kann und ihr ganz genau seht wie einfach und leicht es zu machen ist 🙂
25gBackproteinoptional - wegglassen oder mehr Kokosmehl
25gKokosmehlalternativ Griess
25gXylit
2Eier
Brösel
25gXylit
25gProteinpulver
25gKokosmehl
Soße
250gErdbeeren
Anleitungen
In einer Schüssel die trockenen Zutaten vermischen.
In einer zweiten Schüssel Eier und Magertopfen fein rühren.
Beide Massen zusammenmischen.
In einer Pfanne Kokosmehl, Proteinpulver und Xylit mischen und kurz unter ständigem rühren goldbraun anbraten.
Wasser in einem Topf aufkochen und mit zwei Löffeln kleine Nockerln formen.
Nach circa 4-5 Minuten pro Nockerl abseihen und mit Bröseln bedecken.
Erdbeeren mixen und als Soße mit den Nockerln servieren.
Wenn du noch auf der Suche nach anderen leckeren Erdbeerrezepten bist dann kann ich dir auf jeden Fall mein Erdbeer-Tiramisu und die Rhabarber-Erdbeer Marmelade ohne Zucker empfehlen.
Du kannst dir auch mein gratis E-Book mit 35 tollen Fitnessrezepten hier herunterladen:
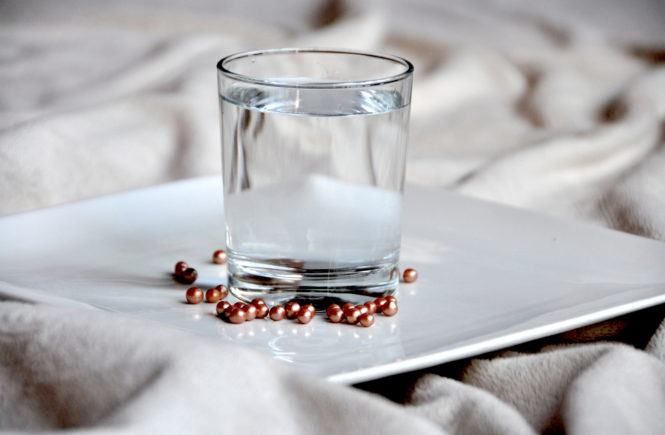
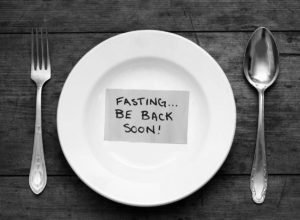
Fasting – a complete abandonment of solid food. During the fasting days you only drink clear liquids.
The last couple days have been an incredible experience, which I would like to share with you here now. Fasting is definitely not something most people do – which they maybe should because it is such a great way to detox and cleanse your body.
Fasting kind of runs in the family if you will. My parents are doing it for decades and the longest they have gone without food was 10 days. My aunt and uncle did it for 14 days one time. Everyone around me loves to fast one time a year and I see how it benefits them all the time. That is why I started fasting once a year as well three years ago. So this is the third time I did it.
My motivation for fasting
Some of you were asking me why I am fasting. My main motivation to fast was to really give my body and digestion a break and totally cleanse my body. I wanted a couple days to slow down and focus on myself. I feel like we focus way to much on what we eat, how much we eat and sometimes even obsess about it. Especially being a food blogger a lot of my time evolves around food. I wanted to take a step back from my daily nutrition and let my body step forward.
You should never do a fasting cure because you simply want to loose weight. I believe this is the completely wrong motivation and won’t get you very far.
How it works
This is by no means a guide to fasting, I am just sharing my personal experience here. There are many different types of fasting out there. I am sure you have heard of juice fasting before where you only drink juice for a couple of days. I don’t like this type of fasting because in my opinion your body still needs to work and digest and you will be so hungry all the time. The way I fast is simply by drinking pure, clear liquids. Mostly water and tea and once a day for lunch or dinner a clear soup. On day two and day four I took bitter salt. This is a laxative which helps you to completely cleanse everything out 😀 It has the most horrible taste ever, but is a key element of this fasting cure and its effectiveness.
Aren’t you so hungry all the time?
Most of you asked me this question. The funny thing is after the second day all signs of hunger completely vanish. You feel like you have just eaten the perfect amount of food and are totally satisfied. No grumbling stomach or feeling hungry. Every once in a while a notion of hunger would come along. But then I would simply drink something and it was gone. Especially on day 4,5 and 6 I didn’t feel any hunger anymore. Just the first days are hard.
My fasting tips
When fasting try to plan the days well. Pick a week where you are not invited to any events or dinners. This will just make it harder on you when you see everyone else eating. When it was really hard I would allow myself a tiny teaspoon of honey. And for the first three days I bought unsweetened almond milk (13kcal per 100ml) to add to my water for a bit of taste.
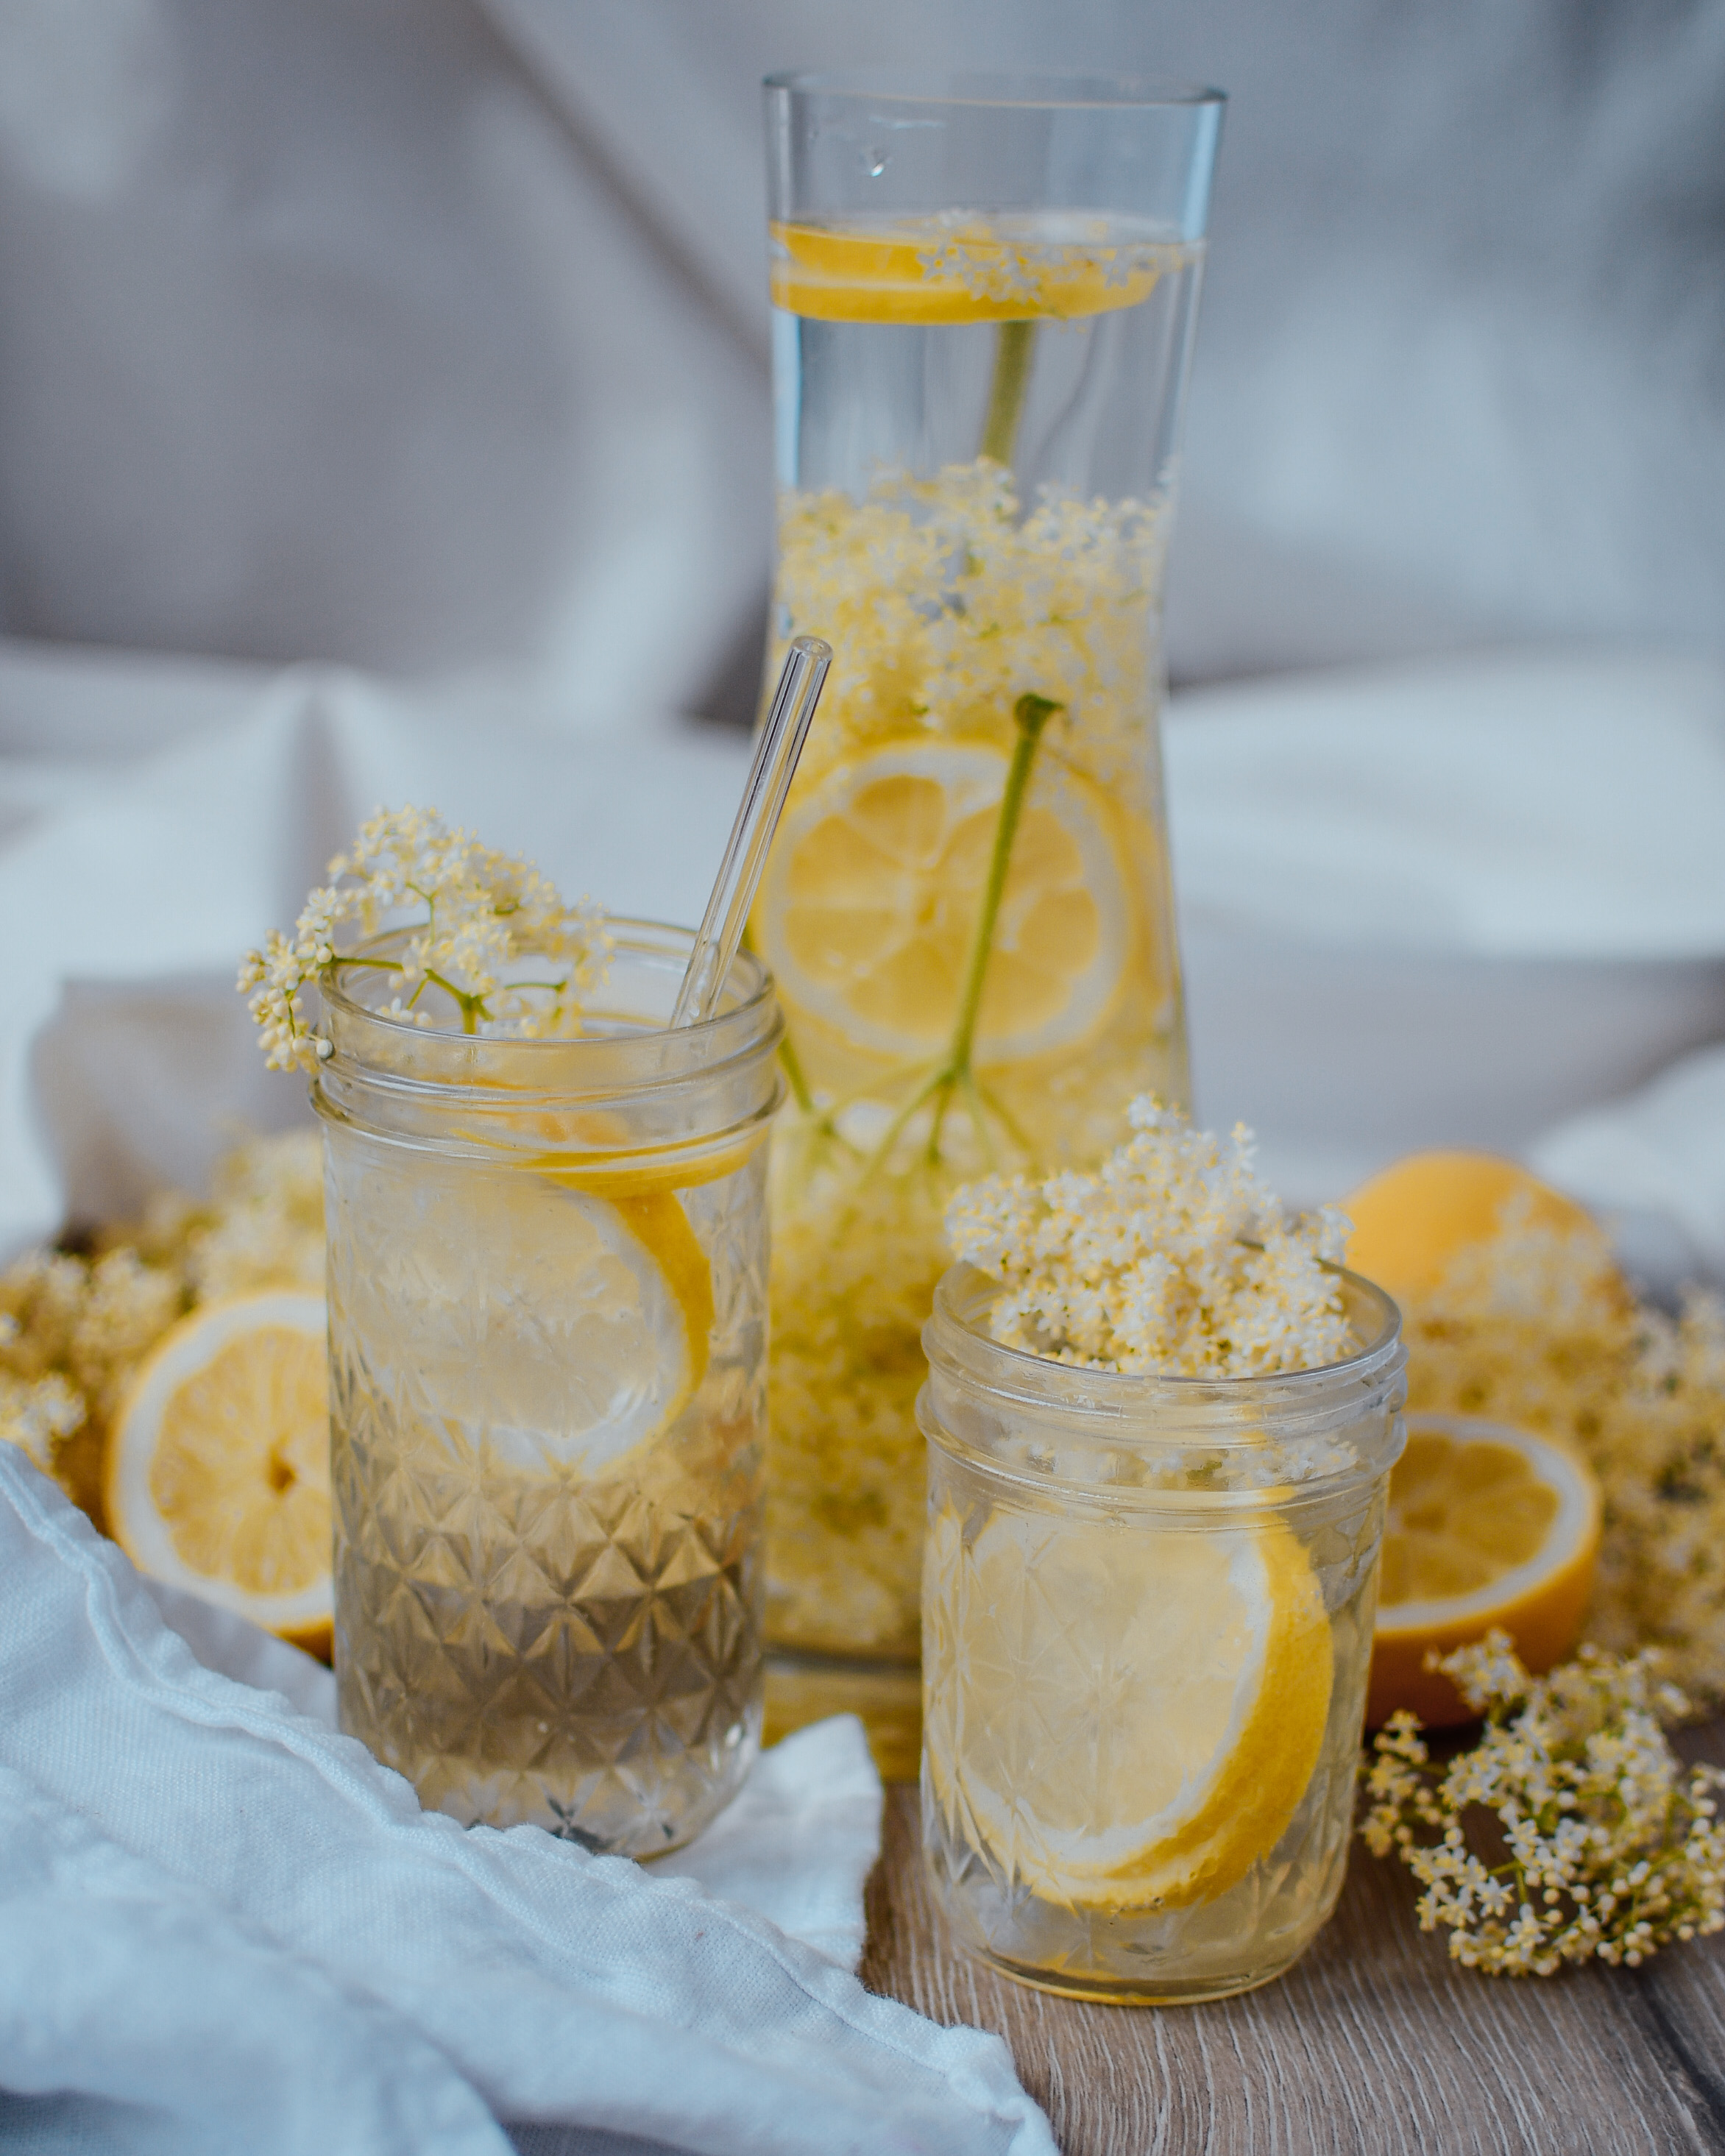
Also try to flavor your water. I liked to put elderberry flowers and lemons into my water. It is just nice to have your water taste a little bit different. The same goes with tea. I bought a multitude of different teas to not get bored of the same taste. Make sure to buy a detox or fasting tea with nettle leaves. Chewing gum was also helpful every once in a while to keep me distracted.
My positive sides of fasting
Fasting results in a reduction of toxic and superfluous substances and detoxifies the metabolism and connective tissue. Blood lipid levels are reduced, elevated blood sugar levels are decreasing and you will see a discharge of the gastrointestinal tract, biliary tract and pancreas. All of which are huge reliefs and well deserved breaks for your body! Perfect for regeneration.
I noticed that I needed so much less sleep than usual. I was completely fine with 5 hours every day. I always woke up way before I had set my alarm. Since my body wasn’t digesting anything at night I also needed less time to recover at night and had more energy available in the morning.
Another very positive benefit is that you have so much more time on your hands. All the time you usually spend on grocery shopping, cooking food 3 times a day, preparing snacks is available for you to use now.
What I love about doing the fasting cure once a year is to prove to myself how strong my will power is and my dedication. It is such a rewarding and powerful feeling when you have achieved something as hard as not eating for five days.
Also I feel like my skin is just perfect at the moment and when I look in the mirror I kinda see myself glowing. 🙂
And almost forgot to mention the weight loss part. I lost 3kg within 5 days – half of it will probably be right back on simply because my whole digestive system is empty right now. When my parents fast they usually loose up to 8 kg within a week. Usually half of the weight you lost will stay 🙂
before – after before – after
My negative sides of fasting
Especially in the first two days I still felt hungry and even had a headache on the first day. This is perfectly normal as your blood sugar levels are simply super low and your body is not used to that. Occasionally I would feel weak and on the first day in the afternoon I had a real energy low. Besides that I have to honestly say I felt super fit and strong. I even went for a run one day.
What I really noticed is how cold I got. As soon as the sun was gone I started freezing. Since my body wasn’t digesting anything I produced less body heat.
Another negative side effect was the mood swings. I noticed how jumpy and bitchy I could be in the last couple of days. I would simply snip at people without much reason. I was definitely not the easiest person to be around with the last week 😀 Thankfully I have such a supportive boyfriend <3
Okay not sure how open you want me to be about ALL negative side effects 😀 BUT you will need to go to the bathroom a lot. Not only because you are drinking so much liquid (up to 4l a day) but also because you are taking bitter salt which helps you empty out your digestive system.
The days after the fasting – SO IMPORTANT
Okay you NEED to get this right when you are fasting. The days you build back up to your normal nutrition are so crucial and important. Much more important and way harder than the actual fasting. If you do this wrong all of it was in vain. When you are fasting your body goes into starvation mode. This means it will store every little piece of nutrition it gets. So once you start eating again you have to start bit by bit and gradually increase your calories. When you fast for 5 days you should at least do 4 build up days (Aufbautage – sagt man das so auf Englisch? :D) Here you can find special eating plans on the internet for the first days after breaking your fast.
Getting this right and not starting to eat everything you couldn’t during your fasting period is so important, otherwise you will have a huge JoJo effect! For example when my sister fasted for 5 days she started to eat so much after that she gained more weight within a short period of time than she lost during her fasting cure!!
Quick rundown of my fasting cure
Full Fasting Days:
Day #1: The hardest one. I felt very hungry, had an energy low and a headache. Water, tea, clear soup.
Day #2: Still a bit hungry. Headache was gone. Felt weak and very cold in the evening. Water, tea, clear soup, a bit of honey and unsweetened almond milk. Went for a run. First round of bitter salt.
Day #3: Not hungry anymore. Felt very cold at night. Water, tea, clear soup, bit of honey, matcha powder and almond milk.
Day #4: Felt perfectly fine, satisfied and fit. No feelings of hunger. Less cold. Water, tea, clear soup, second round of bitter salt.
Day #5: Felt absolutely great. No signs of hunger. Not cold. water, tea, clear soup, a bit of grape juice with a lot of water.
Breaking the fast
Day #6: Felt so great that I decided to fast until lunch for exactly 5.5 days of fasting. Oat soup, steamed apple
Day #7: Small porridge, Oat soup, potato with greek yoghurt and salt
Day #8: Joghurt with oats and fruit, Spinach and potatoes, light salad
Day #9: Joghurt with flax seeds and fruit, couscous salad, potato soup
Summary
I hope you enjoyed this article and my personal insights and experiences. I am sharing all of this with you because I truly think it is a fantastic experience everyone should make at least one time in their lives. It makes you realize how strong your body and your mind is and you give your body a well deserved break for regeneration.
Let me know in the comments if you have enjoyed this article and you are ever planning on fasting as well! 🙂
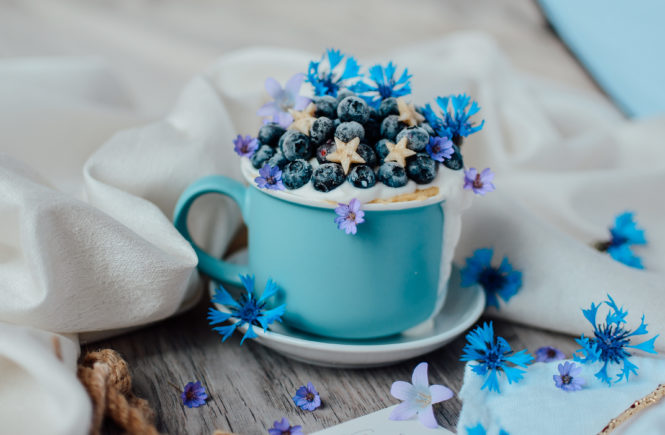
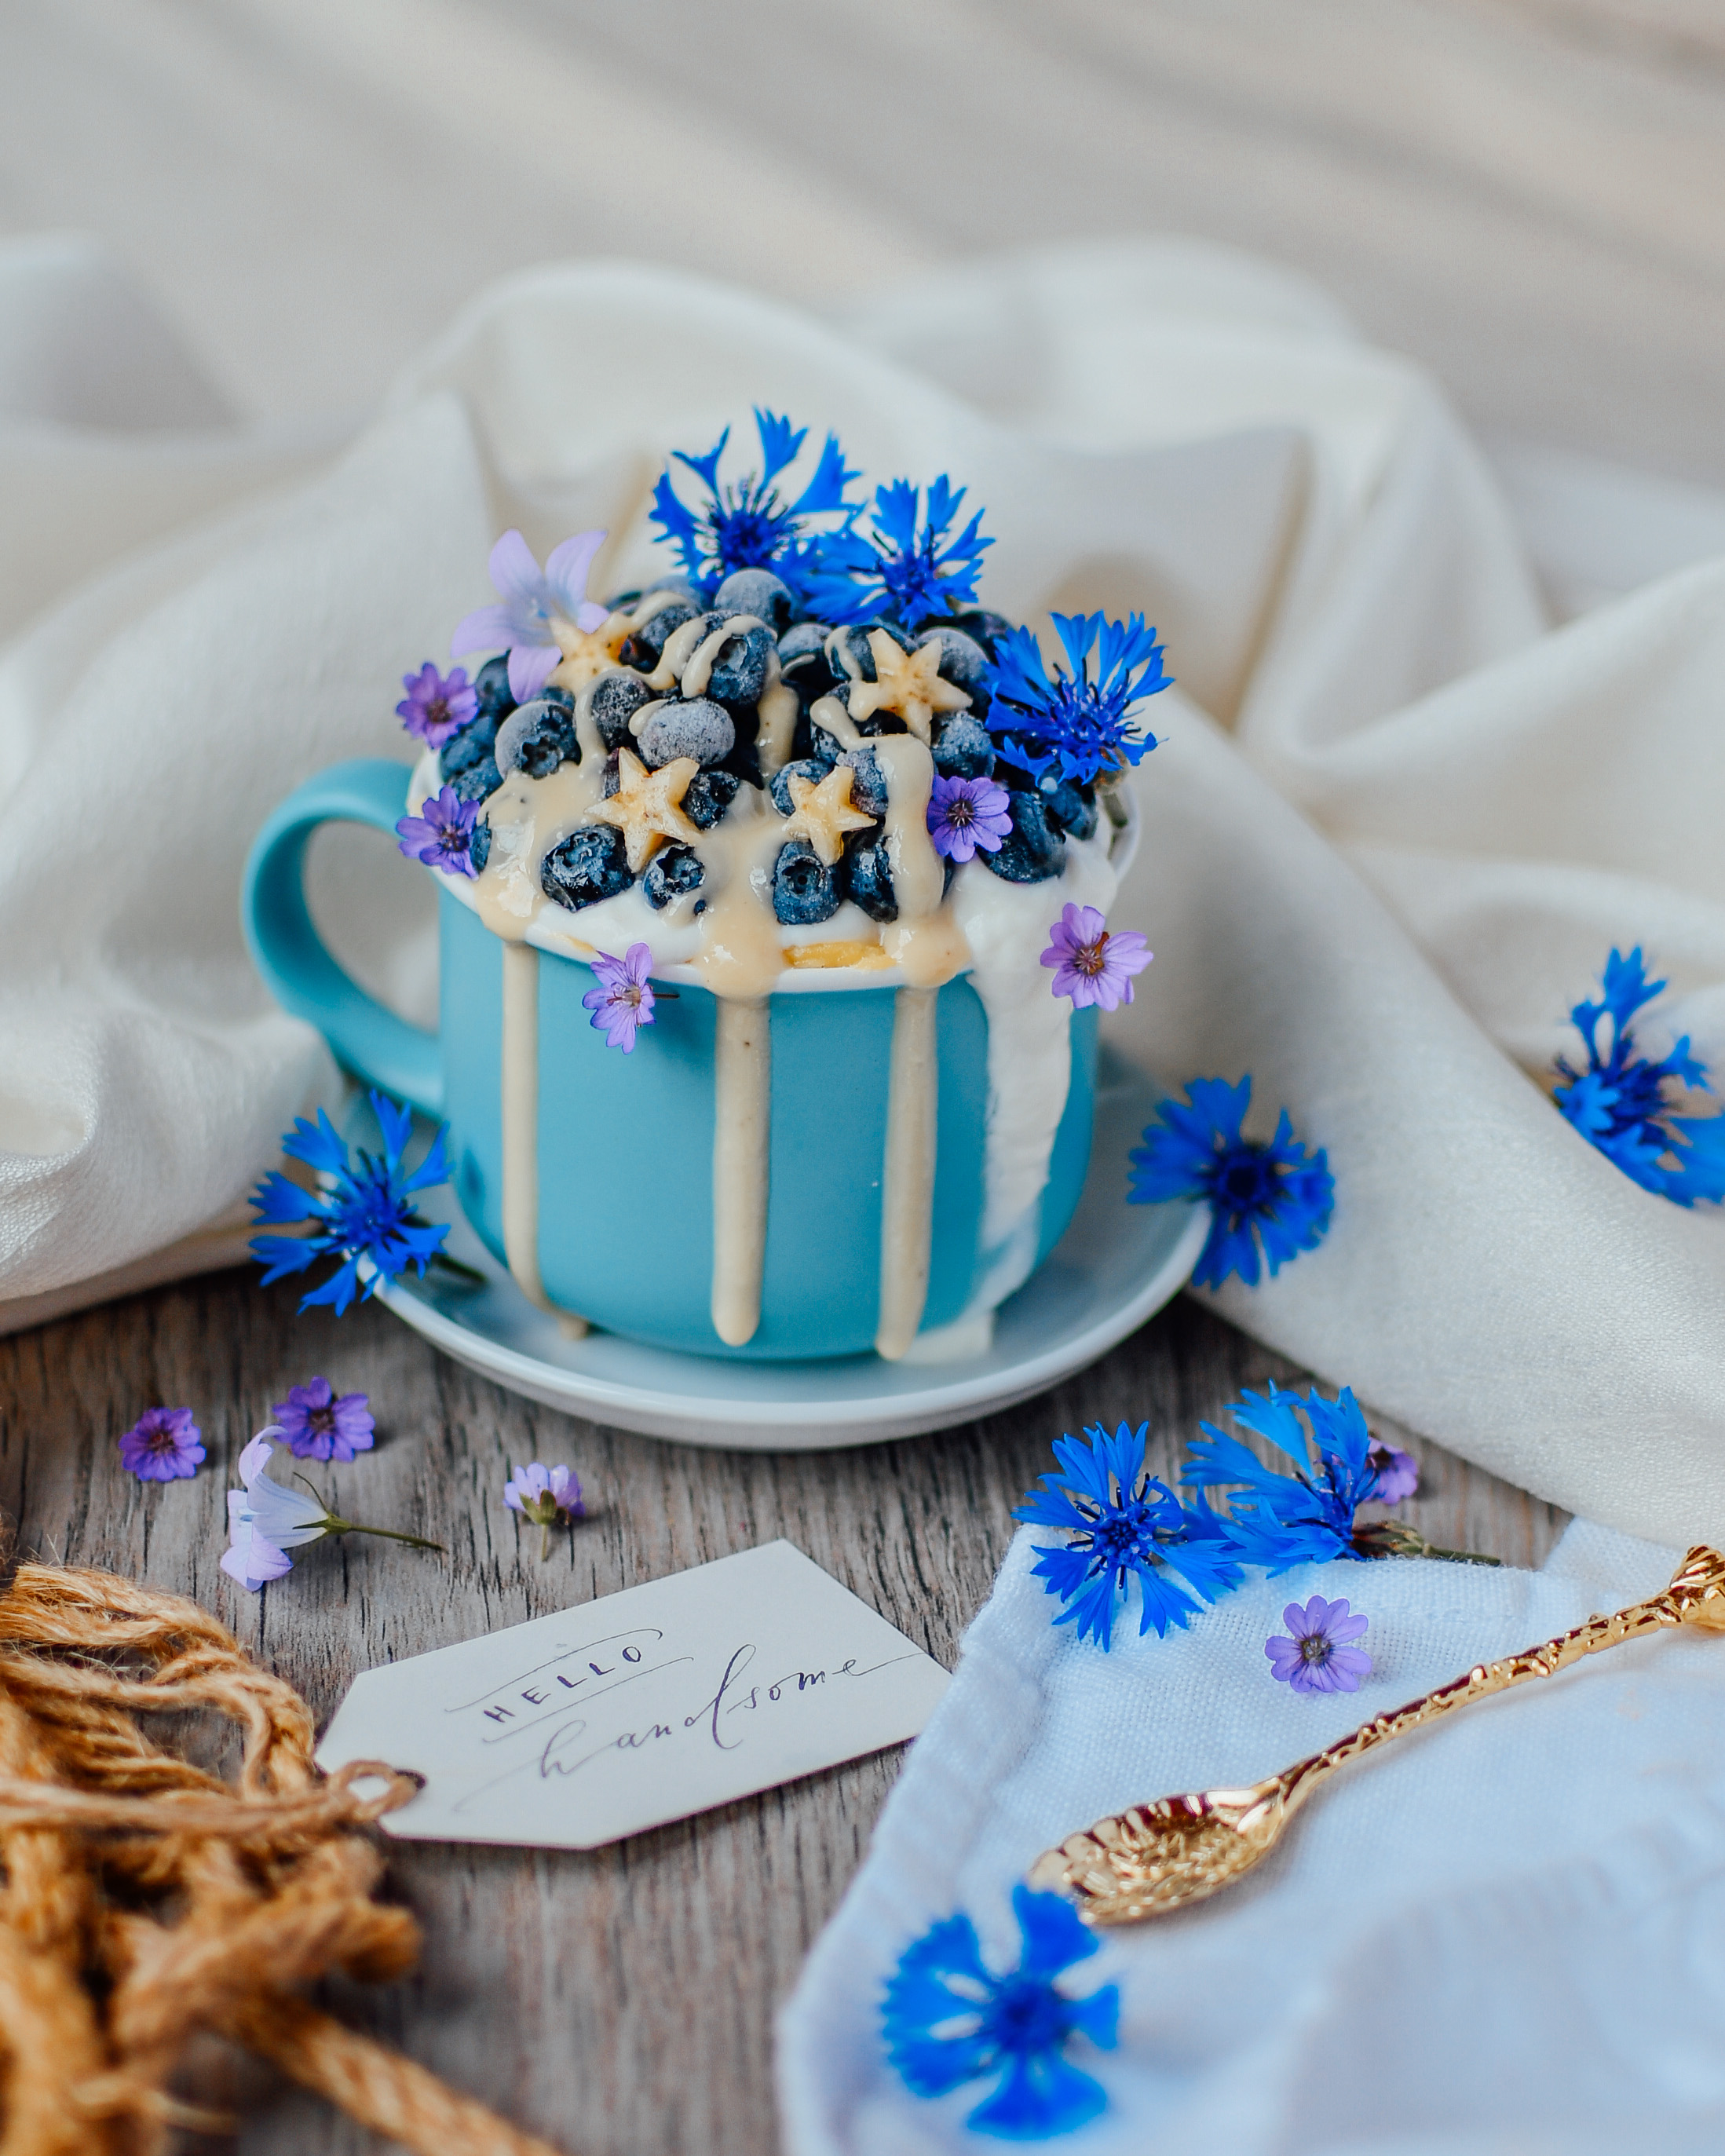
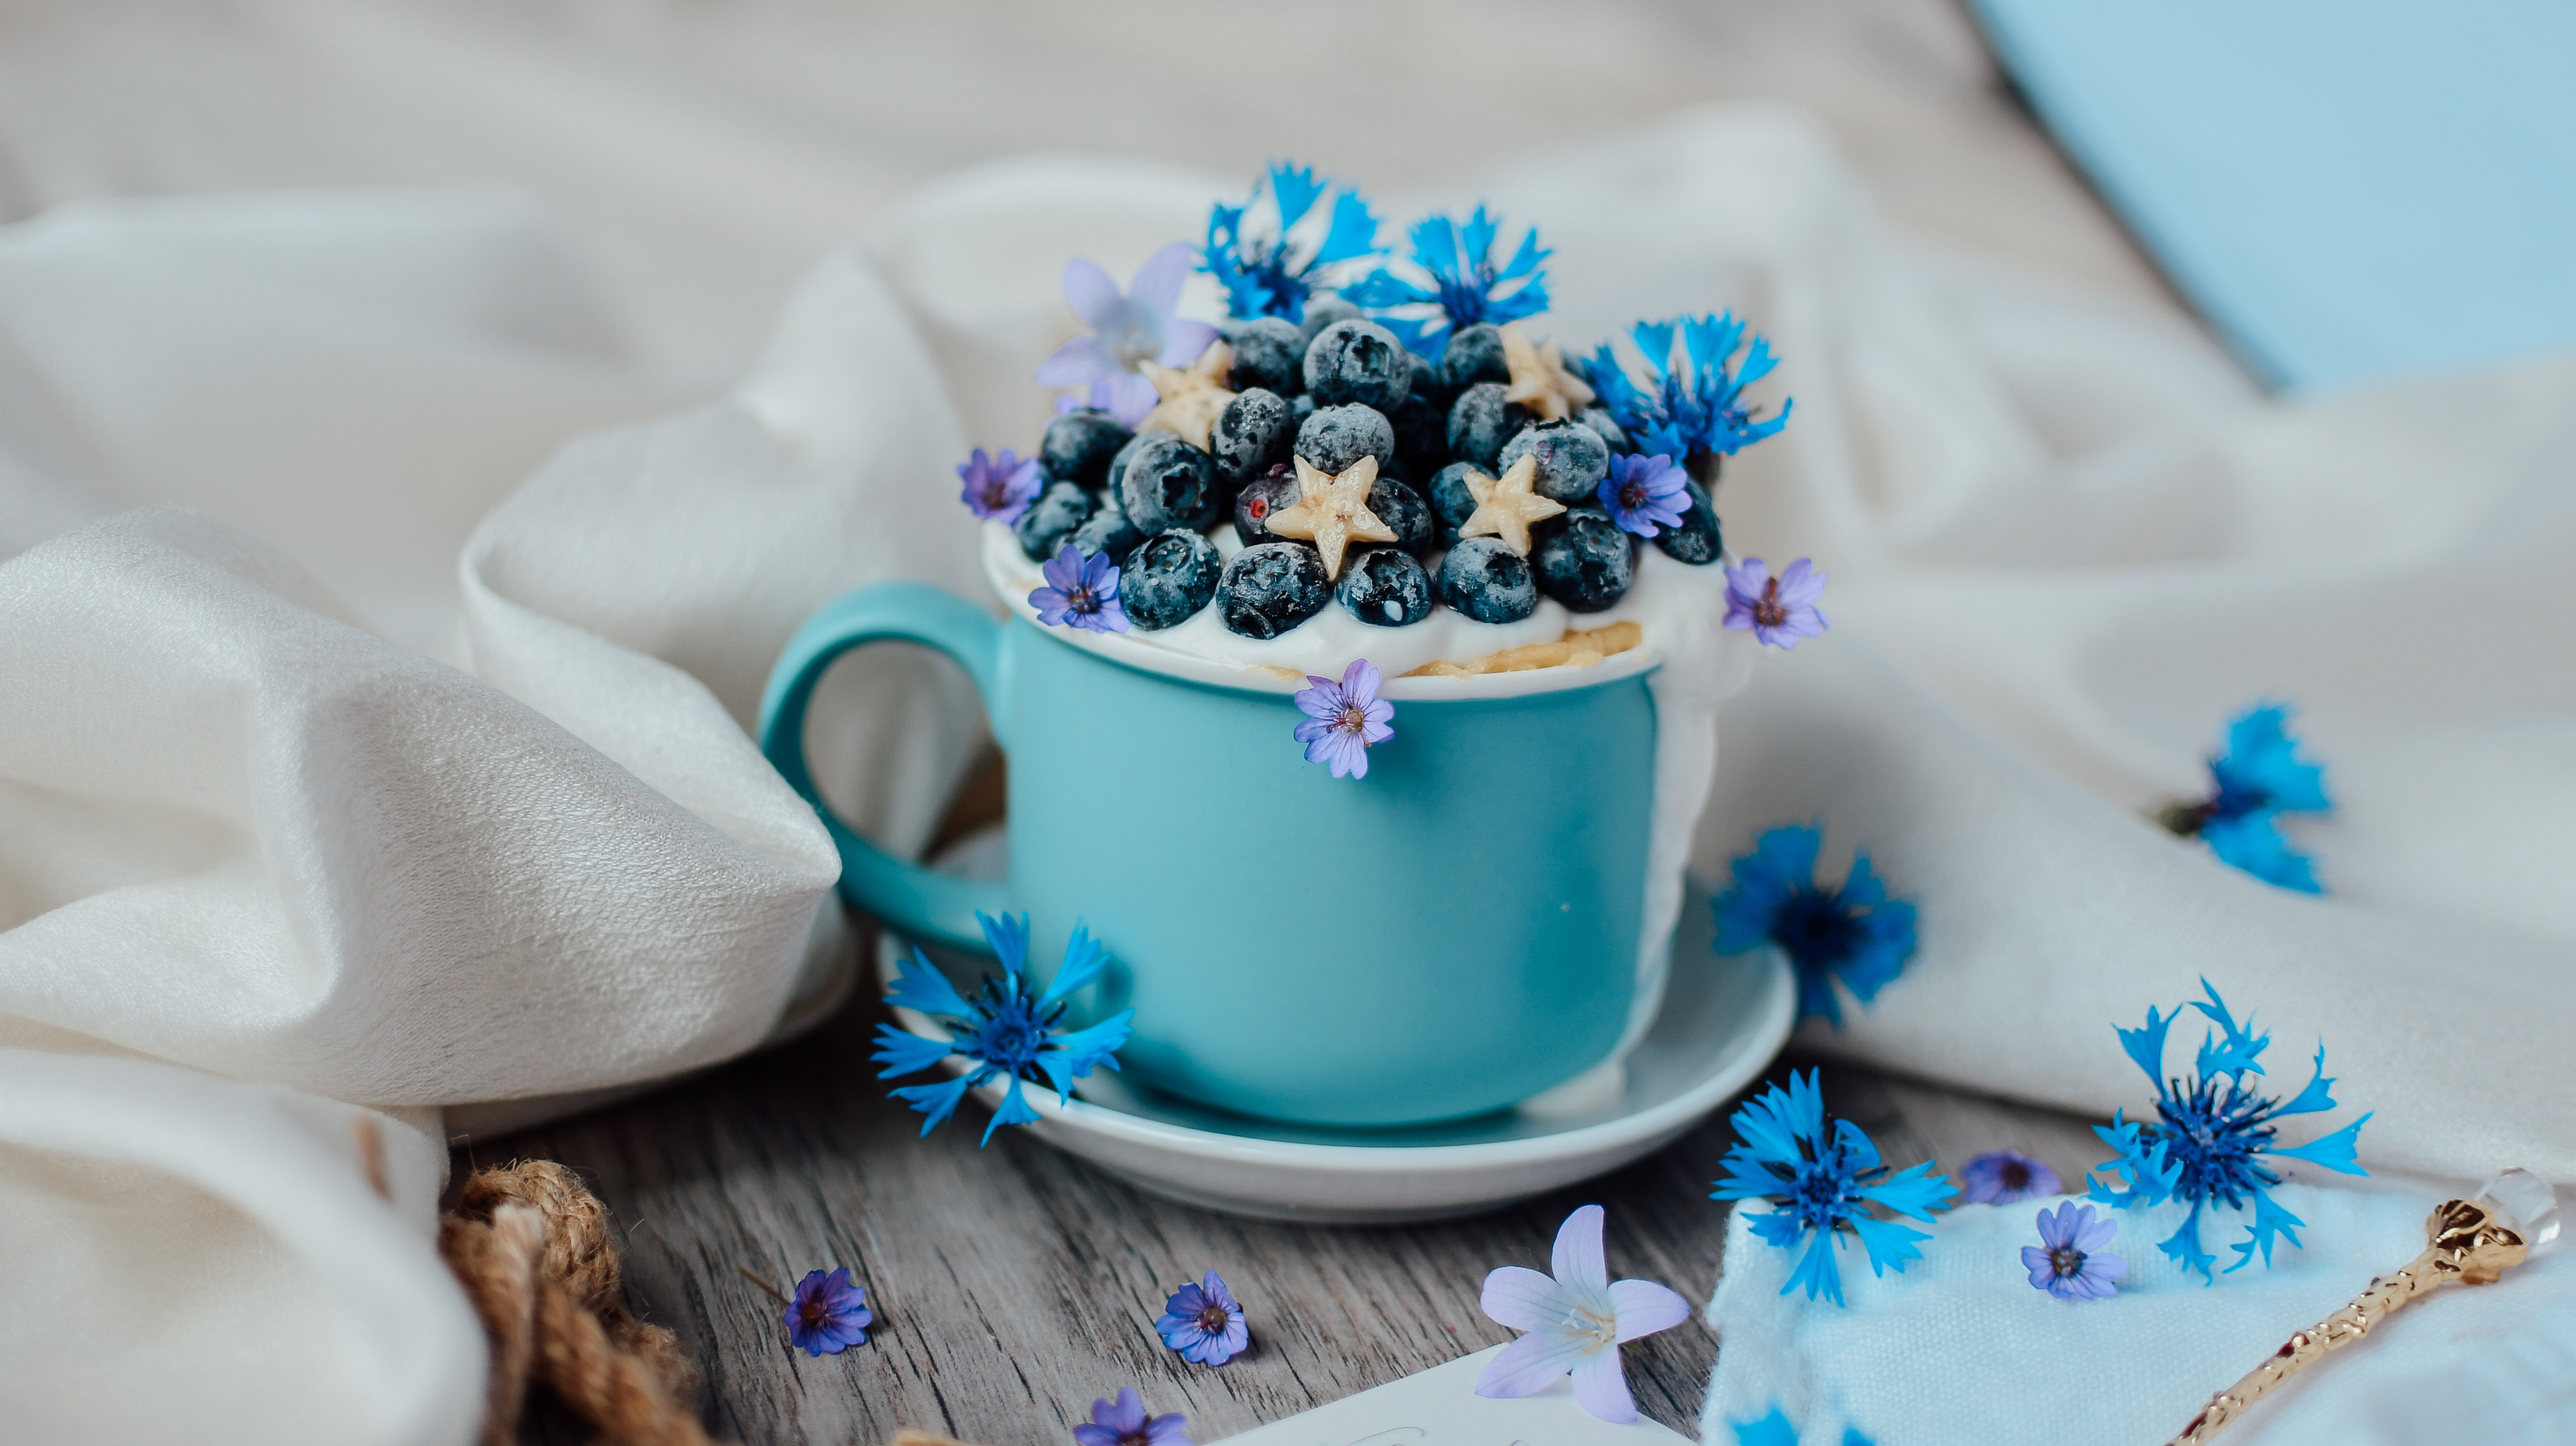
Are you looking for a quick and delicious recipe? Then this might be for you! A tasty protein blueberry mugcake with fresh blueberries, almond butter and greek yoghurt.
So many people have the misconception that protein food doesn’t taste good. I can promise you this recipe will make you think otherwise. I love it when I surprise myself with delicious creations like this one.
Protein Blueberry Mugcake
The fun thing about this recipe is that you simply put everything in a mug, stir and microwave it for a minute and voilà you have a delicious treat.
I actually made this recipe for mothers day this May. I surprised her with breakfast in bed and this mug cake was the absolute highlight!
Ingredients
For this blueberry mug cake you need only a few basic ingredients. The only „special“ ingredient you need for this mug cake is coconut and almond flour. But in my opinion these two great flour substitutes should be part of every fitness kitchen anyways.
Decoration
This mug cake by the way works with all kind of fruit. You can use strawberries, raspberries, peach, kiwi or mango to decorate it. For this special recipe I picked corn flowers from the field as they match the blue color of the blueberries perfectly. Flowers simply always pimp your recipe decoration. If you look very closely you can also see the little stars I cut out of bananas. If you have little cookie cutters that is a great way to add some eye-catcher effect.
I really hope you will try this recipe, as it is definitely one of my favorites. 🙂
Mix all the ingredients for the mug cake together and put it in the microwave for 1.5 minutes. Put some more yoghurt on top and decorate with blueberries, almond butter and flowers.
carinaberry.com https://carinaberry.com/
Did you make this recipe?
Tag #carinaberry and get the possibility for a shoutout on my Instagram!
Mai ist Hollunderblüten Zeit. Jedes Jahr freue ich mich so sehr wenn überall in der Natur die herrlich duftenden Blumen zu finden sind. Ich liebe Holler, da er einfach so unglaublich vielseitig einsetzbar ist, total biologisch aus dem Garten und saisonal noch dazu – keine langen Transportwege, einfach vom Strauch in meine Küche.
Mit den derzeitigen Blüten könnt ihr so viele leckere Rezepte zaubern. In diesem Blogpost habe ich euch einmal meine zwei MUST MAKE Rezepte zusammengefasst. Diese zwei Rezepte mache ich wirklich ausnahmslos jedes Jahr.
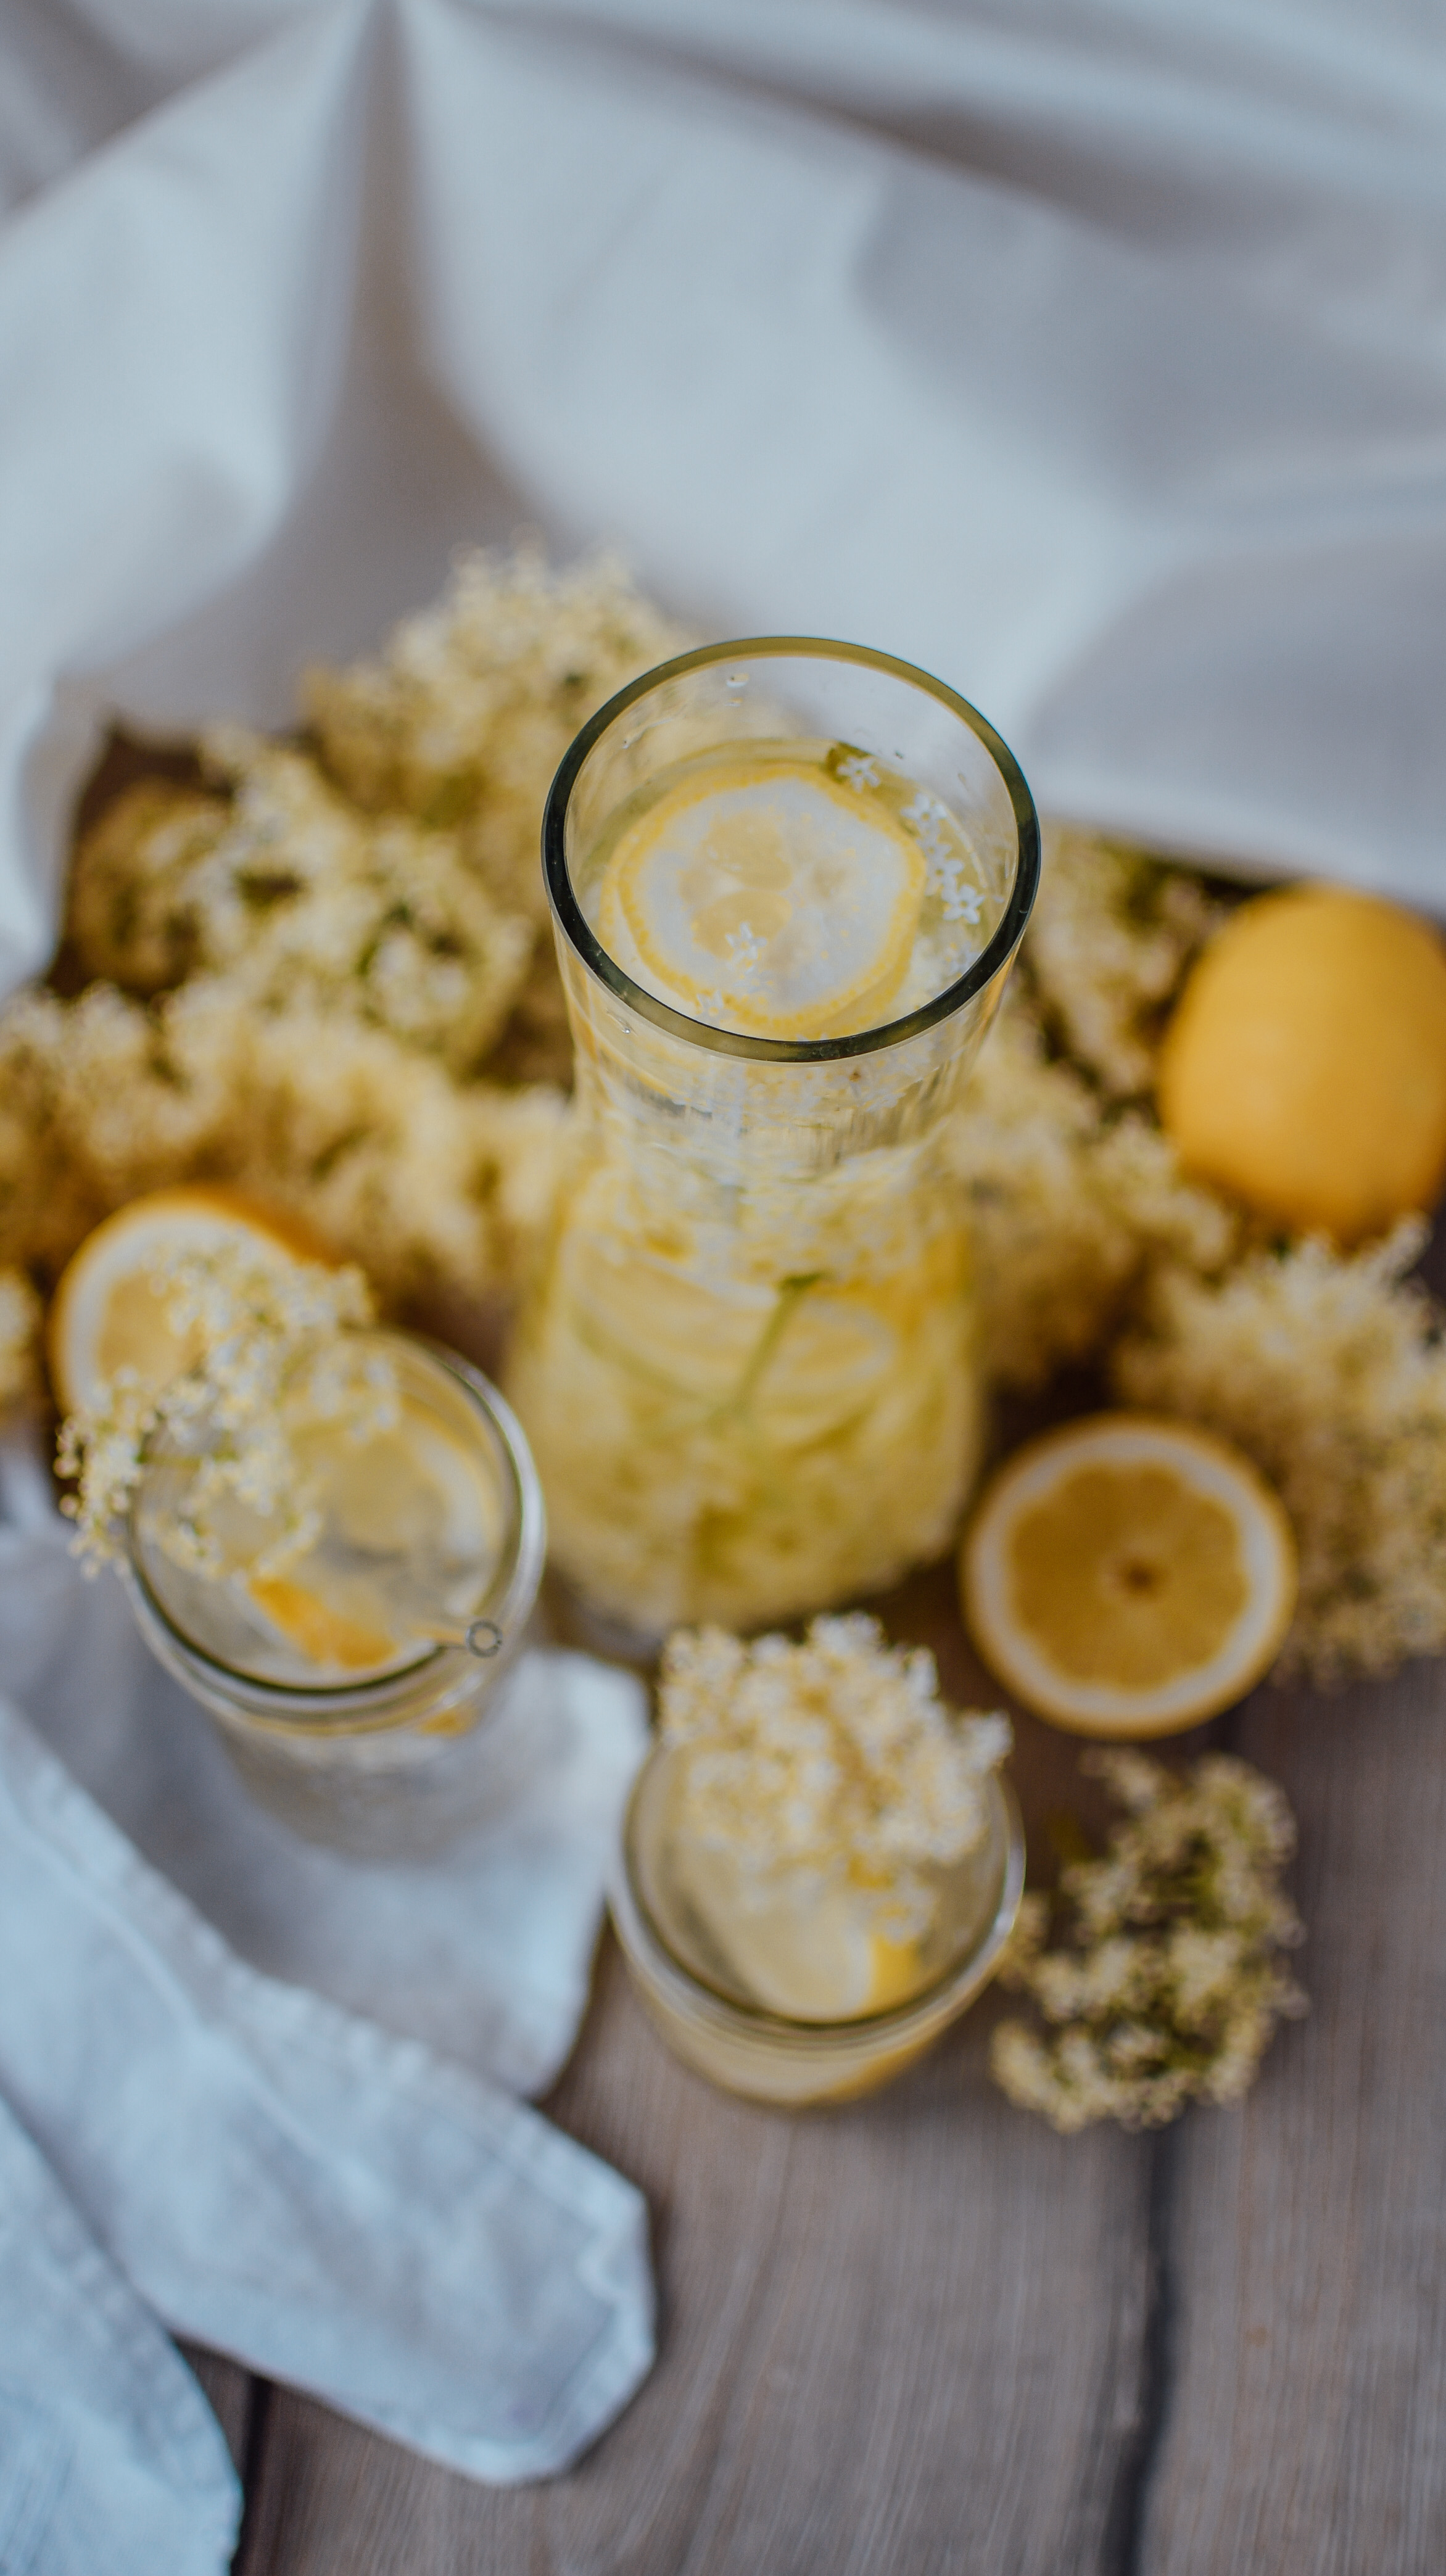
Holler Detox Water
Ich bin mir sicher ihr kennt alle Hollundersirup. Super lecker oder? Leider hat das total viel Zucker. Ich mache mir lieber Detox Wasser damit – völlig ohne Süßungsmittel.
Hollunderblüten sind die Basis und dann könnt ihr entweder Erdbeeren, Zitronen, Basilikum oder Gurken noch hineinschneiden. Je nach eurem Lieblingsgeschmack. Ich verwende einfach gerne Zitronen da diese entschlacken und entgiften. Da ich ja gerade eine Heilfastenkur machen ist das natürlich im Moment perfekt für mich.
Hier das Rezept:
1 Liter Wasser
1 Zitrone in Scheiben geschnitten
5 Holunderblütendolden
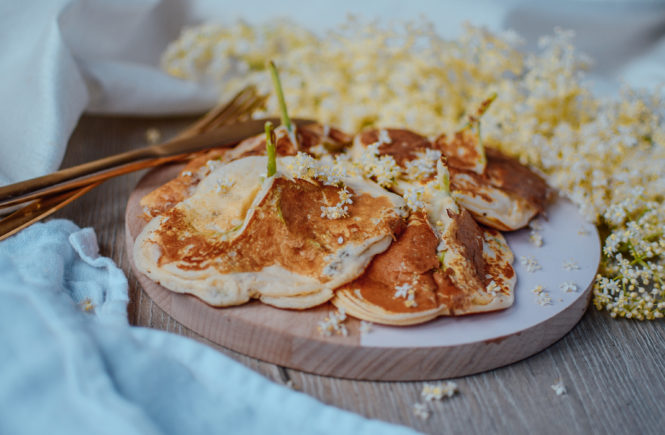
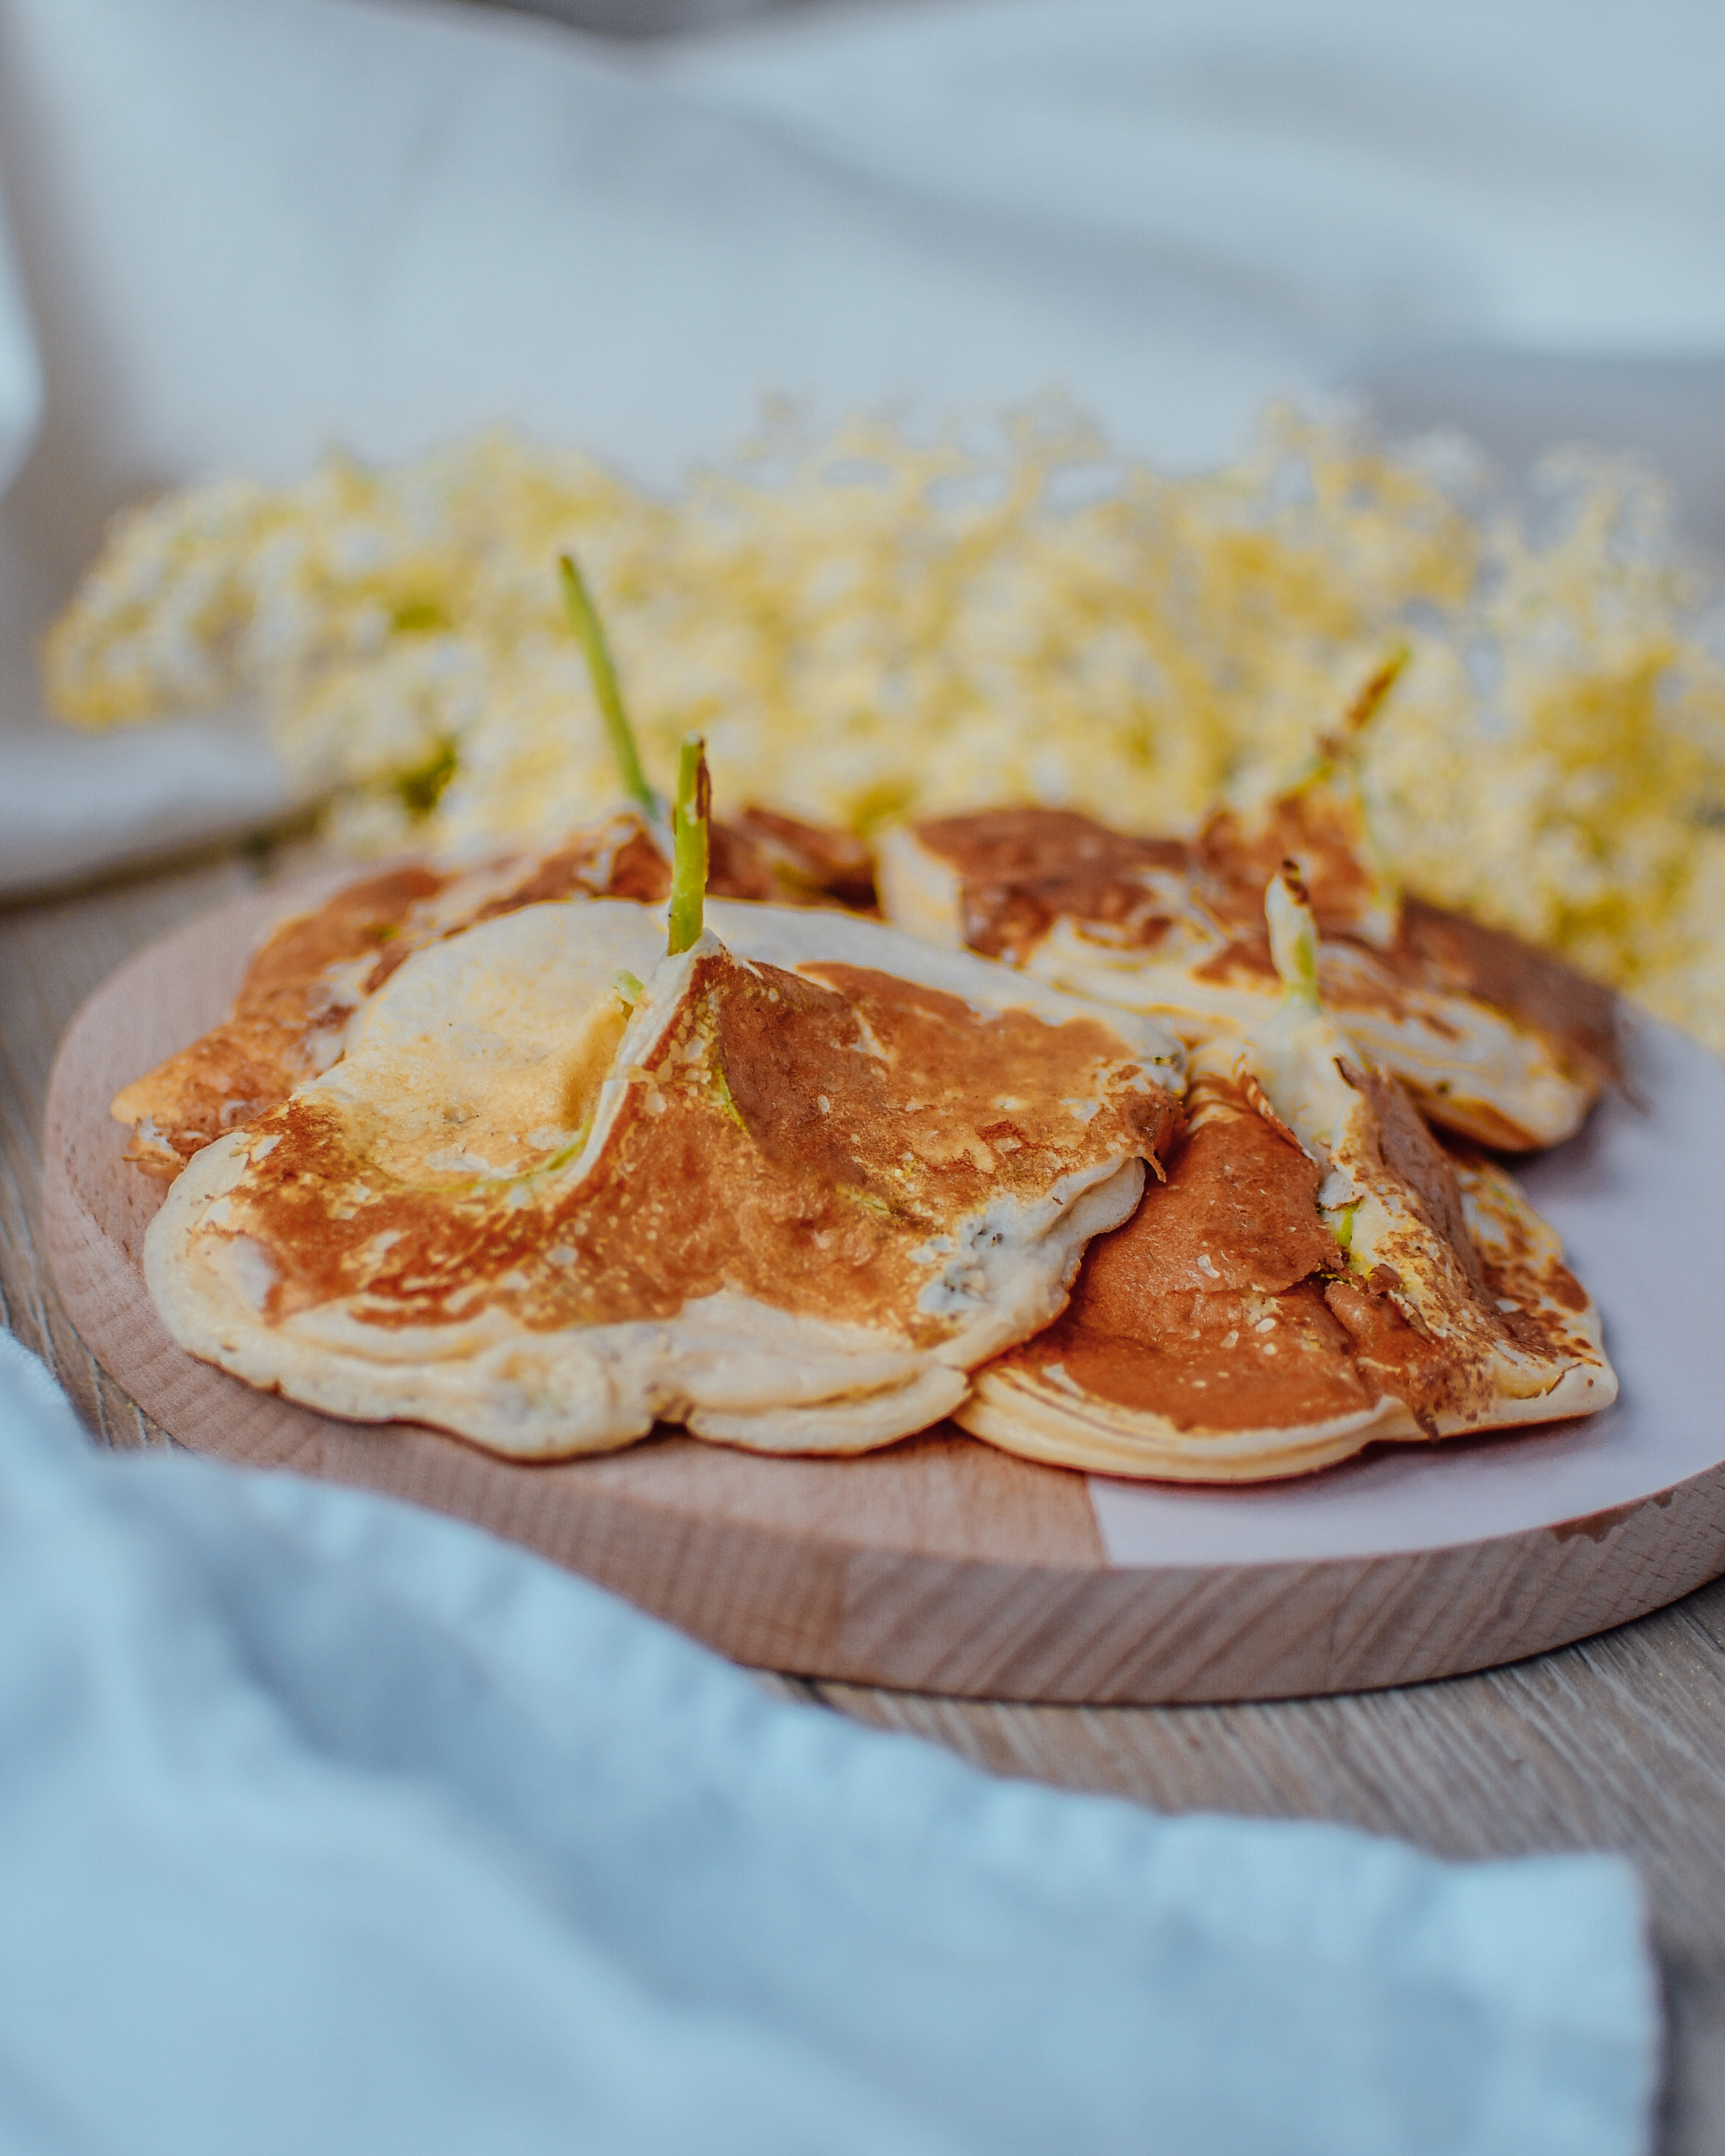
Hollunderblüten Pancakes
Dieses super einfache Rezept ist mein absoluter Geheimtip! Ich mache es gerade total oft für meine Familie. Ihr könnt hier natürlich normalen Pfannkuchenteig verwenden, aber ich habe hier einfach mein Protein Pancake Rezept benutzt da dies einfach bessere Nährwerte hat!
Für dieses Rezept nehmt ihr einfach euer Lieblingspfannkuchenrezept als Basis. Schneidet circa 10 schöne, große Holunderblütendolden ab. Vorsichtig schauen, ob sie sauber sind. Sobald ihr den Teig fertig habt könnt ihr einfach die Hollunderblütendolden in den Teig tauchen bis sie rundum mit Teig umgeben sind. Dann einfach in der Pfanne auf beiden Seiten herausbacken.
Ich liebe den einzigartigen Geschmack der Hollunderblüten in den Pancakes. Als Alternative könnt ihr auch normale Pancakes machen und dann eine Joghurtsoße machen in welche ihr nur die Blüten hineinmischt.
Ich hoffe euch haben diese zwei Rezepte gefallen und ihr probiert sie aus solange es draußen diese herrlichen Blüten noch gibt.
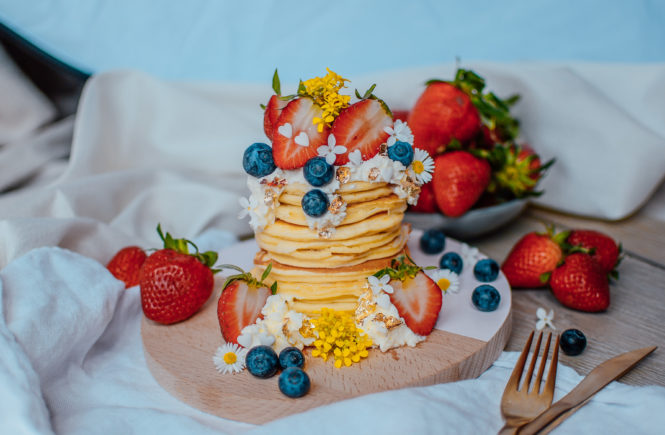
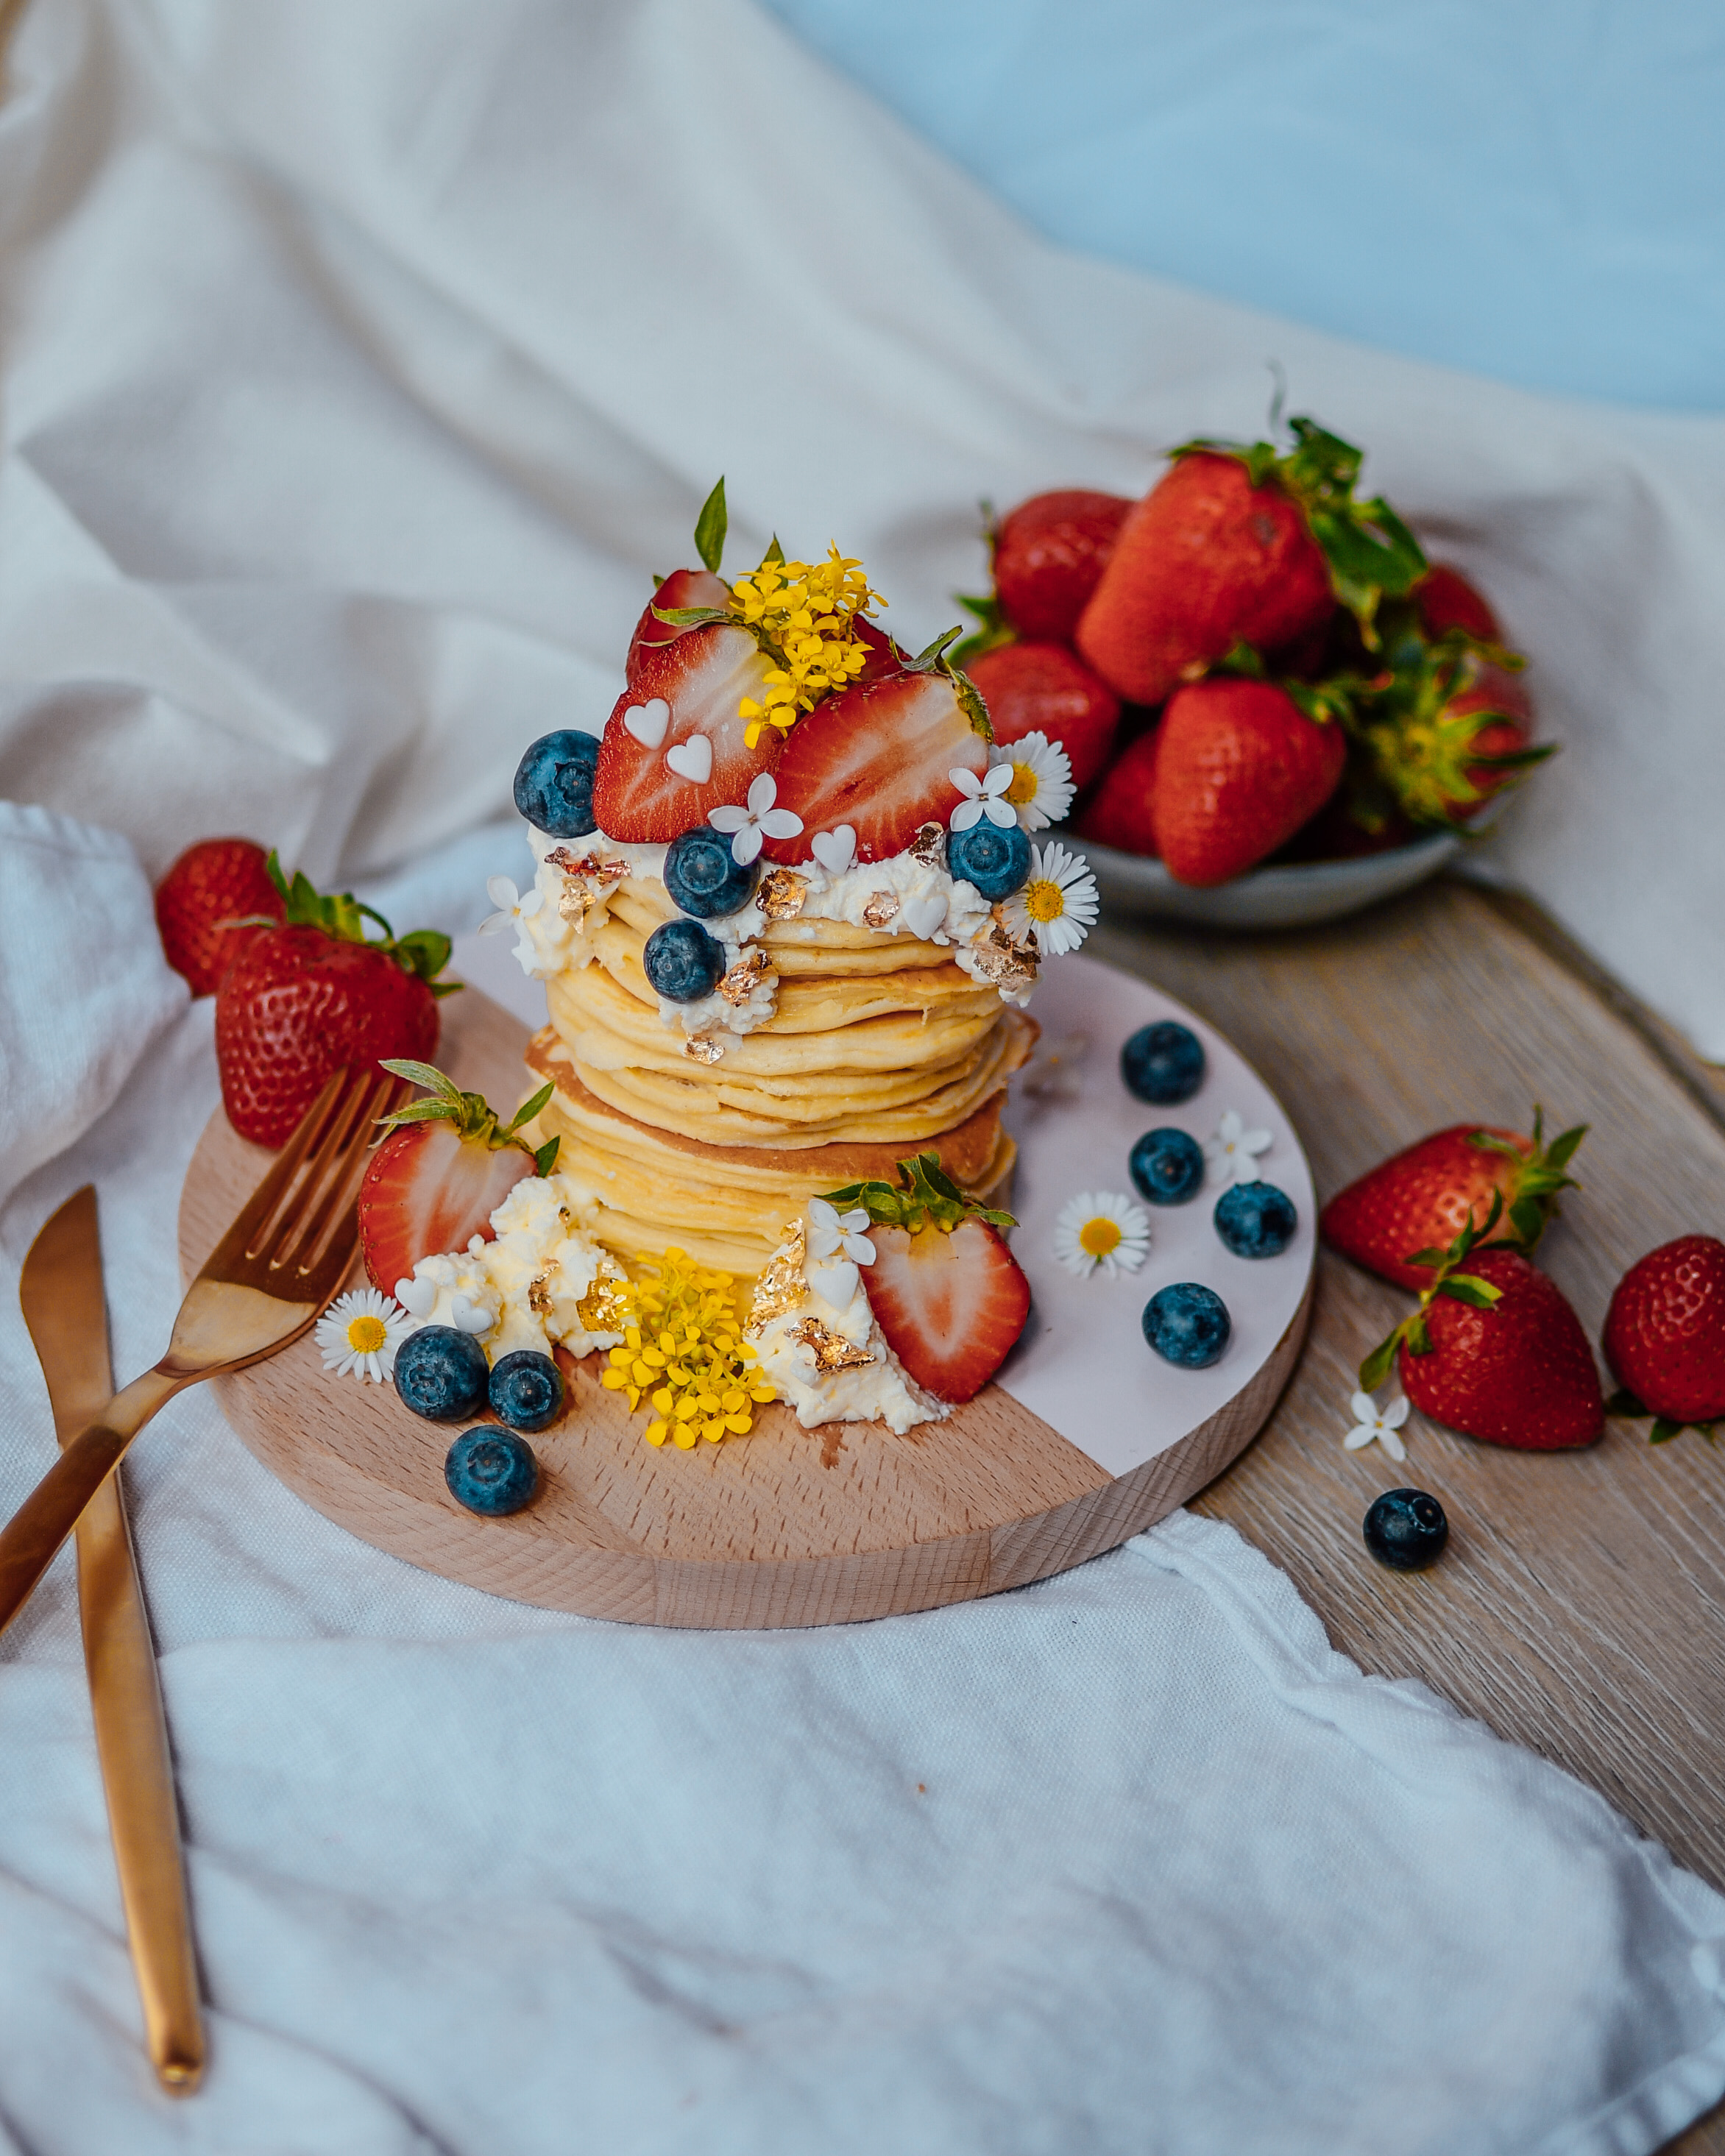
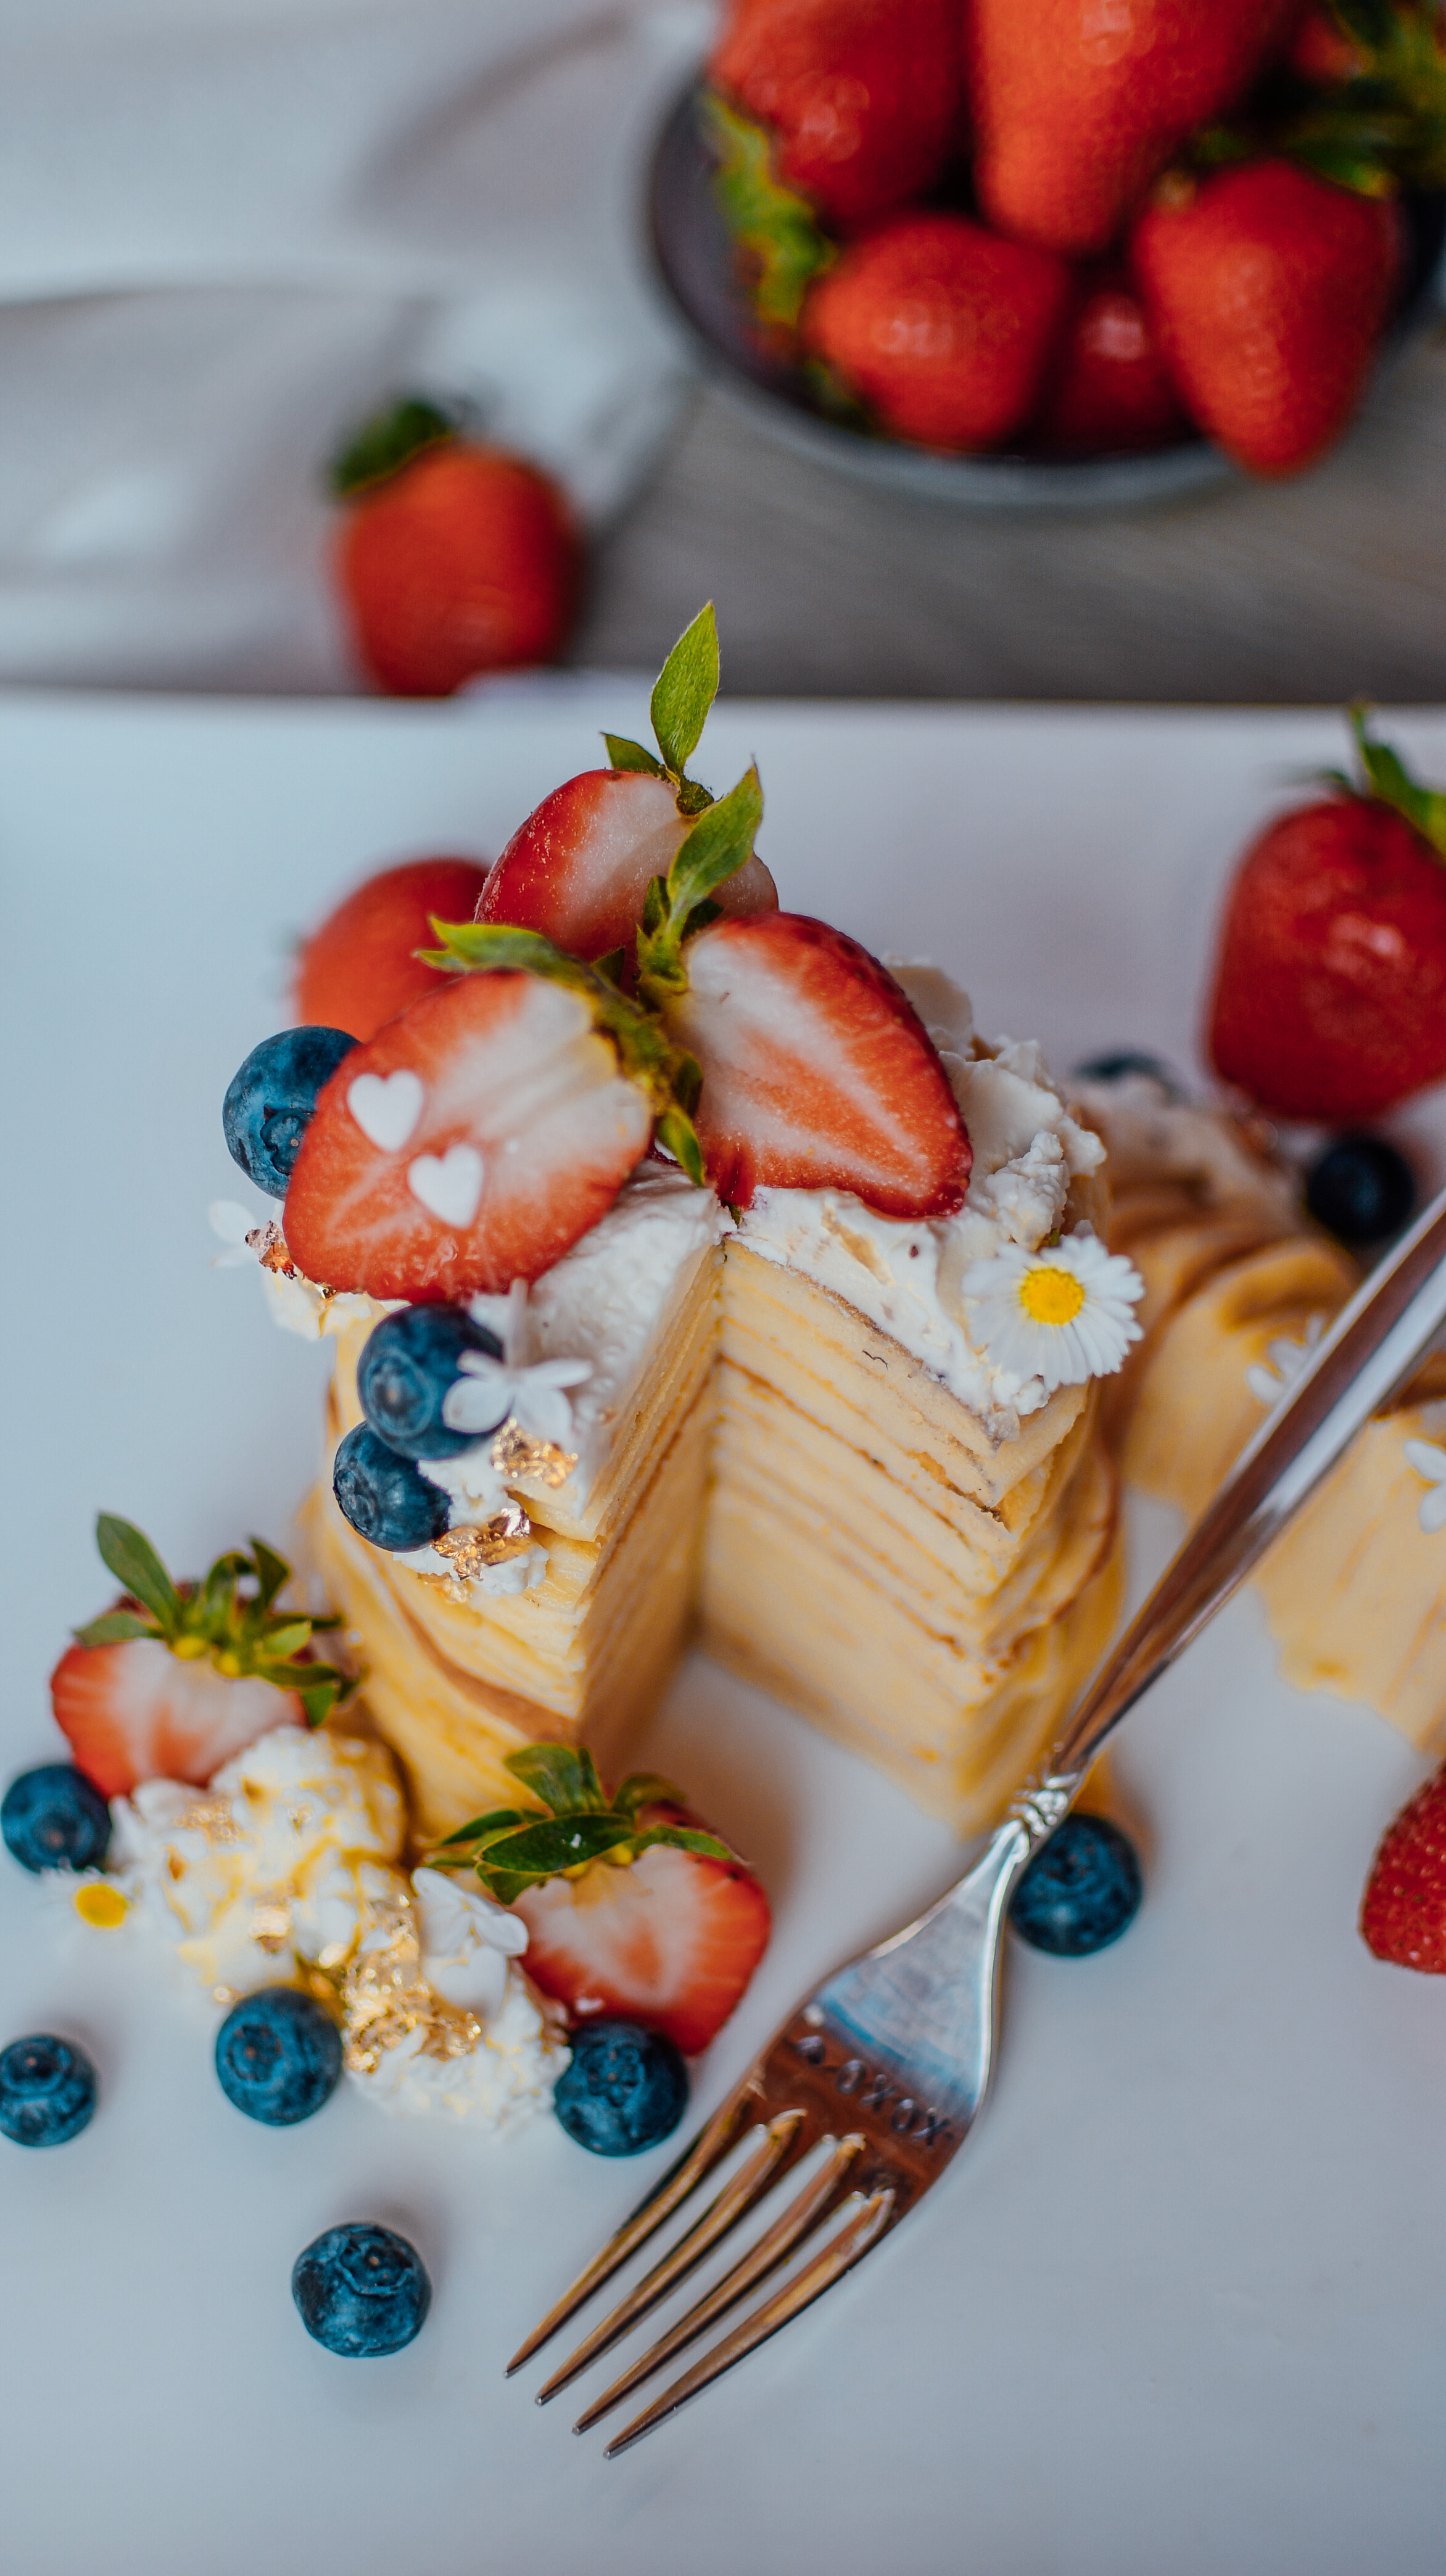
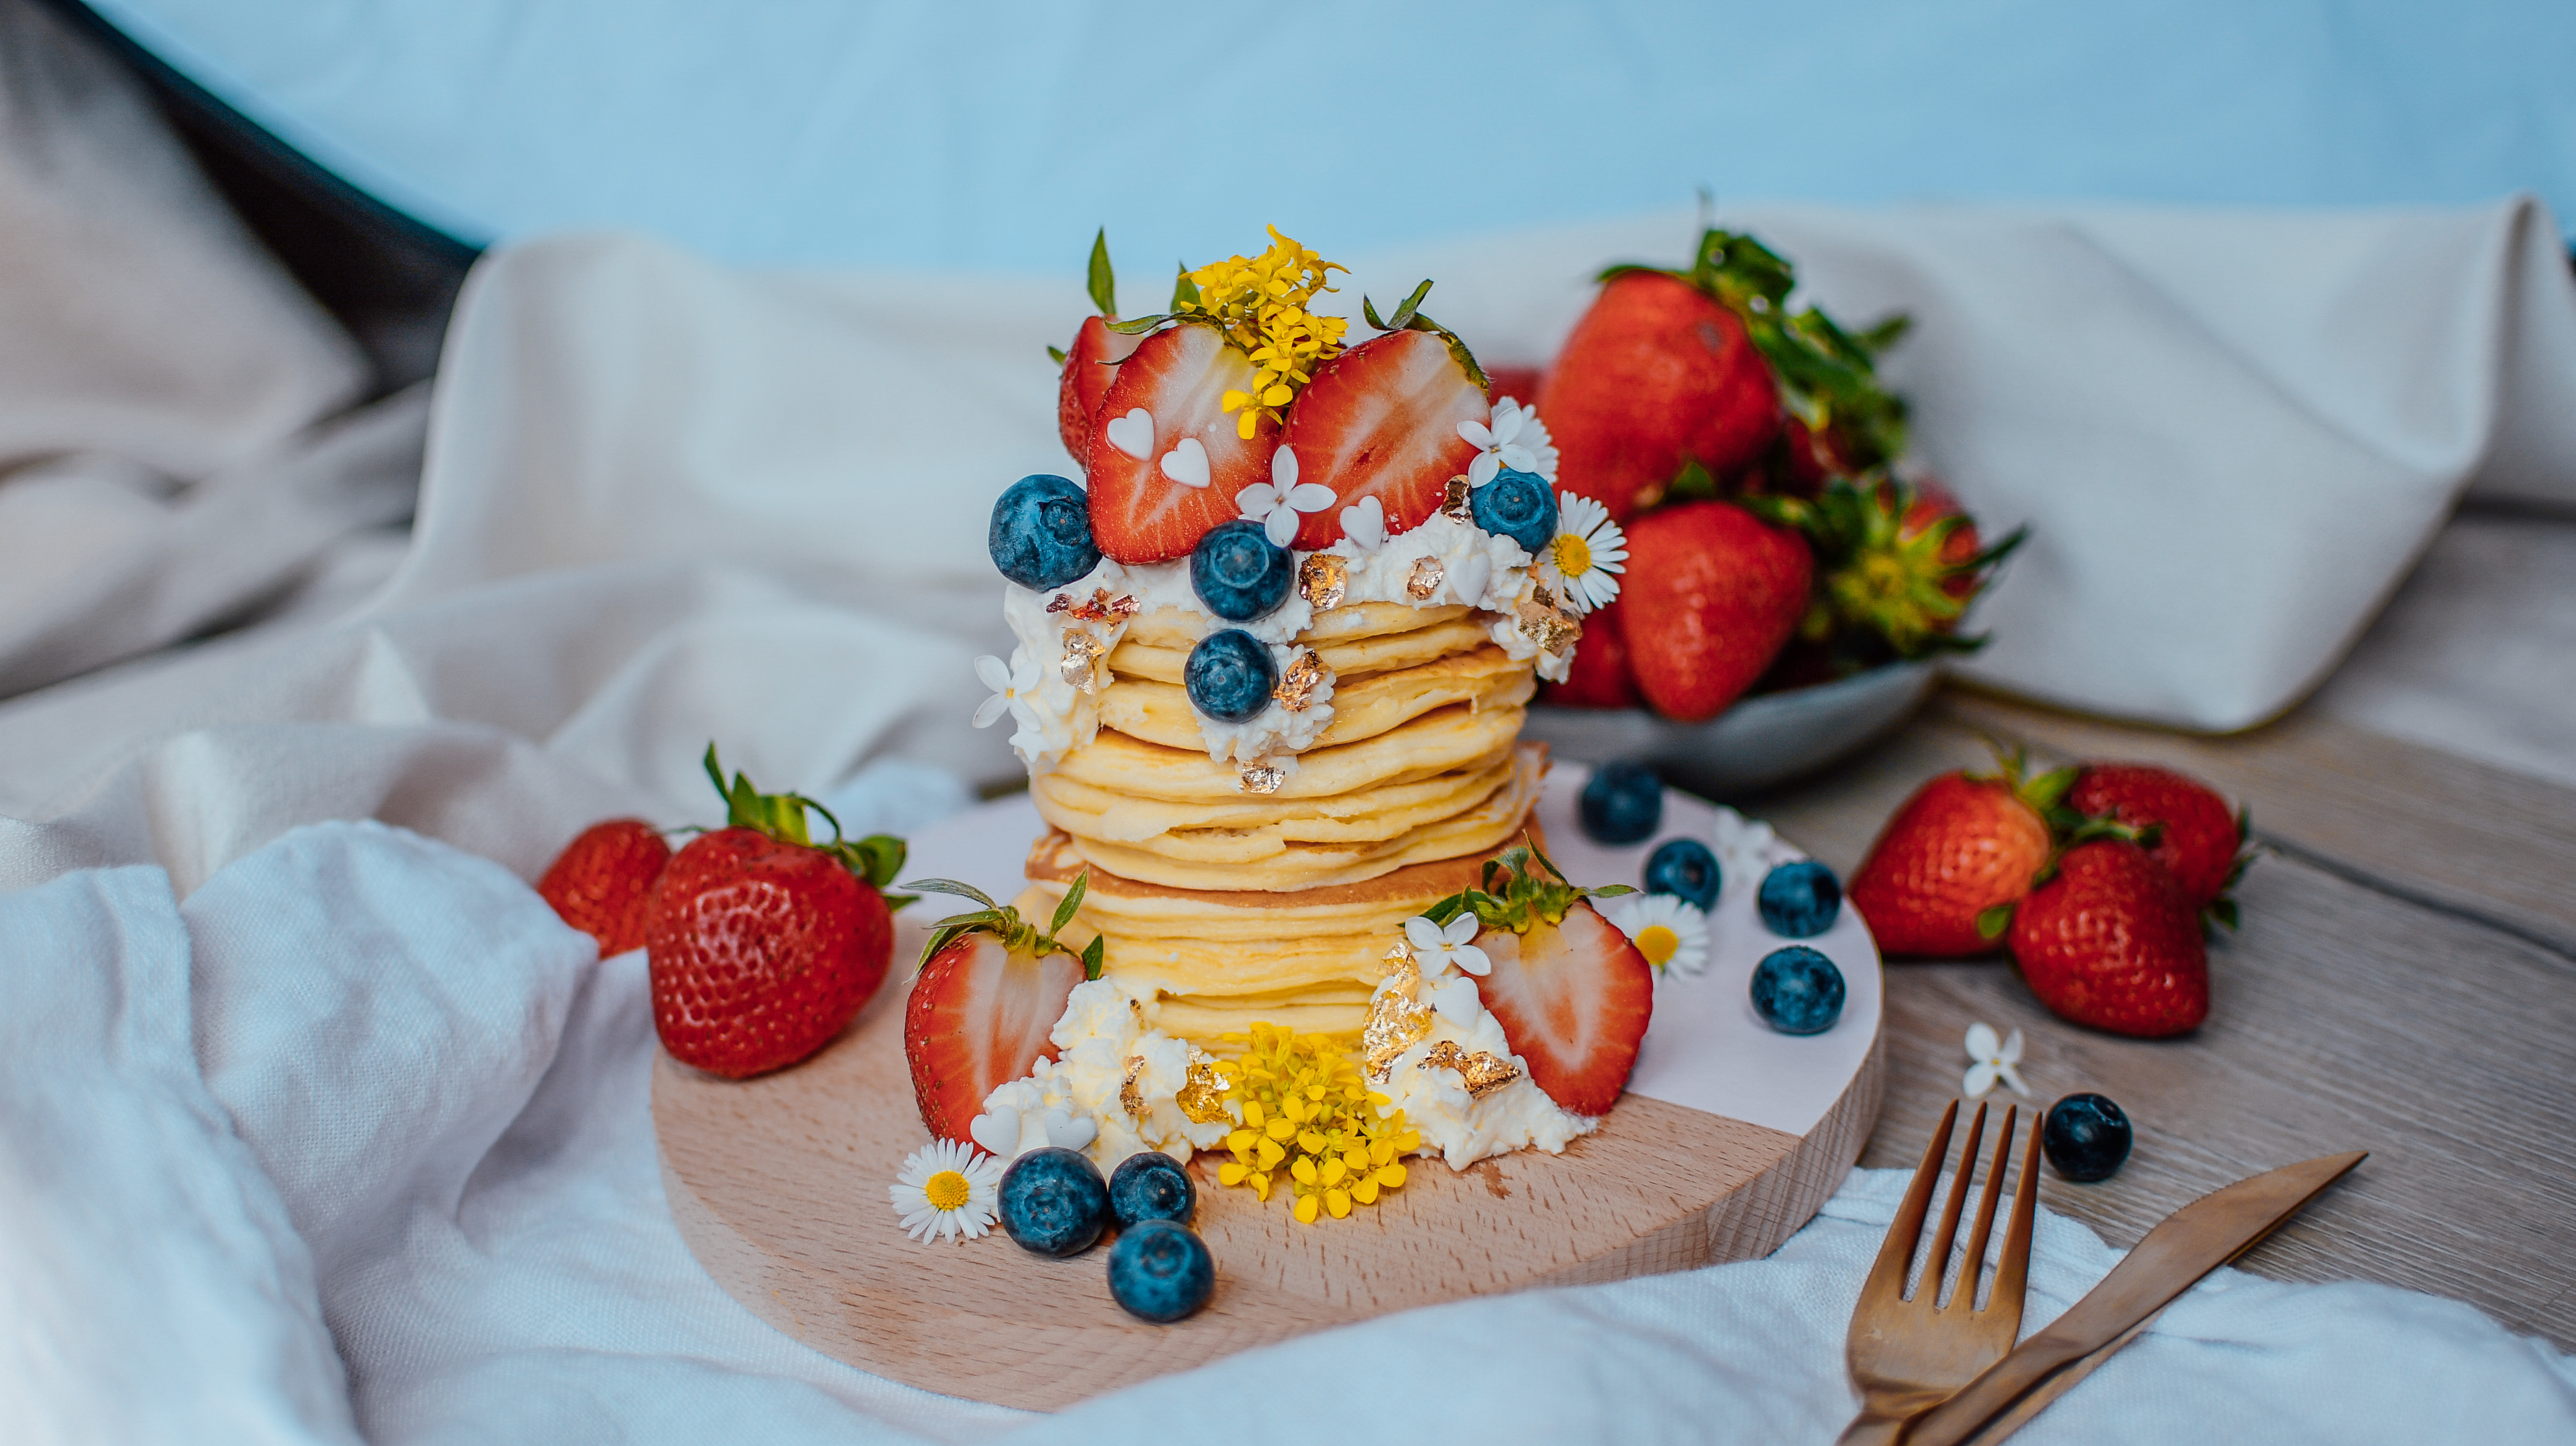
Protein Pancakes – what a delicious way to start the day!
Skip the flour, sugar and butter and replace it with an extra dose of healthy protein. I use this recipe so many times for weekend brunches and birthday pancake morning surprises. No matter what the occasion these protein pancakes will always make an impression and will let you enjoy a guilt-free breakfast!
What most people don’t know that you can actually use whey protein powder for cooking and baking! I make the most wonderful recipes with it. You leave out the high calorie flour and replace it with protein powder. Perfect for protein pancakes!
A little pancake making secret
Like most of my recipes it is very easy to make as you are basically just throwing things together in a bowl and blending it until you have a smooth dough. My one and only most important tip for you guys is to make SMALL pancakes! As the dough is simply not as strong and dense as a normal pancake dough you need to be more careful when flipping them. Making big pancakes will not work. The smaller the better 😉 I can also recommend using an empty ketchup bottle. Fill the dough inside the bottle and like this you can make perfectly round pancakes.
Choosing your toppings
Regarding topping you can use everything your hearth desires. I like to mix greek yoghurt with a bit more protein powder and top it with fresh berries. For the berry pancakes in this blogpost I also used sugar free strawberry jam and white almond butter for topping. This obviously adds extra calories, but also makes it extra tasty 😀
The recipe
Now lets not keep you waiting for much longer. Here is the recipe:
Blend the banana with the greek yoghurt and the egg yolks until smooth. Stir in the remaining ingredients. Now fold in the egg whites until well combined.
Heat up a pan and fry little pancakes until golden brown.
Mix the greek yoghurt for the topping with the protein powder and top the pancakes with it.
Decorate with fresh berries, almond butter and sugar free raspberry jam.
Notes
Make sure to make small pancakes. It is easier to flip them.
carinaberry.com https://carinaberry.com/
Did you make this recipe?
Tag #carinaberry and get the possibility for a shoutout on my Instagram!
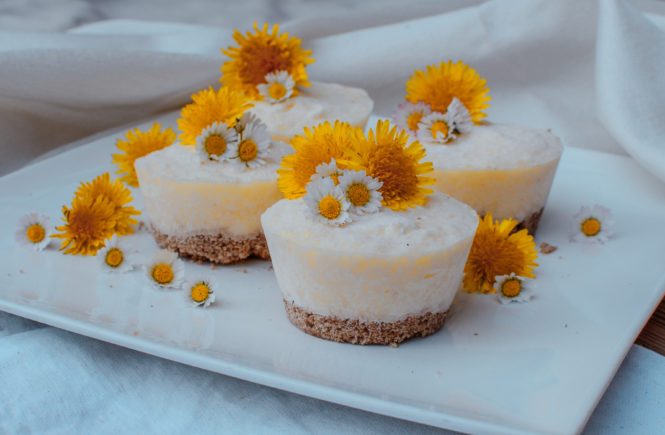
Ready for the summer? You definitely will be with these delicious pineapple mousse cups.
This is really the perfect cold ice cream treat for the sunny season. 🙂
Why I love pineapple mousse cups
What I love about this recipe, just like most of the ones I make, is how easy and fast you have a super tasty treat. It won’t take you a long time to prepare this dish and the results are really great.
This was actually the first recipe where I tried making coconut whip cream. I have seen it all over Instagram and finally wanted to try it myself. I was so surprised that it really worked!
For this recipe you will also need 6 silicon molds. Make sure to grease them well so nothing will stick.
Lets not keep you waiting for much longer. Here is the recipe for you:
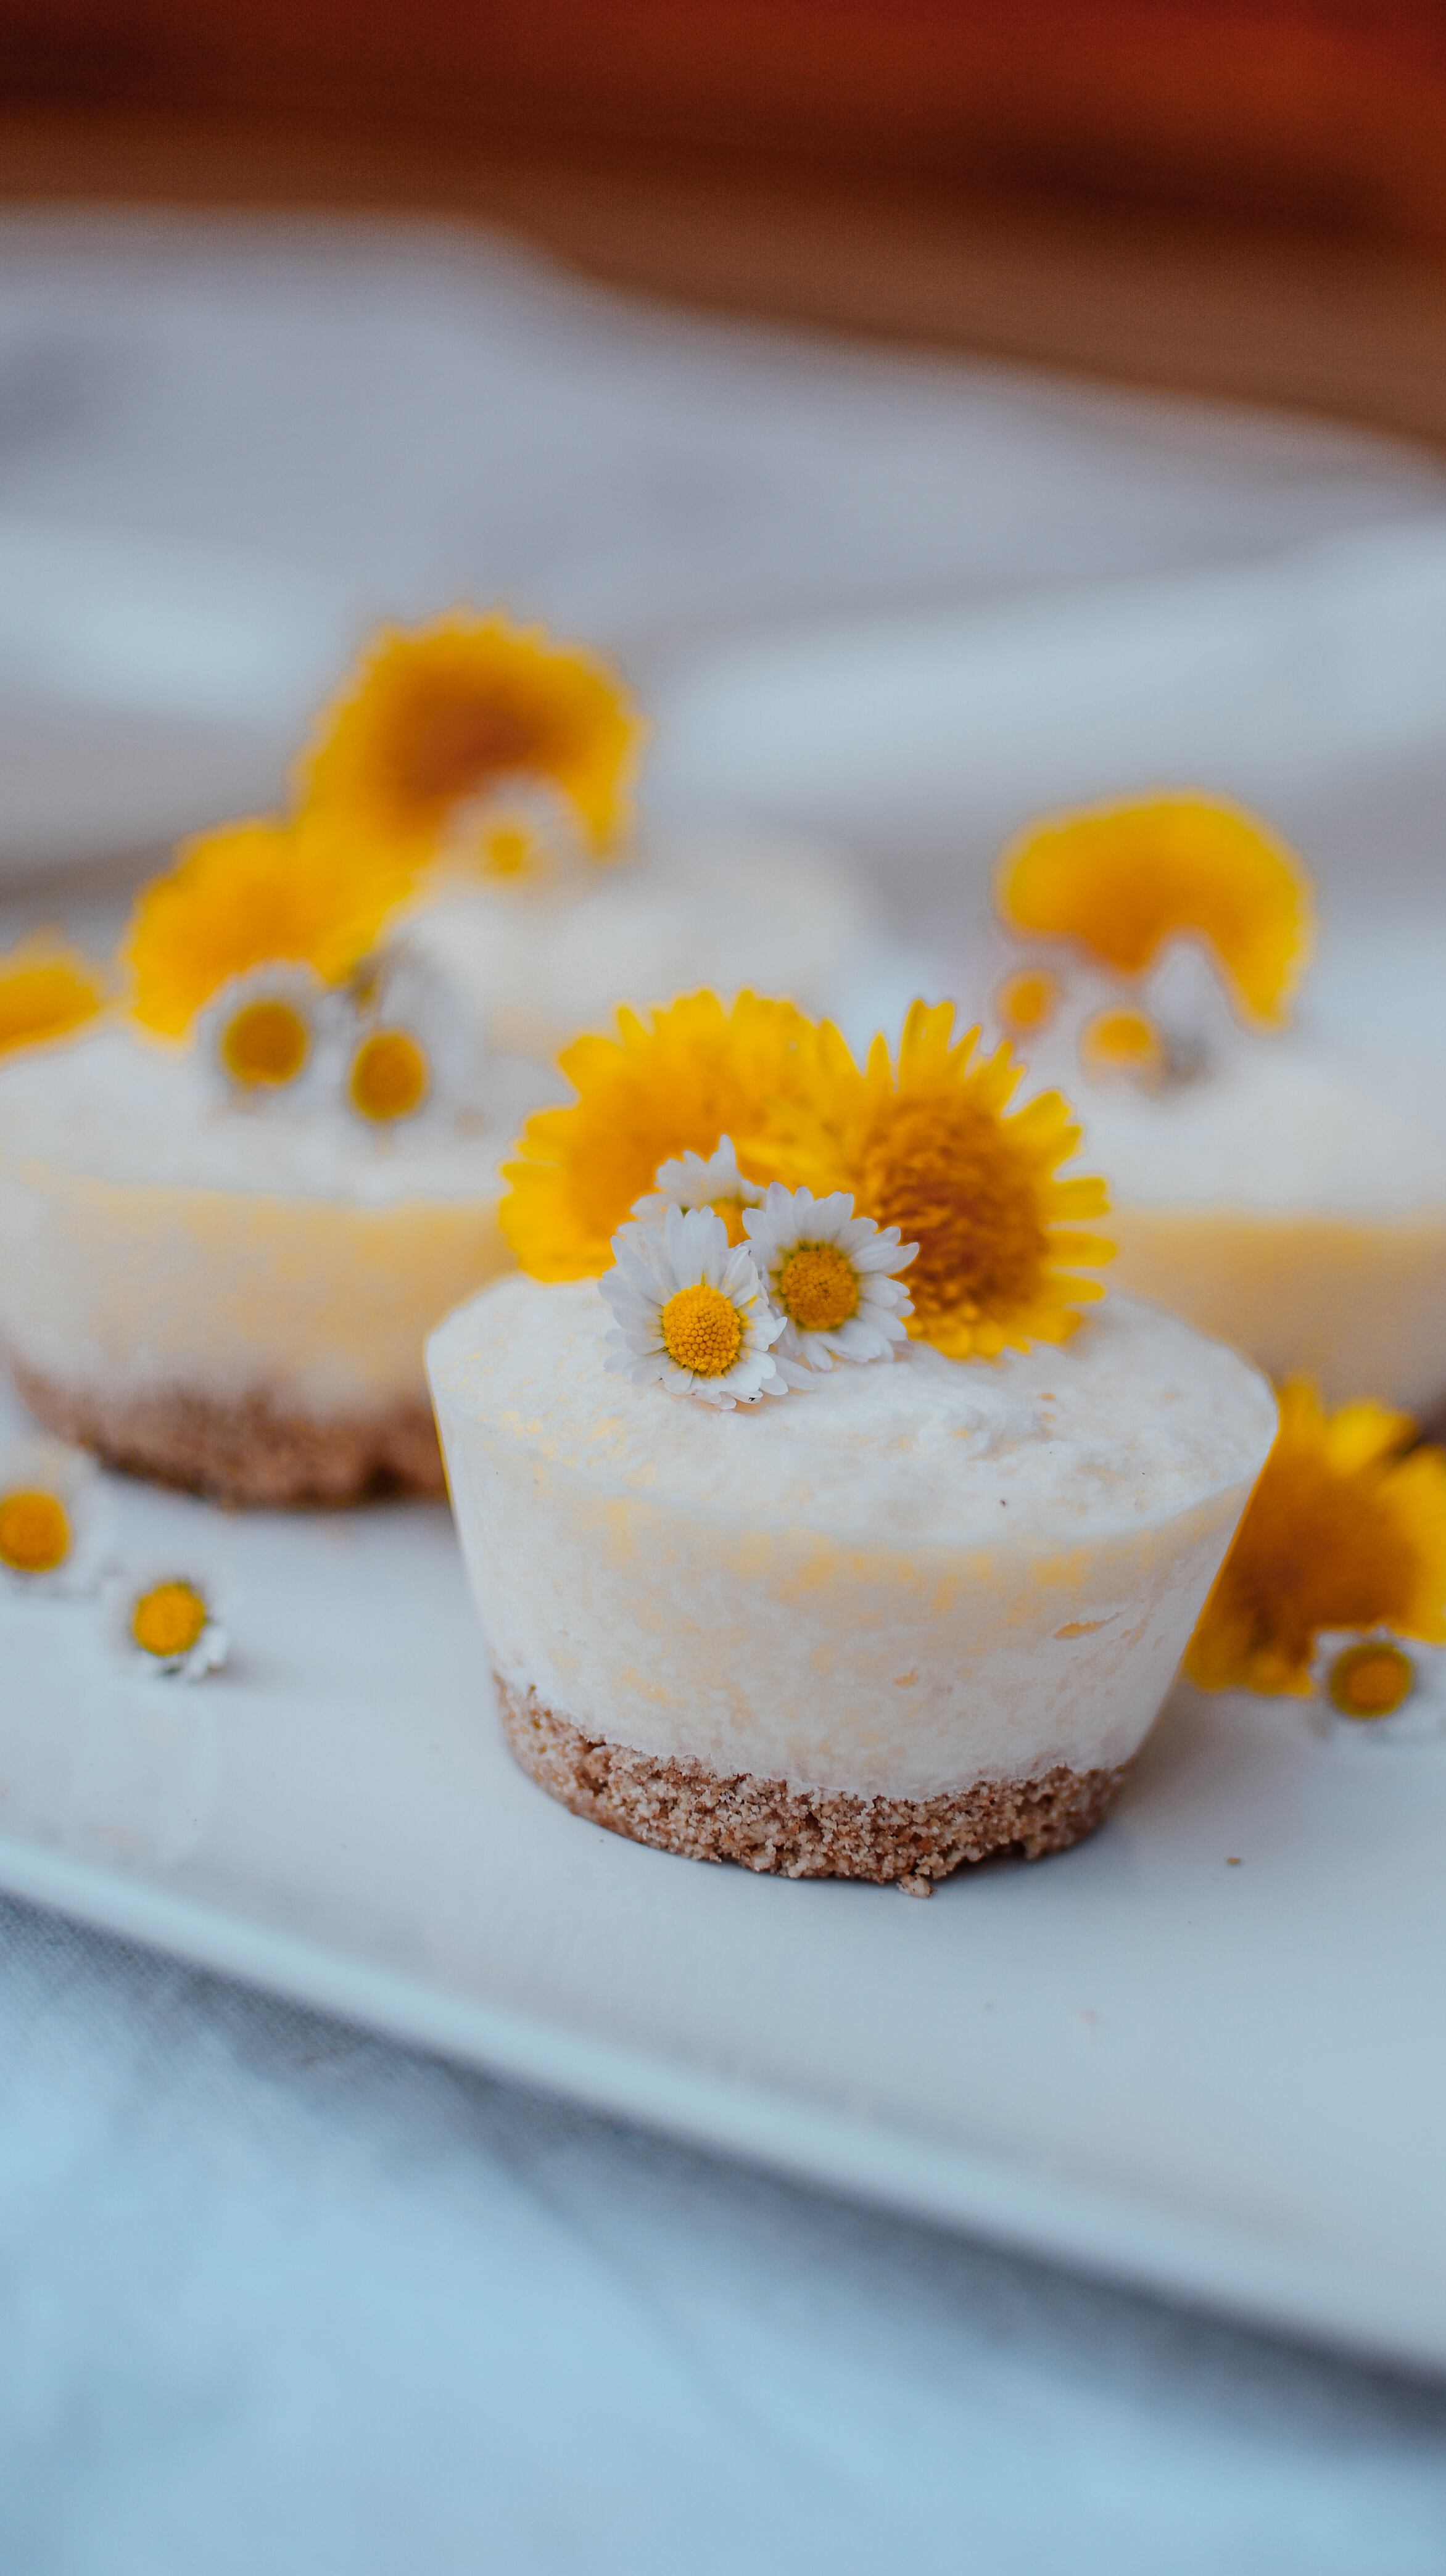
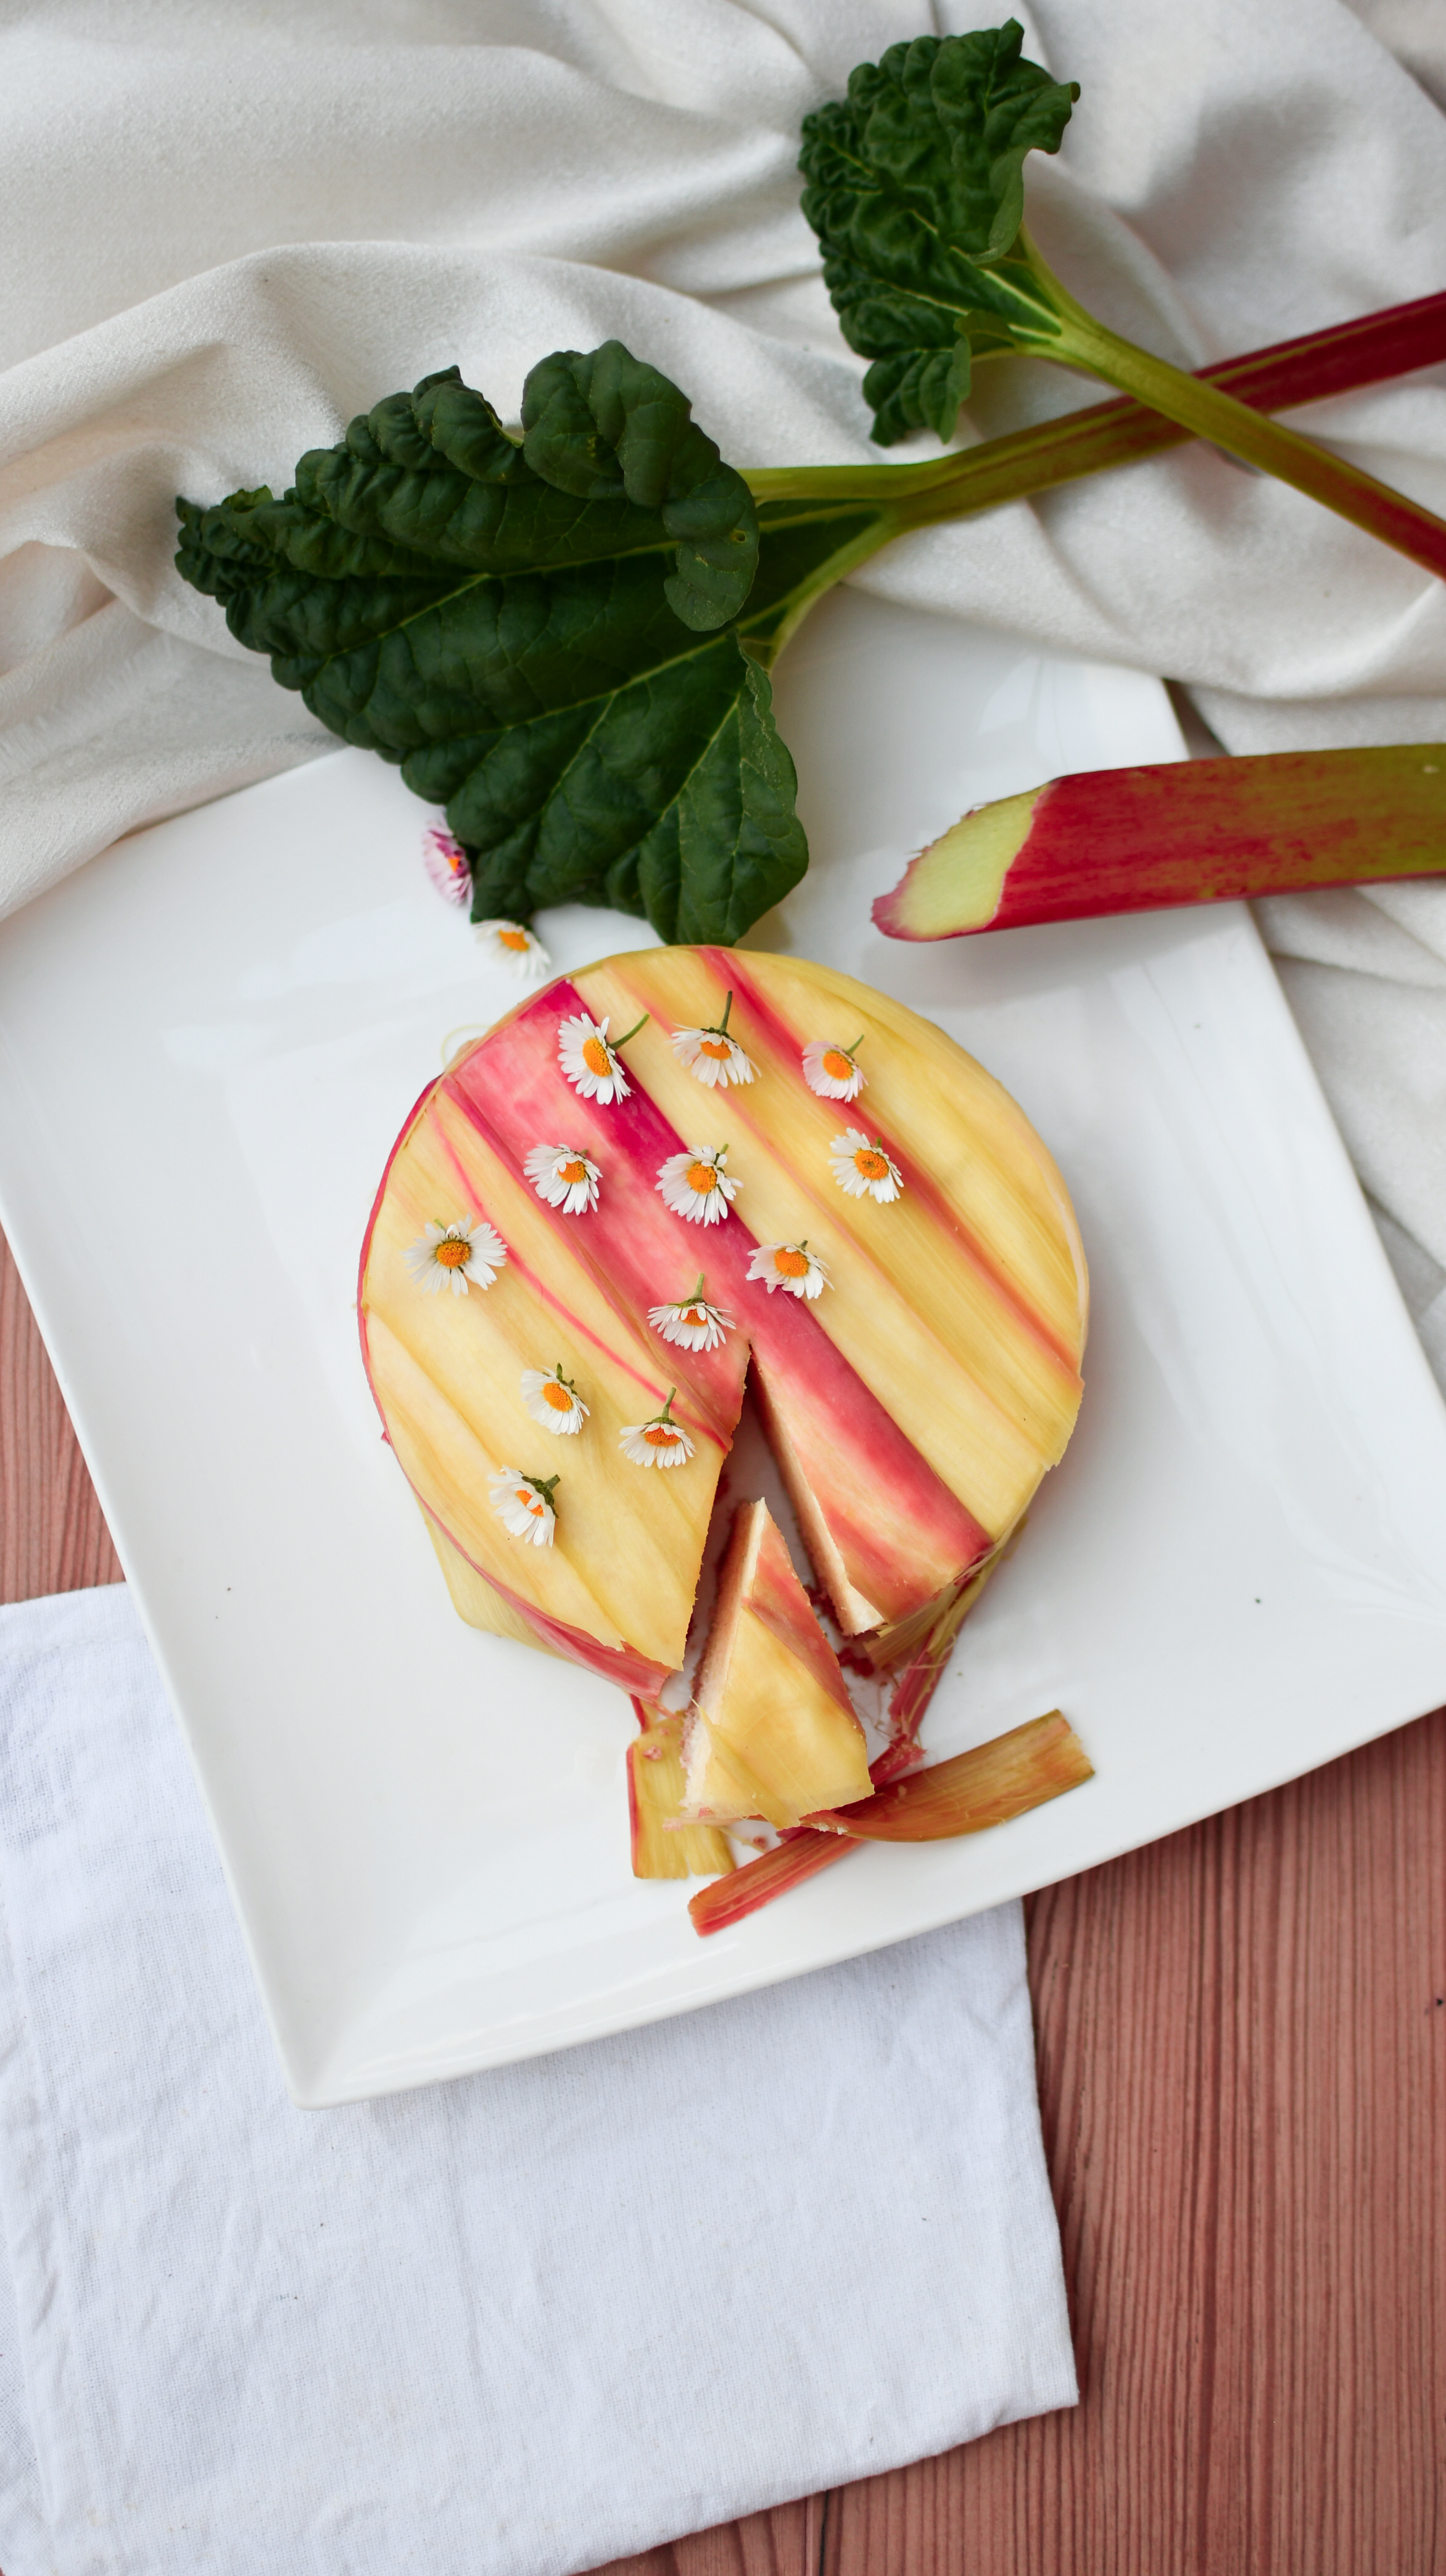
The first sunny days brightened up the country and summer is almost in sight. This week I discovered how fast the rhubarb in my garden had grown and was super motivated to create the first summer recipe of the season. That is why I am sharing a wonderful wrapped rhubarb cake recipe with you today!
I have a soft spot for rhubarb. It’s just like asparagus such a seasonal speciality. It barely has any calories and simply such a unique and awesome taste. I love that it grows right in my garden – fully organic.
I wanted to create something extremely special to celebrate the start into my favorite season of the year. Since I love rhubarb and also cheesecake I thought why not combine both of my addictions into one explosion of deliciousness and therefore created a wrapped rhubarb cheesecake.
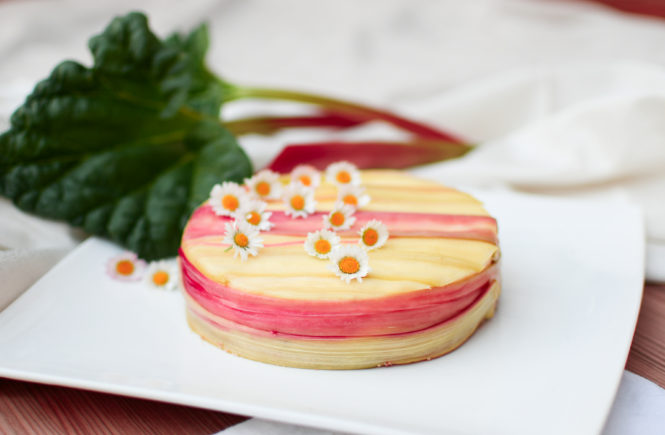
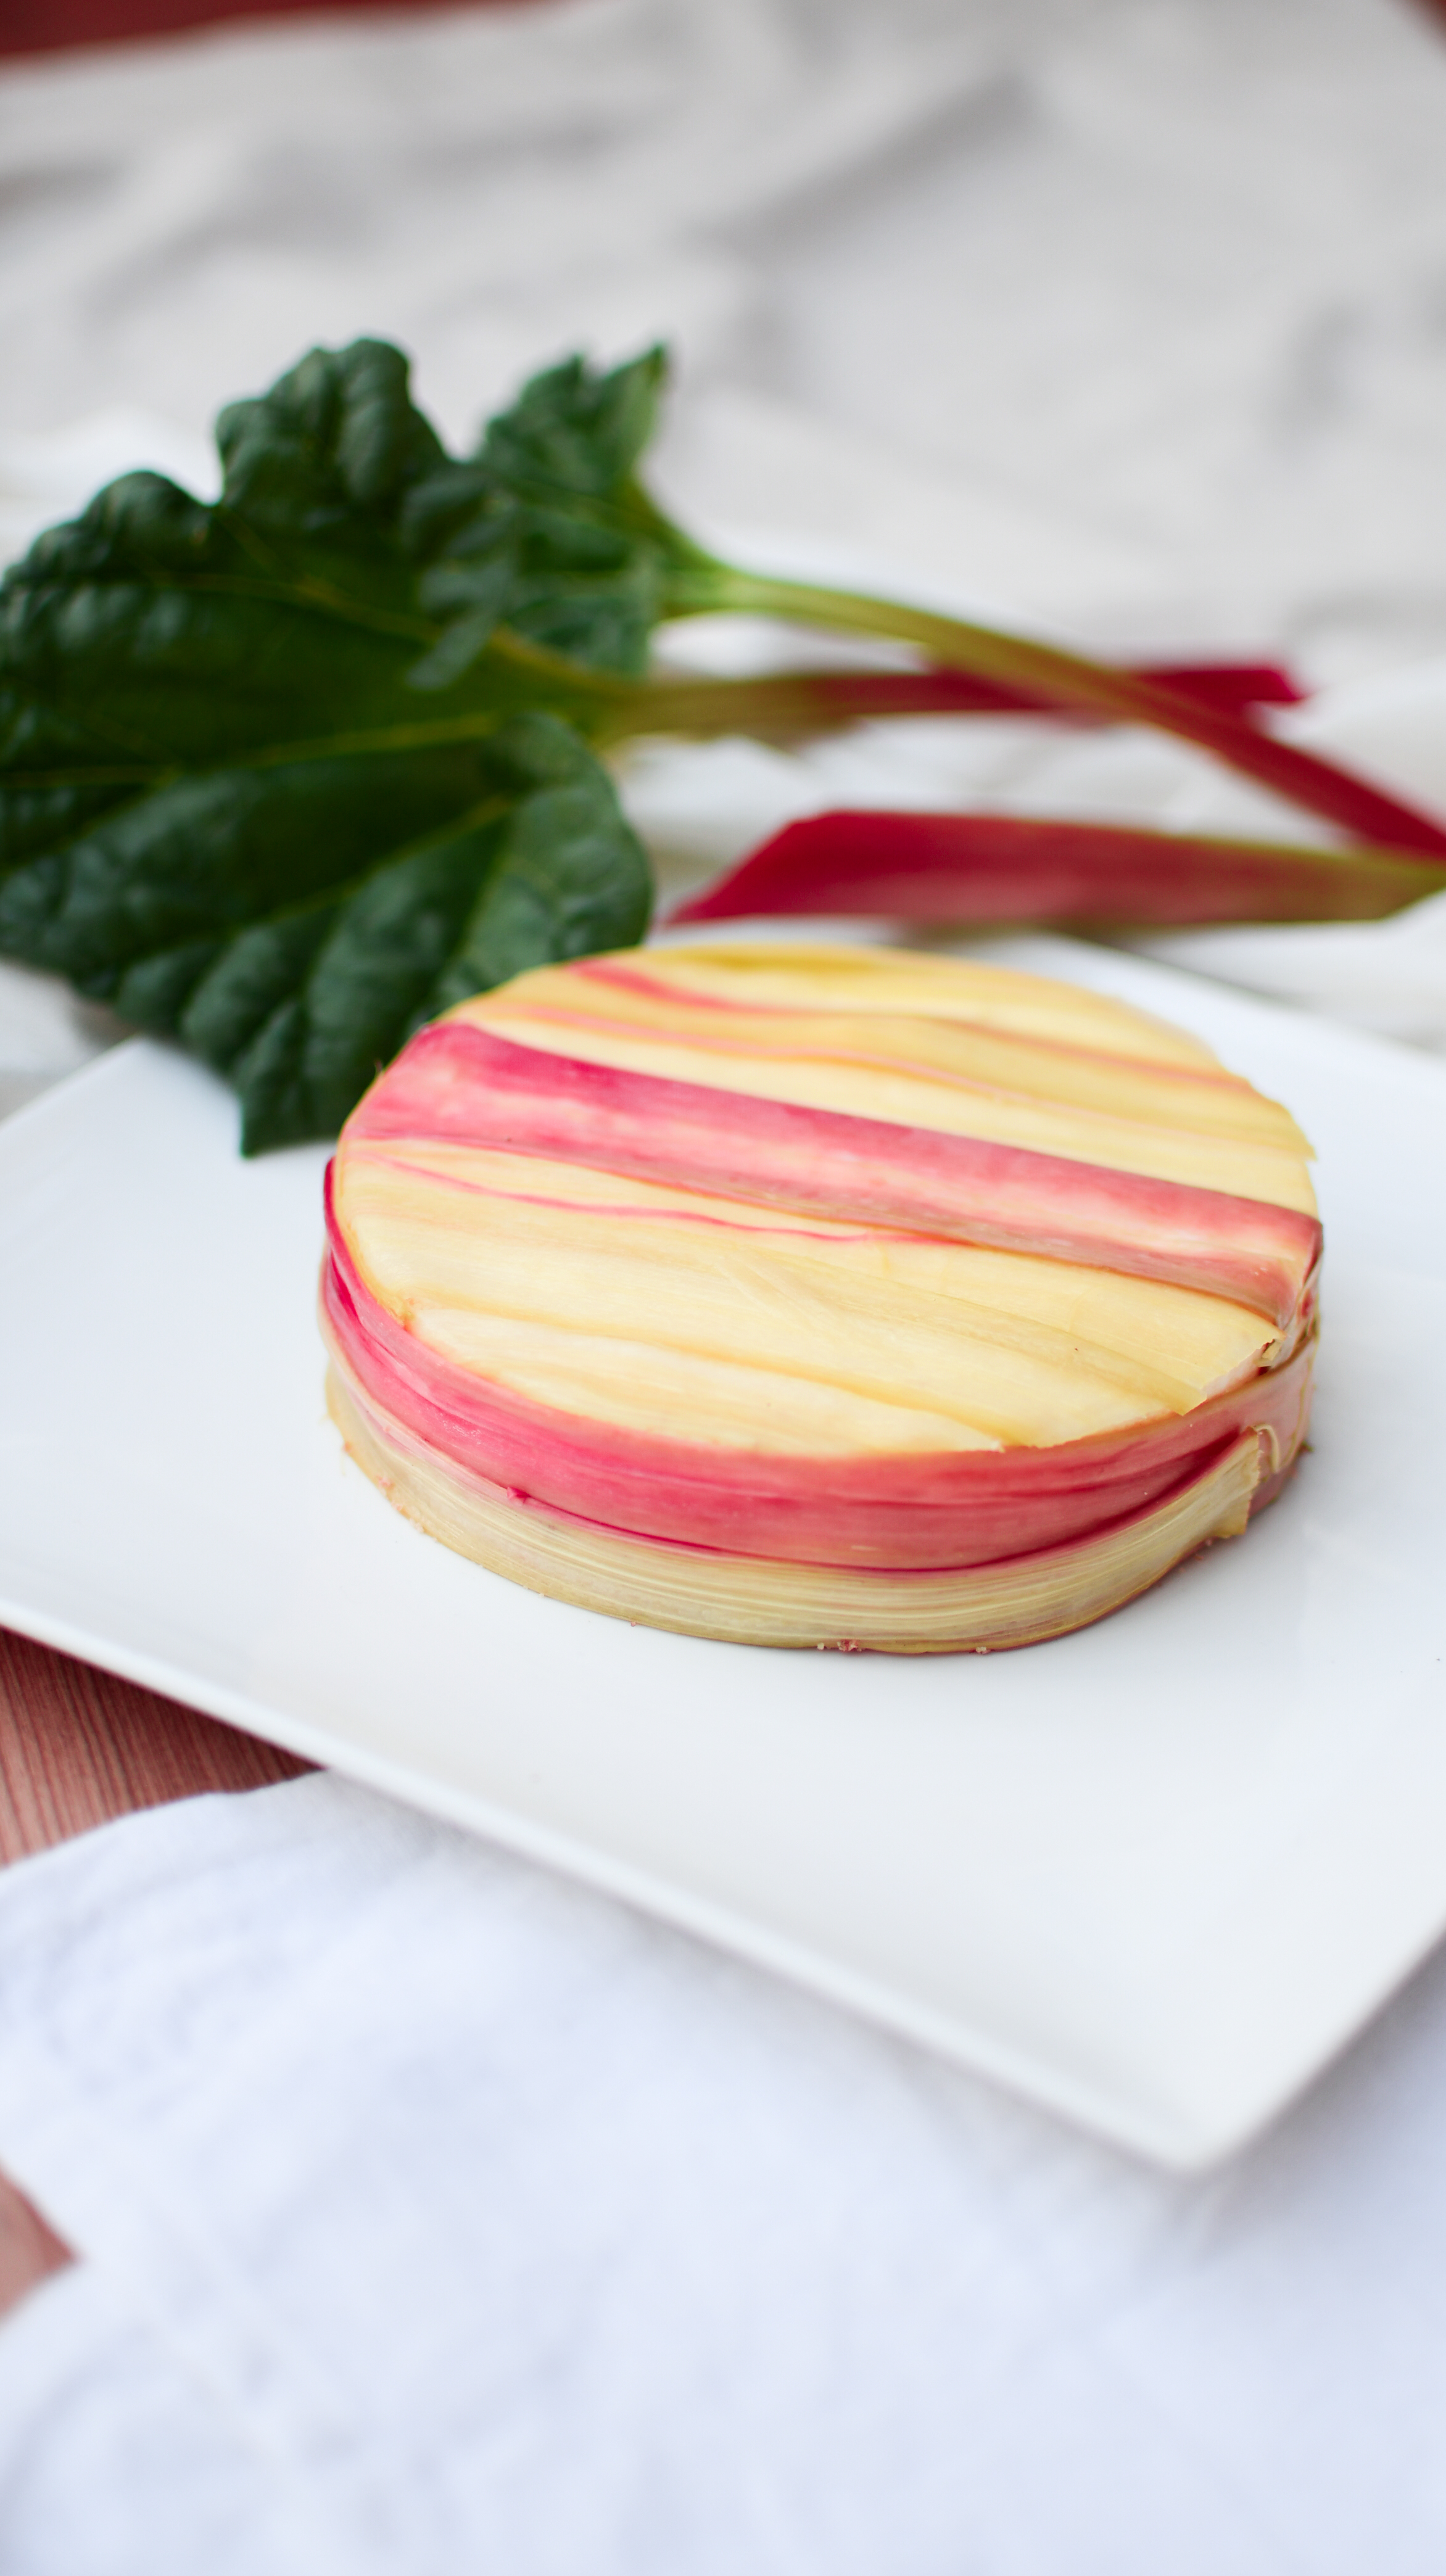
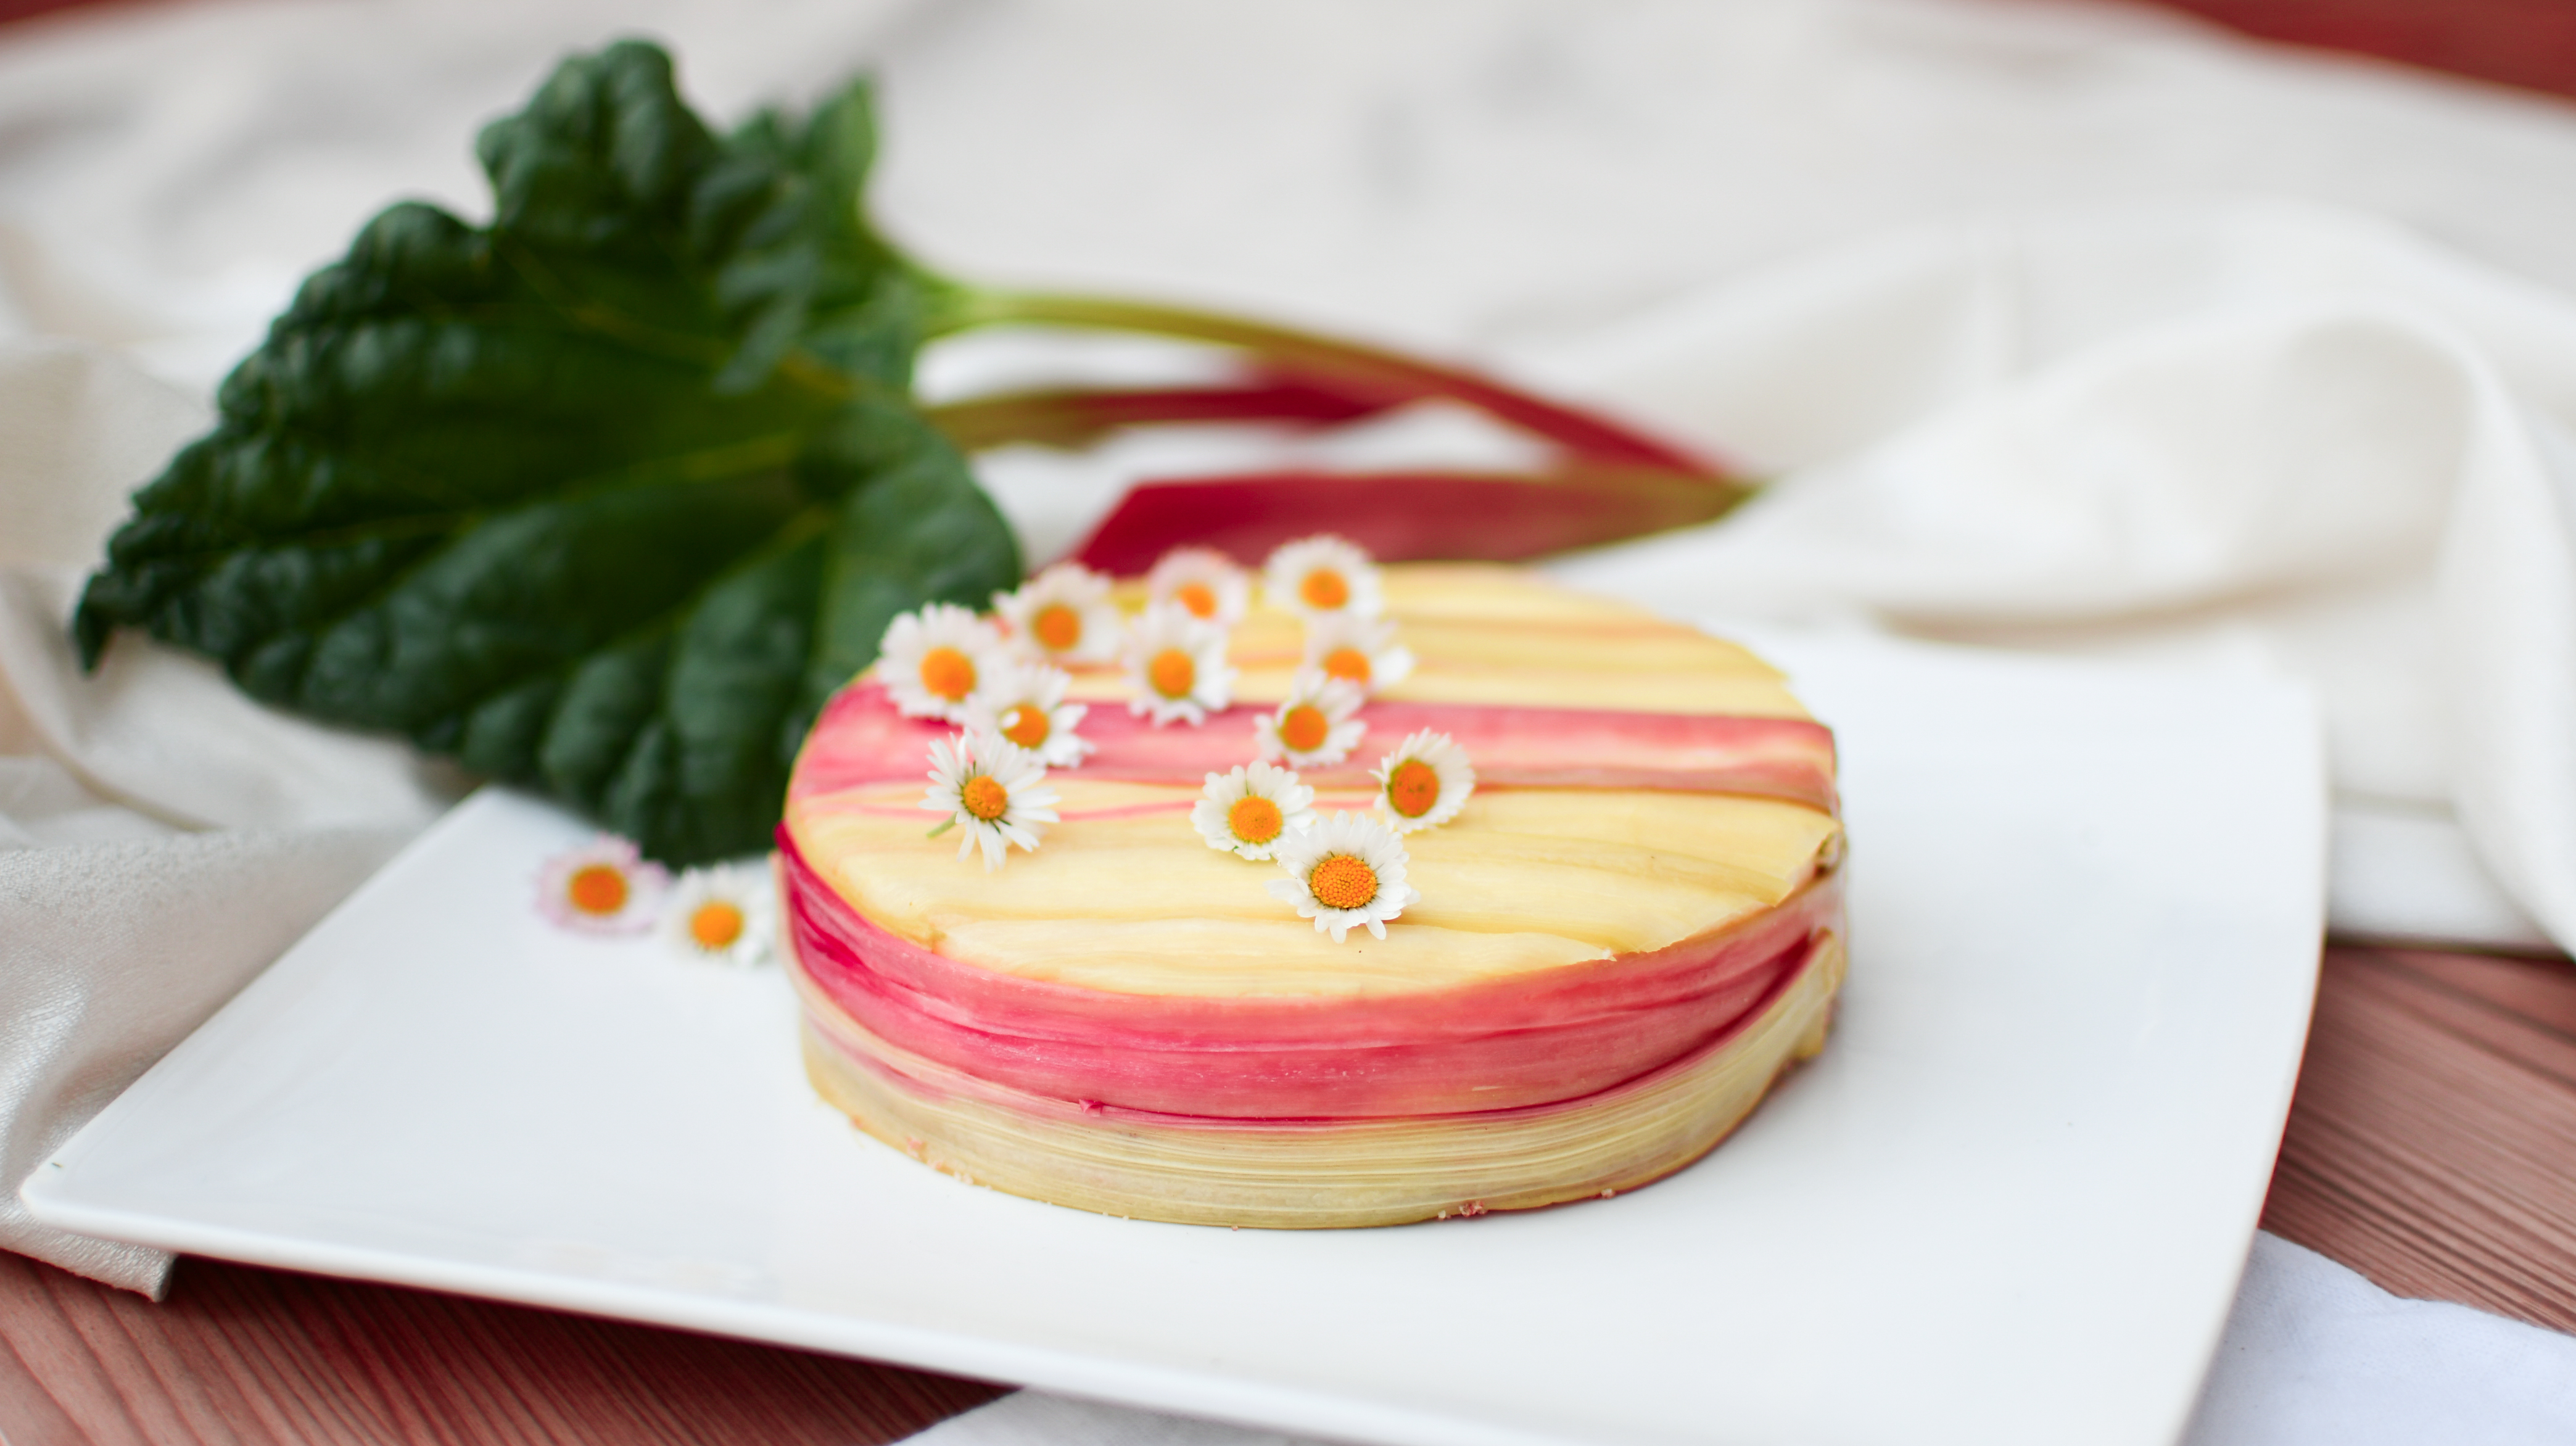
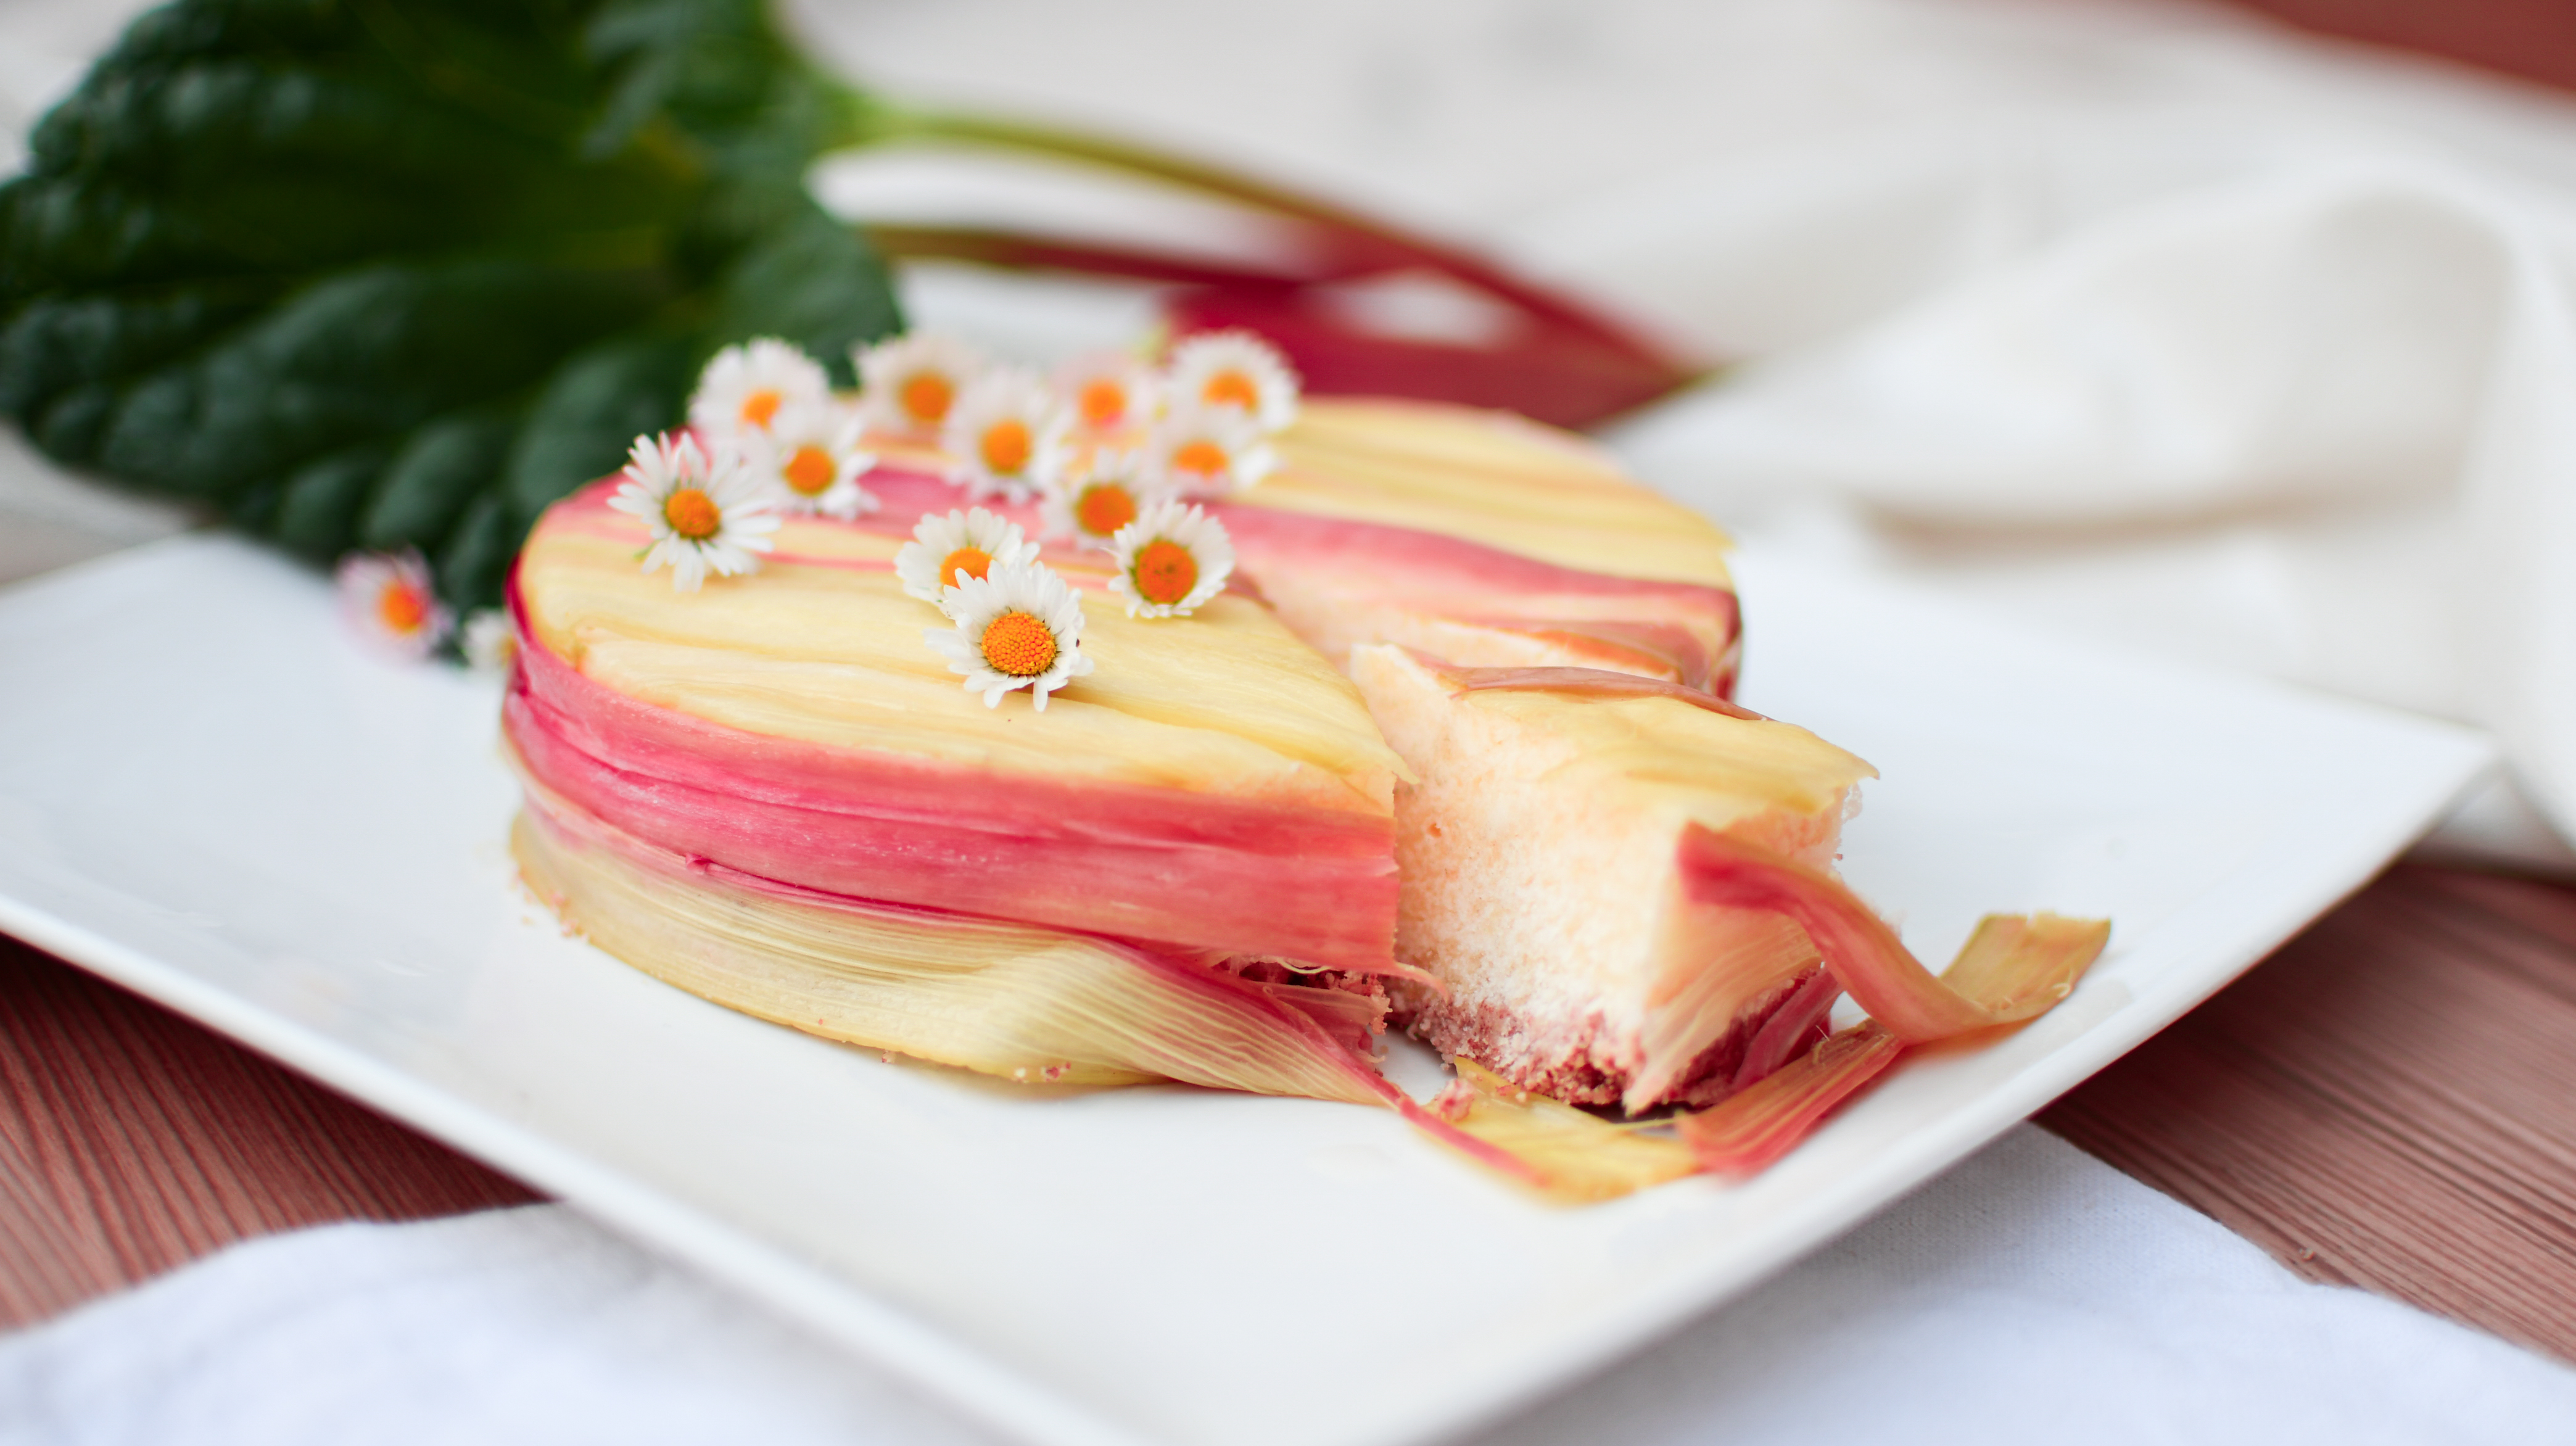
What I love about this special cake is that it looks so beautiful with its subtle pink colors. Almost too beautiful to cut and eat. The rhubarb stalks give the wrapped rhubarb cake almost a bit of an ombré effect which is simply breathtaking.
This was the first time I made a more difficult recipe and it actually took me quite some time to prepare it. It is by no means a difficult recipe, but there are simply many different steps with a lot of waiting time in between. However, if you have time on the weekend this could be a super fun project for one of your mornings.
Most of the recipe consists of only mixing things together in a food processor. However there is one tricky part which is boiling the rhubarb stalks. The only super important thing is to not let them cook for too long or otherwise you will have rhubarb noodles 😀
Once you have the cake ready you need to make sure to slowly let it thaw in the fridge. Stil serve it cold and impress everyone at your summer party with this easy to make delicious and sugar-free cake!
Tip: Make sure you use a very sharp knife for cutting.
Let’s jump into the wrapped rhubarb cake recipe. You will see, it is easier than it looks! This recipe is adapted from Sprinklesbakes
2 1/2 cups raw cashews (covered with water and soaked for 8 hours)
1 tbsp vanilla bean paste
1/2 cup pure maple syrup
1/4 cup melted virgin coconut oil
1/2 cup lemon juice
1/4 cup water
pinch of salt
Rhubarb Coating
1 cup water
1/2 cup sugar
6-7 long rhubarb stalks
Instructions
In a food processor mix the dates until well blended. Put them into a bowl and set aside.
Now blend the raw walnuts until you also have a very smooth mixture.
Mix both parts together and press into the bottom of a silicone form. The crust should be around half an inch.
Drain your cashews that have been soaking for at least 8 hours and combine them with all the other ingredients for the filling in a food processor. Make sure to mix them until you get a very smooth blend.
Pour into the silicone form and freeze for 3 hours
Now moving on to the rhubarb coating use a vegetable peeler and shave the rhubarb stalks into paper thin strips.
Take a pot and let the sugar and water boil together. Don’t place more than three stalks in the water at the same time and only let them cook for about 20-30 seconds.
Let the cooked rhubarb strips drain on a paper towel.
To decorate the cake, lay the strips on top of the cake first until the whole surface is covered completely. Trim away the excess with kitchen scissors. Since the cake is frozen the stalks will stick perfectly onto the cake.
Now wrap the remaining stalks around the cake. If your rhubarb has different shades of pink you can even create an ombre look.
Place the cake in the fridge and let thaw. Cut with a very sharp knife.
Notes
Don't cook rhubarb for too long.
carinaberry.com https://carinaberry.com/
I hope you enjoyed this wrapped rhubarb cake recipe and will try it yourself someday. In case you are looking for another vegan recipe I can recommend you check out my vegan waffles without sugar or my vegan avocado cheesecake.
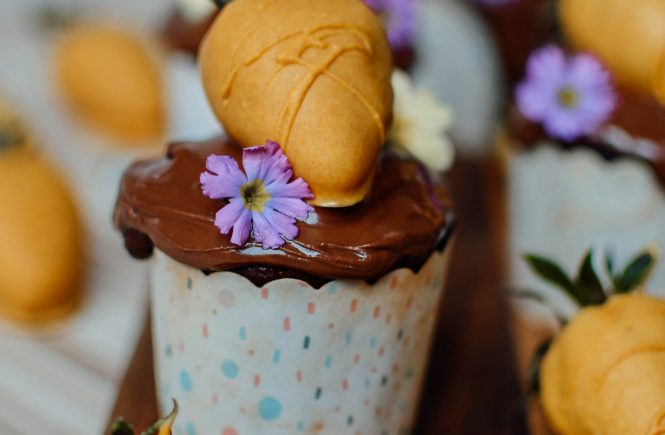
The cutest Easter garden cupcakes you will see this spring! The highlight is definitely the turmeric white chocolate dipped strawberry that looks like a carrot on top of the Easter garden cupcakes.
I tried to make this recipe as fitness approved as possible and expect some white chocolate that you will need to dip the strawberries in there is really nothing unhealthy about the delicious treats. So get ready for a guilt free Easter snack this year.
Turmeric carrots
Ready to make your own healthy Easter garden cupcakes? Let’s start off by making the strawberries look like carrots. Since I didn’t want to use artificial food coloring I simply used turmeric powder to get a nice orange carrot color. Melt the white chocolate with a teaspoon of coconut oil and mix in another teaspoon of turmeric powder. Now simply dip the strawberries in the chocolate and place them on a cold plate and put them into the freezer for a couple minutes.
The Easter garden cupcakes
The fitness cupcakes don’t contain any of the usual unhealthy ingredients like sugar, butter or four. I substituted the regular sugar for Xylit, the flour for coconut four and protein powder and the butter for organic coconut oil. The last things you need are 100ml of milk, some baking powder and cacao powder to give the cupcake the nice brown earth color. Simply mix everything together and bake at 180 degrees for about 20 min. Don’t fill your cupcake molds up all the way as the dough will rise quite a bit!
Once the cupcakes are baked make sure the let them cool off completely before going onto the next step.
The garden icing
From the picture you might think I used Nutella for the icing. But also here I tried to substitute the unhealthy version for something better. I used a chocolate protein spread I found in the local fitness supplement store. If you don’t have chocolate protein spread at home – which I am guessing most people don’t you can make your own by mixing low fat cream cheese with cacao powder, Xylit and some melted dark chocolate. Or you simply take regular Nutella. I mean it’s Easter – we got to cheat a little bit sometimes 😉
Once you have your three parts we can start building the perfect Easter muffin. Spread the chocolate icing over the muffin and carefully place the dipped carrot strawberry over it. Now you can decorate the cupcake with a couple small flowers. It will make them look even prettier.
Here is the full recipe for you so you can start making these yummy Easter garden cupcakes right away:
Start by making the strawberries. Simply melt the white chocolate with the Kurkuma and 1 tsp of coconut oil. Dip the strawberries in the Kurkuma chocolate and put them into the freezer for 10 minutes.
Now let's make the cupcakes. Mix all the other ingredients together and bake at 180 degrees for about half an hour. Let cool off completely before moving on.
Last but not least put the protein spread or Nutella over the cupcake and place the strawberry on top of it. Decorate with some nice little spring flowers.
Notes
Make sure the strawberries are really cold before touching them and also the cupcakes should not be warm before placing the strawberry on top of it. Otherwise the chocolate will melt!


 Most of you asked me this question. The funny thing is after the second day all signs of hunger completely vanish. You feel like you have just eaten the perfect amount of food and are totally satisfied. No grumbling stomach or feeling hungry. Every once in a while a notion of hunger would come along. But then I would simply drink something and it was gone. Especially on day 4,5 and 6 I didn’t feel any hunger anymore. Just the first days are hard.