Healthy Crumble Recipe

Healthy crumble with plums

Fall is just around the corner and its time to harvest all those delicious pears, apples, plums and blackberries. A perfect opportunity to make a healthy crumble for dessert! 

In this blogpost I will be sharing my favorite healthy crumble recipe with you, which I use all the time. It is packed with delicious protein and sweet fruit. Like all of my recipes it is super easy to make and doesn’t require a lot of cooking skills. 

Since I am going to Central America soon – Costa Rica and Panama – I am trying to get all my favorite fall recipes in before I leave since I am pretty sure I won’t find fresh pears, pumpkins and plums there. Plus it will be so hot over there that I will probably not feel like eating decadent fall food. Therefore I am currently eating a lot of pumpkin bread, pumpkin soup, pear cake, ect. I will be dedicating the next blogpost to my pumpkin addiction by the way. So many awesome recipes on the way soon guys! 

Healthy crumble with plums

Crumble Variations 

So, I will be sharing a basic recipe for the healthy crumble which you can alternate depending on your fruit wishes. You can make the same recipe with pears, cherries, blueberries, blackberries or plums. I have tried it with almost any kind of fruit. The only fruit that doesn’t really work are tropical fruits because of their acid which doesn’t get along with the dairy and strawberries because they have too much water. 

Healthy crumble with blueberries

Ingredients 

As always you will only need a handful of very basic ingredients. The recipe is divided into two parts. The crumble and the filling. 
In total you need 8 ingredients for the healthy crumble. Eggs, protein powder, greek yoghurt, Xylit, oats, peanut butter, cinnamon. 

We are replacing unhealthy sugar with Xylit and four that is filled with fast acting simple carbs with complex oats! Also, we are substituting the butter for peanut butter, which adds just like the whey extra protein to the healthy crumble recipe.  

Healthy crumble with cherries

Instructions 

You simply mix the eggs, greek yoghurt and Xylit with each other for the filling. Now its up to you to decide which kind of fruit you want to use. Dice your apples, throw in the blueberries, pit  and add the cherries. 

Now lets make the crumble. For that you simply mix the oats with some water, peanut butter and cinnamon. 2/3 of the crumbles will serve as the crust and the rest will be sprinkles on top of the filling. 

Finally, put the crumble into the oven and let it bake for half an hour at 180 degrees. Best served still warm. 

Have you seen my favorite protein cheesecake recipe yet? If not check it out here

Healthy crumble with plums

Healthy Crumble
A perfect healthy recipe for the fall season.
Write a review
Print
Prep Time
15 min
Cook Time
30 min
Total Time
45 min
Prep Time
15 min
Cook Time
30 min
Total Time
45 min
Ingredients
  1. 2 eggs
  2. 1 scoop whey protein
  3. 1 tsp baking powder
  4. 200g (7oz) greek yoghurt
  5. 3 tbsp Xylit
  6. Crumble
  7. 100g oats
  8. 2 tbsp peanut butter
  9. 2 tbsp Xylit
  10. 1 tsp cinnamon
  11. 40 ml water
Instructions
  1. Mix all the ingredients together for the filling. Cut fruit of choice (except berries) and add them to the mixture.
  2. Combine all ingredients for the crust and crumble until you get a crumbly texture.
  3. Press 2/3 of the crumbles into a little pie form.
  4. Add the filling on top.
  5. Sprinkle the rest of the crumbles on top of the filling.
  6. Bake for 30 minutes at 180 degrees.
Notes
  1. All type of fruit work except tropical fruit with a lot of acid and strawberry because of the high amount of water.
carinaberry.com https://carinaberry.com/

Did you make this recipe? 

Did you make this recipe?

Tag #carinaberry and get the possibility for a shoutout on my Instagram! 

Finally, I always love to see your wonderful creations and it makes me so happy to see you guys actually making my recipes. 

xoxo,


Weiterlesen

Caramel Protein Cheesecake – low carb and keto

Ready to taste the best protein cheesecake of your life?! With this blog post I am sharing my all time favorite recipe with you 🙂

Protein Cheesecake 

My protein cheesecake consists of some very easy ingredients and gives you the full dessert indulgence you are looking for without adding those extra calories to your hips 😉 

I am literally making this protein cheesecake once a week because it is that good. The wonderful thing about it is that you only need a couple ingredients and it is so easy and fast to make. like most of my healthy recipes. 

protein cheesecake

Macronutrients of the protein cheesecake 

First of all, I am sure you are wondering why this cake is so much better than regular cheesecake. Obviously since we are not using any sugar the taste will be a bit different than the unhealthy options you get to eat in restaurants, but the macro nutrients are sooo much better. 
A lot of people always think that in order to make fitness food you need to spend a lot of time in the kitchen and buy many expensive ingredients. That is not the case at all though, especially not with my recipes. They usually never take longer than 15 minutes and the end result will be tasty and good for you at the same time. 

Calories

Did you know that a regular New York Style Cheesecake has about 450kcal per slice? For some girls that could be a regular meal for them. If you go to the Cheesecake Factory and order yourself a Peanut Butter Fudge Ripple cheesecake you might end up eating up to 1100 kcal per slice. That is crazy right. I bet you are curious how many calories this healthy protein version of a cheesecake has now?! 
So this one will have only about 250kcal per slice depending on the exact ingredients you use. That is quite a difference right?! You can save almost half of the calories you would usually eat with a normal cheesecake. 

Protein

Let’s go back and compare our fitness protein cheesecake to a regular New York Style cheesecake regarding the amount of protein you will get per slice. Usually one slice only provides you with around 9 grams. However, due to adding protein powder this fitness cheesecake has up to 31 grams of protein per slice, depending on the whey you are using. 

protein cheesecake

Protein Cheesecake Recipe

Alright after having told you how awesome this protein cheesecake is I hope you are totally ready to make it now. 
It is really so easy. All you need are basically two bowls. In the first one you mix all the ingredients for the filling and in the second one all the ingredients for the base.
Then you press the base into a pie form or silicon mold and pour the filling over it. After that it goes into the oven and you let it bake for about half an hour. Take it out and let it cool off completely. For the glaze you will be mixing more cream cheese with Xylit and simply cover the cheesecake with it. Finally melt some dark chocolate and sprinkle over the cake. In my recipe I used a sweetener called Yacon syrup for decoration as well, since it has the looks and subtle taste of liquid caramel. But that is not a must. 

protein cheesecake

Low carb protein cheesecake variations

Certainly in this very specific example I made a caramel protein cheesecake. I used specifically caramel protein powder and Yacon syrup which is quite similar to caramel. However the base recipe always stays the same and you can substitute the flavors as you want. 

Here are some ideas for cheesecake variations: 

  • Strawberry protein cheesecake: You can use strawberry or vanilla whey for the filling. Use sugar-free jam to cover the surface of the cake and decorate with sliced strawberries. 
  • Peanut butter cheesecake: Add 2 tbsp of peanut butter to your filling and more peanut butter for the topping. 
  • Blueberry cheesecake: check my recipe from earlier at the beginning here!

For more healthy recipe make sure to check my YouTube and Instagram channel. 

protein cheesecake

The Recipe

Protein Cheesecake
Full taste & half the calories
Write a review
Print
Prep Time
10 min
Cook Time
30 min
Total Time
45 min
Prep Time
10 min
Cook Time
30 min
Total Time
45 min
Filling
  1. 2 eggs
  2. 250g (8,8oz) greek yoghurt
  3. 250g (8.8oz) 
cream cheese
  4. 1 scoop protein powder
  5. 40g (1.4oz) xylit
  6. zest of one lemon
  7. Crust
  8. 80g (2.8oz) oats
  9. 1 tbsp coconut oil
  10. 2 tbsp water
  11. 1 tbsp xylit
  12. 2 tbsp peanut butter
  13. Dash of cinammon
Topping
  1. 100g (3.5oz) cream cheese
  2. 1 tbsp xylit
  3. 1 tsp lemon juice
For "caramel" cheesecake topping
  1. 1 tbsp Yacon syrup
  2. 2 tbsp melted dark chocolate
Instructions
  1. Mix all ingredients for the crust together and press into a pie form.
  2. In a blender mix all ingredients for the filling together and pour over the crust.
  3. Bake for 30 minutes at 180 degrees. Let the cake cool down completely.
  4. For the topping mix the cream cheese with the lemon juice and the sweetener. Spread over the cake.
Notes
  1. For a cheesecake variation you can use anything from blueberries to peanut butter and melted chocolate.
carinaberry.com https://carinaberry.com/

Life Update

On another note I thought to give you a short life update in this blog post. At the moment I am super busy planning everything for my big trip starting at the end of September. I will be going to Costa Rica, Panama and Mexico.
Alberto and I will be traveling through these countries, but working at the same time. It is the first time we are doing this and are simply so excited to try it out. It is so amazing when your work is that flexible and I really just need my camera, computer, phone and internet.

However, there is still so much travel preparation to do and I am getting more and more excited every day to finally leave and escape the cold and windy Austrian fall days. 
Also, I need to come up with a plan of how to take most of my food props with me on my travels. This will be quite the challenge, but we will see how it goes to take food pics somewhere else than at my studio at home. 

Did you make this recipe? 

Did you make this recipe?

Tag #carinaberry and get the possibility for a shoutout on my Instagram! 

Finally, I always love to see your wonderful creations and it makes me so happy to see you guys actually making my recipes. 

xoxo,


Weiterlesen

Easy full body workout routine – no equipment

Easy full body workout routine

I know how busy life can get and sometimes there is simply not enough time for a full body workout in the gym. That is why I am showing you in this blogpost four easy exercises for a full body workout routine. The best thing? You don’t even need any equipment. Just your wonderful self! 

This easy full body workout routine can be done literally anywhere. In your room, in the city, in a park. It won’t take up much of your time, but still work different muscle groups in your body and you will even get some cardio in. 

How long does this full body workout routine take? 

This is a perfect quick workout you can get in between meetings, lunch breaks or simply if you don’t have a lot of time to work out on a specific day. The entire workout only takes you 12 minutes. However you will be taking breaks between each set. Depending on how long you will need for your breaks the full body workout will be done within 14 – 20 minutes. So very fast, but also effective at the same time! 

How does the full body workout routine work? 

This routine is a circuit. Which means that you will go through the exercises in a loop doing one after the other. Finally, after 5 different exercises you will be taking a break before going back to the first exercise and doing it all over again. It will be a workout of 5 exercises and 4 sets. This means you will do the whole circuit 4 times. One circuit takes 3 minutes. So, if you do it 4 times it will be 12 minutes of exercising.
Sounds quite short, but you will see once you are in the workout it will be challenging! 

How long is the rest between each set? 

You will want to take a break between the circuits. I recommend anything from 30 seconds to 2 minutes. Take as much time as you need, but make sure to also push yourself a bit. You might need less rest after the first round and more rest in the following rounds. Just listen to your body and start with the new round once you have caught your breath. 

Exercise #1 – High Intensity 

For a warm up exercise we will do a set of four times 30 repetitions of high knees. That means you will be running on the spot always trying to pull up your knees as far as possible. Also, try to run as fast as you can on the spot with your knees up high. Like this we will get your heart rate up. This helps to burn fat along the workout. 

Full Body Workout Routine

Exercise #2 – Planking for those abs

After getting your heart rate up with some cardio, the second exercise will target the abdominal muscles. Place the forearms on the ground with the elbows aligned below the shoulders. If you have a matt, that is fantastic but you can also just do it without it. Make sure that your arms are parallel to the body at about the shoulder-width distance. Hold this position for 30 seconds. 

   full body workout routine

Exercise #3 – Side plank

Lie on your right side with your legs straight. Lift yourself up with your forearm so your body forms a diagonal line. Rest your other hand on your hip or at a more advanced level up into the air. Tighten your abs and hold for 30 seconds.  Make sure your hips and knees stay off the floor.

Switch to the other side and do it again for 30 seconds. 

Easy full body workout routine

Exercise #4 – Triceps Dips

After getting up the heart rate and challenging the abdominal muscles it is time to work our upper body. With this exercise you will be working your triceps hardcore. 

Position your hands shoulder-width apart on a secured bench or stable chair. Extend your legs and arms.  Now bend down your elbows to keep tension on your triceps and off your elbow joints. Lift up again. Do this for 30 seconds. 

      Full Body Workout Routine Full Body Workout Routine


Exercise #5 – Wall sits for the legs 

The final exercise will target your legs and hamstrings. Lean with your back against a wall and place your feed shoulder width apart. Your knees should be in a right angle with your upper legs. Hold this posture for 30 seconds. 

I really love this exercise and it is a great way to really strengthen your leg muscles. I do this for example very often before our skiing vacation in the winter to build up muscle before hitting the slopes and being sore all day.Full Body Workout Routine

How often should you do this?

I personally work out 4-5 times a week. If you really want to see results I would recommend you to do the same. High intensity workouts like this one are perfect to help you with fat loss since it increases your heart rate by a lot and you will be burning a lot of calories during the workout and even after. 
I recommend you to do this short workout either as a warm up when you are in the gym or a fast workout alternative if you do not have time to go to the gym that day. Anything is better than nothing 😉 

Once you feel comfortable with this workout you can switch up exercises and look for different ones that will challenge you more. You can either exchange exercises or add them to the workout to make it longer. There are really a lot of possibilites with these kinds of circuit workouts. You can customize them until you find the perfect workout for you targeting all the muscles you want to focus on, bringing you great results within a short time. 

I hope you will see great results with this super easy and fast workout and get a step closer to your personal fitness goal!
Keep in mind though that consistency is the key and such workouts have to be done on a regular basis in order to be effective. 

If you are looking for a healthy meal after your workout. I can suggest the delicious zucchini linguine. Simply click here and you will find the recipe. 

Lots of love,

Weiterlesen

Vegane Waffeln ohne Zucker

Vegane Waffeln ohne Zucker

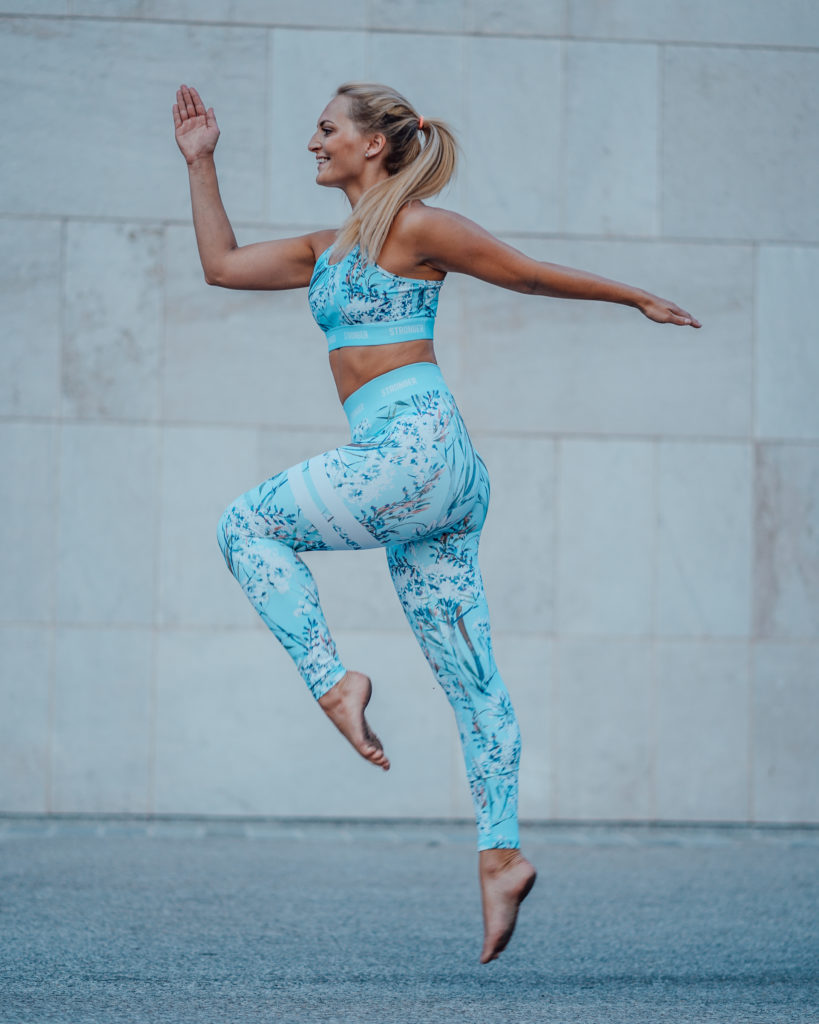
Habt ihr schon mal vegane Waffeln ohne Zucker probiert? Ihr denkt euch wohl, dass kann ja gar nicht schmecken. Vegan und dann auch noch ohne Zucker? Lasst euch von diesem gesunden Fitnessrezept verzaubern. Mit nur ganz wenigen Zutaten könnt ihr in kurzer Zeit ein leckeres Meisterwerk herstellen. 

Als ich das Rezept zum ersten Mal gemacht habe kam mein kleiner Bruder in die Küche und meinte „Was riecht denn hier so lecker“. Ich habe ihm gesagt, dass ich gerade dabei bin Waffeln zu machen und er wollte sie unbedingt probieren. Nach dem ich alle Fotos geschossen habe durfte er sie dann kosten und ich war unglaublich überrascht von seiner Reaktion. Er hat nämlich gleich den ganzen Teller aufgegessen. Ziemlich ungewöhnlich für meinen Bruder der von veganer Ernährung nicht gerade begeistert ist und lieber Burger, Pommes und Pizza bevorzugt. Der beste Beweis also, dass dieses Rezept wirklich lecker ist! Obwohl es vegan ist und ohne Zucker! 

Vegane Waffeln ohne Zucker

Die Zutaten

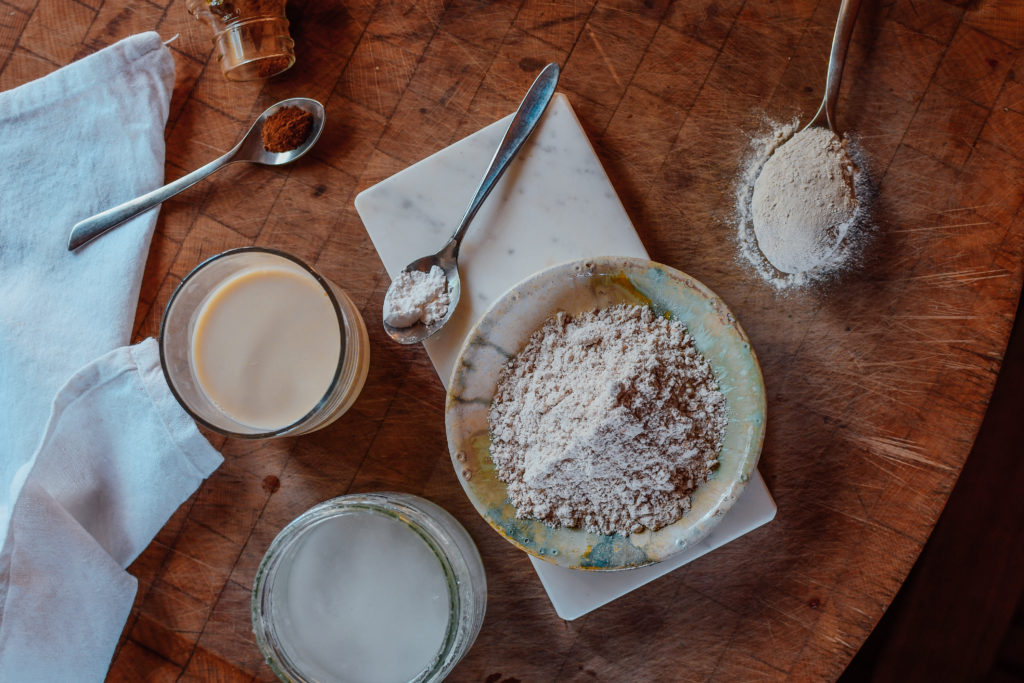
Ihr benötigt insgesamt sieben einfache Zutaten um die Waffeln zu machen. Ich habe in diesem Rezept bewusst die Menge an Dinkelmehl reduziert und mit veganem Protein ersetzt. Ich verwende im Rezept 100% Sonnenblumenprotein. Ihr könnt es aber durch jedes andere vegane Protein auch ersetzen. In meinem Rezept habe ich Mandelmilch verwendet. Auch hier könnt ihr den Pflanzendrink gegen Soja-, Hafer- oder Reismilch tauschen. 

Außer Backpulver, Zimt und Kokosöl braucht ihr dann noch Erythrit oder Xylit. Da das Rezept ja ohne Zucker is brauchen wir dennoch eine Alternative um es zu süßen. Hier greife ich immer auf diese zwei Zuckeralternativen zurück. Xylit auch bekannt als Birkenzucker hat um 40% weniger Kalorien als normaler Zucker. Erythrit oder Erythritol hat keine Kalorien und ist ein natürlicher Zuckeralkohol. Beides lässt sich beim Kochen und Backen genauso wie Zucker verarbeiten. 

Wo bekomme ich veganes Protein und den Zuckerersatz?

Die meisten Sportnahrungsonlinestores haben mittlerweile ein veganes Protein im Sortiment. Hier gibt natürlich Qualitätsunterschiede. Ich habe im Rezept reines Sonnenblumenprotein aus dem Biomarkt verwendet. Dieses besteht wirklich zu 100% aus Sonnenblumenkernen. Wenn ihr euch ein Proteinpulver bestellt achtet darauf, dass nicht viele Zusatzstoffe wie Süßungsmittel, Farbstoffe oder Aromen zugesetzt worden sind. Am besten ist es wirklich 100% Hanf-, Erben-, Reis-, oder Sonnenblumenprotein zu kaufen. 

Xylit oder Birkenzucker bekommt man in Österreich eigentlich schon in jedem Supermarkt. Sogar die Discounter haben das bereits im Sortiment. Erythrit und Erythritol kann man allerdings nur online bestellen. 

Vegane Waffeln ohne Zucker

Zubereitungsdauer

Generell würde ich euch empfehlen, dass ihr euch für diese Waffeln etwas mehr Zeit nehmt als ich das sonst für normale Waffeln machen würdet. Da hier kein Ei verwendet wird welches den Teig bindet ist es etwas schwieriger damit im Waffeleisen zu arbeiten und es ist große Vorsicht geboten. Das ganze Rezept wird in etwa 15 bis 20 Minuten benötigen. 

Anleitung für die veganen Dinkelwaffeln ohne Zucker 

Trockene Zutaten:

Beginne zuerst alle trockenen Zutaten in einer Schüssel zusammen zu mischen. Hier kommt das Protein, Xylit, Mehl, Zimt und Backpulver zusammen. Einmal gut umrühren und beiseite stellen. 

Flüssige Zutaten: 

In einer zweiten Schüssel das Kokosöl mit der Mandelmilch verrühren und nun Stück für Stück zu den trockenen Zutaten dazu geben. Hier immer wieder umrühren bis eine homogene Masse entsteht. 

Vegane Waffeln ohne Zucker

Den Teig kurz beiseite stellen während das Waffeleisen eingeölt und erhitzt wird. Nun ist alles bereit um die leckeren Waffeln heraus zu backen! 

Zubereitungstips für vegane Waffeln

Da wir bei diesem Rezept weder Ei noch Zucker verwenden, darf man das Endergebnis natürlich auch nicht 1:1 mit der Konsistenz von normalen Waffeln vergleichen. Ihr werdet sehen, dass auch die gebackenen Waffeln innen noch weich sind und nicht ganz fest werden. Hier fehlen einfach die Klebeeigenschaften. Schmecken tuts aber genauso lecker 🙂 

Ich empfehle euch das Waffeleisen auf die höchste Stufe zu drehen und die Waffeln überdurchschnittlich lang drinnen zu lassen, da sie sonst kleben bleiben. Auch unbedingt das Waffeleisen gut einölen und immer kleine Mengen an Teig heraus backen. 

Vegane Waffeln ohne Zucker

Warum kleben vegane Waffeln? 

Dadurch, dass kein Ei verwendet wird kleben die Waffeln einfach nicht so gut zusammen. Deshalb ist es wichtig im Waffeleisen kleine Waffeln zu formen die nicht bis zum Rand hinausgehen. So kann man sie leichter mit einer Holzspachtel vom Deckel lösen wenn sie kleben bleiben. 

Alternative zu Dinkelmehl 

Wer noch einen Schritt weitergehen möchte kann auch noch einen Teil des Mehls durch Chiamehl ersetzen. Das habe ich auch schon ausprobiert. Hier spart ihr euch nochmal einiges an Kohlenhydraten und erhöht den Proteingehalt des Gerichts. Falls ihr das ausprobiert würde ich euch aber raten keine Waffeln im Waffeleisen zu machen sonder lieber kleine Pancakes, da sie sonst sicherlich kleben bleiben. Als kleine Pancakes kann man sie in der Pfanne viel leichter umdrehen. 
Chiamehl bekommt ihr übrigens in vielen Naturkostläden und großen Onlineshops. 

Vegane Waffeln ohne Zucker

Toppings

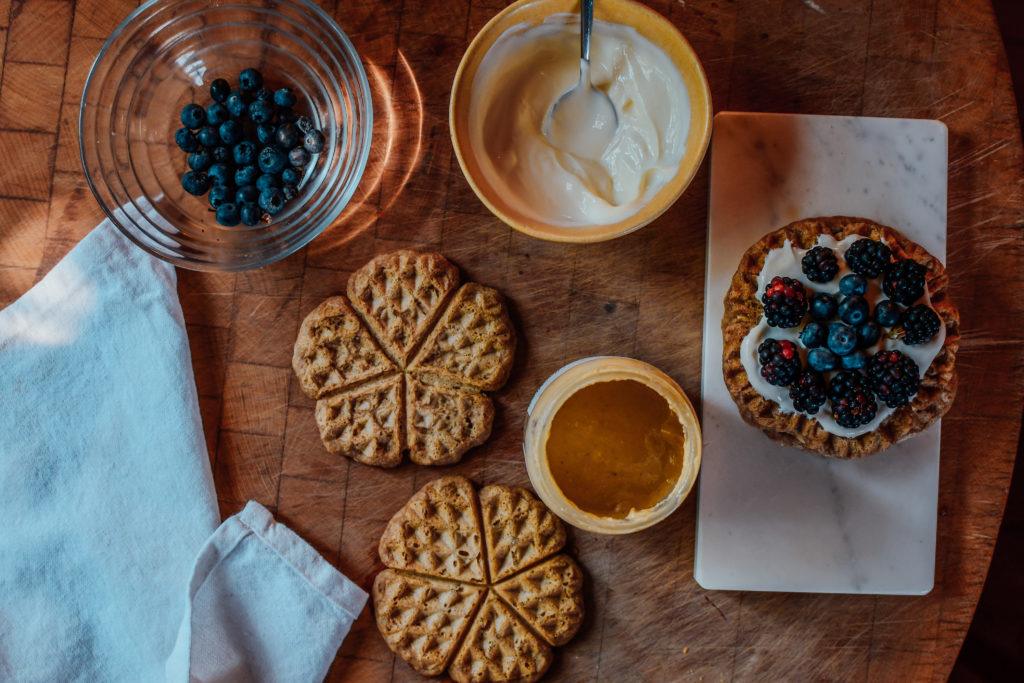
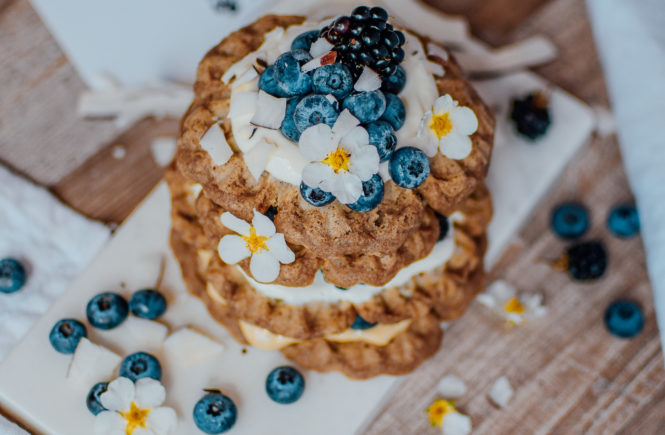
Sobald ihr mal die Waffeln fertigt habt, seid ihr vollkommen frei in der Gestaltung eurer Toppings. Ich habe in diesem Rezept Sojajoghurt verwendet und dunkle Beeren, welche perfekt damit harmonieren. Jegliches Nussmus (Mandel, Erdnuss, Cashew) schmeckt auch unglaublich lecker mit den Waffeln. Dann noch ein paar Bananen darauf und ihr habt eine weitere leckere Kreation. 

Hier noch ein paar Topping Ideen: 

  • Peanut Butter and Jelly (Erdnussbutter und Marmelade) 
  • Schokoaufstrich und Banane (Achtung nicht vegan!) 
  • (Soja)joghurt mit Beeren 
  • Mandelmus mit Rohkakao und Bananen 

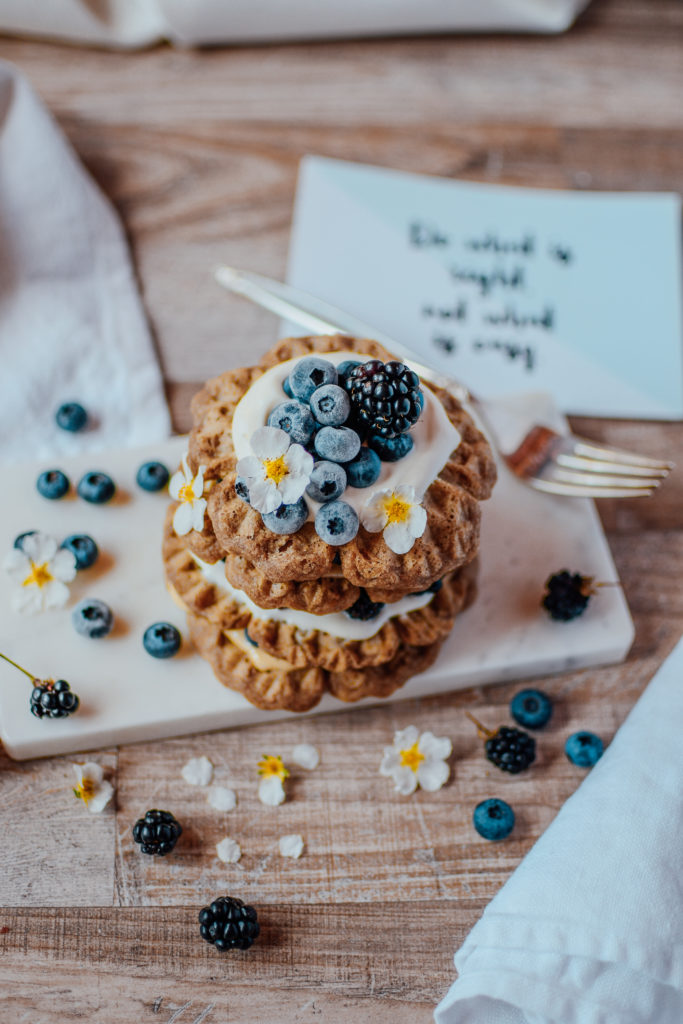
Die perfekte Präsentation 

Zum Abschluss kann ich mir es als Food Blogger natürlich nicht nehmen lassen euch noch einen super Dekorationstip zu geben! Am besten sehen eure veganen Waffeln ohne Zucker aus wenn ihr diese als Turm schlichtet und immer eine Schicht Joghurt/Mandelmus/Schokoaufstrich dazwischen aufträgt. Ganz oben kommen dann noch ein paar Beeren oder Bananenscheiben drauf. Dann huscht noch schnell in den Garten und findet eine kleine Blume die ihr ganz oben platzieren könnt und fertig ist euer Meisterwerk. 

Viel Spaß beim Kochen!

Ich hoffe ich konnte euch einen guten kleinen Überblick geben wie ihr am besten vegane Waffeln ohne Zucker zubereiten könnt. Als ich das Rezept das erste Mal gemacht habe war ich wirklich begeistert wie lecker es schmeckt und mache es mittlerweile fast wöchentlich. 

Ich finde es ist ein optimales Brunch Rezept für das Wochenende, da man dafür schon etwas mehr Zeit benötigt als der oft stressige Arbeitsalltag unter der Woche erlauben würde. Solltet ihr also mal vegane Freunde zu Besuch haben, wisst ihr nun mit welchem Frühstücksrezept ihr sie beeindrucken könnt 🙂 

Vegane Waffeln ohne Zucker
Ein gesundes Frühstücksrezept ganz ohne Zucker!
Write a review
Print
Waffeln
  1. 100ml Mandelmilch
  2. 1 Esslöffel Kokosöl
  3. 40g Dinkelmehl
  4. 1 Esslöffel veganes Proteinpulver
  5. 25g Xylit oder Erythrit
  6. 1 Teelöffel Backpulver
  7. 1 Messerspitze Zimt
Topping
  1. (Soja)Joghurt, Mandelmus, Beeren
Instructions
  1. Beginne damit alle trockenen Zutaten in einer Schüssel zu verrühren.
  2. Danach vermische die flüßigen Zutaten nach und nach mit den trockenen bis eine homogene Masse entsteht.
  3. Das Waffeleisen gut einölen und bei stärkerer Hitze etwas länger als normal herausbacken.
  4. Vorsicht beim öffnen des Waffeleisens, da die Waffeln kleben bleiben können.
  5. Zum Schluss die Waffeln mit eurem Topping nach Wahl toppen und noch heiß genießen.
Notes
  1. Da die Waffeln ohne Ei gemacht werden kleben sie auch nicht so gut zusammen wie normale Waffeln. Daher muss gerade beim Öffnen des Waffeleisens vorsichtig gearbeitet werden.
carinaberry.com https://carinaberry.com/

Hast du das Rezept nachgemacht?

Dann tagge mich mit @carinaberry auf Instagram verwende den Hashtag #carinaberry

Ich teile immer wieder nachgemachte Rezepte auf meiner Instastory  <3

xoxo,

Weiterlesen

Zucchini Linguine with feta cheese

Zucchininudeln mit Ziegenkäse

Its zucchini time in our garden right now and since I always love to make seasonal recipes and use the fruit and veggies that are currently ripe and ready for my recipes I came up with this amazing low carb dish for you!

I am sure many of you have heard of zucchini noodles and you might think that you need to buy a special spiralizer for it. No need my friend. In this blogpost I will show you how easily you can make your own zucchini noodles just buy using your regular kitchen utensils. 

Zucchininudeln mit Ziegenkäse

Why I love vegetable pasta

I am always looking for ways to replace simple carbs like pasta with a better gluten free and low carb substitute. Making pasta out of vegetable is simply a genius invention and zucchinis are perfect for it. Using zucchini as your base you will be saving so many calories and carbs from a meal, but still get the full taste and pasta experience in my opinion. 

How to make Zucchini Linguine 

What you need to do first is wash your zucchini and dry them up. Then use a normal vegetable peeler and peel thin slices from the zucchini. Like this you will get your Linguine. 
Then you will need to boil them in hot water for just 3-4 minutes, so they wont get too soft. It really isn’t that much more work than making regular pasta. You will see! 🙂

How_to_make_zucchini_noodles

Regarding the sauce for your zucchini linguine you can let your creativity run free. I used low fat cream cheese (which I put in after I took the photo – doesn’t look so pretty mixed up with the cream cheese) and then just threw some fun veggies in there. I topped it off with feta cheese dices. 

Zucchini Linguine with Feta

The recipe

  • 1 big zucchini
  • 40g feta cheese
  • 5 cherry tomatoes
  • 2 tbsp low fat cream cheese
  • salt & pepper

With a vegetable peeler carefully peel thin slices off the zucchini. Boil them in salt water for 3 minutes and strain well. Put them back into the pot and mix in the cream cheese, salt and pepper. Cut the feta cheese into small dices and mix under the zucchini pasta. Put on a plate and decorate with small cherry tomatoes.

Enjoy! 🙂

I hope you enjoyed this light summery low carb pasta creation and will try making it yourself soon. Btw, have you seen my healthy low carb salads? No?! Well then, click here!


Tag @carinaberry on Instagram and hashtag it #carinaberry

I’ll always be giving shoutouts on my Instastory for those who are making my recipes. <3

xoxo,

Weiterlesen

Try This Raw Vegan Cashew Cheesecake

Raw_Vegan_Cashew_Cheesecake

Have you ever tried raw vegan cheesecake? Most people think that raw food can’t possibly taste great. Raw and vegan?! Well that has to be horrible than right?! This is absolutely not the case with this delicious, creamy and tasty raw vegan cashew cheesecake!

Raw_Vegan_Cashew_Cheesecake

Why do I share a raw vegan recipe this time?

I took part in a blogger event this week and learnt that on August 2nd 2018 we had the Earth Overshoot Day. This is the day that we have used up more resources than the planet can regenerate in one year. This really made me realize how terrible we are treating our environment. Each year this day is coming earlier and we are already using 1.7 Earths right now! I believe we ALL need to do something against this. I think it can already be small steps that all of us take that will make a big difference. These could be better choices regarding the food you eat, the way you live, the waste you produce and the way you care about the environment. 

Personally, I decided to introduce one vegan day of the week! Most carbone dioxide emissions come from animal production. By giving up meat and dairy products for a day I can already reduce my personal animal product consumption. To be honest, I am yet not totally able to give up meat and dairy completely, but already one day of the week will make a difference! 
And that is why I am especially sharing a raw vegan recipe this time!

Raw_Vegan_Cashew_Cheesecake

Raw Vegan Cashew Cheesecake Recipe 

The recipe itself is super easy, like most of the recipes I share here. It basically consists of throwing stuff into a blender. So no cooking skills needed here 🙂 

The crust recipe is actually from my lovely food blogging friend @foodie.yuki , who I definitely need to give credits here for her AMAZING crust recipe! 

The filling I made up myself and you wont need more than 3 ingredients to make it and trust me you will fall in love with the marvelous creamy texture it has <3 

I recommend you already soak the cashews overnight to have them ready in the morning for your raw vegan cheesecake. The whole recipe will take around 30 min. So lets jump right in: 

Raw Vegan Cashew Cheesecake
Serves 1
A delicious, creamy recipe without any sugar, dairy or flour!
Write a review
Print
Total Time
30 min
Total Time
30 min
Ingredients
  1. Crust
  2. 340g chopped almonds
  3. 170g oats
  4. 1 TBSP almond butter
  5. 9 dates, pitted and chopped
  6. 1 TBSP water
  7. Filling
  8. 200g cashew nuts (soaked overnight)
  9. 200ml coconut milk
  10. 70g Xylit
  11. zest of half a lemon
Instructions
  1. Starting with the crust put all the ingredients into a food processor and mix well. Press the sticky mixture onto a tart form and put it into the refrigerator while working on the filling.
  2. For the filling put all the ingredients again in the food processor and mix until well combined. Then transfer the batter into the tart form and brush out evenly to the edges.
  3. Put the cheesecake back into the refrigerator for another 2 hours.
Notes
  1. Best when served cold.
Adapted from Crust by @foodie.yuki
carinaberry.com https://carinaberry.com/
Raw_Vegan_Cashew_Cheesecake

If you are interested in more vegan cheesecake recipes? Check out my vegan rhubarb summer cake here

If you make this recipe and want to share it on your Instagram make sure to tag me in the photo and use the #carinaberry. I am always featuring posts on my story!

xoxo,

Weiterlesen

The art of food styling

I strongly believe you can make anything look absolutely fantastic by just adding some simple decoration items to your dish. Even the most boring chia pudding can turn into something colorful and exciting wit a couple of small styling items. In this blogpost I want to share some of my favorite decoration tricks and food styling tips. Read on if this is something you are interested in 🙂 

The importance of decoration

First off I would like to show you how important it is to style your food. It simply makes a huge difference! Below you find two images showing exactly the same chia pudding. On the left side without any decoration and on the right side with decoration. I would advise you to always use a nice surface to shoot your food on. Plain and simple surfaces are great. 

Food Styling Food Styling

More over I like to use dish towels as background props. It gives the image a soft look and feel. Then I usually use flowers to add an extra touch. I ordered cute spoons on the internet and frequently place them next to my dish to make the picture look more interesting. Having fruit in the picture is also always a good way to make the photo more interesting. 

No decoration

Food Styling Food Photography

With decoration

Food Styling Food Photography

In my food blogging online course I have two chapters especially dedicated to food styling and food props to teach you everything you need to know to become a professional in this area. 

Food props

Here are some photos from the food blogging course video where I am showing all the props I have at home and use for my own creations. 

Food Blogging Course  

As you can see over the months I have acquired quite a big array of different glasses, bowls, plates, spoons and deco material. I love to be able to choose from different fabrics and styles in order to keep my feed interesting. I would also suggest you to slowly build up your own propping equipment.

Here are my top five food blogging styling props: 

  1. Cute spoons 
  2. Tiny little cookie cutters
  3. White dish towel 
  4. Mason jars
  5. Flowers 

In my online course I am explaining how and when I use all of these tools to get the best results. I will also be sharing the links to the products that I use, so you don’t have to look for them yourself.  If you are interested in food blogging and how to get started and improve you should definitely check out my food blogging online course. You can also sign up for free food blogging tips on the website. 

Food Blogging Course

My opinion is always: Content is king on Instagram. If you manage to produce better pictures you will most certainly also see an enhanced growth on your account 🙂
I hope this article was helpful for you! If you have any questions, let me know in the comments!
Feel free to check out my other articles on food styling and food blogging

xoxo,


Weiterlesen

AdeZ und Frühstück

Ende Mai war ich in Mailand für den großen Produktlaunch von AdeZ – vegane Drinks auf Pflanzenbasis, ohne Zuckerzusatz.*Werbung* 
Viele haben bestimmt in letzter Zeit die Plakate der neuen Produkte in der Stadt gesehen und die schönen Flaschen vielleicht sogar schon im Supermarktregal entdeckt. Als stolzer AdeZ Ambassador habe ich heute das große Vergnügen euch die Produkte ein bisschen näher vorzustellen und ein herrlich saisonales Frühstücksrezept mit euch zu teilen!

AdeZ Pflanzendrinks

5 AdeZ Drinks in Österreich

Das exklusive Launch-Event in Mailand fand in einer italienischen Villa statt. Hier begab man sich auf eine Reise durch die verschiedenen Räume in welchen jeweils ein Produkt vorgestellt wurde. In Österreich sind im Moment Rockin’ Rice, Surprising Soy und Amazing Almond erhältlich, sowie die kleinen On-the-go Drinks. Diese handlichen 250ml Drinks sind in den Geschmäckern „Outstanding Oat Strawberry & Banana” sowie “Amazing Almond Mango & AdeZ_AT_Family_
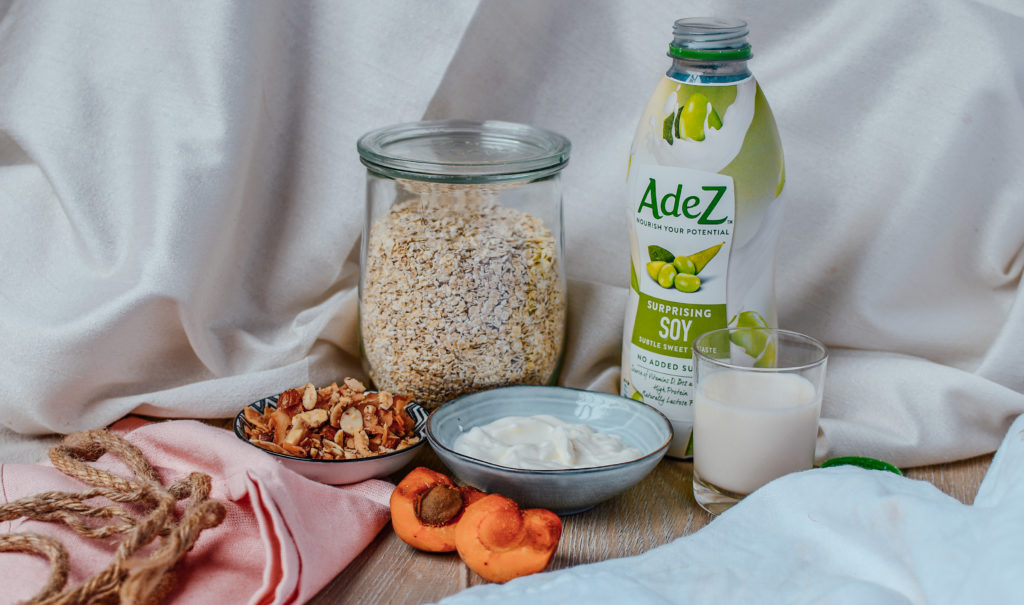
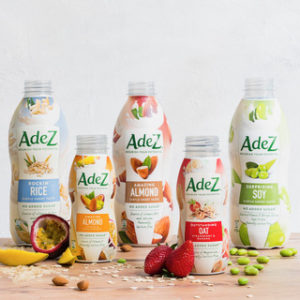
Passionfruit“ erhältlich. Outstanding Oat Strawberry & Banana” hat den Haferdrink als Basis und  “Amazing Almond Mango & Passionfruit“ den Mandeldrink. Beide sind mit leckerem Fruchtsaft/-püree verfeinert. Ich verwende die on-the-go Drinks gerne als Snack für Zwischendurch wenn der kleine Hunger aufkommt.

Perfekt zum Frühstück

Dieser Blogpost widmet sich vor allem meiner Frühstücksliebe. Für mich ist Frühstück die meist zelebrierte Mahlzeit des Tages und hier sind die Produkte von AdeZ eine wahre Bereicherung. Ich habe schon seit langem aufgehört normale Milch zu trinken und greife seit Jahren auf alternative Pflanzendrinks zurück. Hier nehme ich natürlich immer die zuckerfreien Varianten. Jedoch muss ich auch ganz ehrlich anmerken, dass ein zuckerfreier Mandeldrink oder Sojadrink einfach nur halb so gut schmeckt wie die zuckerhaltigen Alternativen, die natürlich auch weitaus mehr Kalorien haben. AdeZ vereint nun beide mir wichtigen Aspekte. Die Drinks sind nämlich ohne zugesetzten Zucker, schmecken aber trotzdem durch das natürliche Stevia leicht süß! Bezüglich dem Stevia muss ich auch sagen, dass ich total positiv überrascht war, da es überhaupt nicht künstlich oder bitter schmeckt, wie man es sonst bei manchen Produkten kennt. Diese süße Tatsache macht die Produkte natürlich perfekt für jegliche Frühstückskreationen. Man spart sich also den extra Zucker, Honig oder was ihr sonst so zum Süßen verwenden würdet. Porridge, Waffeln, Pancakes und Chia Pudding bekommen so ganz von selbst einen dezent süßen Geschmack! Außerdem sind die AdeZ Plain Drinks (Rockin’ Rice, Surprising Soy & Amazing Almond) laktosefrei und enthalten Kalzium, Vitamin D und B12. 

Mit AdeZ kann man die selben wichtigen Vitamine und Mineralstoffe aufnehmen wie durch Milch. AdeZ enthält nämlich genau denselben Gehalt an Kalzium wie Kuhmilch. Super geeignet also für eine vegane Ernährung. Adez Rice Drink

PlantbottleTM für weniger Müll

Etwas tolles muss ich euch jetzt noch bezüglich der Flasche erzählen. Ich stehe ja Plastikflaschen unglaublich kritisch gegenüber und setze im Moment alles daran meinen eigenen Plastikmüll so gut es geht zu reduzieren. Die Flasche von AdeZ ist eine PlantBottleTM. Sie besteht bis zu 30% aus pflanzlichem Material und ist zu 100% recyclebar! Die PlantBottleTM ist umweltfreundlicher als Tetrapack. Kein extra Plastikmüll also 🙂

Marillenparfait

In den nächsten Monaten möchte ich euch alle Pflanzendrinks vorstellen und leckere Rezepte für euch damit kreieren. Heute starten wir mit Surprising Soy – dem Sojadrink von AdeZ. Mit

seinem super natürlichen und cremigen Geschmack ist er viel milder als die meisten Alternativen die ich kenne.

Hierfür habe ich speziell ein saisonales Rezept entwickelt. Wie ihr vielleicht wisst ist bei mir in der Wachau gerade Marillenzeit und unsere Bäume biegen sich vom Gewicht der süßen Früchte. Ein super Anlass um ganz regional ein leckeres Frühstücksrezept zu zaubern. Ich habe auch darauf geachtet, dass es wirklich einfach zu machen ist, damit es wirklich jeder nachmachen kann.

Ich zeige euch heute ein Marillenparfait, welches aus drei einfachen Teilen besteht. Das ganze dauert etwa 10 Minuten zum Zubereiten und schmeckt absolut herrlich!

Adez Recipe

Hier das Rezept:

Zutaten:
150ml AdeZ Surprising Soy
30g Haferflocken
1 Messerspitze Zimt
30g Xylit ( alternativ 1 EL Honig oder Agaven Dicksaft) 100g Marillen
100g griechisches Joghurt
20g Toasted Granola

Zubereitung:

AdeZ Surprising Soy aufkochen und mit den Haferflocken verrühren bis ein fester Brei entsteht. Zimt unterrühren. Das Joghurt mit Xylit vermischen und beiseite stellen. Die Marillen klein schneiden und in ein leeres Glas füllen. Die Haferflockenmasse nun darüber leeren und mit griechisches Joghurt auffüllen. Mit weiteren Marillen und dem toasted Granola dekorieren.

Apricot breakfast recipe

Wenn ihr das Rezept selbst ausprobiert tagt doch @adezaustria. Vielleicht werdet ihr damit auf der Instagramseite gerepostet 🙂

Xoxo, 

Weiterlesen

Summer Barbecue Shrimp Recipe

Summer Barbecue Recipe

Celebrating Summer

What I love most about the summer is the wonderful barbecue season! It is so easy to eat healthy and not miss out on the tasty barbecue goods. You guys asked me to make more savory recipes, therefore I would like to share two of my new go-to low carb barbecue recipes with you. 

I discovered shrimps to be the ultimate hit regarding the perfect summer barbecue. So, I experimented a bit with different shrimp variations, also pairing it up with pineapple in my second recipe. 

May this summer celebrate slow, delicious, lazy days and simplified living. Let’s read long books, stay up late drinking wine with friends and stroll our local farmers markets, slowing life down enough to taste its sweetness. Here is to backyard bungalow get-togethers, shrimp barbecues, long sunsets, beach picnics and getting back to nature! 

barbecue summer bowl shrimp salad

Summer Barbecue Bowl 

This bowl is a delicious compilation of my favorite summer food. Tomatoes and cucumber straight from the garden. Crispy sweet potato fries, tasty avocado  and protein packed shrimp! 

This is what you need for this unique salad bowl: 

  • 100g of shrimp
  • 100g of tomato
  • 1 cucumber
  • 50g of greek yoghurt 
  • 200g of sweet potato 
  • clove of garlic
  • 1/2 avocado 
  • salt & pepper
  • balsamic and olive oil 
  • rosemary, thyme, marjoram
  • 2 wooden skewers 

Method: Cut the sweet potato in rectangular fries and place in a bowl. Marinate with olive oil, salt, pepper, thyme, marjoram and rosemary. Put aside. Place the shrimp into another bowl and marinate the same way. Put the garlic clove into a press and mix with the greek yoghurt and some salt. Put aside. Put the the shrimp onto wooden skewers and place them together with the sweet potatoes on the barbecue grill. Wait until the have the typical barbecue pattern and are done. In a bowl spiralize the cucumber and marinate with olive oil, balsamic, salt & pepper. Put into a nice bowl and decorate with cocktail tomatoes, half an avocado (sprinkled with sesame or chia seeds). Now place some of the sweet potato fries and greek yoghurt mix on it. Finally top with two shrimp skewers and serve while still warm. 

Summer Barbecue Recipe

Pineapple Barbecue Shrimp Skewers

Okay I admit this is a crazy creation I very spontaneously made up when I had leftover pineapple sitting in my fridge. Usually I am not the biggest fan of combining sweet and sour taste into one dish, but this one is actually pretty great and I was surprised myself! 

Ingredients: 

  • 200g pineapple 
  • 100g shrimp 
  • 100ml water
  • 1 tbsp of honey 
  • pinch of salt 
  • 1 lemon 
  • some rosemary 
  • wooden skewers

Method: 

Cut the pineapple into nice rectangular pieces. Dissolve the honey with some water and at the juice of a lemon. Add a pinch of salt. Let the shrimp and pineapple soak in it for about 15 minutes. Take some wooden skewers and put alternating pineapple and shrimp on it.  Place skewers onto a barbecue grill until well done on both sides. Cut rosemary into small pieces and sprinkle over the skewers. Serve while still warm.  

Pineapple Shrimp Barbecue Skewer

I hope you enjoyed these recipes 🙂 For the perfect side salads check out this blogpost here. Also, here is my dessert suggestion to round up the night. For more recipe you can also check my Youtube channel

Happy start into your summer season!

xoxo,

Weiterlesen

Cucumber Summer Salads

Cucumber Feta Salad

I absolutely love summer for being able to eat the most amazing and creative salad creations. It is just so refreshing and healthy! Lately I have been experimenting with cucumbers, as I feel like their neutral taste lets them mix perfectly with all kinds of different things. Thats why I came up with this delicious cucumber summer salad! 

In this blog post you will find two of my new and favorite cucumber salad creations. They are both so extremely easy and fast to make, look beautiful and taste delicious. 

Cucumber Summer Salad

I found feta cheese to harmonize perfectly with the subtle sweet cucumber taste. This creation is the perfect summer salad and the perfect addition to every lunch and dinner meal. All you need is a cucumber, some feta and tomatoes. I used a spiralizer to make cucumber pasta – works amazingly well! 

Make sure to let the cucumber noodles sit for 15 minutes because they will loose a lot of water. Drain the noodles and mix them with tomatoes and feta. 

Regarding the dressing I always used simple balsamic vinegar, olive oil, salt and pepper. 

Cucumber Feta Salad

Cucumber Melon Salad

The second cucumber salad variation is very similar to the first one. The only difference this time is that I replaced the tomatoes with watermelon. I found this combination of sweet watermelon and tart feta cheese to taste extremely delicious. This is really the perfect summer salad with its tropical vibes and sweet taste.

Now with the barbecue season this is really the perfect side dish to impress your friends with! Definitely something different and I think they would love it. So make sure to give it a try!

Again all I did was mix 1 cucumber with 50g of Feta cheese and 100g of watermelon. Dressing was: white balsamic vinegar, olive oil, salt and pepper. 

Feta Watermelon Cucumber Salad

I hope you enjoyed these light summery cucumber creations and will try making them yourself soon. 

Tag @carinaberry on Instagram and hashtag it #carinaberry

I’ll always be giving shoutouts on my Instastory for those who are making my recipes. <3

xoxo,

Weiterlesen