Mond Milch: ein Moon Milk Rezept

Moon Milk Latte Rezept

Mond Milch, Werbung – Kooperation mit AdeZ

Mond Milch Rezept – der neue Instagram Trend

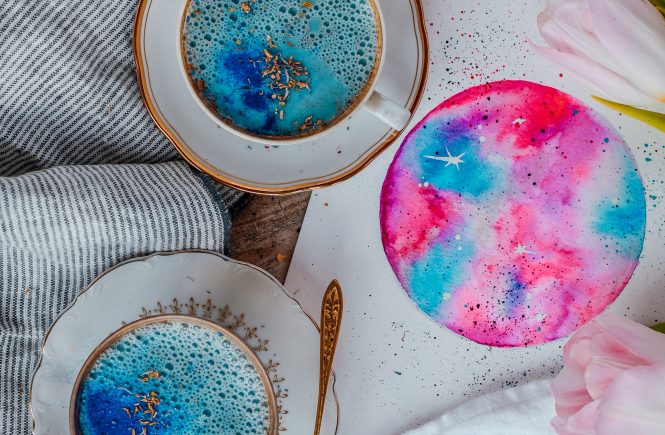
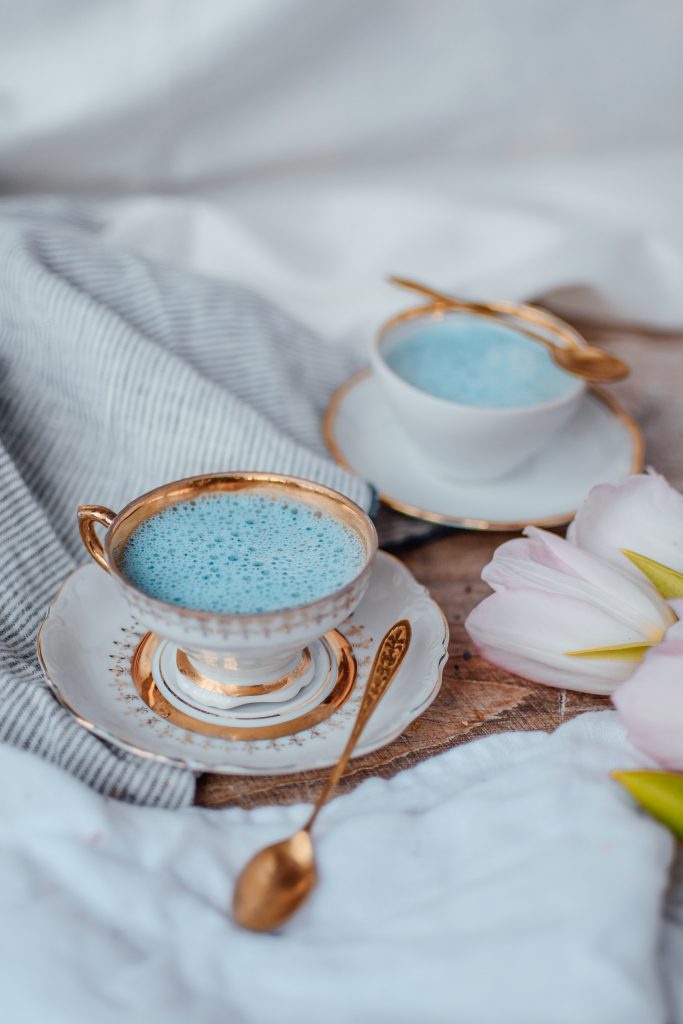
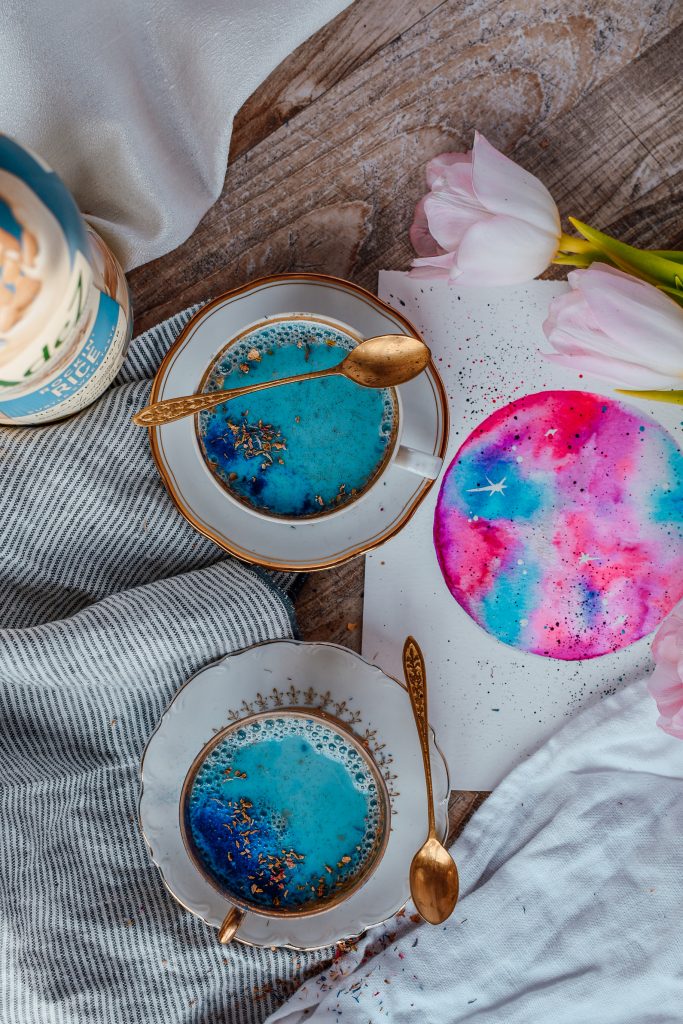
Moon Milk (zu Deutsch Mond Milch) ist gerade einer der größten Food Trends auf Social Media. Überall sieht man die bunten Tassen von mystischer Mond Milch. Sie ist viel ausgefallener, als die herkömmliche Latte und kommt in allen Variationen dekoriert mit Blümchen, Gewürzen und Kräutern. Aber woher kommt der Hype eigentlich?

Was ist Moon Milk?

Mond Milch hat ihren Ursprung in der ayurvedischen Küche. Die ayurvedische Heilkunde ist ein 5000 Jahre altes Heilungssystem. Sie steht für das Wissen vom Leben und legt einen starken Fokus darauf den Körper zu entgiften und die Selbstheilungskräfte zu aktivieren. Man muss allerdings anmerken, dass viele die Wirkung der ayurvedischen Medizin anzweifeln, da es nur wenige handfeste Beweise über ihre Funktionalität gibt. Jedoch muss ich persönlich sagen, dass ich den Ansatz toll finde und die ausgelesenen Gewürze, welche ein großer Bestandteil von Ayurveda sind, bestimmt eine positive Wirkung auf den Körper haben.

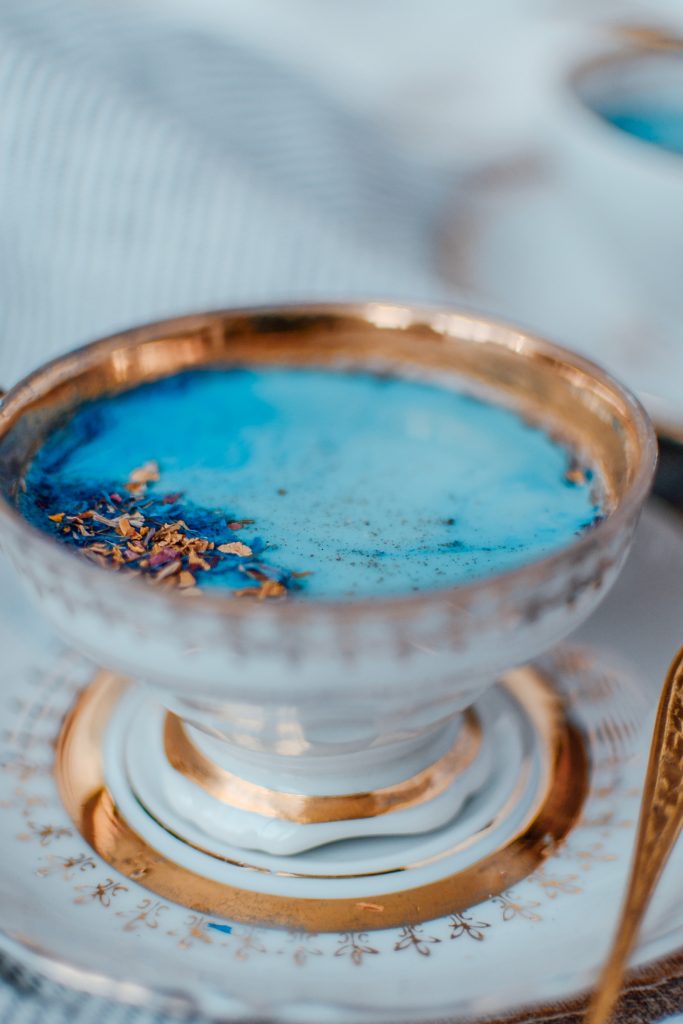
Im wesentlichen beinhaltet die Moon Milk viele Gewürze, die in der ayurvedischen Küche sehr beliebt sind. Darunter zählen zum Beispiel, Ginseng, Kurkuma, Ginseng, getrocknete Rosenblätter, Pfeffer oder Muskatnuss.

Mond Milch Rezept

Eigenschaften von Moon Milk

Viele sagen, dass Moon Milk beim Einschlafen helfen soll, da die Zutaten besonders schlaffördernd wirken sollen. Warme Milch mit Honig vor dem Schlafen gehen zu trinken war schon der Geheimtipp meiner Omi. Diese Variation des Getränkes ist etwas ausgefallener, soll aber die gleiche beruhigende Wirkung haben.

Die Zutat, welche dieses besondere Rezept auszeichnet ist Ashwagandha, welches vielleicht besser als indischer Ginseng oder Schlafbeere bekannt ist. 

Ich habe dieses mystische Kraut im Internet recherchiert und herausgefunden, dass es zur Familie der Nachtschattengewächse gehört und wie der Name Schlafbeere schon sagt dazu beitragen soll Stress abzubauen und besser einschlafen zu können. Es wird dem Kraut auch nachgesagt, dass es positive Auswirkungen auf den Blutzuckerspiegel und die Gehirnfunktion haben kann. Es soll auch bei Angstzuständen und Depression helfen sowie das Cortisol Level im Körper reduzieren und entzündungshemmende Eigenschaften haben.

Mond Milch Rezept

Welche Basis eignet sich am besten für den Drink?

Ich habe das Rezept in verschiedensten Formen ausprobiert. Um den ganzheitlichen Aspekt der ayurvedischen Küche zu bewahren, habe ich mich bei diesem Getränk dann für eine laktosefreie Basis entschieden. Im Moment bin ich sowieso kein Freund von tierischer Milch weil ich einfach der Meinung bin, dass wir Menschen ab einem Gewissen Alter nicht mehr so viel Milch konsumieren sollten und habe die Milch gegen meine Lieblingspflanzendrinks von AdeZ eingetauscht. Diese eignen sich einfach perfekt für die Mond Milch.
Ich liebe die cremige und weiche Konsistenz der alternativen Pflanzendrinks von AdeZ und die natürliche Süße! Für die Mond Milch habe ich schon alle drei Sorten probiert: Rockin’ Rice, Surprising Soy und Amazing Almond! Am besten hat es mir mit dem Rockin’ Rice Drink geschmeckt, aber ich denke das ist Geschmackssache. Ihr könnt das Moon Milk Rezept auf jeden Fall mit allen drei Sorten machen.

Moon Milk Latte Rezept

Vorteile von AdeZ

Ich habe schon viele alternative Pflanzendrinks probiert und war bis jetzt mit keiner so richtig zufrieden. Entweder waren sie vom Geschmack total fahl und langweilig, die Konsistenz passte nicht oder die Milch flockte bei meinen Rezepten. Das alles passiert bei AdeZ nicht und deshalb liebe ich diese Drinks!

Hier ein paar Bullet Points mit meinen persönlichen AdeZ Highlights:

  • Kein zugesetzter Zucker! Die Drinks schmecken dennoch durch das natürliche Stevia leicht süß.
  • Sie enthalten extra Kalzium, Vitamin D und B12 und damit die selben Vitamine und Mineralstoffe wie auch Kuhmilch.
  • Die Drinks von AdeZ sind laktosefrei und eignen sich perfekt für eine vegane Ernährung
  • Die Flasche ist eine PlantBottleTM. Das heißt ihr verringert damit euren Plastikmüll weil sie bis zu 30% aus pflanzlichem Material besteht und komplett recyclebar ist.
  • Die Milch flockt nicht wenn man sie erhitzt! Das heißt man kann sie perfekt für seinen morgendlichen Kaffe verwenden oder eben für Heißgetränke wie die Moon Milk, die ich euch gleich zeigen werde.   

Moon Milk Latte Rezept

Moon Milk Rezept

Lasst mich euch nun erklären wie man Moon Milk zubereitet. Im Prinzip ist das alles sehr einfach. Dennoch beinhaltet das Rezept zwei etwas exotischere Zutaten. Das Ashwagandha Pulver und blaues Spirulina Pulver. Beides kann man ganz einfach online bestellen. Wie oben erwähnt ist Ashwagandha die typische Zutat der Mond Milch. Solltet ihr das allerdings nicht zu Hause haben oder besorgen wollen könnt ihr es auch weglassen. Die Moon Milk schmeckt dann trotzdem noch super lecker.

Ihr müsst nur einen großen Topf nehmen und alle Zutaten langsam erhitzen. Gut umrühren und kurz aufkochen lassen.

Solltet ihr keinen trockenen geriebenen Ingwer zu Hause haben, könnt ihr auch frischen ganz fein reiben und in das Rezept rühren.

Hier habe ich euch das Rezept in druckbarer Version für 2 Portionen zusammen gefasst:

Mond Milch
Serves 2
Mond Milch - die etwas ausgefallenere Latte!
Write a review
Print
Prep Time
10 min
Prep Time
10 min
Ingredients
  1. 500ml Rockin’ Rice von AdeZ
  2. 2 EL Honig oder Ahornsirup
  3. 1/4 TL Kardamon
  4. 1/4 TL Muskatnuss
  5. 2 Tropfen Vanillearoma
  6. 1/4TL geriebener Ingwer
  7. 1 TL Ashwagandha Pulver (optional)
  8. 1 TL blaues Spirulina Pulver
  9. Dekoration: getrocknete Blütenblättern
Instructions
  1. In einem Kochtopf alle Zutaten miteinander mischen und kurz aufkochen.
  2. Die Mischung in Tassen füllen und bei Bedarf mit getrockneten Blütenblättern dekorieren.
Notes
  1. Ihr könnt das blaue Spirulina Pulver auch gegen rote Rübenpulver oder Kurkuma tauschen.
carinaberry.com https://carinaberry.com/
Mondmilch Rezept

Variationen des Rezeptes

Ich habe meine Mondmilch mit blauem Spirulina Pulver gemacht. Es gibt aber viele verschiedene Variationen, welche ihr ausprobieren könnt. Viele meiner Food Blogger Freunde machen die Mondmilch mit Kirschsaft und Rote Beete Pulver. So bekommt man einen wunderschönen pinken Ton. Wenn ihr das auch weglässt und stattdessen Kurkuma verwendet wird euer Getränk goldig gelb. Ihr seht also eurer Fantasie sind keine Grenzen gesetzt.

Ich hoffe euch hat dieser Beitrag gefallen und ihr probiert das Rezept mal aus. Solltet ihr noch nach mehr interessanten Rezepten mit den Pflanzendrinks von AdeZ suchen, dann kann ich euch noch meinen Feigenporridge und das Marillenparfait empfehlen. Schaut mal vorbei.

Hast du dieses Moon Milk Rezept nachgemacht?

Dann markiere mich mit @carina_berry auf Instagram verwende den Hashtag #carinaberry

Ich teile immer wieder nachgemachte Rezepte auf meiner Instastory  <3

xoxo,

Moon Milk Rezept

Weiterlesen

Gesunde Biskuitrolle mit Matcha

Matcha Biskuitrolle

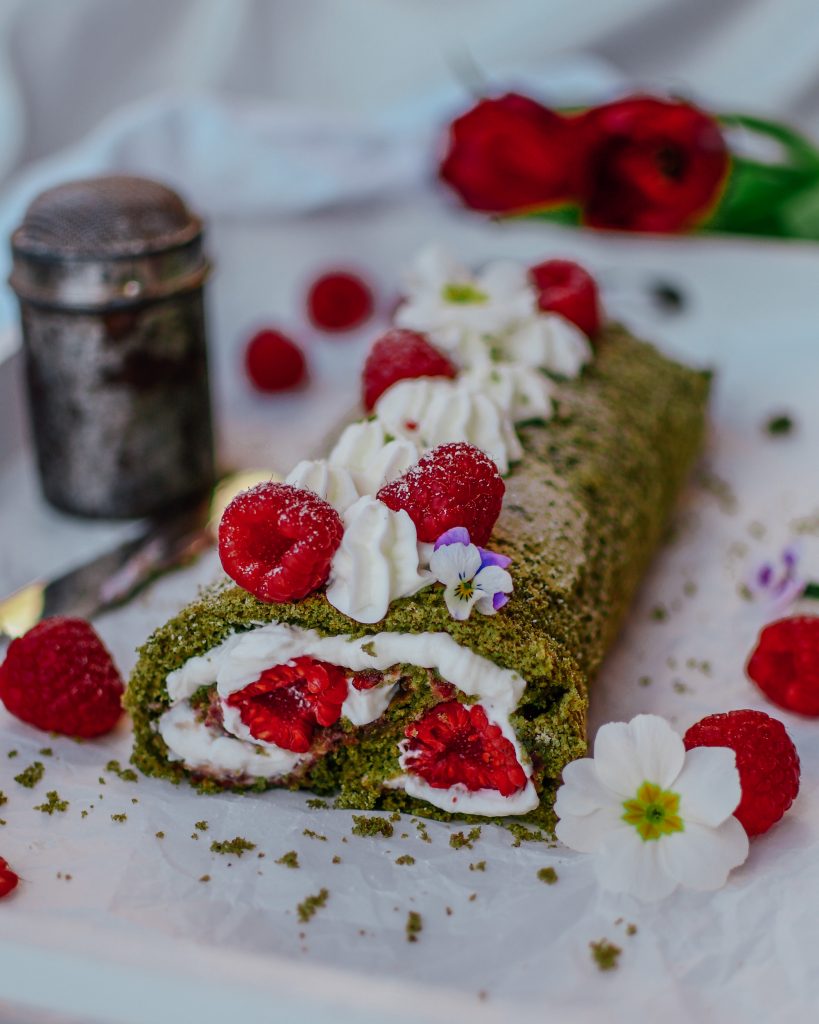
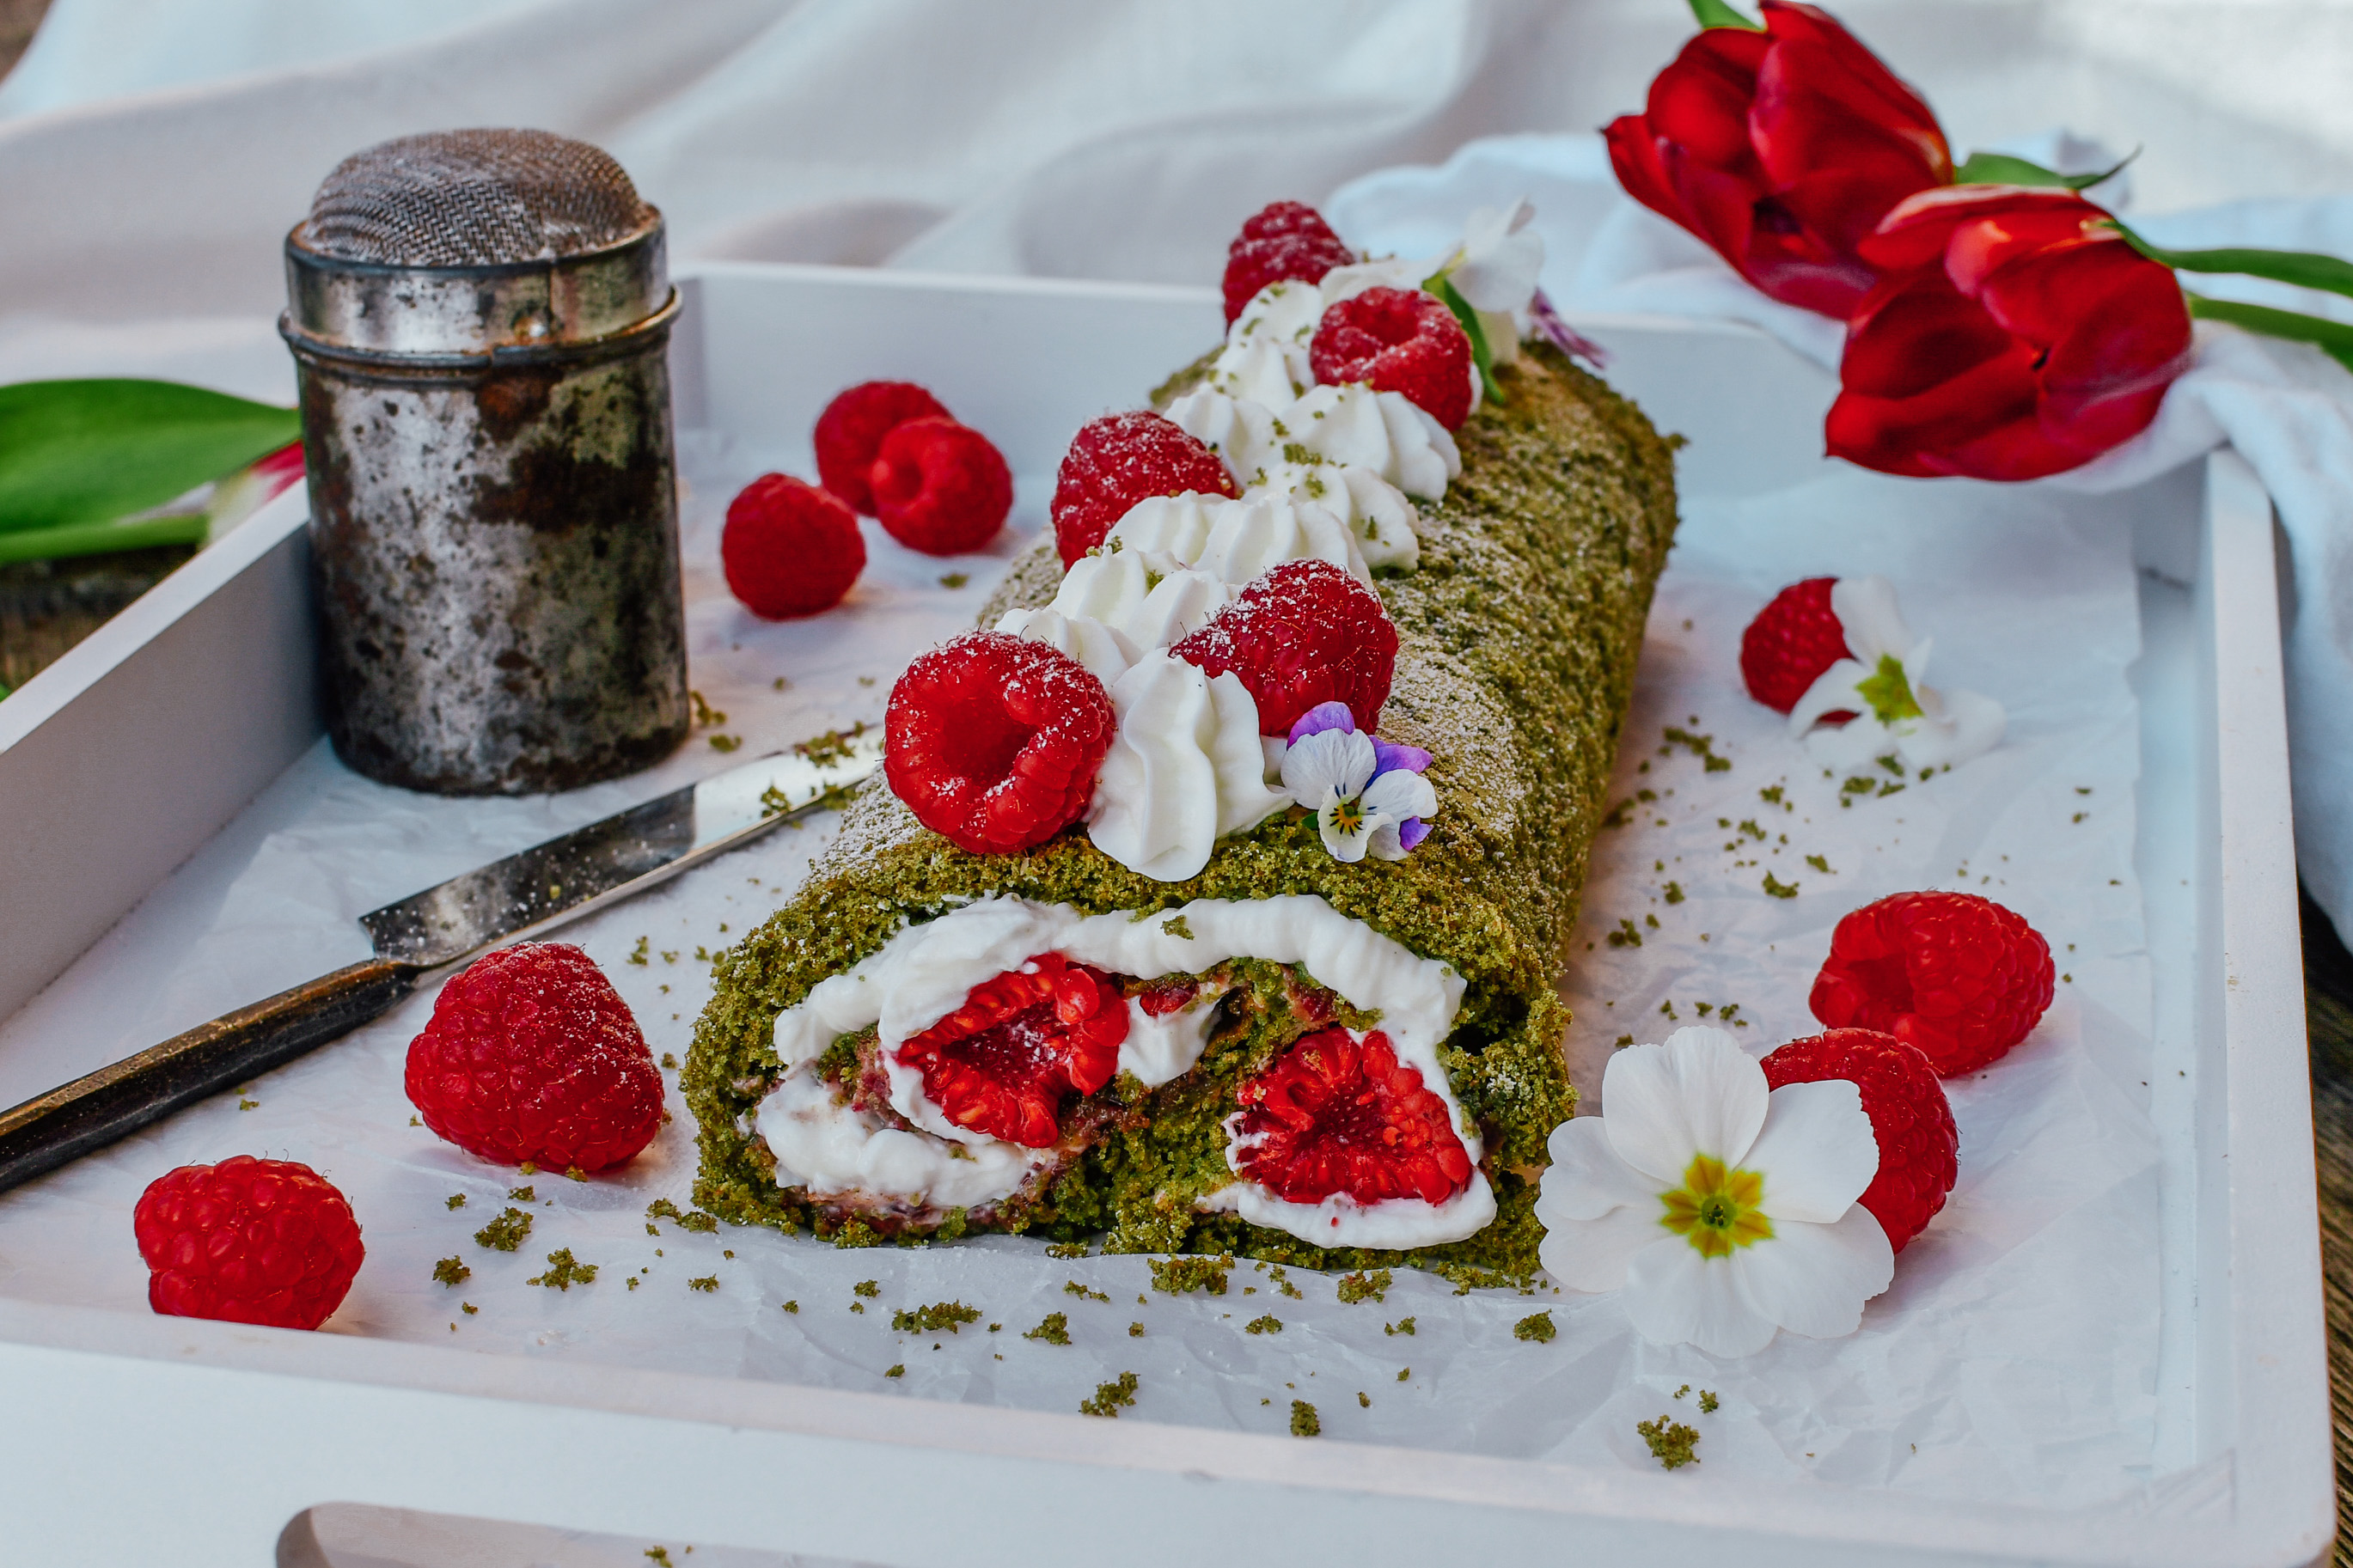
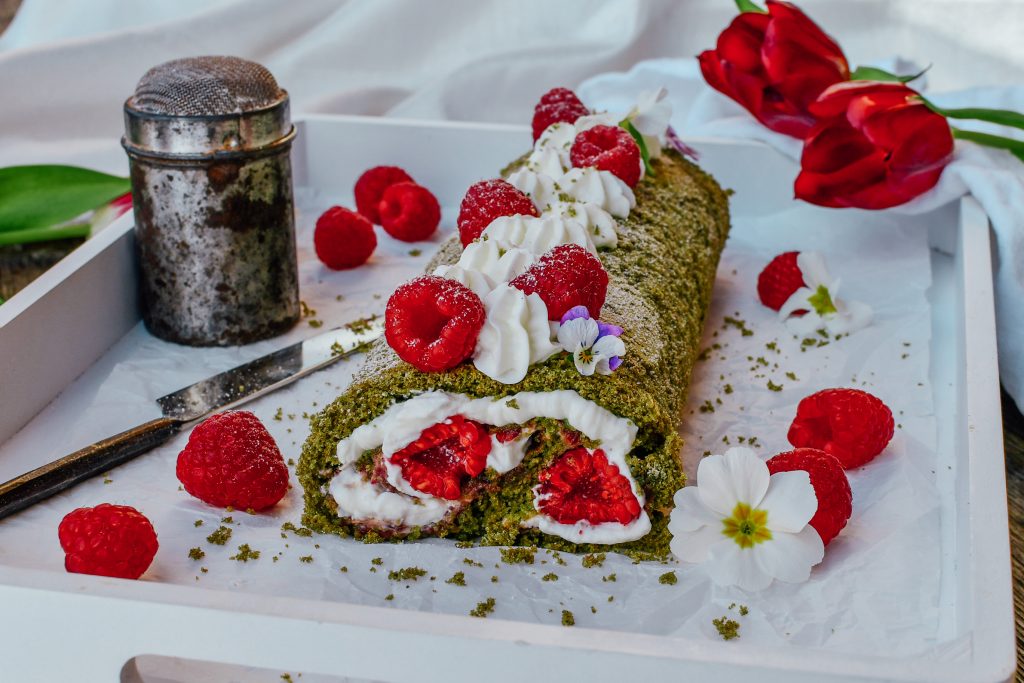
Ich freue mich so heute mein neues Lieblingsrezept – die gesunde Biskuitrolle mit Matcha – mit euch teilen zu dürfen! Es ist ein super einfaches Dessert Rezept inspiriert durch meine liebe Omi. 

Der Frühling naht

Hier in Österreich haben wir gerade die ersten Frühlingstage, die Sonne scheint schon länger und die ersten Frühlingsblumen wie Schneeglöckchen, Frühlingsknotenblumen und Krokusse sind am sprießen. Ich habe sogar schon die wachsenden Blätter der Narzissen bei uns im Garten gesichtet. Frühling ist also nicht mehr weit und deshalb ein guter Grund meine Rezepte etwas der Saison anzupassen. 

Wie ihr vielleicht schon gesehen habt gebe ich meinem Instagram Feed immer ein Thema. Im Winter war es schwarz, weiß und jetzt in der letzten Zeit rot. Für den Frühling möchte ich jetzt in ein sattes grün gehen und generell mein Feed etwas bunter gestalten. Aus diesem Grund bin ich gerade fleißig am Rezepte entwicklen und habe unter anderem diese neuartige Kreation mit Matcha Pulver probiert. 


Matcha Biskuitroulade . - backen mit Superfood

Die Inspiration für die Fitness Biskuitroulade 

Am Wochenende war ich nämlich bei meiner Oma zu Besuch, welche mir als Nachspeise mit den Worten: „Ich hatte leider nicht viel daheim, also habe ich nur das hier gemacht.“eine Biskuitrolle anbot. Ich fragte also genau nach dem Rezept nach, da meine Oma normalerweise zum Backen immer eine Million Zutaten verwendet und sonst nicht wirklich einfache Rezepte kochte. Deshalb war ich nun mega interessiert wie sie aus „nicht viel daheim“ so eine leckere Nachspeise gezaubert hatte. Als sie mir die Zutaten aufzählte erkannte ich sofort das Potential eines Fitnessrezeptes. Für eine gesunde Biskuitrolle musste man einfach nur den Zucker austauschen und die einer oder andere Zutat anpassen. 

Am nächsten Tag stand ich also schon in der Küche mit meiner Misson: Eine gesunde Biskuitrolle zu zaubern im passenden Frühlingslook für meinen Feed! 

Gesundes Dessert mit Matcha und Spirulina

Superfood im Dessert

Da ich die gesunde Biskuitrolle ja grün einfärben wollte, überlegte ich wie ich das am besten anstellen sollte. Natürlich wollte ich keine künstliche Lebensmittelfarbe verwenden. Spinat hätte funktioniert, aber ich habe mich dann aus eine Mischung von Matcha und Spriulina entschieden. So habe ich einen schönen Grünton bekommen und zusätzlich noch jede Menge positiver Wirkstoffe des Superfoods!

  • Matcha: Ich verwende Matcha unglaublich gerne weil es einfach so gesund sein soll. Ich lese mir sehr oft Berichte darüber durch und es wird immer wieder hervorgehoben, dass Matcha ganz viele Antioxidantien hat, das Immunsystem boostet und sogar das Krebsrisiko verringern soll. 
  • Spirulina: Spirulina ist eine Alge mit besagter Superpower! Sie soll beim entgiften von Schwermetallen im Körper helfen, entzündungshemmend und leberreinigend sein. 

gesunde Biskuitrolle mit Matcha

Gesunde Biskuitrolle mit Matcha und Spirulina – das Rezept 

Hier nun mein schnelles Rezept für eine gesunde Biskuitrolle mit Matcha und der Power Alge Spirulina:

Gesunde Biskuitrolle mit Matcha und Spirulina
Yields 1
Eine leichte Frühlingsrolle!
Write a review
Print
Prep Time
25 min
Cook Time
10 min
Total Time
35 min
Prep Time
25 min
Cook Time
10 min
Total Time
35 min
Ingredients
  1. 5 Eier
  2. 2 EL Matcha Pulver
  3. 1 EL Spirulina Pulver (oder mehr Matcha)
  4. 100 g Erythrit (oder Xylit)
  5. 1/2 Pkg. Backpulver
  6. 100 g Dinkelvollkornmehl
Füllung
  1. 200g Griechisches Joghurt
  2. 50g Xylit oder Erythrit
  3. 200g Himbeeren
Instructions
  1. Das Backrohr auf 180 Grad Ober-/Unterhitze vorheizen und ein Backblech mit Backpapier auslegen.
  2. Die Eier trennen und mit dem Mixer aus dem Eiklar einen steifen Schnee schlagen.
  3. In der 2. Schüssel die Eidotter sehr schaumig rühren. Dann den Alternativzucker (Erythrit oder Xylit) einrieseln lassen und weiter schaumig rühren.
  4. Mehl, Spirulina und Matcha mit dem Backpulver vermengen und abwechselnd mit dem Eischnee unter die Eiermasse heben.
  5. Den Teig 2 cm dick auf das Backblech streichen und im Backrohr 10 bis 12 Minuten goldgelb backen.
  6. Das Blech aus dem Backrohr nehmen und den Kuchen abkühlen lassen.
  7. Für die Füllung das griechische Joghurt mit dem Alternativzucker mischen und über der gebackenen Masse vertstreichen. Die Himbeeren nun auf dem Joghurt gleichmäßig verteilen.
  8. Nun ganz vorsichtig beginnen den Biskuitteil einzurollen. Vorsichtig dabei das Backpapier ablösen und den ganzen Teig zu einer schönen Roulade rollen!
Notes
  1. Ich habe die gesunde Biskuitroulade noch mit etwas mehr griechischem Joghurt und Himbeeren dekoriert. Man kann übrigens auch Marmelade für die Füllung verwenden!
carinaberry.com https://carinaberry.com/
Ich hoffe sehr, dass dir dieses Superfood Rezept gefallen hat. Die gesunde Biskuitroulade mit Matcha und Spirulina ist wirklich ein herrlich einfaches Frühlingsrezept zum Nachmachen! Wenn du noch auf der Suche nach mehr Fitness Dessertideen bist dann sie dir doch mal meinen Low Carb Apfelkuchen oder meine Proteincheesecake an! 

gesunde Biskuitrolle mit Matcha und Spirulina

Biskuitroulade mit Superfood

Hast du das Rezept nachgemacht?

Dann markiere mich mit @carina_berry auf Instagram oder verwende den Hashtag #carinaberry

Ich teile immer wieder nachgemachte Rezepte auf meiner Instastory  <3

xoxo,


Weiterlesen

Spiegelei Waffeln ohne Zucker für den Osterbrunch

Osterrezept Spiegelei Waffeln

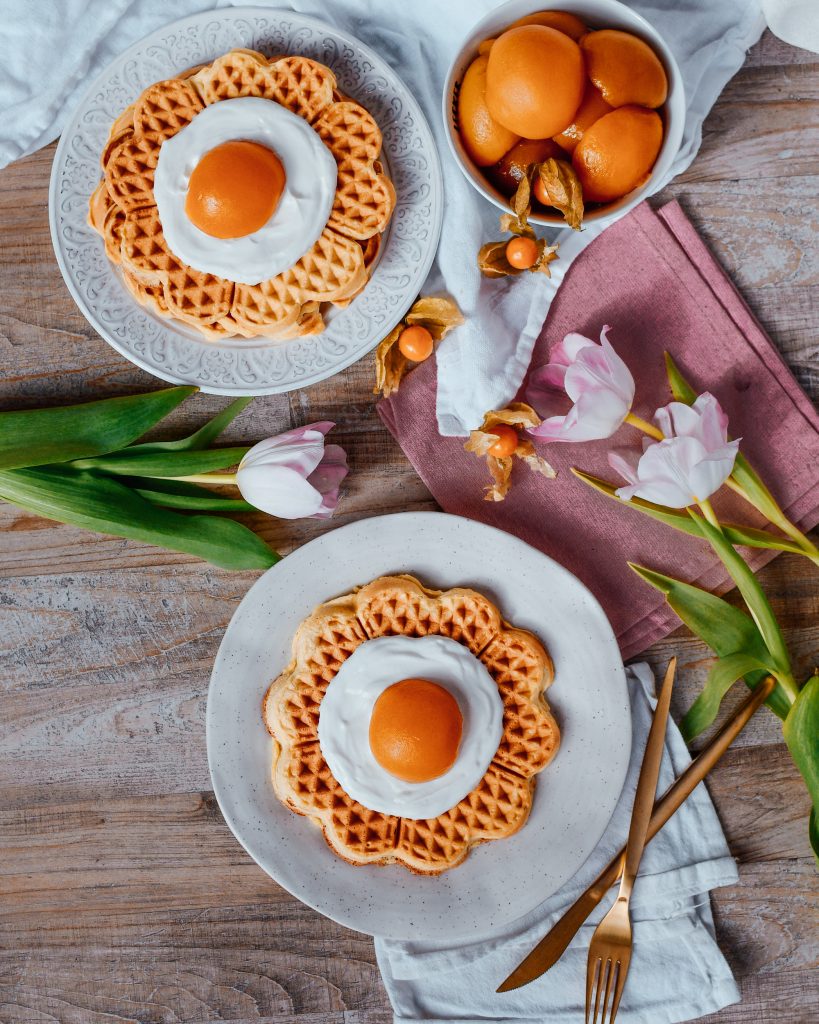
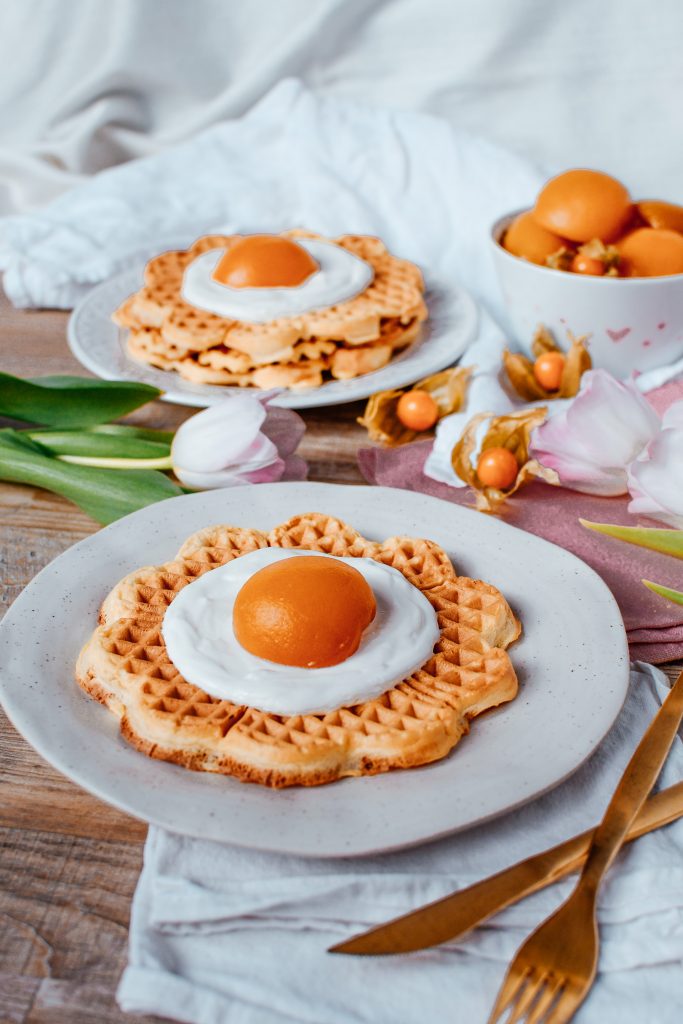
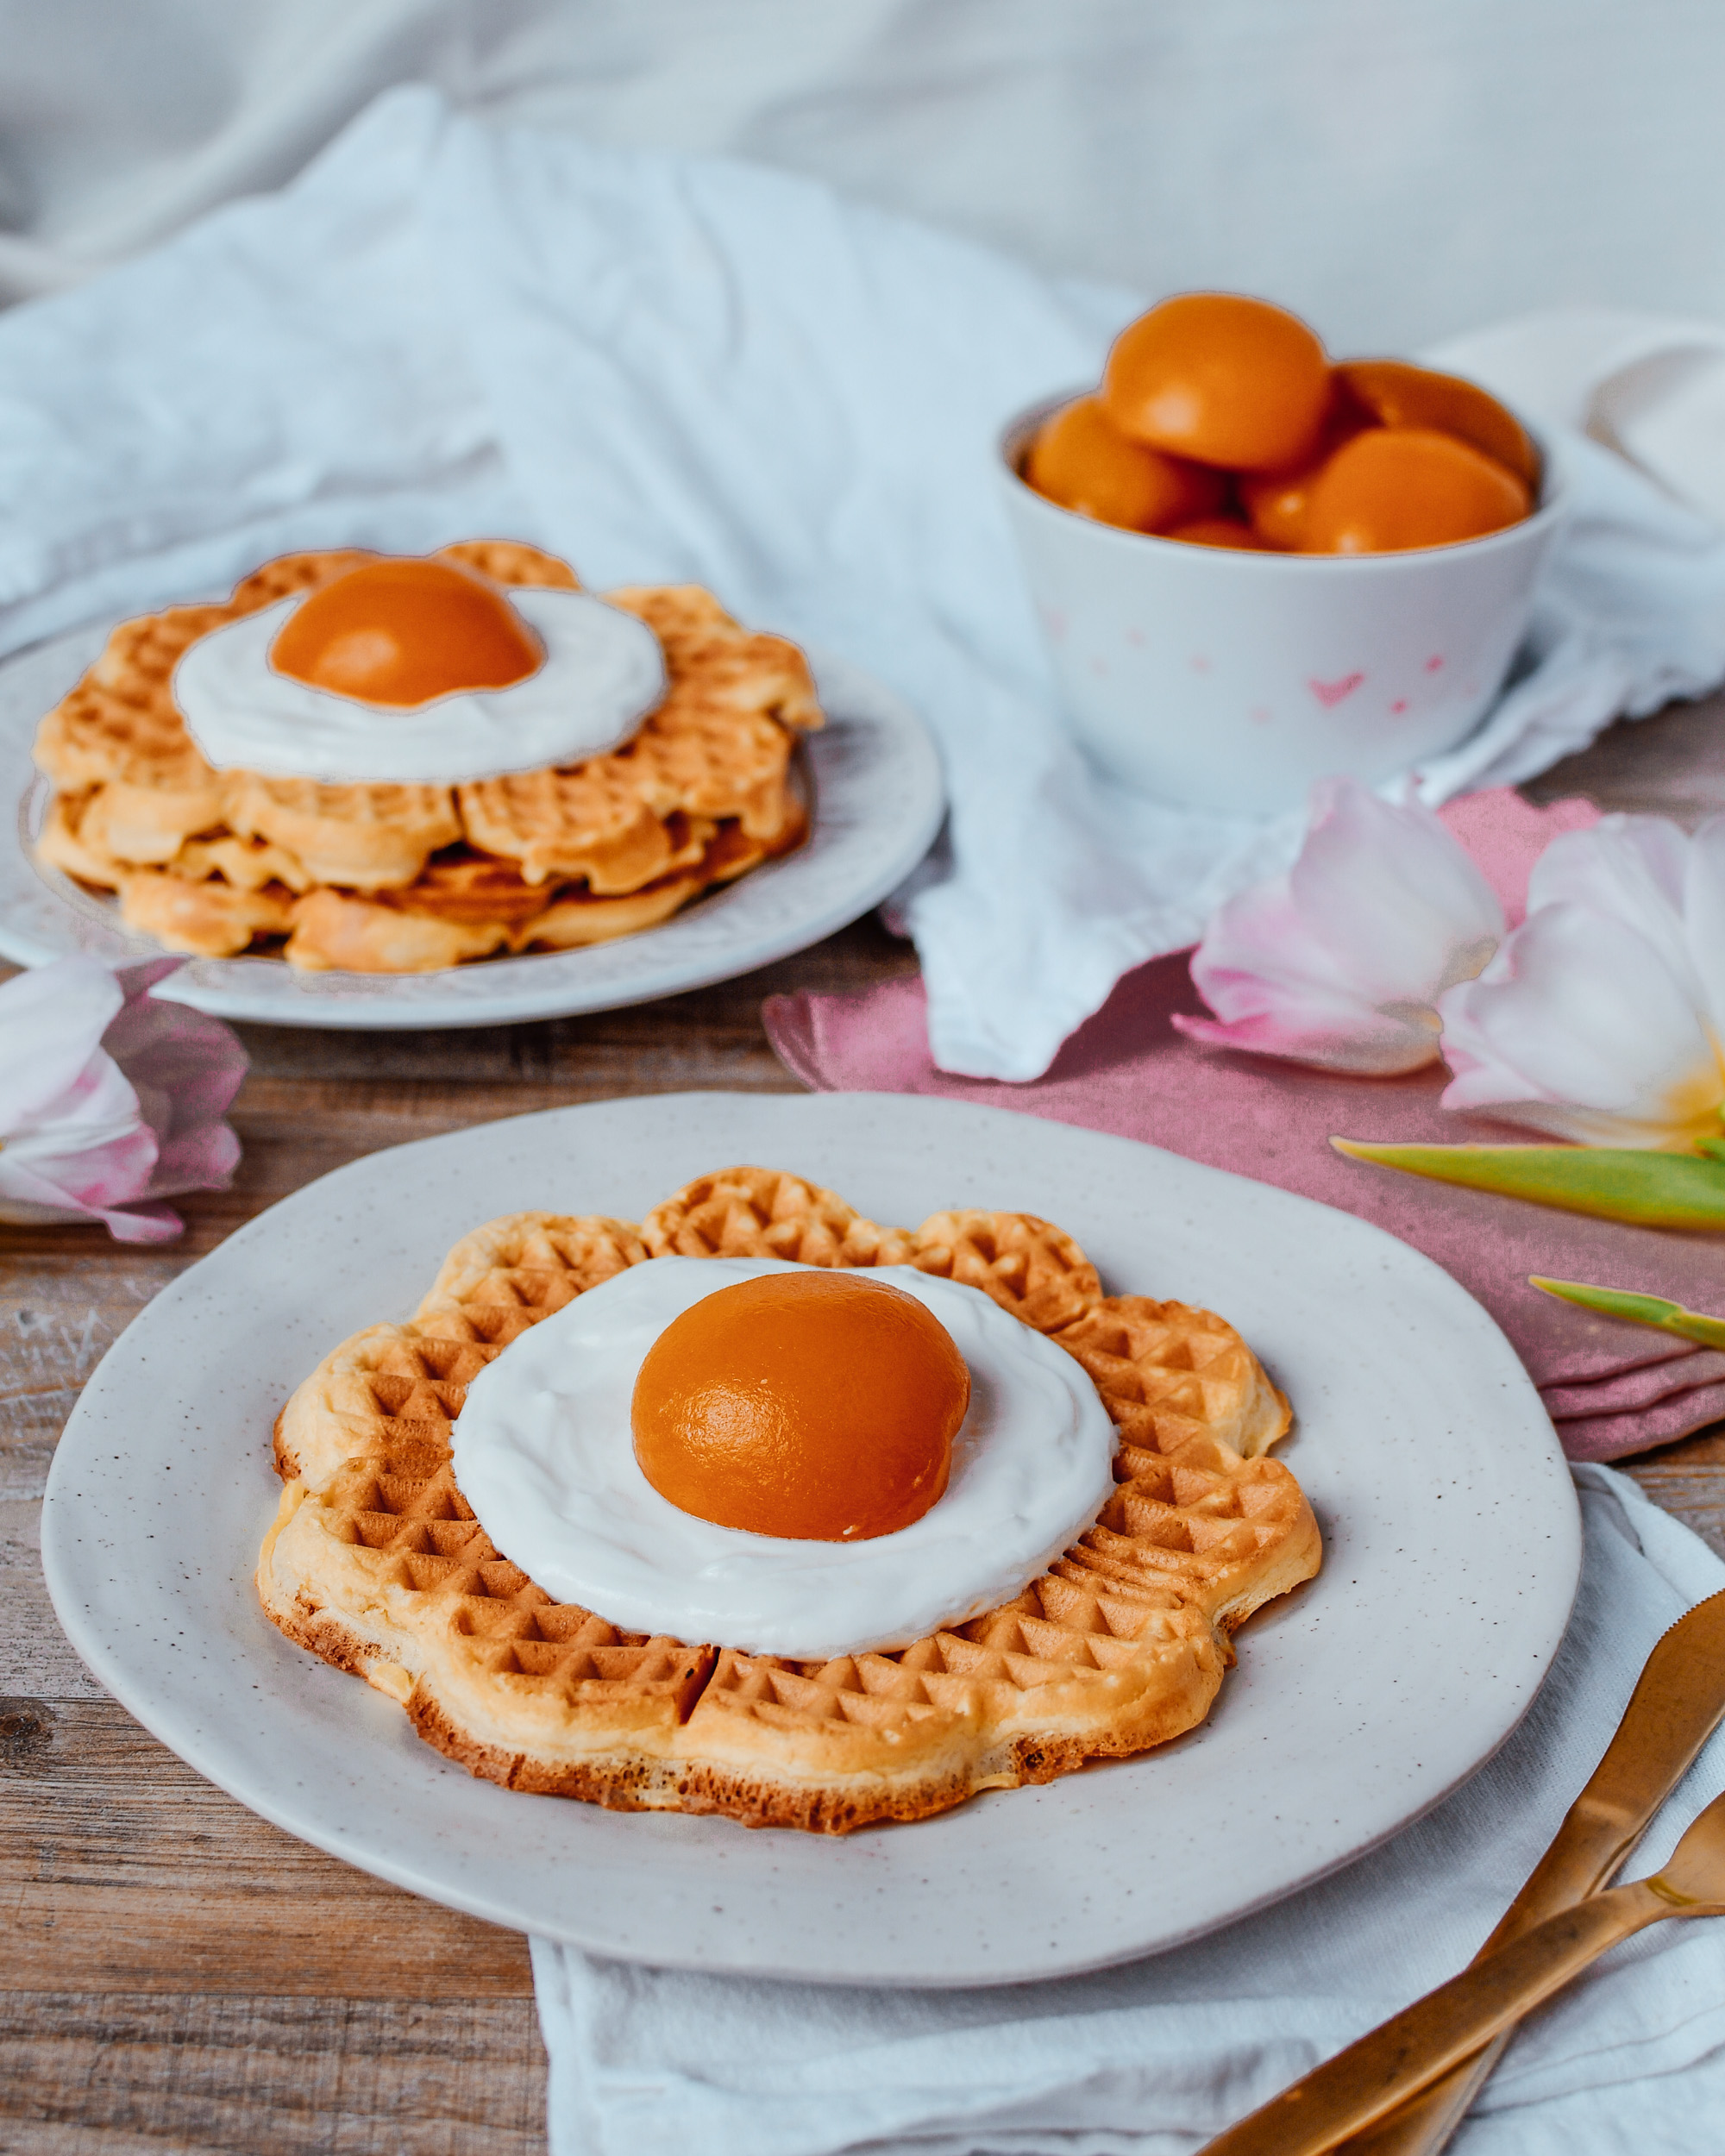
Hast du einen Osterbrunch geplant und suchst nach einem besonders einfallsreichen Rezept? Dann werde ich euch jetzt von diesen leckeren Spiegelei Waffeln überzeugen – wie immer ohne Zucker und Fitness approved! 

Der perfekte Osterbrunch

Spiegelei Waffeln kann man ja eigentlich das ganze Jahr über essen, aber gerade um Ostern machen sie besonders viel Spaß da sie irgendwie was frühlingshaftes an sich haben 🙂 Was ich an dem Rezept auch besonders toll finde ist die Einfachheit. Der Waffelteig ist wirklich schnell zubereitet und auch das Topping der Osterwaffeln geht ziemlich rasch. Dieses Osterrezept könnt ihr auch gut vorbereiten. Einfach den Teig schon am Vortag machen und am nächsten Morgen nur mehr die frischen Waffeln mit dem Waffeleisen heraus backen. 

Spiegelei Waffeln Oster Rezept

Da ich auf meinem Blog ja nur gesunde Fitness Rezepte ohne Zucker teile habe auch hier auch den Teig gegenüber anderen Waffel Rezepten angepasst. Es ist nicht der gleiche Teig wie bei meinem veganen Dinkelwaffeln, da ich diesmal schon etwas Vollkorn Mehl für eine bessere Stabilität verwendet habe. Trotzdem findet ihr keinen raffinierten Zucker oder Öl in dem Waffel Rezept. Auch das „Eiweiß“ welches bei vergleichbaren Rezepten aus Schlagsahne besteht habe ich durch kalorienfreies Erythrit ersetzt. Solltet ihr das nicht zu Hause haben könnt ihr auch Xylit (Birkenzucker) verwenden. 

Falls ihr Kinder zu Hause habt finde ich diese Spiegelei Waffeln besonders toll fürs Osterfrühstück, da es einfach mal was anderes ist und man den lieben Kleinen damit bestimmt eine Freude machen kann. 

Dieses Jahr werde ich Ostern in Italien mit ein paar Blogger Freunden verbringen. Als einzige Food Bloggerin in der Runde werde ich hier natürlich am Ostersonntag dann für das festliche brunchen sorgen und bestimmt für alle diese Spiegelei Waffeln zubereiten. 

Osterrezept Spiegelei Waffeln

Variationen des Rezeptes

Diese Spiegelei Waffeln kann man auch super variieren und dem eigenen Geschmack anpassen. Ich könnt zum Beispiel einfach etwas weniger Milch nehmen und diesen Teil mit Eierlikör ersetzen. Hier habt ihr dann noch extra Osterpep in der Waffel. 
Wenn ihr noch einen Esslöffel Kakaopulver in den Teig mischt bekommt ihr schöne dunkle Schokoladenwaffeln. Da sieht das Aprikosen „Spiegelei“ auch besonders toll drauf aus. 

Osterrezept Spiegelei Waffeln

Spiegelei Waffeln für Ostern

Hier für euch nun das leckere und einfach Osterrezept zusammengefasst:

Spiegelei Waffeln
Serves 5
Für den perfekten Osterbrunch!
Write a review
Print
Prep Time
10 min
Cook Time
20 min
Total Time
30 min
Prep Time
10 min
Cook Time
20 min
Total Time
30 min
Waffeln
  1. 100g Butter
  2. 3 EL Erythrit oder Xylit
  3. 3 Eier
  4. 200g
  5. Dinkelvollkornmehl
  6. 80ml Mandelmilch
  7. 1/2 TL Backpulver
Topping
  1. 200g griechisches Joghurt
  2. 3 EL Erythrit oder Xylit
  3. 5 eingelegte Pfirsichhälften
Instructions
  1. Butter und Zuckeralternative gut verrühren.
  2. Die Eier zugeben und unterrühren. Mehl und Mandelmilch abwechselnd unter den Teig rühren.
  3. In einem eingefetteten Waffeleisen die Waffeln heraus backen.
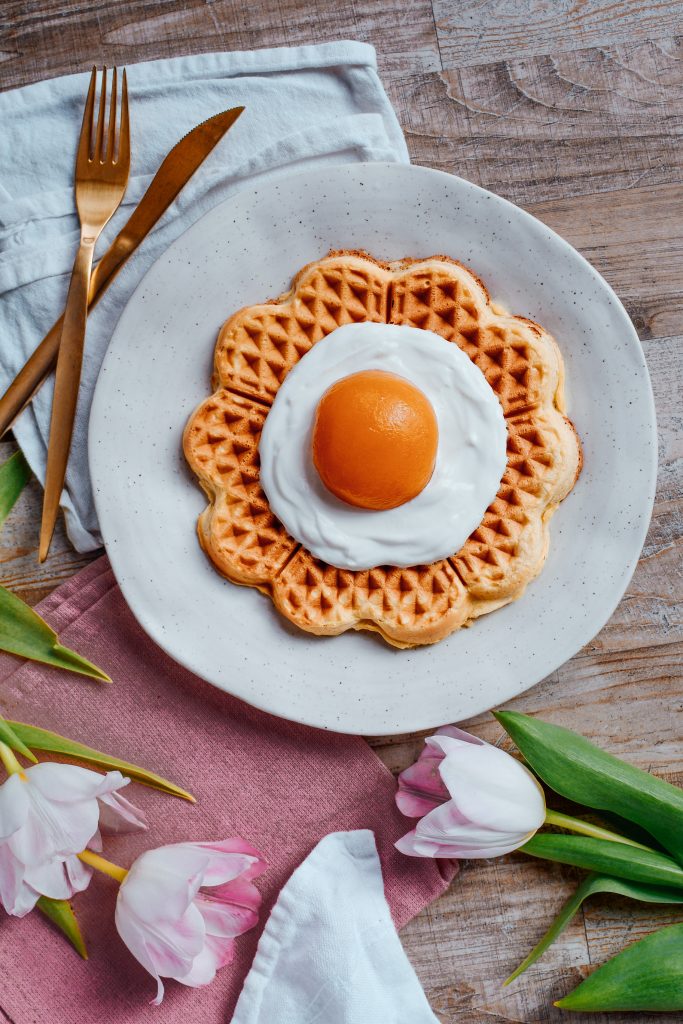
  4. Das Joghurt mit der Zuckeralternative mischen und einen großen Klecks als “Eiweiß” auf die Waffeln geben. Schön rund verteilen. Eine Pfirsichhälfte in die Mitte der Waffel setzen.
Notes
  1. Für dunkle Schokowaffeln kann man noch einen Esslöffel Kakaopulver zum Teig hinzugeben.
carinaberry.com https://carinaberry.com/

Hast du das Rezept nachgemacht?

Dann markiere mich mit @carina_berry auf Instagram oder verwende den Hashtag #carinaberry

Ich teile immer wieder nachgemachte Rezepte auf meiner Instastory  <3

xoxo,

Spiegelei Waffeln


Weiterlesen

Food Blogging Online Course – grow your food blog!

food blogging online course

Want to have your first company cooperations? Want to start making money with your food blog? Or even want to become a full time food blogger?Then check out this blog post about my food blogging online course where I will teach you everything you need to know in order to take your food blog to the next level!

My expertise as an instructor for this course

I started food blogging in 2016. In the beginning I started off with posting mobile phone pictures on my newly opened Instagram account, back when my name was still strengthberrynutrition – a word I still can’t even spell today. Fast forward three years I am proud to say that I became Austrias biggest fitness food blogger being able to blog as my full time profession and having turned my hobby into my dream job! 

Here is a short video explaining you a bit more about my food blogging background and how I got started:

I have been through the process of starting with nothing and building your blog and Instagram from scratch and want to give all my knowledge to you now. Along the way I have learnt a tremendous amount of skills necessary in this field of business and made important mistakes that I can share with you now.  That is why I developed a food blogging success online course! This course is an extremely valuable source of information. Basically I put everything I’ve learnt in the past years about food blogging and how I made it into my full time job into this online course. 

Recently I am getting more and more requests from international events and university to speak to their guests and students about social media blogging and content production.  I was also featured in some of the most important international food magazines and had a national media food blogging campaign in Austria reaching 1 million people a day, having them participate with their healthy dishes. I would consider myself an expert in the food blogging niche and can’t wait to share my knowledge with you in my own food blogging online course! 

how to food blog

Food blogging online course chapter breakdown

I really wanted you to learn from a first hand experience and that is why you will find a lot of personally recorded videos in the course with a lot of practical real life examples. 

Food blogging basics

The course is structured into 6 chapters. The first chapter is the introduction. Here you will find an overview of the course and I will explain a thing or two about the right blogging mindset and content creation in general. 

After the introduction you will find the food blogging chapter, where you will learn how to find your vibe and voice, develop great content and a content policy, learn how to set up a blog and I will also be touching on legal requirements. I will help you to find the best wordpress plug-ins a food blogger needs on their website and we will talk about SEO optimization on your blog so your blog posts have a higher chance of ranking on Google. 

This is important to set the base for that is coming in the later chapters. You will learn how to define a brand for yourself and how to set up your blog as a website. I will be sharing some of the important plug ins you need as a food blogger and help you find the right niche!

Food Styling course

Click here to go to the food blogging online course. 

Food photography

The third chapter is dedicated to food photography, where I will share my camera equipment with you, tips on how to prop and style your food, how to find the right light, how to edit your pics with and without lightroom and some more tricks along the way. Most photos really come down to how you present your dish and we will be going into a lot of detail to make sure you know how to decorate your dishes.

Food Styling Course
Without Decoration
Food Styling Course
With Decoration


I will also show you what kind of food props you should acquire and the basic things that are necessary for your food blogging equipment. Without the right equipment it will be hard to take high quality images. We will also touch on things like ISO, aperture and shutter speed. Taking good high quality images is easier than you might think!

Food blogging online course

Click here to go to the food blogging online course. 

Instagram Growth

The fourth chapter is dedicated to Instagram growth. Since I started on Instagram and grow my account up to 50k followers this platform really is my main expertise. I had my Instagram before I had my blog and was able to acquire a deep knowledge in this field. You will learn how to make use of the Instagram algorithm and make the features of the app work for you. Learn how to get reposts and post content the right way, join the right shoutout parties and create your own Insta highlights.

This chapter is dedicated to showing you how you can maximize the platform and become noticed out there! With Instagram you can attract a lot of people onto your blog so this can be a very powerful medium. 

Click here to go to the food blogging online course. 

Monetization 

Before the final send off I dedicated a whole chapter to the topic of monetization. I’ll be sharing with you how to find your pricing rates and put together your media kit with great examples. We will talk about how to reach out to companies, negotiate prices and the important topic of disclosing a partnership. 
The reason why so many bloggers fail to become successful is that they don’t know how to monetize their work. Most are afraid of being rejected by companies or have the fear of charging too much money. I will take you through all these issues and show you a couple of simple tricks to look so much more professional to companies. 

Click here to go to the food blogging online course. 

Food blogging online course

Learning outcome

You see this is a well rounded course giving you all the insights you need. By the end of the course you will feel comfortable building your food blogging empire because you will have the skills and knowledge for it and won’t be afraid to charge fair prices for the work you create! 

I know that the course has its price – but I am pretty positive after all the company cooperations you will get after this course your money will be well spent! See this as an investment in yourself and in your dreams. 

So head over to the course page right now. Read through the curriculum and I can guarantee you this food blogging online course will bring you to the next level! 

Course for food bloggers

Weiterlesen

How to make bubble tea – boba pearl recipe!

How to make bubble tea - boba pearl recipe

Ever since my trip to Taiwan this year I have a serious bubble tea addiction. It’s a drink that can be found on almost every corner and is hugely popular there. But do you actually know how to make bubble tea? I always wondered how those little black pearls get into my drink. 

Making it at home from scratch can sound like a daunting task. In this blog post I will show you how to make bubble tea like at Chatime yourself and show you how easy it actually is! 

Springe zu Rezept

My inspiration for this milk tea recipe post 

Taiwanese milk tea might be the best thing I have tasted in a very long time! I have spent a week in Taiwan at the beginning of January. It was a quiet spontaneous trip and I had no idea what to expect food wise there. I was blown away by the incredible Taiwanese cuisine. You can check out my Taipei food guide here. I knew bubble tea from Austria. It was a short lived trend some years ago. Bubble tea stores opened all around Vienna, but there was no real demand for it and they all closed down again. I don’t even think I ever tried the tapioca pearl tea they sold there. So when I came to Taiwan I had heard of the drink but never really tasted it. 

After my first pearl milk tea in Taipei I went back to the bubble tea shops every day to get one for breakfast. I love them because they keep you full and I can totally substitute my breakfast for it. After we left Taiwan I had one clear goal in my mind: I wanted to learn how to make bubble tea at home! 

making bubble tea at home from scratch

Tea time

Do you usually drink coffee or tea? If you are more on the tea side you will love this easy boba pearl recipe. Since I don’t drink coffee I am always looking for some good replacements for it and found one in this drink! Did you know that black tea also contains caffeine? This means it also does the trick of waking you up in the morning! Depending on how long you let the tea brew the caffeine is stronger or weaker. I just recently learned during my bubble tea recipe research that if you infuse the black tea for 2-3 minutes the caffeine will be the strongest. If you infuse it longer (4-5) minutes it will have a calming and soothing effect as the tannins will take over the caffeine. Don’t let the tea bag sit in the water for too long. Otherwise the tea will become bitter. 

When asking yourself the question how to make bubble tea you must not only consider preparing the pearls, but also the tea itself! Regarding the prefect black tea there are also some differences. My mom goes to London every year to bring home our favorite black English breakfast tea (Yorkshire). I found that was the perfect tea to make the recipe with! 

how to make bubble tea from scratch

How to make bubble tea

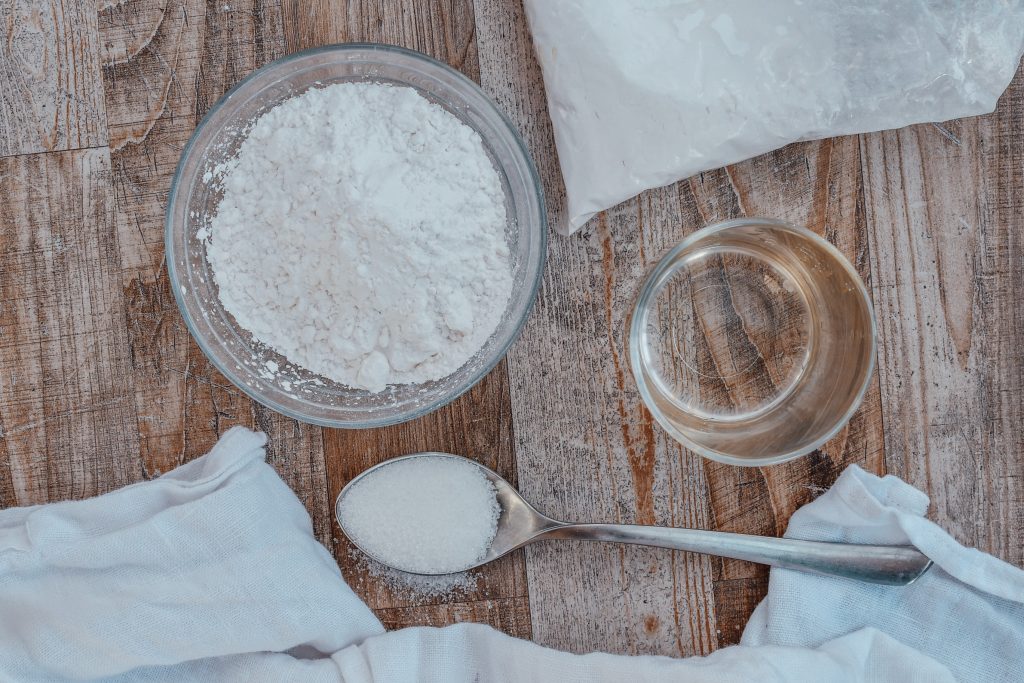
So what are your bubble tea supplies? You actually won’t need a lot of ingredients to make this yummy milk tea recipe! I am making my bubble tea with tapioca flour. Since I am all about fitness food and healthy recipes I also want to show you how to make bubble tea healthy without unnecessary calories! 

Starting off you will need your Tapioca flour, water and simple caramel. You can make simple caramel by yourself. Just take 2 tablespoons of sugar and add a bit of water so the sugar gets soaked. Stir until the sugar caramelizes. It will become a sticky dark brown substance.

Boil 50ml of water and add it together with the simple caramel to the tapioca flour. You need to be quick with the simple caramel sauce as it will start to harden very very fast. So once it is dark brown transfer it to the tapioca starch and the water immediately and stir. Once it is all mixed together you will need to knead it very well until you get a smooth dough. Be careful it can be super hot in the beginning so don’t burn your fingers! If the dough is still sticky add a bit more tapioca. 

How to make bubble tea

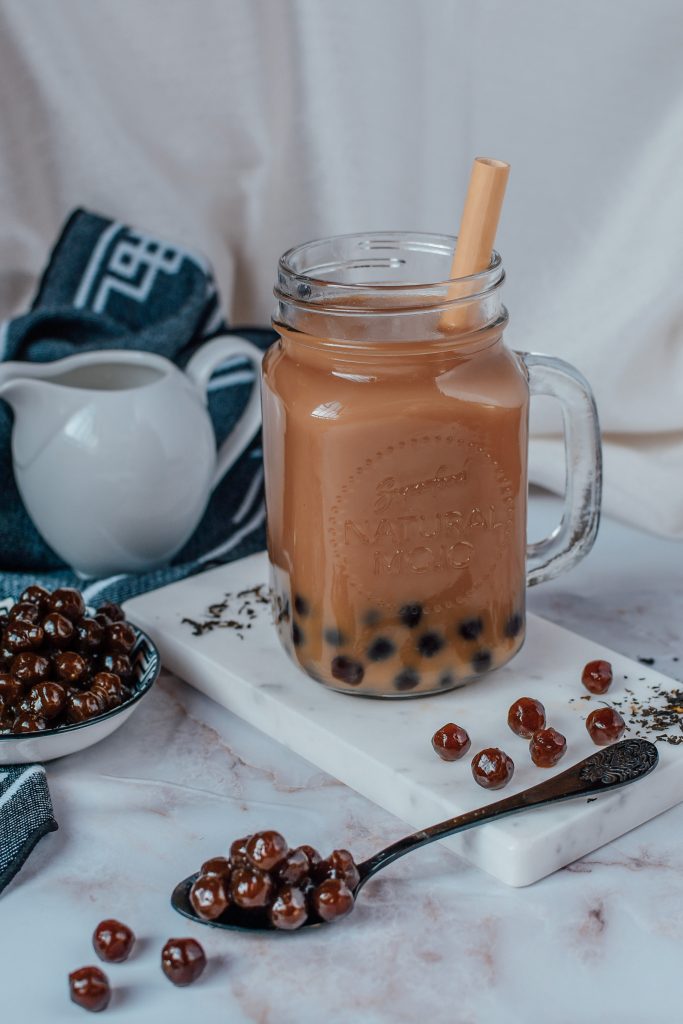
Divide the dough into four different parts and make them into little rolls. Cut pea-sized cubes from the rolls and shape them into little balls. This is very time consuming and the longest part of the bubble tea preparation. Once you have mastered forming a gazillion little balls out of the dough you can put them into the boiling water. 

Let them simmer for about 10-15 min and stir occasionally. You can see how they slowly become see through! When they are cooked, drain and rinse them with cold water. Put them into a container and add some sugar syrup, maple syrup or honey to keep them from sticking to each other. 

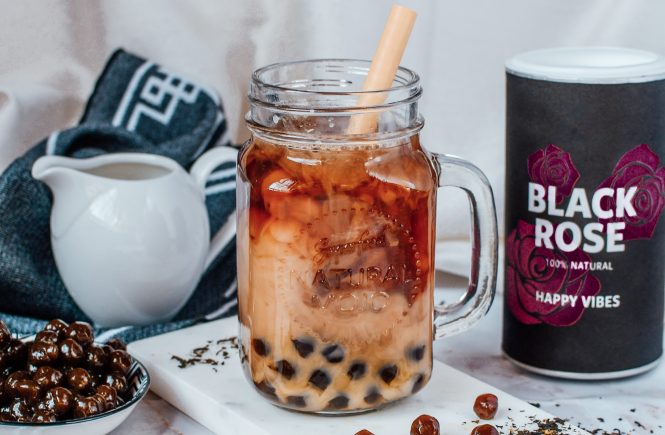
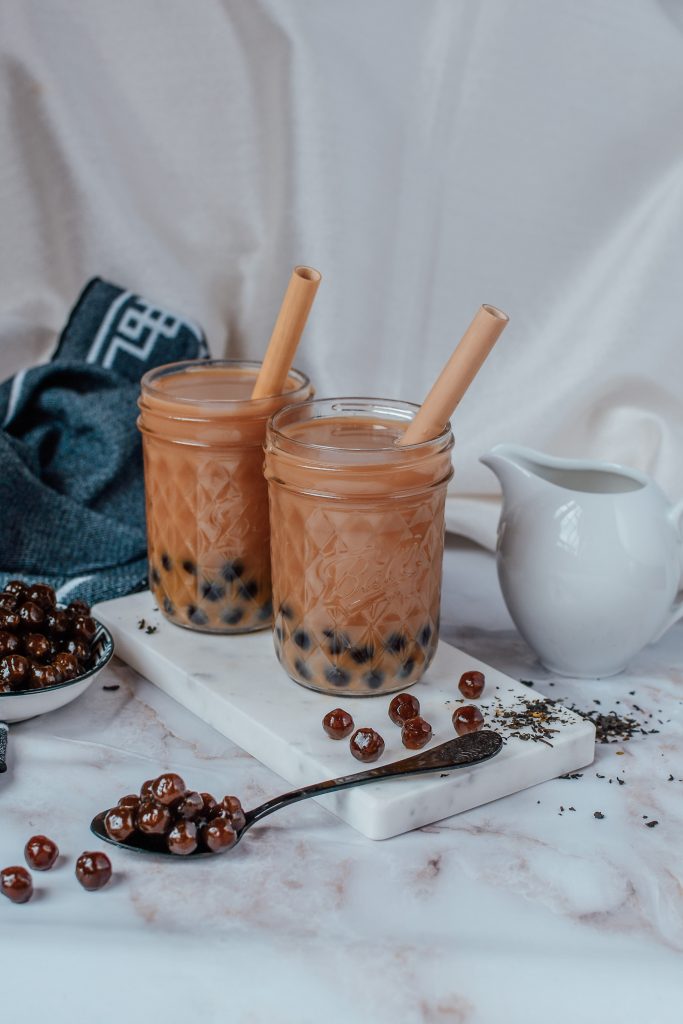
Once you have your precious boba pearls you can start brewing your tea! Put 5g of black tea into 250ml boiling water and infuse for 3-5 minutes. Add milk and sweetener of choice. Once you are done pour the drink into a glass jar and add the pearls. In Taiwan they were sipping their pearl milk tea through very wide straws. I wasn’t able to find these here in Austria so I just use a spoon to scoop up some of the delicious pearls with each sip!  

Bubble Tea variations

You might want to know how to make bubble tea in a different color.
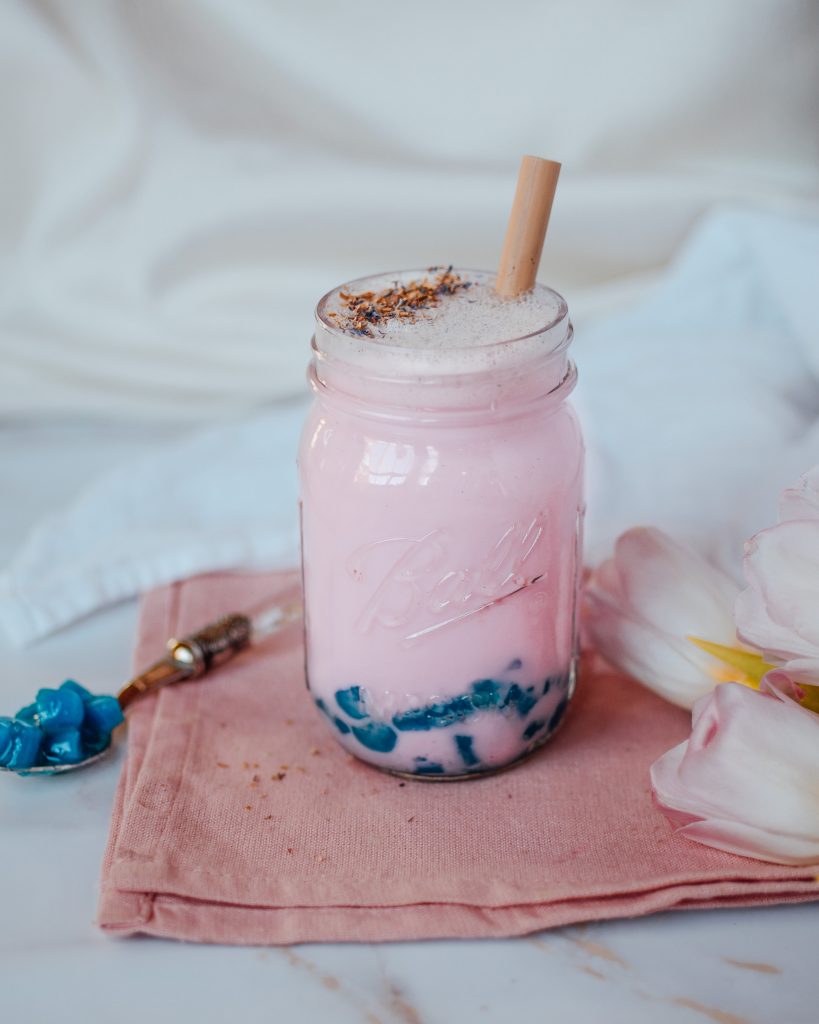
Of course you can vary this recipe and instead of black tea you can make strawberry bubble tea, pink pitaya bubble tea or matcha latte bubble tea. The options are really endless. As soon as you have the pearls you can exchange the drink depending on your mood! You can also make the pearls themselves colorful! You can use grape juice instead of water or simply add a teaspoon so pink pitaya powder to the starch if you want pink pearls for example!! Just make sure to have 100g tapioca starch with 50ml of hot boiling liquid. 

Tapioca Pearl milk tea boba

On the picture above you can see I colored the water blue (blue food coloring) to get pearls in a different color. Instead of black milk tea I made a pink pitaya latte!

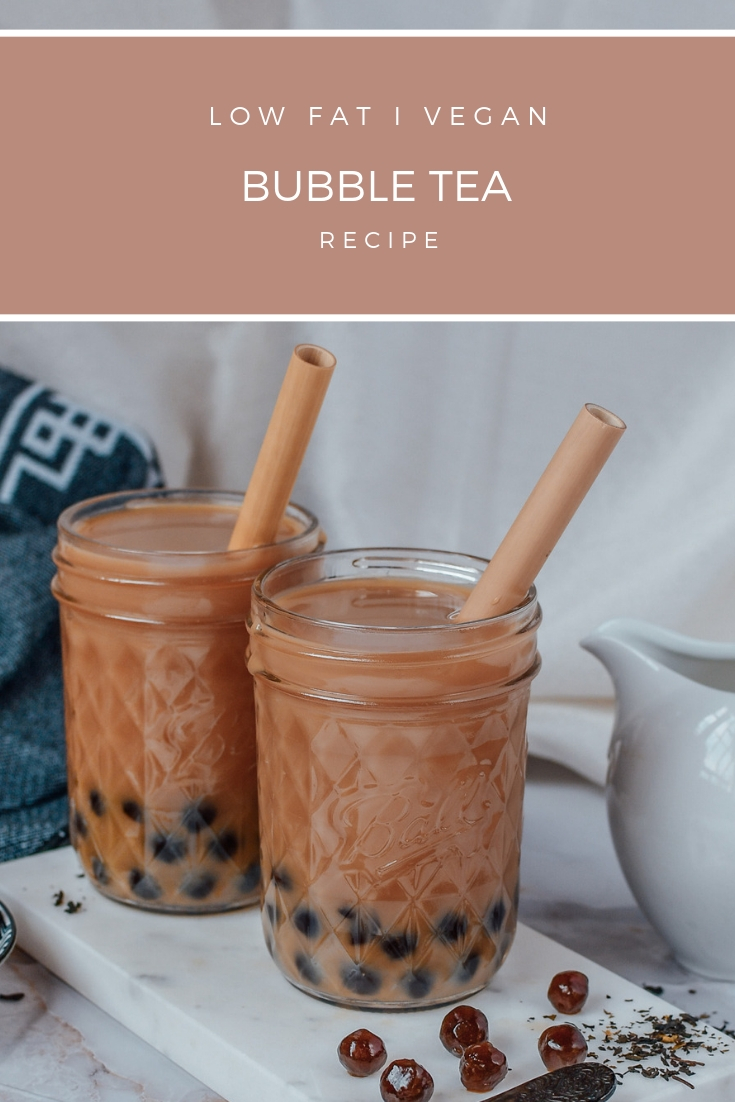
Bubble tea

How to make bubble tea from scratch!

Gericht Drinks
Portionen 6

Zutaten

Dough

  • 50 ml water
  • 100 g tapioca starch

Caramel Syrup

  • 1 tbsp water
  • 2 tbsp sugar

Anleitungen

  1. Bring 50 ml water to boil.

  2. In a separate pot add 1 tbsp of water and the sugar. Bring to boil and stir until the sugar caramelize.

  3. Now quickly add the hot water and the caramel to the tapioca starch. Stir quickly and knead the dough (carefully - it will be hot) until it becomes very smooth.

  4. Now form little, tiny bubbles with the dough - the smaller the better.

  5. Boil the pearls in hot water for about 10-15 minutes and then add to your tea mixture.

I hope you like this excursion to the Taiwanese cuisine and enjoyed learning how to make bubble tea. If you are looking for another fun drink make sure to check out my golden milk and pumpkin spice latte! Follow my Instagram for more inspiration <3 

Did you make this recipe? 

Did you make this recipe?

Tag  @carina_berry and use the Hashtag #carinaberry to get the possibility for a shoutout on my Instagram! 

Finally, I always love to see your wonderful creations and it makes me so happy to see you guys actually making my recipes. 

xoxo,


Making tapioca pearl milk tea

Weiterlesen

Ballaststoffreiches Frühstück Müsli mit Flohsamen

Ballaststoffreiches Frühstück

Oft essen wir einfach viel zu viele Kohlenhydrate und vergessen dabei total auf die wichtigen Ballaststoffe, welche so gut für unsere Verdauung sind. Deshalb möchte ich euch in meinem heutigen Blog Post ein einfaches Flohsamen Rezept für ein ballaststoffreiches Frühstück zeigen!

Die Bedeutung von Ballaststoffen im Körper 

Ganz zu Beginn sollten wir uns Ballaststoffe einmal genauer ansehen, denn sie haben eine ganz besondere Funktion in unserem Körper. 
Das interessante an Ballaststoffe ist, dass sie für den Körper unverdaulich sind. Das heißt wenn ihr euch die Nährwert Tabelle von Produkten anseht könnt ihr eigentlich die Ballaststoffe von den angegebenen Kohlenhydraten abziehen um auf die verdauliche Menge an Kohlenhydraten zu kommen. Dies wird oft extra bei Proteinriegeln ausgeschildert. 

Da Ballaststoffe also nicht verdaut werden liefern sie dem Körper somit auch keine Energie und brauchen nicht mitgezählt werden.  
Für eine ausgewogene Ernährung sind sie aber trotzdem sehr wichtig weil Ballaststoffe dabei helfen, die Verdauung zu regulieren und eine positive Wirkung auf den Stoffwechsel ausüben. Ich verwende ballaststoffreiche Nahrungsmitteln sehr gerne in meinen Rezepten da sie immer für ein super Sättigungsgefühl sorgen. Der Tagesbedarf von Ballaststoffen liegt bei mindestens 30g. (Quelle)

 Ballaststoffreiches Frühstück

Die Zutaten des Frühstücks

Ballaststoffreiche Rezepte verwenden meistens Flohsamenschalen , da sie eine hervorragende Ballaststoffquelle sind und für eine geregelte Verdauung sorgen. Die Leinsamen haben hochwertige Omega 3 Fettsäuren und verfügen auch über viele Ballaststoffe, welche helfen sollen die Verdauung zu reinigen. Chiasamen sind eine gute Proteinquelle und enthalten ungesättigte Fettsäuren.

Zum Süßen habe ich bei diesem Rezept Honig verwendet. Sollte euch dieser aber zu viele Kalorien haben könnt ihr in auch durch Xylit oder Erythrit ersetzen. Ich mag bei diesem Flohsamen Rezept aber einfach den typischen Honiggeschmack da er so super gut mit dem griechischen Joghurt harmoniert! 

Ballaststoffreiches Frühstück

Zum Toppen verwende ich immer frisches Granola, Mandelbutter und Früchte. Diese süßlich/säuerliche Mischung macht das Frühstück für mich ganz besonders lecker. Im Moment mache ich es mir fast täglich und habe es auch schon nur mit Leinsamen oder nur mit dem Chiasamen ausprobiert. 
Die Früchte koche ich meistens kurz mit etwas Wasser auf. Ihr könnt aber natürlich auch frische Früchte unter das ballaststoffreiche Frühstück mischen. 

Ballaststoffreiches Frühstück

Möchtest du mehr über gesunde Ernährung lernen?

Seit kurzer Zeit ist nun mein erster Fitness Food Online Kurs gestartet! Mit 140 Minuten Videomaterial, 9 Kapiteln und 6 Kochlektionen lernst du im Selbststudium die Basics zu Clean Eating und gesunder Ernährung. Wir kochen zusammen verschiedene, leckere Fitnessrezepte! Außerdem findest du Expertenwissen von staatlich geprüften Ernährungstrainern und ganz viele PDF’s, Rezeptkarten und Fact Sheets zum Ausdrucken! 

Fitness Food Online Kochkurs

Ballaststoffreiches Frühstück mit Leinsamen Rezept

Ich liebe das Rezept weil man es super schon am Tag davor herrichten kann. Somit habe ich am nächsten Morgen viel weniger Arbeit und gleich ein leckeres ballaststoffreiches Frühstück! Es ist also auch ein perfektes on-the-go Rezept. Hier also die genaue Zubereitung für euch: 

Ballaststoffreiches Frühstück mit Flohsamen
Serves 1
Ein Frühstück welches der Verdauung gut tut!
Write a review
Print
Prep Time
10 min
Total Time
15 min
Prep Time
10 min
Total Time
15 min
Ingredients
  1. 200ml Wasser
  2. 2 EL Leinsamen
  3. 2 EL Flohsamen
  4. 1 EL Chiasamen
  5. 80g Joghurt (vegan oder griechisch)
  6. 1 EL Honig (vegane Option ist Ahornsirup)
  7. 1 EL Mandelbutter
  8. 2 EL Granola
  9. 50g Himbeeren
Instructions
  1. Chiasamen, Leinsamen und Flohsamen zusammenmischen und mit dem Wasser über Nacht (oder zumindest 2 Stunden) quellen lassen. Am nächsten Tag das Joghurt und den Honig untermischen und die Masse in eine kleine Schüssel füllen. Himbeeren mit etwas Wasser aufkochen und darüber gießen. Mit Mandelbutter und Granola dekorieren.
Notes
  1. Ihr könnt außer Himbeeren auch alle anderen Früchte verwenden 🙂
carinaberry.com https://carinaberry.com/
Bist du noch auf der Suche nach mehr gesunden Frühstücksrezepten? Dann sie dir doch noch meine Protein Pancakes oder meinen Pumpkin Porridge an! Du kannst auch mein gratis E-Book mit 13 tollen Fitnessrezepten hier herunterladen:

Hast du das Rezept nachgemacht?

Dann markiere mich mit @carina_berry auf Instagram verwende den Hashtag #carinaberry

Ich teile immer wieder nachgemachte Rezepte auf meiner Instastory  <3

xoxo,

Ballaststoffreiches Frühstück

Weiterlesen

Vegan bagels with cranberries by Lenny

Cranberry Bagels by Lenny

Welcome to this special guest blog post! Today I would like to introduce one of my super talented foodie friends. Her name is Lenny, she is 17 years old and currently lives in the US. She is a passionate vegan and tries to inspire her followers with amazing plant-based food creations.  She will tell you a bit about herself and share a delicious recipe with you in the end!

Lenny and I have been supporting each other on Instagram for a while now and I love seeing her colorful dishes and yummy bowls everyday on my feed. I am impressed by the quality of photos, the creativity of each dish and the love for detail in each shot. You should totally check out her Instagram @vegamelon. She also has a lovely blog which she keeps updating with new recipes. You will find a wide range from mains, to breakfast, dessert and snack recipes. Best you have a look yourself at www.vegamelon.com.

I love that Lenny’s plant-based recipes are full of flavor, nourishment, and happiness. The fact that she keeps her recipes quick and easy to make goes hand in hand with my cooking philosophy. Also, we are both fruit addicts. Her favorite fruit is the watermelon and mine is the strawberry. So we are basically fruit sisters 😉

Cranberry Bagels by Lenny

In today’s blog post she will be taking over and share one of her favorite dishes with you – vegan bagels with cranberries! So lets hand it over to Lenny:

Meet Lenny – a math & watermelon enthusiast

Hi, I’m Lenny! As you may have already read, I am a passionate ‘teen chef’ who loves to share her plant-based creations! I started my Instagram blog in January 2017, when I was still in grade 10. I didn’t post much in the beginning, but I truly began working on this platform in the summer, starting to share my recipes with the community. Along with my cooking adventures, I also embarked on a journey of food photography, learning how to capture my dishes in an eye-catching way. It’s been two years since my very first post, and I can hardly believe how much my skills have grown!

My recipes are generally healthy and easy! I believe that vegan food can taste amazing; it is affordable and approachable. I hope to inspire thousands (and perhaps millions) to eat more plant-based food because it is also much more sustainable for the environment than foods with meat and dairy.

Other than running this Instagram page, I find joy in reading, running, and studying math! I hope to major in mathematics in university and to teach college-level math in my future (of course, all while doing the things I love)! Although, I don’t share much about my personal life on social media, I hope to incorporate more of that this year and inspire you the way Carina does, hehe.

Cranberry Bagels by Lenny

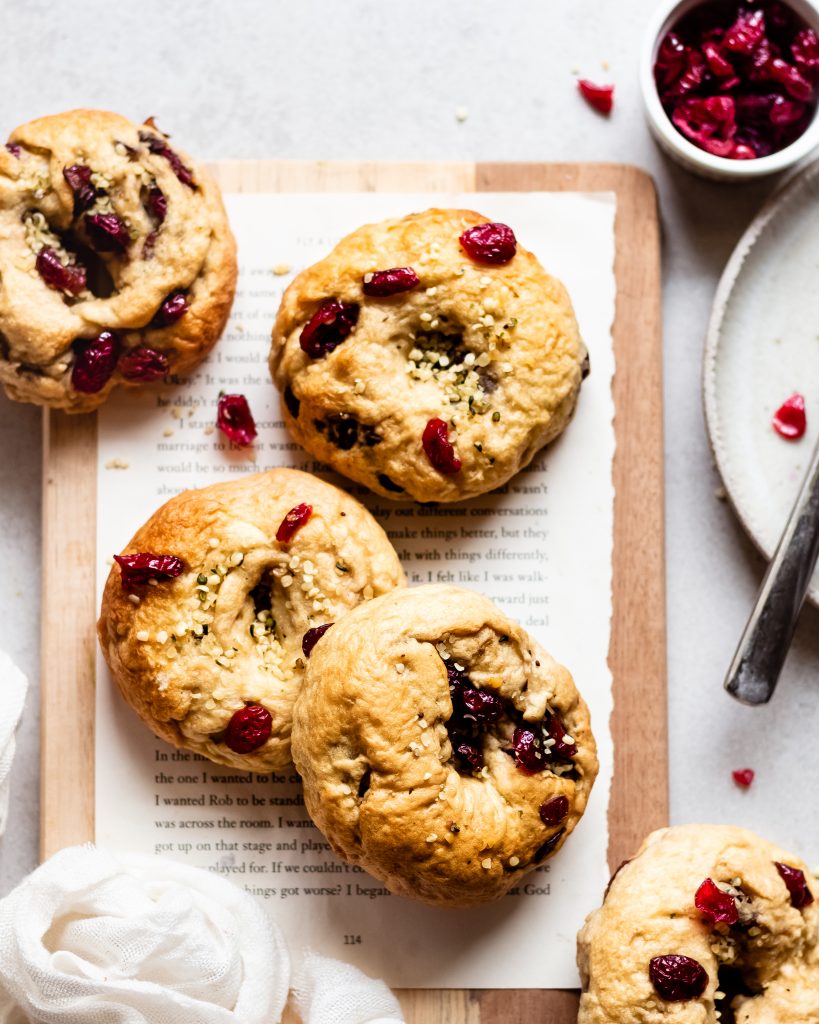
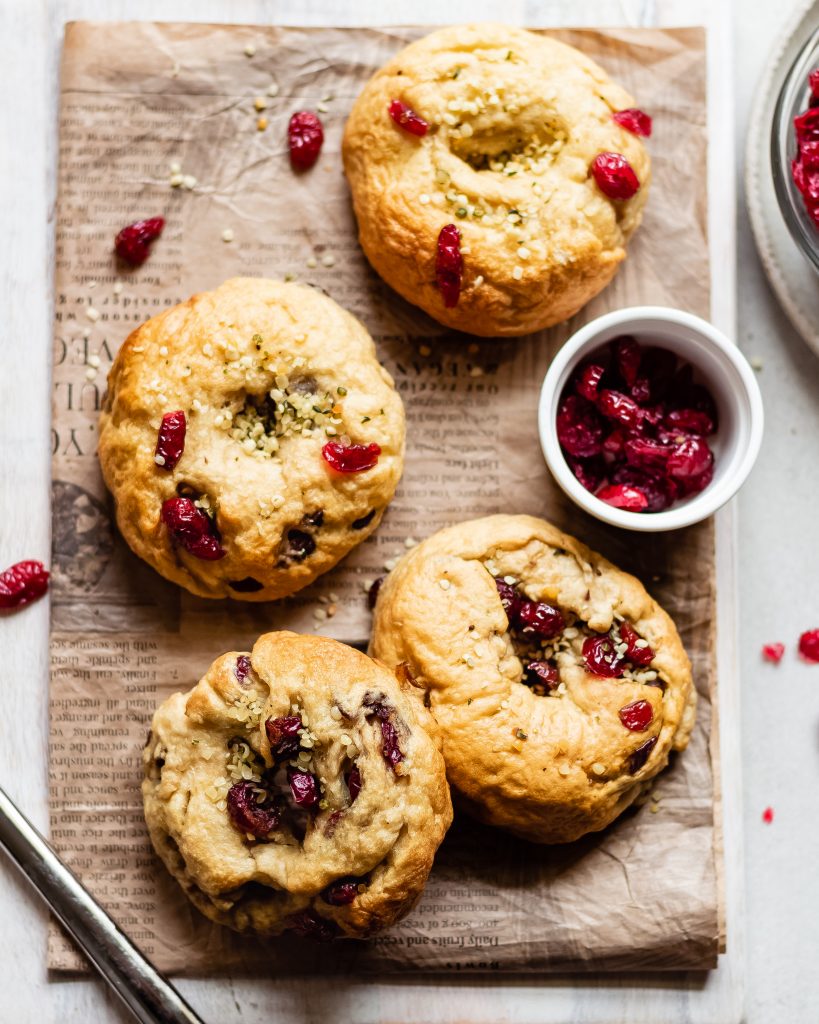
Now, here is my recipe for some delicious seeded vegan bagels with cranberries! These are absolutely customizable and, in my opinion, are superior to store-bought ones. I mean, commercial bagels are delicious and all, but they sometimes have all kinds of weird ingredients/preservatives that might not be so good for your body. These bagels only require 5-7 pantry ingredients, and they’ll be ready to serve in a couple of hours! Just imagine biting into a warm, fluffy bagel right out of the oven.

Vegan bagels with cranberries

Ingredients:

dough

-2 cups (240g) bread flour
-1 tsp (3g) instant yeast
-1/2 tsp (3g) fine sea salt
-1 tbsp (12g) granulated sugar
-1/2 cup + 2 tbsp (150mL) warm water

mix-ins

-¼ cup (40g) mixed seeds of choice
-½ cup (80g) cranberries, or dried fruit of choice

for boiling

-1 tbsp (12g) baking soda
-water

Cranberry Bagels by Lenny

Directions for my yummy vegan bagels:

  1. Mix the dough ingredients in a large bowl.
  2. Once the mixture starts to form, transfer to a flat surface and knead into a smooth dough; about 15 mins by hand.
  3. Shape into a ball and let the dough rise in a covered bowl for 1-2 hours, or until doubled in size.
  4. Once risen, punch down the dough, then mix in the dried fruit and seeds. Divide into 6 equal pieces and form into balls.
  5. Create a hole in the center of each piece using your thumb, then stretch into a ring with your fingers gradually rotating outward from the center.
  6. Place under a damp towel and let the dough rise again, for 30 minutes.
  7. Preheat the oven to 400°F and fill a wide pot with water. Bring to a boil, then add in 1 tbsp baking soda. Alternatively, use 1 tbsp maple syrup (or other liquid sweetener).
  8. Drop in 2-3 bagels and boil on medium heat for 60 seconds on each side. Dry the dough and place onto a greased baking tray.
  9. Repeat for the remaining pieces of dough, then sprinkle on more seeds and bake for 13-15 minutes (until golden brown). Enjoy warm.

I hope you try out these vegan bagels some time! They’re so fun to create and will fill your stomach with happiness. And, for more recipes, feel free to visit my Instagram page or my website. Have a lovely week, friends!

Thanks Lenny for sharing this wonderful recipe with my readers. Well, I hope you guys enjoyed meeting one of my awesome foodie friends and will check Lenny’s social channels out. If you are interested in meeting more of my talented food blogging friends you can read the guest blog post from Zoe and from Rita as well who already shared amazing dishes on my blog. 

vegan bagels with cranberries

Weiterlesen

Blogging while traveling – a how to guide

Blogging while traveling

Over the last half a year I have been all around the world, food blogging while traveling at the same time. I love how my job as a food blogger gives me so much freedom and flexibility and combining my two biggest passions: the love for healthy food and my excitement for seeing new countries makes me feel like I created my own dream job. In this blog post I would love to show you and explain how you can travel and still keep up the quality of your food pics along the way. 

My story of blogging while traveling

I became a self-employed food blogger in February 2018 and couldn’t be happier ever since. Turning your hobby into your profession is something extremely special and I am grateful every single day to be able to do this kind of work. Since I am very flexible with my working hours and do mostly everything online I decided last year to travel the world while still working and creating content like I would in Austria. I figured it shouldn’t really matter if I sit at home in Austria or work from a beach in Panama. Simpler thought as done – this I can tell you already. Obviously there are quite some challenges when you want to travel and still produce the same quality results for your clients as you would at home in your familiar surroundings. In this blog post I would like to share some important food blogging travel tips. 

In the fall of 2018 I planned my first big international working trip. I set out together with my boyfriend to travel through Costa Rica, Panama and Mexico, both working full time. For our first trip we were gone for almost three months. After that we came back home for Christmas and left again for our trip to Asia, visiting Taiwan and the Philippines. The second time we were gone for one month, creating content and doing company promotions just like I would have at home. By now I would say I have gotten pretty good at knowing what things are essential when blogging while traveling and would love to share these insights with you in this blog post. 

Blogging while traveling

Challenges you will face

On your trips there are quite some challenges you will face at some point. Especially when you travel to developing countries like I did. The infrastructure simply isn’t the same as you would find it in Europe, America or Australia. You simply can’t expect to find internet everywhere, good lighting or a quality working place. Here are some challenges I ran into on my trips:

  • Time difference 
  • Shipping difficulties of products
  • Non availability of certain ingredients
  • Poor internet connection 
  • Terrible lightning situations 
  • Broken props (plates, bowls) due to rough airport handling 

Blogging while traveling

Food blogging travel tips

Here are my major tips for food blogging while traveling that will help you to smoothly create content on your trips without frustrations. Please note that some of the links below are affiliate links and at no additional cost to you, I may earn a commission. Know that I only recommend products, tools, services and learning resources I’ve personally used and believe are genuinely helpful. This is not because of the small commissions I make if you decide to purchase them. Most of all, I would never advocate for buying something that you can’t afford or that you’re not yet ready to implement. The products are simply the ones I use when blogging while traveling and where I thought you might find the direct Amazon link helpful as well ?  

  • Use waiting time: Especially in countries with polychronic tendencies, meaning they don’t really value the concept of punctuality you will run into a lot of unnecessary waiting time. There will be a lot of time lost waiting for planes, buses or being stuck in traffic. Especially in the Philippines I had to learn the hard way to use my waiting time wisely for work projects. Literally every plane, bus or taxi was delayed and it always took us twice the time than expected. That is why I recommend you always save some work you can do offline. For me that was usually editing my pictures, planing my gallery or like right now – just sitting on a flight to Coron island right now actually – writing a blog post. This way you will use otherwise dead time super efficiently and will have more time for yourself once you arrive at your destination. 

Blogging while traveling

  • Always have your charging devices with you: This is a mistake I kept making for a long time. I would charge my laptop and phone thinking it would last for our traveling days. Each time we had another airport delay or spent another hour in traffic I ran out of battery not being able to charge my devices. Blogging while traveling means keeping your batteries charged! I would also recommend buying a strong power bank so you always have a charging opportunity. This is the one from Anker that I have and can greatly recommend. Another tip I can give you regarding managing your device compatibility is buying an charge-all-in-one device. Like this you only need to bring one cable and can charge all your devices. This is the one from VONMÄHLEN that I use and can recommend. 
  • Schedule in enough working time: When blogging while traveling make sure to schedule in dedicated working time every day. I was better with this on my Central America trip than now on my Asia trip. I simply had too many things planned changing location almost everyday leaving very little time to work. In Panama and Costa Rica I defined a pretty fixed working schedule for me. Work from 6am-12am then time for beach or activities until 6pm and back to work from 6pm-8pm. Since the sun set at 5pm I really wanted some daytime to enjoy and scheduled in that long lunch break. Now in the Philippines I tried to travel more, see more places and I really noticed how much it reduced my quality working time. Now on this trip I did the bare minimum. So my take-away is definitely to schedule in definite working days where you have no trips or excursions planned or like I did in Central America go to one location for longer (at least 7 days) work from Monday to Friday with a fixed schedule and do day trips on the weekends. 

Blogging while traveling

  • Thoroughly screen your accommodation:
    • Kitchen: This will be one of the most important things to consider before leaving for your trip. When you work and travel at the same time you simply won’t be as flexible as the average backpacker booking the accommodation one night before and rearranging the entire trip from one day to the next. When food blogging while traveling you must consider a couple of things: you need a kitchen, good lightning and at least a supermarket close by. From experience I can tell you that hotels are generally a really bad idea because it is quite impossible to prepare your own dishes. I recommend booking an Airbnb with a full kitchen. Inquire about the kitchen appliances. Do you need a baking dish and a stove? What about a blender? 
    • Lightning: Besides the kitchen inspect the lightning situation on the photos of the Airbnb listing. Is there enough natural light coming into the apartment? I have gotten quite creative here, also shot outside in front of the door because sometimes the actual accommodation ends up looking different than you imagined on the photos.  
    • Internet: Last but not least, make sure the apartment has a good internet connection. I always ask them for a speed test. I can recommend this one by Ookla showing you the exact download and upload speeds. The results of the upload speed should be somewhere around 3mb and the for the download around 2mb. Having good internet is really the most vital thing for a productive work day. Especially when traveling to developing countries the connection can be unstable. We had internet blackouts because of Typhoons, earthquakes and over-usage already. So make sure you always have a back up plan like a close by Café with Wifi. I think this point is the most crucial one when blogging while traveling. One time I was stuck on an island without internet for 8 days and wasn’t able to do anything which created quite some problems for me. So make sure you always check the internet situation before you go somewhere!
  • Find a co-working space: When we stayed in big cities we were usually looking for co-working spaces. This is a great way to get out of the apartment and mingle with other like minded people. Internet is usually fantastic there and it’s great to switch up the work atmosphere. Co-working spaces provide you with great infrastructure and are designed to give you the best working experience possible. I always found myself super focused there and having the most productive work days. 

blogging while traveling

  • Be aware of time difference when blogging while traveling: My tip is to write emails at least one day earlier than you would have done at home. Since you won’t have the entire day to monitor your inbox the email conversation will just take longer than it usually would if you were in the same time zone. Try to work at least 2-3 hours overlapping your home country’s time zone or the time zone where most of your clients are. When I was in Costa Rica and had an 8 hour time difference I was always working from 6am-9am so I would still reach them in Austria for their last 2-3 working hours of the day. In the Philippines I was mostly working at night time because of the 7 hour time difference in the other direction. I was usually working from 5pm-8pm to reach the Europeans in their first working hours of the morning. 
  • Plan your gallery/blog posts ahead: This is something that has help me tremendously on my trips. When I know I have a big trip coming up I usually already take a lot of photos before. So when I leave I have a buffer of about 10-15 recipe photos that I can post without having to produce anything in between. I also already pre-take all the photos for my long term cooperations. So in case I won’t have good photo opportunities on my trips I can at least go back to these photos I took beforehand. Like this it is also much less stressful because you already know you have got your „posting to-dos“ covered for the trip. I schedule my posts with an app called UNUM, which I can highly recommend you to use as well to plan your IG gallery ahead. 
  • Preorder products for promotion: When I know a long trip is coming up I give my cooperation partners a heads up and get the products I need to promote during my time abroad shipped to me in advance. I made the experience that companies don’t want to ship overseas because it is simply too expensive for them. That is why my suitcase is usually pretty full when I travel. I would say 1/3 of the space is taken simply by the products I need for my cooperations. Plan ahead of what you are going to promote on the trip and then just bring the essential things for those posts or IG hauls. 

Blogging while traveling

  • Get a local SIM card: Blogging while traveling means you will probably need internet on the go. If you want to make your life a lot easier I recommend getting a local SIM card. You usually already find little SIM card stands at the airport and the prepaid plans are really affordable connecting you to the internet without a problem. This can also be super useful if you need taxi services like Uber or Grab. I however decided against a local SIM card because I consciously wanted to force myself to some internet free time when away from the hotel or restaurant. 
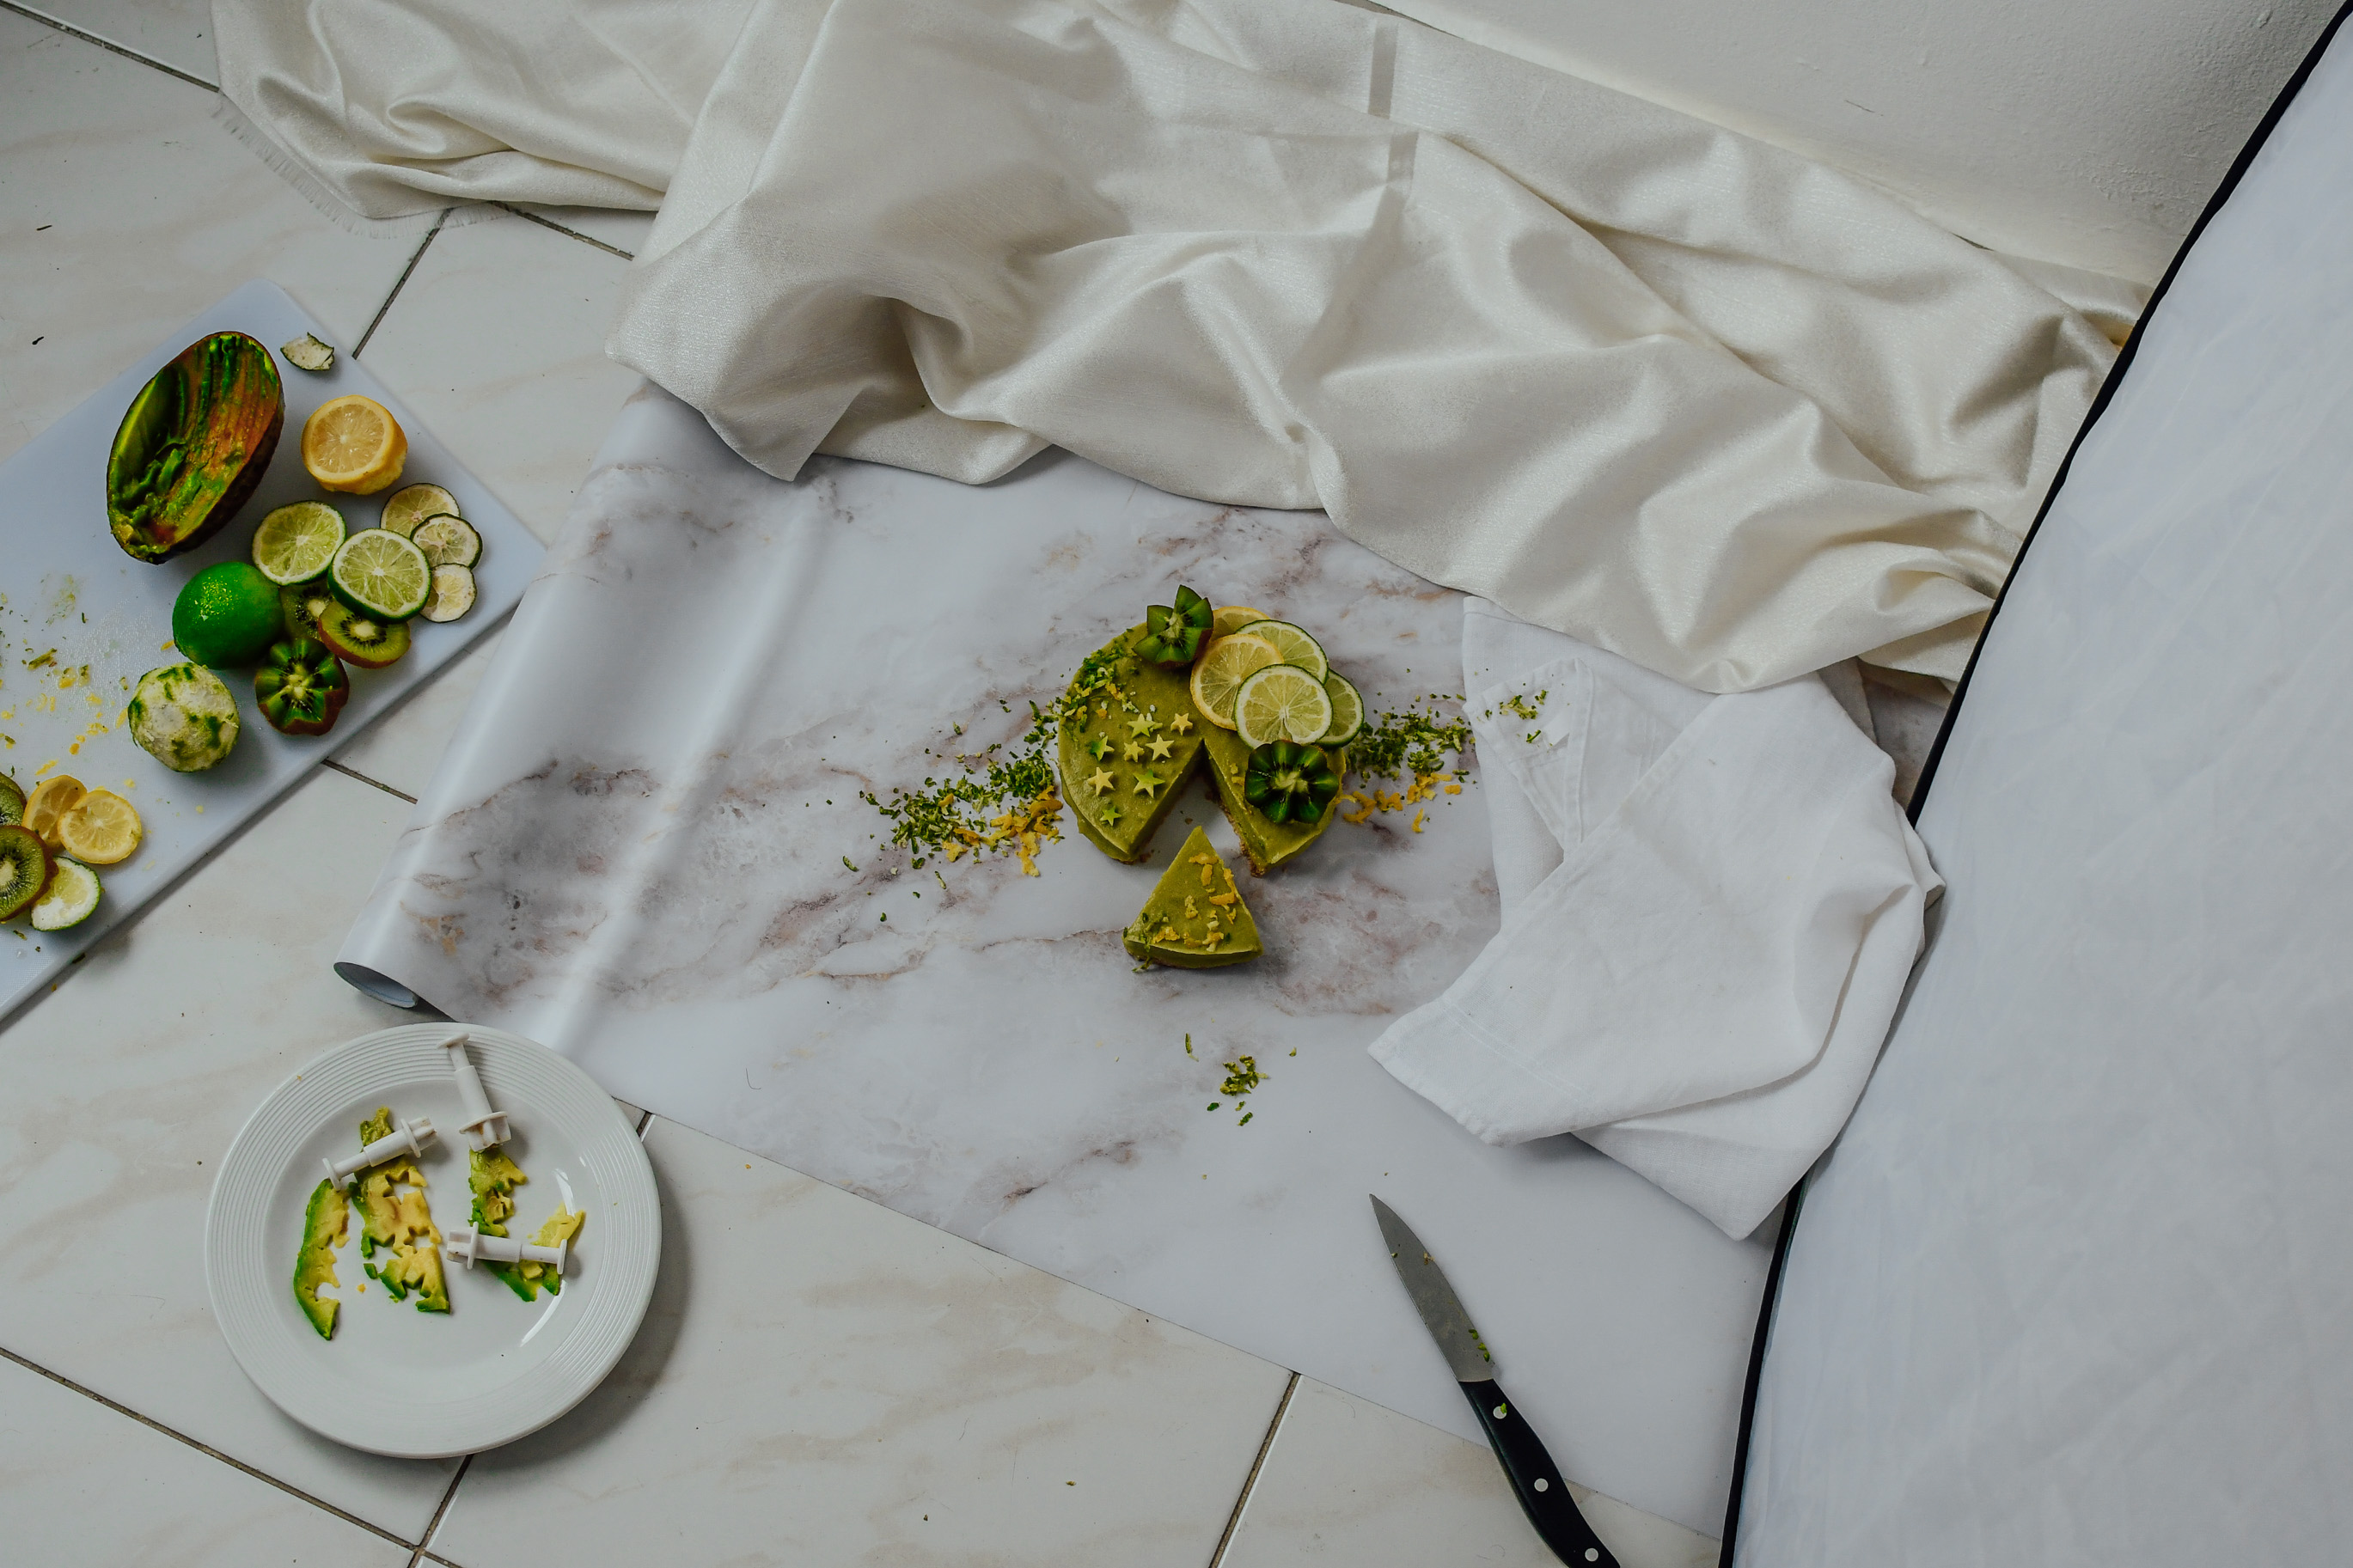
  • Bring the right props: Being gone from your save home set-up can be quite challenging. At home its quite easy to get a good photo because if you are like me you will probably have various plates, kitchen towels, decoration items and other fancy props to choose from. On your trip however you can only bring the essentials. This is what I brought with me on my trip: 3 of my best plates (neutral but unique), 1 white background fabric I could always use for a nice blurred out background, my favorite little spoons, a golden knife and fork, my mini cookie cutters for decoration and one coconut bowl. Like this I could create a wide array of different settings. It might also be a good idea to ask the Airbnb host about the color of plates and silverware. Another insider tip is to buy plastic backdrop paper. In Austria I usually use wooden backdrops which are bulky and quite heavy. Before my trips I bought this marble backdrop paper that I can simply roll up and is super light! 
  • Bring the right equipment:  When you are gone for a longer period of time you surely still want to keep producing amazing content but simply can’t take all your inventory with you. Photo equipment can get really heavy and your suitcase is usually limited to 23kg per flight. This is what I had with me: A super light travel tripod, my reflector, my favorite 35mm 1.8 lens together with my Nikon D7500. Since I travelled together with my boyfriend it was a bit easier to bring more equipment because he also had some suitcase space. Therefore, we brought also the drone and the gimbal. 

Blogging while travelilng

Blogging while traveling and still keeping up the quality of your content can be a challenge at first, but also presents amazing new opportunities for different content and unexpected shooting possibilities. I hope this blog post was helpful. If you have any unanswered questions feel free to put them in the comments. I will make sure to answer them all. You can also always reach out to me on Instagram. You might also be interested in my online food blogging course that will teach you some more about the art of food blogging. 

If you want, you can also sign up for free food blogging tips and tricks here: 

I recommend you also check out my top food blogging tips as this blog post is teaching the essentials of amazing food pics and could be super helpful for you as well! If you are interested in how to make money as a food blogger you might want to watch this YouTube video on different ways to monetize your blog. 

xoxo,


Weiterlesen

Low Carb Kuchen Rezept – gesunder Apfelkuchen

low carb Kuchen

Wir alle lieben doch süße Desserts und Kuchen. Ich persönlich bin eine totale Naschkatze und wünsche mir immer die leckeren Nachspeisen wären nicht immer so kalorienreich. Aus diesem Grund setze ich immer alles daran ungesunde Desserts in Fitness Food zu verwandeln. So auch bei diesem low carb Kuchen Rezept. Ihr dürft gespannt sein 🙂 

Low Carb Kuchen 

Anfang Jänner arbeitete ich daran ein low carb Apfelkuchen Rezept zu entwickeln welches reich an Protein ist, kohlenhydratarm, kalorienreduziert und aber trotzdem noch super lecker schmeckt. Ganze 5 Versuche brauchte ich um dieses Rezept zu perfektionieren um es nun mit euch teilen zu können.

Ich persönlich ernähre mich wahnsinnig gerne low carb weil es mir einfach hilft so mein Gewicht ohne Probleme zu halten. Meiner Meinung nach ist eine low carb Ernährung auch zum Abnehmen bestens geeignet. Durch den teilweisen Verzicht von Kohlenhydraten und die erhöhte Aufnahme an fett- und eiweißreichen Lebensmitteln soll erreicht werden, dass der Körper seine Energie überwiegend aus Fetten und Eiweiß gewinnt, anstatt von Kohlenhydraten. 

low carb Kuchen

Die Rezeptentwicklung

Zuerst wollte ich natürlich den Zucker weglassen. Hier habe ich dann Dattelsirup als das perfekte Süßungsmittel gefunden. Es hat besser funktioniert als Xylit oder Erythrit da es dem Teig zusätzlich noch eine cremige Konsistenz gibt.
Für Butter oder Öl musste natürlich auch eine andere Zutat finden. Hier habe ich dann fest Coconut Cream, also das weiße cremige bei der Kokosmilch verwendet. Dies hat weniger Kalorien und Fett wie Kokosöl, macht den Kuchen aber trotzdem saftig. Danach kam das Mehl dran für welche ich gesündere Alternativen suchte. Zuerst versuchte ich es mit Kokosmehl – zu trocken. Dann mit Chiamehl – hier passte die Konsistenz dann gar nicht. Schlussendlich habe ich eine super Kombination aus Mandelmehl und geriebenen Walnüssen. Ganz zum Schluss kommt dann natürlich immer meine Lieblingszutat das Proteinpulver in den Teig um die Nährwerte nochmals aufzubessern.

low carb Kuchen

Für den Belag wollte ich auch so wenig Zutaten wie möglich verwenden. Früchte eigneten sich hier am allerbesten. Da Äpfel von Natur aus schon sehr viel Fruchtzucker enthalten muss nicht mehr zusätzlich süßen.

Ihr wisst wie gerne ich einfache Rezepte mag. Der Apfelkuchen ist wieder ein super Beispiel. Im Prinzip müsst ihr einfach nur alle Zutaten zusammen mischen. Der Belag ist auch ganz easy zu machen wie ihr gleich in der Beschreibung sehen werdet.

Ein Hingucker

Das tolle bei diesem Kuchen ist der wunderschöne Roseneffekt den ihr mit den Apfelstücken ganz einfach hinbekommt. Auf diese weise könnt ihr eure Gäste gleich doppelt beeindrucken. Einmal mit einem gesunden Kuchen und einmal mit der tollen Dekoration.
Ich empfehle euch richtig schön rote Äpfel für dieses Rezept zu verwenden um noch einen tolleren Effekt am Ende zu erzielen. Kleiner Tipp: Ihr könnt beim nächsten mal die Äpfel auch durch Birnen oder Pflaumen ersetzen für ein etwas anderes Geschmackserlebnis.

low carb Kuchen

Das Rezept

Hier nun das Rezept für meinen leckeren low carb Kuchen mit Äpfeln:

Zutaten:

Teig:
2 EL Dattelsirup
80ml  Milch
2 EL Kokosmilch
1 EL geriebene Walnüsse|
3 EL Mandelmehl
2 EL Proteinpulver
1/4 TL Backpulver 

Belag:
1 ganzer Apfel
Zimt

Zubereitung:

In einer Schüssel zuerst alle trockenen Zutaten zusammen mischen. In einer zweiten Schüssel alle flüssigen Zutaten vermengen. Dann die trockenen langsam unter die flüßigen Zutaten mischen. Die Masse in eine kleine runde Silikon Backform füllen. (Für einen großen Kuchen die doppelte Menge machen.) Den Kuchen bei 180 Grad 30 Minuten backen. In der Zwischenzeit die Äpfel in dünne Scheiben schneiden. In einem Topf mit etwas Wasser und Zimt vorsichtig dünsten. Sobald der Kuchen fertig ist kann man die einzelnen Scheiben mit der Schale nach außen kreisrund am Kuchen auflegen. So bekommt man einen wunderschönen Roseneffekt. 

low Carb Kuchen - Apfelkuchen gesund_

ch hoffe euch hat dieses low carb Kuchen Rezept gefallen und ihr probiert es selbst mal aus. Schaut doch auch noch bei meinem Protein Cheesecake Rezept vorbei. Das könnte euch bestimmt auch gefallen. 

Hast du das Rezept nachgemacht?

Dann markiere mich mit @carina_berry auf Instagram verwende den Hashtag #carinaberry

Ich teile immer wieder nachgemachte Rezepte auf meiner Instastory  <3

xoxo,
Low Carb Kuchen Apfel

Weiterlesen

Best healthy food in Taipei – vegan cafés included!

food blogging online course

As I am writing this blog post about healthy food in Taipei I am sitting in this cute little plant-based vegan cafe snacking on a whole wheat cashew cheese sandwich and enjoying an unsweetened vegan chia tea. At first you might not expect to find healthy places in Taipei, but I am here to show you that the city offers some great choices for conscious eaters. Also, scroll all the way down if you want to find the best Mochi in Taipei!

Healthy food in Taipei

I have spent a week testing different restaurants and cafés in Taipei and want to summarize my best healthy food experiences in this blog post. Healthy food in Taipei is something quite „new“ apparently. I have talked to the owners of several restaurants who all were mainly expats coming back to Taiwan to bring plant-based food and healthy choices from their oversea adventures to the city of Taipei.

I was told Taiwanese people are not so interested in eating healthy yet as their local food is mainly fried and very calorie rich, but the trend is slowly taking off here as well. The owner of one restaurant even told me that they were the first ones to introduce kale to Taiwan. So the whole concept of plant-based food and clean eating is quite new here. Which makes it super interesting to find the hidden gems of fitness food in the city. 

In this blog post I want to share the best healthy food in Taipei with you, introducing 4 of my favorite cafés and also giving away some additional food recommendations in the end.

First off, what I loved about all of them was that each of these places had super fast wifi available. If I have had more time in Taipei I would have totally gone to them for some morning work sessions with my laptop 🙂 

The tamed fox 

Besides the delicious food I had at the tamed fox my highlight was their super cute little poodle dog Rae. He is so tame and instantly jumps on your lap to sit with you during breakfast. Definitely one of the sweetest little dogs I have ever seen and it made my visit to the tamed fox so memorable! This restaurant is situated within a short walk from the red line metro stop Xyni Anhe. The interior is very minimalist and stylish.

What impressed me was that they are making their own fresh granola right there in front of you in the kitchen, filling the restaurant with a delicious sweet smell. There is also a small shop in the café where you can buy beautiful mugs, portable cups and other fun things. The owner herself is super nice and we talked to her for a while. She has lived in Chicago and Los Angeles for quite some time and speaks perfect English.

Healthy Food in Taipei

Regarding the food we ordered several awesome dishes. Avocado toast with edamame hummus, an Açai chia pudding smoothie bowl and the banana bread french toast. Everything is made fresh right there on the spot with a lot of love and details. Each dish looks absolutely beautiful and is decorated in real food blogging fashion.

Taking a closer look at the menu I was able to find some very unique hot drinks like the black sesame actived characoal latte, the sun moon lake milk tea, the spice girl (turmeric, cayenne, pineapple, lemon juice) and they even had my new favorite drink golden milk. It also seems like a great spot to try typical Taiwanese oolong tea. For mains they have everything from Shashuka to a smoked salmon plate and chicken bowls.

If you are looking for a good Açai smoothie bowl in Taipei this is the place to find it. I like that they enhanced the recipe with a greek yoghurt chia pudding on one side and topped it with their own homemade granola. There were so many yummy dishes on the menu I had a hard time choosing. Really recommend this place for a good breakfast experience in Taipei! 

Best food in Taipei

The Antipodeon 

Regarding the atmosphere of the restaurant the Antipodeon definitely takes one of the first places on my list of healthy food in Taipei. I just loved the interior design. I was also lucky enough to still see their super creative Christmas decoration which was an upside down Christmas tree hanging from the ceiling. Everything is very stylish and modern. 
This place is definitely best for breakfast. They have a huge selection of amazing platters and good morning food choices. Most of it is healthy, but I also spotted some cheat day options – like the cinnamon roll we couldn’t resist to order. 

Healthy Food in Taipei

We got the queens platter featuring smoked salmon, grilled halloumi cheese, roasted cherry tomatoes, eggs, ham, avocado, beans and one sweet yoghurt and muesli parfait. We also ordered their signature Açai bowl which was topped with so many delicious things. Best smoothie bowl I had in the city by the way. They have some yummy porridge for those oats lovers and I even found Austrian Bircher Müsli on the menu! And if you are one of those avocado addicts than this is your place. The Antipodeon has everything from avocado baked egg to smoked salmon avocado toast and even an avocado breakfast platter.  

I was not surprised to find out that the owner is an expat from Brisbane, Australia, who let his inspirations flow into the dishes making them so unique. The restaurant also has a little patio, which makes it perfect to sit outside on a sunny day. It is really a lovely café and I would highly recommend you to go and check it out. 

Healthy Food in Taipei

Café by Juicy Diary 

This very special fitness place has to be included in my list of healthy food in Taipei. Already when I entered the restaurant I was excited about the super fancy look of it. Expect more of a restaurant flair than a normal café one. The tables are set with beautiful silverware, flowers on each table and stylish lights. Juicy diary used to sell fresh pressed juice and then since the demand was so high also opened a Café a couple of years ago. I find it the perfect healthy lunch or dinner spot. 

Healthy Food in Taipei

I think we were looking at the shiny menu for half an hour before we could decide what to order. So many healthy options! We finally got the chicken chipotle bowl, avocado toast and a chia pudding as a dessert. Since this Café by Juicy Diary is popular for its juices we also tried all of them. My favorite was the citrus one (I think that was actually the name of it) and my boyfriend really liked the red juice.

I am glad we actually shared the bowl because it was quite a big portion. The avocado toast was incredible and to my surprise I liked the chia pudding out of everything I ate there the best. It was a mixture of different aromas with a subtle sweetness was fascinating. The owner also recommend us to eat the special filled brioche, but we simply did not have any more space in our stomachs. Like this we also were not able to eat the delicious carrot cake for a second dessert as we initially intended to. 

We also got a chance to chat with the owner of the place who told us that she has lived in San Francisco for a really long time and that she brought healthy food back to Taiwan. She actually introduced Kale to Taipei when she first got started with Juicy Diary. How awesome is that?! Also, I would love to point out the amazing waiters that were on top of their game! 

Best food in Taipei

Ooh Cha Cha – Plant-based café

This vegan café is situated within a short walking distance to the Gutding metro station and is also very close to the center of Taipei. I am actually here right now as I am writing this blog post looking at my B.L.M.T sandwich filled with tempeh bacon, lettuce, cashew mozzarella, tomato and cashew sour cream. It is the first time I get to try vegan cheese and I love it. This cafe is quite different than the other places mentioned earlier as it only serves vegan food. The menu selection ranges from salad bowls to sandwiches, rolls and burgers.

Everything is vegan and they are making everything fresh in front of you. The café also have great smoothie choices, but I consider Ooh Cha Cha more of a lunch place than a breakfast venue. The Chia Masala I ordered is totally homemade and tastes much less sweet than I am used to! Definitely a good thing if you are trying to save calories. Ohh Cha Cha is definitely on top of my list for healthy food in Taipei!

Healthy Food in Taipei

Main take-aways

All food places mentioned above serve really healthy food. So they are the perfect option if you are looking to eat clean, vegan or gluten free in Taipei. They are however not the perfect option if you are looking for a very traditional taiwanese experience. As mentioned above in the first paragraph the local food is not so healthy and therefore these restaurants are heavily inspired by Western healthy food vibes. One exception is the drink menu, all of them serve very traditional matcha latte and Oolong tea. They are all beautiful in their own way, have good wifi and unique food choices I am sure you will enjoy if you want to eat healthy in Taipei. Regarding prices they are all a bit more expensive than local places, but definitely affordable. 

Best Mochi in Taipei – Additional recommendations 

During my week in Taipei I went to many different food markets, local restaurants and also the healthy places mentioned above. I quickly want to give you some extra tips of what you should not be missing out on when you are in Taipei, even though these options are not very healthy but suuuuper delicious.

  • Mochi – I Jy Sheng: they literally call themselves the best bakery in Taipei and I would sign that statement in an instant. Imagine a french macarons bakery but for chinese mochi! It is so incredible. They have this fresh hand made mochi in different flavors. I Jy Sheng is located on the first floor of the Taipei train station and so worth a visit. It is the best mochi in Taipei and I recommend you get the peanut butter Mochi. It is by far the best mochi I have had in Taiwan! 
  • Soup Dumplings- Xiao Long Bao: When you go to Taiwan it is a must to try the traditional soup dumplings. These are chinese dumplings filled with soup. You need to put the bao on a spoon and poke a hole into it to make the soup come out. Xiao Long Bao is a chain and has several locations around town and the best choice if you are looking for soup dumplings 
  • Dim Sum- Din Tai Fung: This chain is so popular we actually had to wait one hour to get a table. So many locals were eating there which is always a good sign when going out to eat in a different country. They also have two kinds of soup dumplings if you only can make it to one restaurant then go to this because you will get both of the dumpling experiences there 🙂
  • Street market food: Shillin night market: For local street food we went to one of the biggest night market where 600 vendors sell yummy traditional food. Some things we tried: Sticky rice on a stick, fried quail eggs, filled dumplings, chinese pancakes, fried mochi, pineapple cake and much more. 

Extra tip – best tea house view of Taipei 

Moreover, I had to include this tea house tip we went to. I mean if you are looking for healthy food in Taipei tea definitely counts! The view you have there while sipping your traditional Oolong tea is simply breath-taking! To get to this special tea house you actually need to make a half-day trip to Maokong station. Take the gondola from Taipei Zoo to the last stop which is Maokong station. Then walk out of the station and take a right, passing the bus stop and you will see the tea house. It is called Sih Ye and has a wide selection of chinese teas.

The tea house is overlooking the beautiful green mountains of Maokong and you can see all the way down to the skyscrapers of Taipei. You can even see the Taipei 101 in the distance. The restaurant has little „rooms“ for each guest with pillows on the floor and a table in the middle. You take off your shoes and have some relax time with your soothing tea.   

best tea house in Taipei

My take on Taiwan

It was my first visit to Taiwan – or to any chinese speaking country for that matter. I absolutely loved it. It was probably one of the coolest city trips I have ever done. I really liked it because it is so different than Austria. You get a complete different cultural experience, different food and you basically cant read anything. It might surprise you how clean the city is. I swear you would have been able to lick the metro floor. In the metro station I saw them sweeping the floor several times in front of me 😀 You can literally go to any public bathroom in every metro stop and not be completely disgusted by them. They are clean and don’t stink at all.

I also love the order in Taiwan. They love to queue for everything and nobody, seriously NOBODY would ever dare to jump the line. In the metro they have exact lines of where to get out and where to get in. The Taiwanese are super respectful and kind people.

I hope you enjoyed my blogpost on healthy food in Taipei. I had such a good time there and hope you will get to make this awesome experience yourself some day!

In case you are looking for more culinary travel guides you can check out my Puebla food guide and my Tulum food guide for the best spots to eat healthy there!

xoxo,

healthy food in Taipei


Weiterlesen