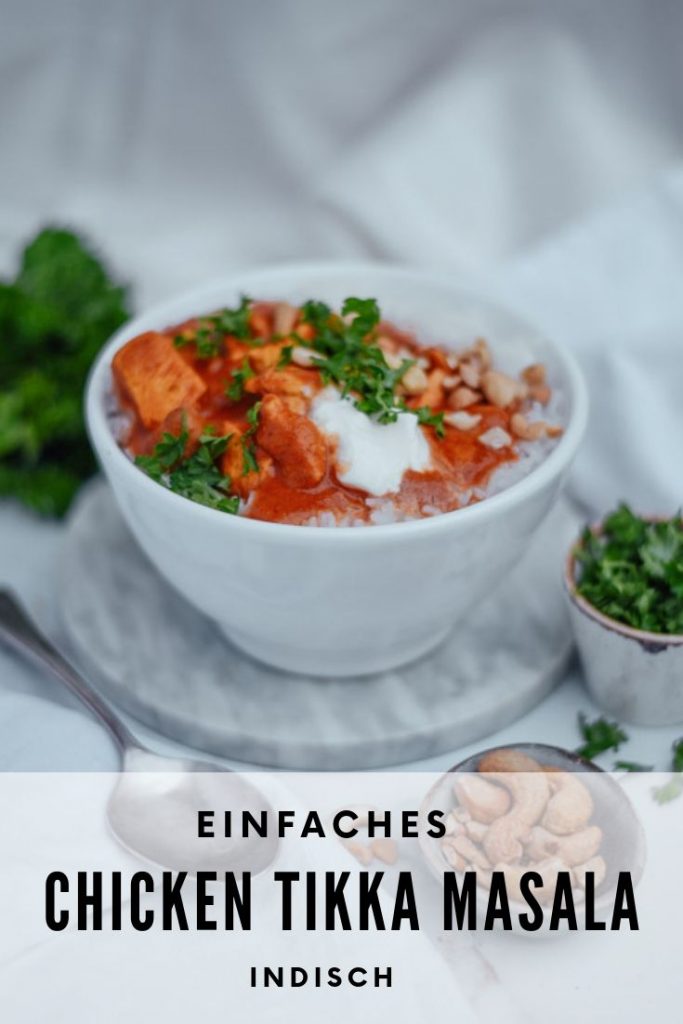
Chicken Tikka Masala – indisch und einfach

Indisches Chicken Tikka Masala Rezept

Chicken tikka masala ist ein einfaches Gericht mit cremiger, würziger Currysoße und zarten, goldbraun gebratenen Hühnerstücken. Dieses Gericht ist vollgepackt mit orientalischen Aromen und eine willkommene Abwechslung in der Küche! 

Es ist ein würziges Gericht aus gegrillten und marinierten Hähnchenfleischstücken in einer Tomatensoße. Gewürze die man darin findet sind Koriander, Kümmel, Knoblauch und Ingwer. Heute zeige ich euch wie ihr dieses sehr einfach chicken tikka masala Rezept zu Hause nach machen könnt! 

Springe zum Rezept

Der Ursprung von Chicken Tikka Masala 

Der Ursprung dieses Gerichtes ist übrigens sehr interessant. Als ich diesen Blogpost geschrieben habe, habe ich ein bisschen über chicken tikka masala recherchiert und herausgefunden, dass dieses Gericht scheinbar nicht wirklich aus Indien kommt sonder in Großbritannien entstanden ist. Die würzige Tomatensauce ist nämlich eigentlich der britischen Cuisine zuzurechnen und soll dort in den 1950er Jahren entstanden sein. 

Der Geschichte nach soll ein indischer Koch einem britischen Gast seine traditionelle chicken tikka (gebratene Hühnerstücke) serviert haben. Da die Engländer aber immer eine Soße dazu bekommen war dem Gast das Gericht zu trocken und so musste der Koch improvisieren und verfeinerte die typisch britische Tomatensoße mit seinen indischen Gewürzen und so war chicken tikka masala geboren. Das Gericht verbreitete sich wie ein Lauffeuer, da es indisches Essen mit den englischen Essgewohnheiten perfekt in Einklang brachte und wurde 2001 sogar zum beliebtesten Gericht Großbritanniens gewählt! 

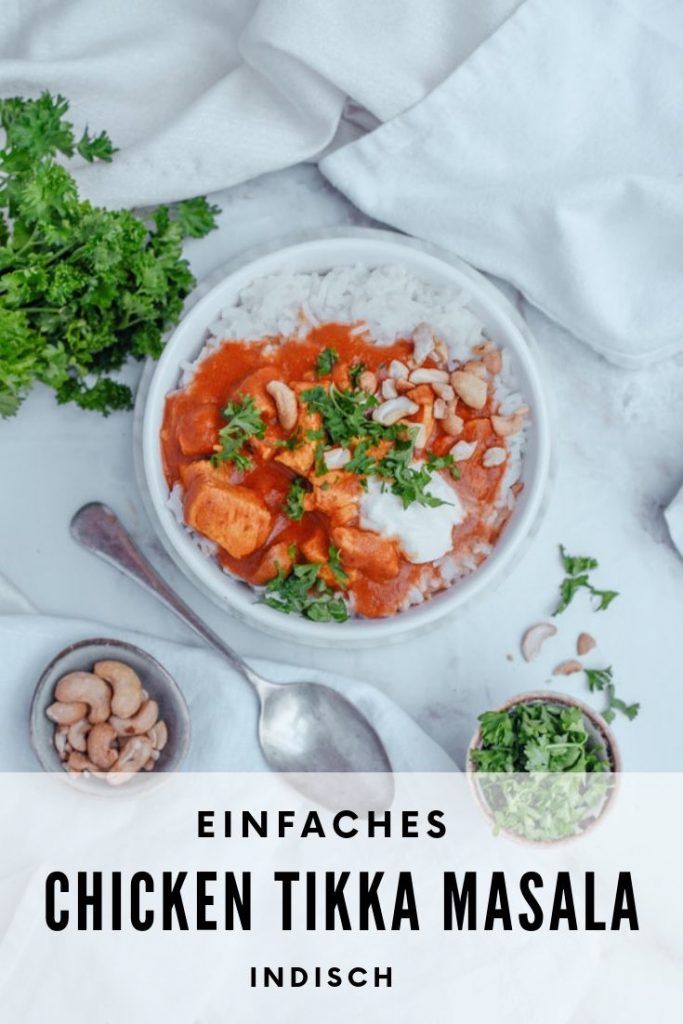
einfaches Chicken Tikka Masala Rezept-3

Die Marinade 

Lasst mich nun noch auf die tikka masala Marinade eingehen. Diese sollte nämlich wenn möglich über nacht Zeit zum marinieren haben. So bekommt das Fleisch einfach einen besseren Geschmack. Es zahlt sich hier also wirklich aus etwas vorzuplanen und die Marinade für das Fleisch schon am Vorabend herzurichten und die Fleischstücke darin über Nacht das Aroma der Gewürze aufnehmen lassen. 

Chicken Tikka Masala Rezept indisch

Vegetarische oder vegane Variante

Für alle die fleischlos oder vegan leben ist dieses Gericht auch perfekt geeignet. Man kann das Hähnchenfleisch ganz einfach mit Tofu ersetzen. Ich habe es selbst auch oft mit Tofu gemacht und es schmeckt genauso herrlich wie mit Fleisch. Auch hier macht es Sinn das Tofu schon über Nacht in der Marinade ziehen zu lassen. Am besten also neutrales Tofu kaufen und so schnell bekommt man ein vegetarisches chicken tikka masala.
Für ein veganes chicken tikka masala kann man dann natürlich das Joghurt auch durch eine vegane Alternative austauschen. Soya, Kokos oder Cashewyoghurt eignet sich hierfür genauso gut und macht das ganze wunderbar cremig. 

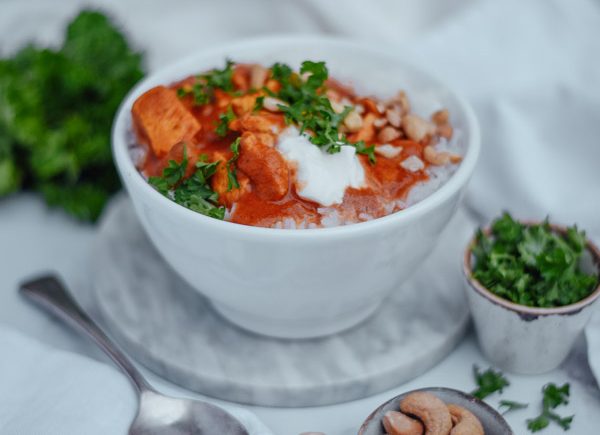
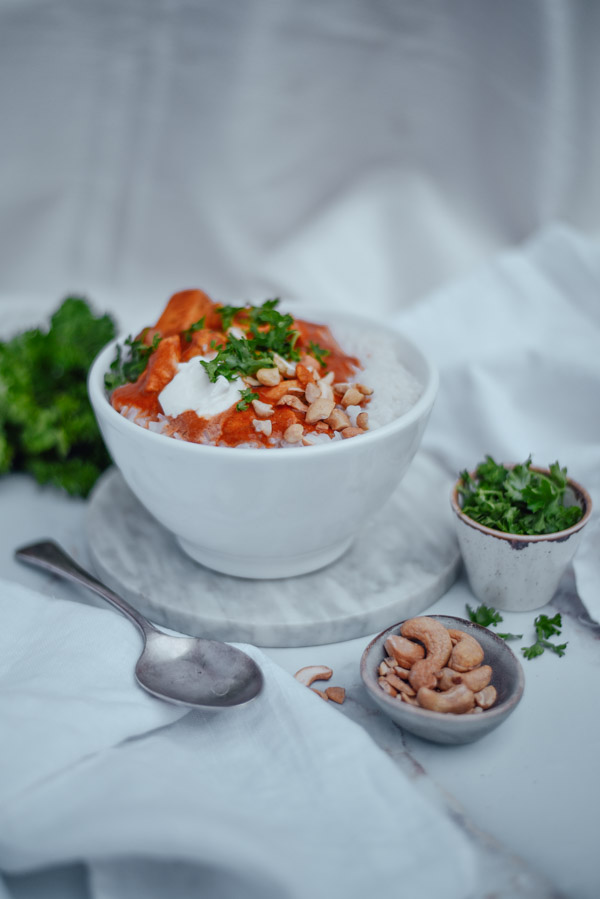
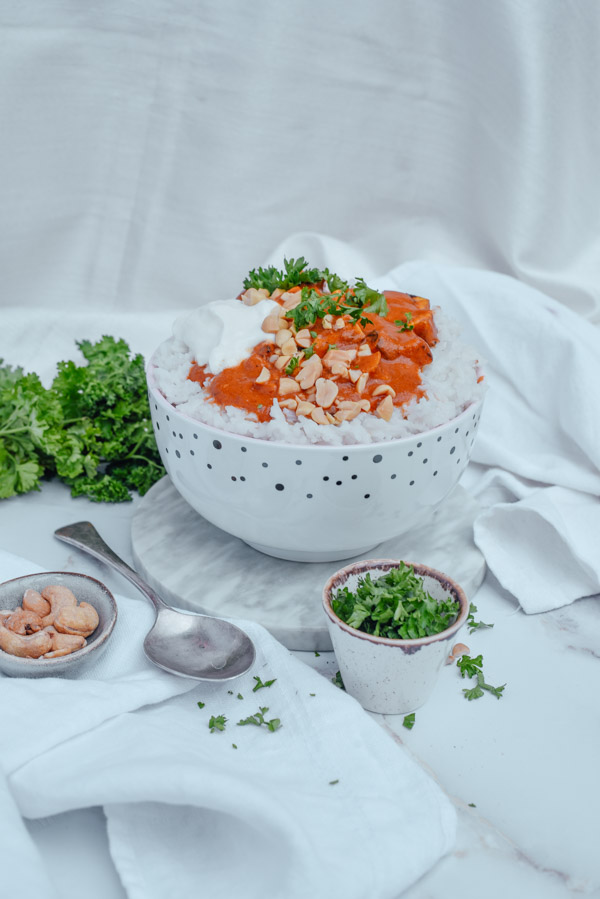
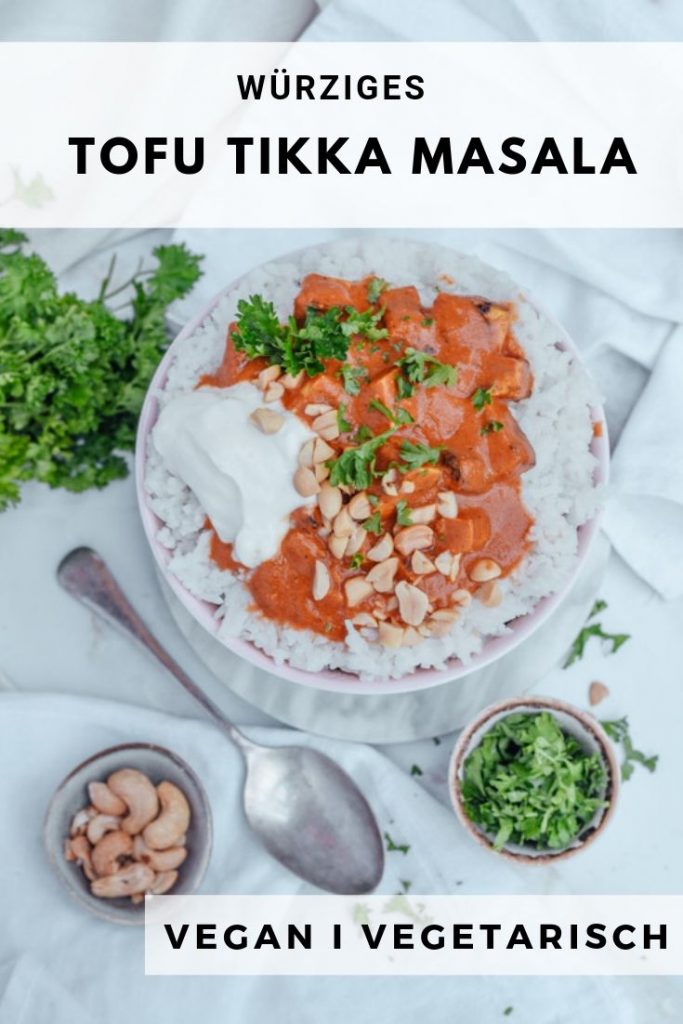
Hier ein Foto von meinem Tofu tikka masala:

Tofu Tikka Masala vegetarisch

Tofu vegan Chicken Tikka Masala Rezept-3

Chicken Tikka Masala Rezept indisch

Am besten passt zu der würzigen Tomatensoße mit Hähnchenfleisch übrigens Reis als Beilage. Gerne kann man dann auch noch frisch gehackten Koriander und ein paar Cashews oder Erdnüsse für den Feinschliff darauf streuen. 

Das Rezept ist sehr einfach nachzumachen und benötigt keine schwer zu bekommenden Zutaten. Viel Spaß beim Nachmachen! 

Chicken (Tofu) Tikka Masala

Ein unkompliziertes Currygericht mit würziger Tomatensoße, indischen Gewürzen und zarten, goldbraun gebratenen Hähnchenstücken. 

Gericht Main Course
Länder & Regionen Indian
Keyword chicken tikka masala
Vorbereitungszeit 15 Minuten
Zubereitungszeit 30 Minuten
Arbeitszeit 45 Minuten
Portionen 5
Kalorien 280 kcal
Autor Carina Berry

Zutaten

Marinade

  • 200 g Chicken Tofu
  • 150 g Naturjoghurt vegane Alternative
  • 1/2 ausgepresste Zitrone
  • 2 Knoblauchzehen
  • 1 TL Ingwer gehackt
  • 2 TL Garam-Masala
  • 0.5 TL Salz

Soße

  • 2 TL Öl
  • 2 TL Butter
  • 1 Zwiebel
  • 2 Knoblauchzehen
  • 1 TL Ingwer gehackt
  • 0.5 TL Kurkuma gemahlen
  • 1 TL Kreuzkümmel
  • 1 TL Garam-Masala
  • 1 TL Chilipulver
  • 150 ml Sahne vegane Alternative
  • 300 g Tomatensoße

Anleitungen

  1. Hähnchenfleisch in würfelige Stücke schneiden und in eine Schüssel geben. Jogurt, Zitronensaft, Knoblauch, Ingwer, Garam Masala und Salz dazu geben und alles gut vermischen. Fleisch für minderstens 20 min im Kühlschrank ziehen lassen oder besser schon über die Nacht zuvor.
  2. Danach das Fleisch in der Pfanne scharf anbraten.
  3. Für die Soße die gewürfelten Zwiebel anschwitzen und Ingwer sowie Knoblauch dazu geben. Alles gut anbraten und die anderen Gewürze dazugeben. Tomatensoße hinzufügen und einkochen bis alles sehr dickflüssig wird. Sahne und Chili dazugeben.
  4. Zum Schluss nochmal das Fleisch dazugeben und für weitere 10 Minuten auf kleiner Flamme köcheln lassen. Am besten passt Basmati Reis zu diesem Gericht. Als Topping Koriander und Erdnüsse hacken und darüber streuen.

Habt ihr jetzt Lust auf die Ferne bekommen? Also mich hat dieses leckere Rezept beim Kochen direkt ins Ursprungsland Indien versetzt! Wenn ihr dieses Chicken Tikka Masala auch ausprobiert und dann aufgrund eurer Begeisterung für das köstliche indische Essen direkt eine Reise dorthin plant, dann vergesst nicht ein Visum für Indien zu beantragen. Das braucht man nämlich unbedingt um als Tourist einreisen zu können – wusste ich vorher auch, aber man muss vorher ein Visum Indien beantragen. Für eine Reise nach Indien ist die Visumbeantragung bereits vor der Abreise erforderlich, da Indien keine Visa-on-Arrival kennt. Indien bietet das E-Visum für Touristen mit der Gültigkeitsdauer von 1 Monat, 1 Jahr und sogar 5 Jahren an. Das Visum mit der Gültigkeitsdauer von 1 Monat sollte jedoch besser nicht verwendet werden, da im Internet viele Berichte von Reisenden zu finden sind, die mit diesem Visum wegen der zu kurzen Gültigkeitsdauer in Probleme geraten sind. Ich hoffe diese zusätzliche Info hilft euch, um problemlos in das Land der Gewürze und Düfte einreisen zu können! 

Wirst du das Rezept ausprobieren? Falls ja schreib mir unbedingt hier mal in die Kommentare wie es geworden ist 🙂 
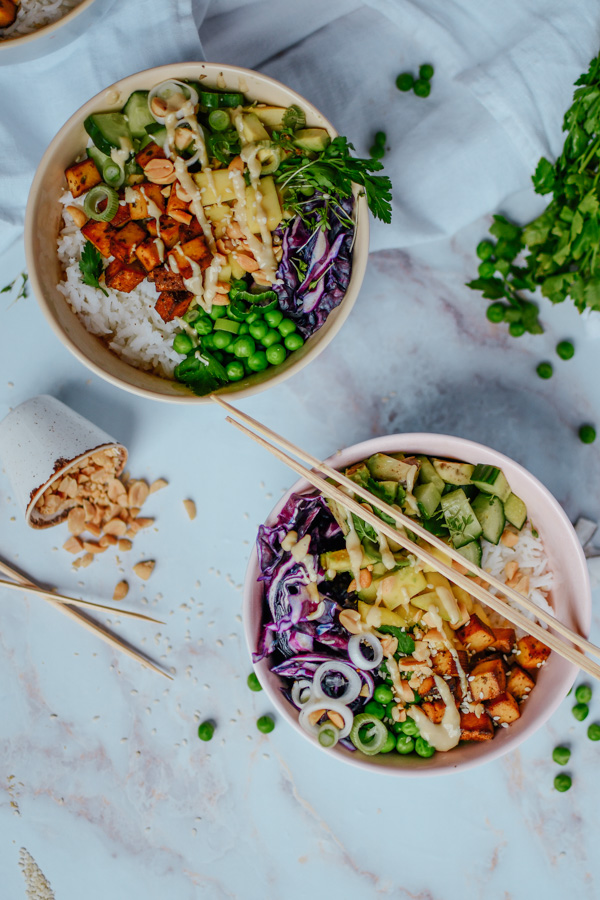
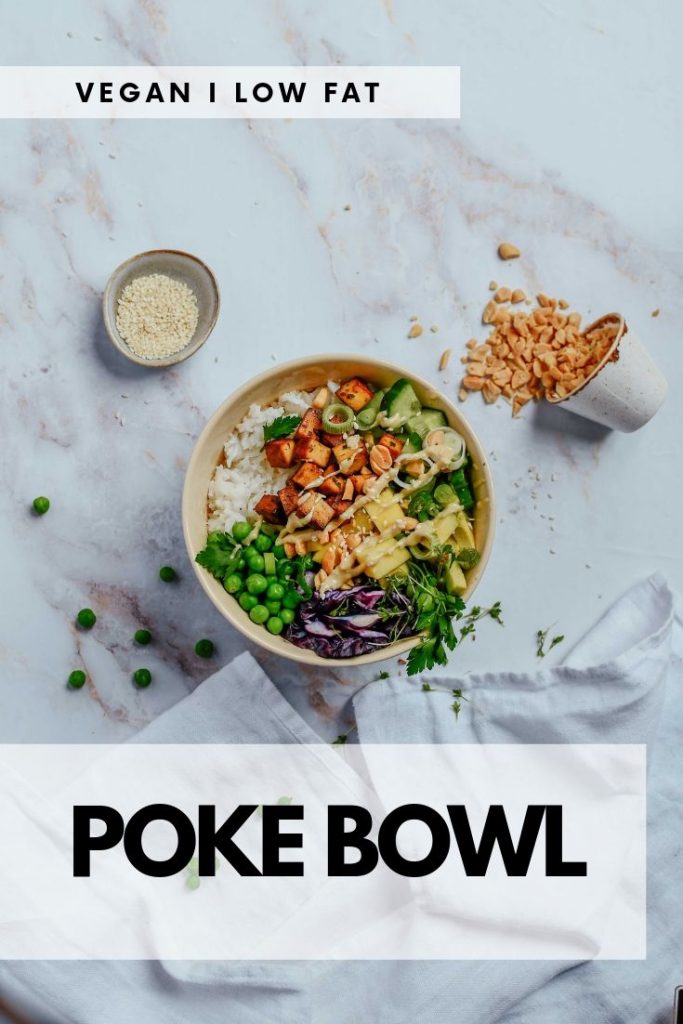
Übrigens dachte ich mir ich verlinke dir hier noch mein Poke Bowl Rezept und meinen Low Carb Flammkuchen, da dir diese beiden Rezepte noch gefallen könnten! 

Übrigens habe ich eine gratis Clean Eating Shopping List für die du dich anmelden kannst. Macht das Fitness Shopping im Supermarkt um vieles einfacher!

Hast du das Rezept nachgemacht?

Dann markiere mich mit @carina_berry auf Instagram oder verwende den Hashtag #carinaberry

Ich teile immer wieder nachgemachte Rezepte auf meiner Instastory  <3

xoxo,

Möchtest du das Rezept auf Pinterest speichern? Hier ein paar Pinterest Grafiken für dich: 
Tofu Tikka Masala vegan.jpg Tofu Tikka Masala.jpg Tofu Tikka Masala vegan.jpg Tofu Tikka Masala.jpg Chicken Tikka Masala indisch Chicken Tikka Masala indisch Chicken Tikka Masala indisch


Weiterlesen

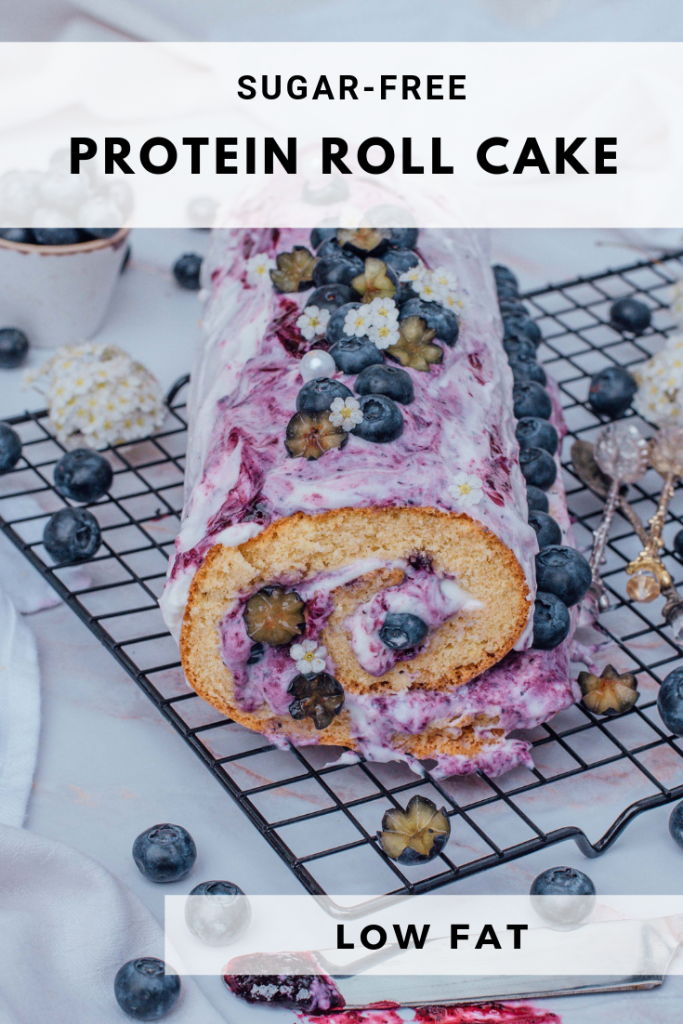
Protein cake sugar-free and low fat

low carb protein cake

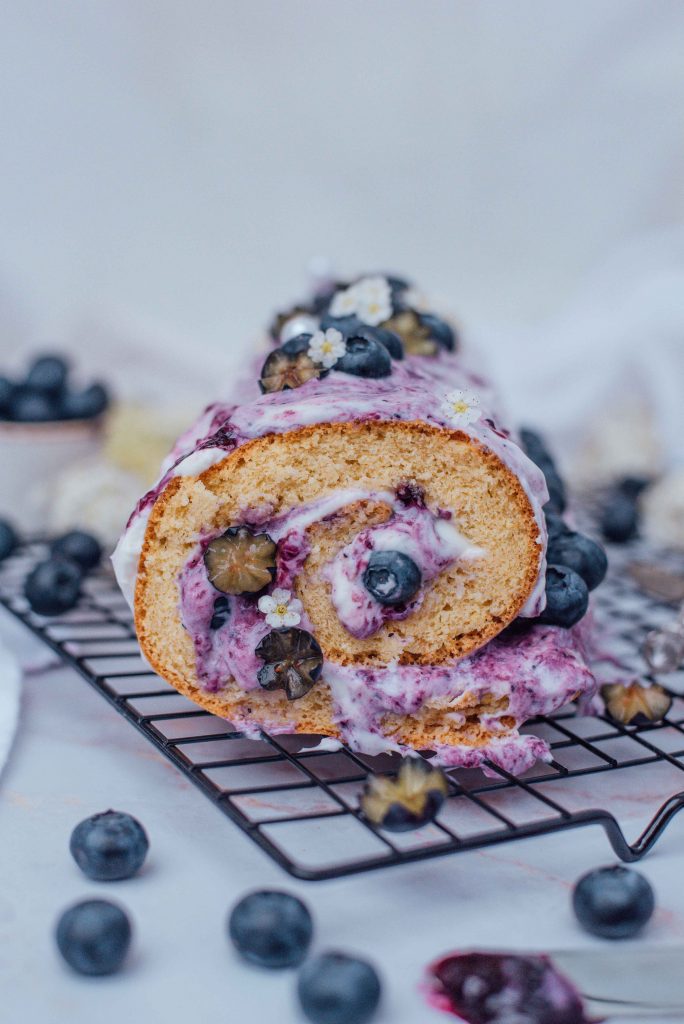
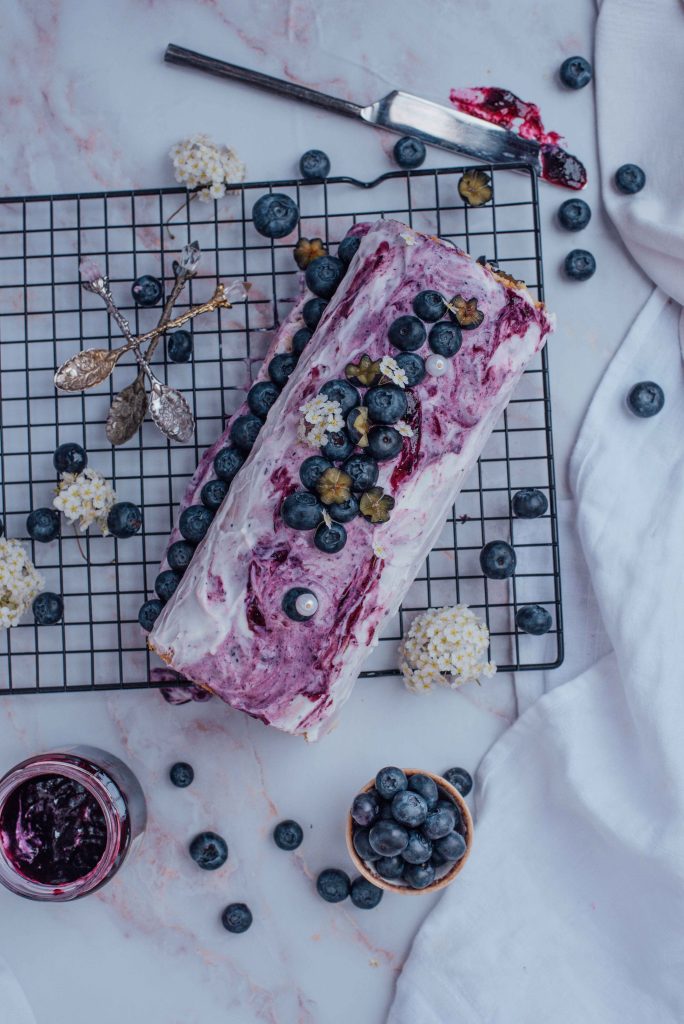
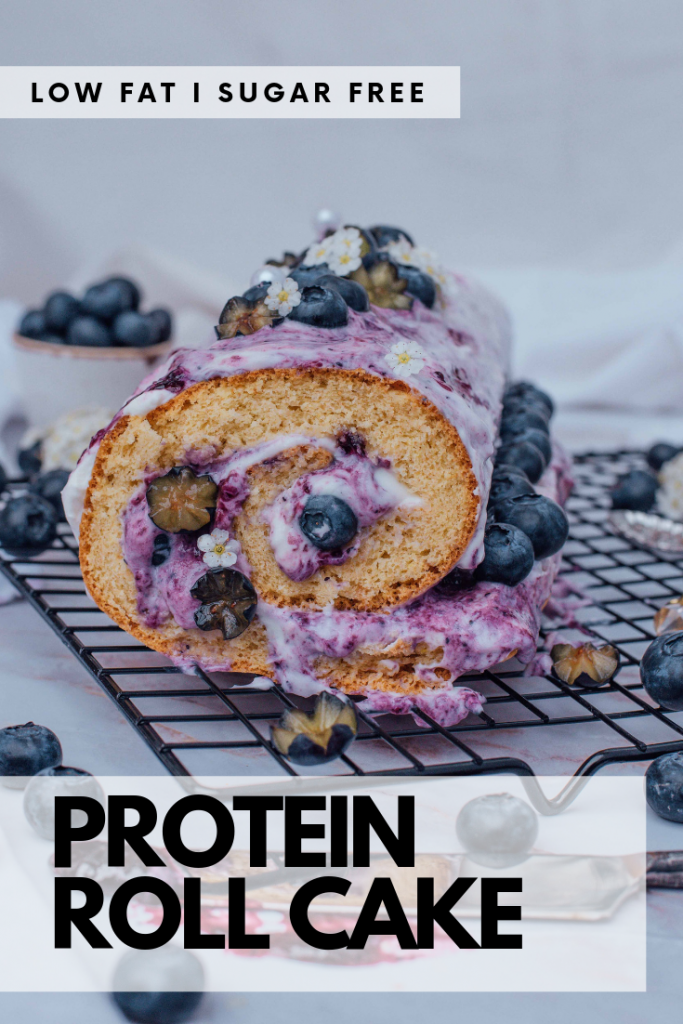
Looking to eat clean but still get in your daily dose of sweetness? Then, this protein cake with yummy blueberries might just be what you are looking for. It is easy to make, low-fat, high protein and very tasty! 

Jump to recipe!

Protein cake- a sugar-free indulgence

I love sugar-free protein cake recipes because they simply don’t make you feel guilty after eating a big slice of it! Today I will be showing you how to make a Swiss roll, but in a healthy version.

The recipe was inspired by my grandma, who bakes better than anyone else in the world. However, her recipes are usually packed with butter and refined sugar. Nothing for fitness fans. That is why I took her recipe and replaced all the „bad“ ingredients with cleaner choices. The result was a very light and low fat cake that is very simple to make and works for breakfast, brunch and dessert! 

Low fat protein cake with blueberries

This could also be a protein cake bodybuilding recipe in case you are training for a competition and need to diet really hard. It can be hard to satisfy your sweet tooth on those pre-competition cutting diets. This low-sugar cake will definitely fit into your meal plan! 

The whole recipe will take you about 30 minutes and doesn’t require any special baking skills. This is how you roll the dough: 

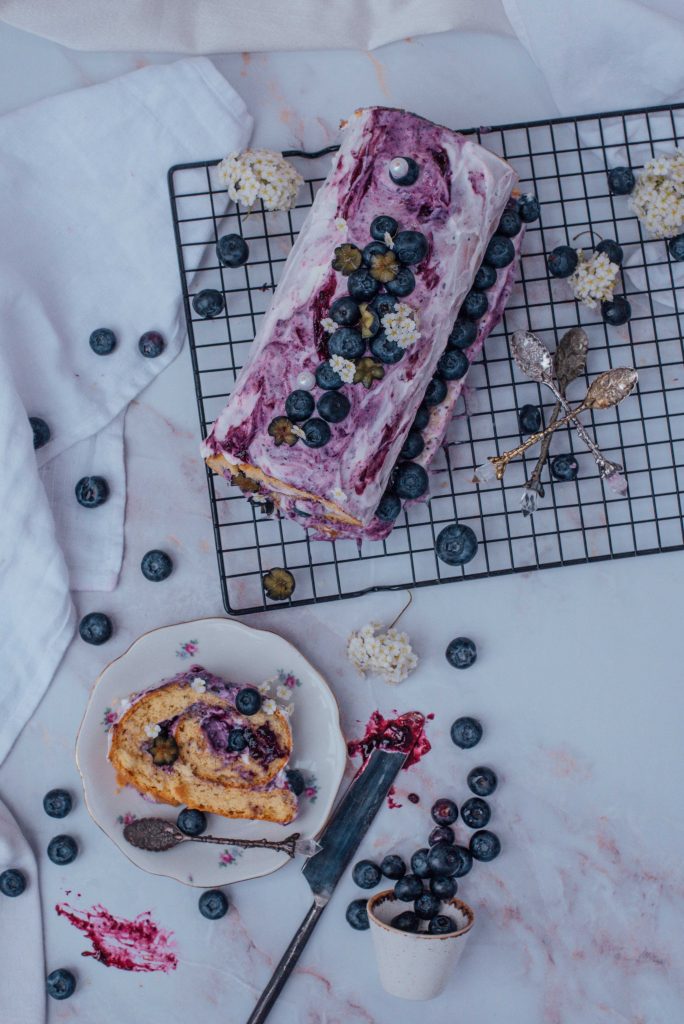
Regarding the filling of the protein cake there are a lot of different options that you have. For this specific recipe I used greek yoghurt mixed with blueberry jam and blueberries. But you can literally use any fruit spread, protein cream or anything else that comes to your mind. That is what I love about the recipe. You have the dough as a base and can vary each time with the filling. 

Low fat protein cake with blueberries

Here is the recipe for you now. Once slice of the cake comes down to approximately 180kcal and only 4 grams of fat! <3

low carb protein cake
5 von 1 Bewertung
Drucken

Protein cake roll-up

A clean and healthy way to satisfy your sweet tooth! 

Gericht Dessert
Vorbereitungszeit 15 Minuten
Zubereitungszeit 30 Minuten
Arbeitszeit 45 Minuten
Portionen 10 Pieces
Kalorien 180 kcal
Autor Carina Berry

Zutaten

Dough

  • 4 Eggs
  • 150 g Icing Sugar Xylit
  • 170 g spelled flour
  • 2 tsp baking powder

Filling

  • 200 g greek yoghurt
  • 200 g cream cheese
  • 30 g Xylit
  • 100 g sugar-free blueberry jam
  • 40 ml lemon juice

Anleitungen

Preheat the oven to 180 degrees upper-lower heat.

    Separate the eggs and beat the egg whites until stiff.

      In a bowl, mix the yolk with the xylit icing sugar and stir until fluffy.

        Mix the flour with the baking powder and alternate with the egg whites and the egg yolk mass.

          Spread the dough on a baking sheet lined with baking paper and place in the oven.

            Bake the oven for 10 to 12 minutes.

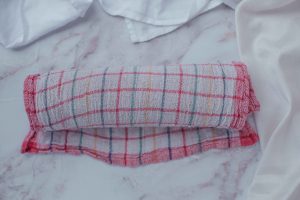
              Remove the dough from the oven and put a clean kitchen towel over it. Flip the dough onto it and carefully remove the baking paper.

                Wit the help of the kitchen towel roll up the dough and let it rest until you are done with the filling.

                  Mix all ingredients (except fruit spread) for the filling together and brush it out onto the dough. Add spoonfuls of the fruit spread over the dough.

                    Now start rolling the cake up again from one side until you have a nice roll.

                      Protein Cake with blueberries

                      I hope you enjoyed this recipe and will try it out soon! 

                      More clean dessert recipes

                      In case you are looking for more healthy desserts check these out: 

                      If you want to keep clean and healthy recipes delivered to your inbox you can sign up for my fitness food list and also receive my free E-Book! 

                      Did you make this recipe? 

                      Did you make this recipe?

                      Tag  @carina_berry and use the Hashtag #carinaberry to get the possibility for a shoutout on my Instagram! 

                      I always love to see your wonderful creations and it makes me so happy to see you guys actually making my recipes. 

                      xoxo,

                      Want to pin this recipe? I made some pins for you: 

                      Weiterlesen

                      5 Tools to Become an Established Instagram Blogger (2020)

                      With roughly 1 billion monthly users, Instagram’s powerful platform carries massive value for brands. If you’re looking to turn your Instagram influence into a side hustle or rather a full-time business, keep reading to learn five tools for Instagram bloggers to help you become an established influencer yourself. 

                      Kicksta

                      It’s extremely difficult to become an established Instagram blogger without a solid following. The key, especially for micro-influencers, is to get more followers who have a genuine interest in your niche aka will actually want to read your blogs and engage with your posts. 

                      Gaining followers on Instagram can be a time-consuming and tedious process. Instagram growth services, like Kicksta, use specific methods such as liking photos posted by people in your target audience, following users in your audience or auto-commenting, to name a few, to get you more organic Instagram followers. Practices like this will avoid gaining robot followers and have you on your way to reaching your goal of an esteemed Instagram blogger. Check out Kicksta now.

                      Lightroom

                      Gone are the days of posting any old unfiltered photo on Instagram. Prospective and current followers expect your account to maintain a certain look, theme, or color palette. Today, the importance of upholding an Instagram aesthetic is key when striving to become an established Instagram blogger. 

                      So how does one create an aesthetic? Editing softwares like Lightroom were originally intended for professional photographers, but now are accessible to everyone. 

                      For new bloggers or for those with limited time, presets aid in speeding up the process. Presets are editing actions saved into a file, so you can categorize projects, batch edit quickly and produce a consistent look for your Instagram feed. Popular influencers now sell their presets to help other inspiring bloggers edit their photos. So whether you’re editing yourself or turning to your favorite bloggers for help, Lightroom is the perfect outlet to ensure your aesthetic is on point. 

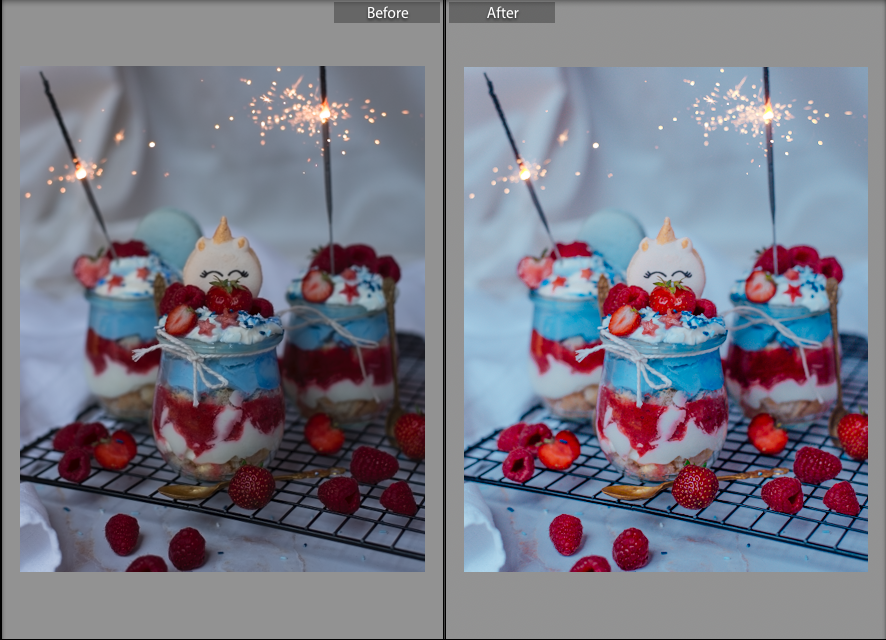
                      This is the before and after of a photo I edited in Lightroom: 

                      Tools for Instagram bloggers

                      LinkTree

                      Linktree allows you to get the most out of your Instagram bio link. This tool creates a custom link for your Instagram profile that houses multiple links like newsletter signups, blog posts and links to promotional products. 

                      Linktree maximizes your Instagram bio and takes away the hassle of constantly switching out the link if you have more than one blog live or simultaneous collabs going on at once. If you’re searching for tools to become an established Instagram blogger, this solo link in your bio is extremely powerful. It is definitely one of the best tools for Instagram bloggers! 

                      Canva 

                      Creating graphics is essential for your blog and social media platforms. Thankfully, if you’re no photoshop wizard, Canva is the best solution. Canva is incredible for creating graphics of all shapes and sizes. This tool is your new best friend to create branded images. 

                      Canva offers a wide range of templates whether it be for social media, blog graphics or headers. No matter the use, Canva captures your social following’s attention and allows you to create like a pro. You can upload images, edit, filter, choose from hundreds of fonts and change the templates’ colors to make one of a kind creations. Did I mention it’s free?

                      When it comes to social media and becoming an established Instagram blogger, Canva is the graphic design tool you need to create better-branded images, pinnable posts, and engaging Instagram stories. 

                      This is for example a graphic I made for my Pinterest board in order to link to this blog post:

                      5 tools for Instagram Bloggers

                      UNUM

                      When we are taking about tools for Instagram bloggers this last one can’t be missing. This free app is my favorite tool for scheduling my posts and planning out my gallery. I usually sit down once a week and prepare all my posts for the upcoming days. 

                      UNUM not only saves users time but also helps influencers and brands design a visually appealing feed. By scheduling posts, you can actively plan how your feed will look ahead of time to match the aesthetic you’re aiming to create. 

                      Additionally, UNUM aims to help users get more engagement and views by providing optimal times to post. While you can do this manually by reviewing audience metrics through Instagram Insights, UNUM does this work for you. 

                      Here is a screenshot of what my UNUM gallery planning looks like at the moment:

                      5 tools to become an established Instagram Blogger

                      Everything over after the blue line is what I have scheduled for the upcoming days. It is so helpful to see the posts next to each other and helps me to color code my feed. 

                      It’s a wrap on my favorite tools for Instagram bloggers

                      Now that you’re equipped with an arsenal of various social media marketing softwares, find your niche and get working. Nothing will make you an overnight success. However with patience, determination and these programs under your belt, you’re guaranteed to see results and become the established influencer of your dreams. 

                      Here are some more blog posts on Instagram growth if you are interested in learning more about this topic: 

                      You can also sign up for my free food blogging success email list to get important blogging info delivered straight to your inbox:

                      I hope you enjoyed this blog post on my favorite tools for Instagram bloggers. Let’s talk soon!

                      xoxo,

                      Weiterlesen

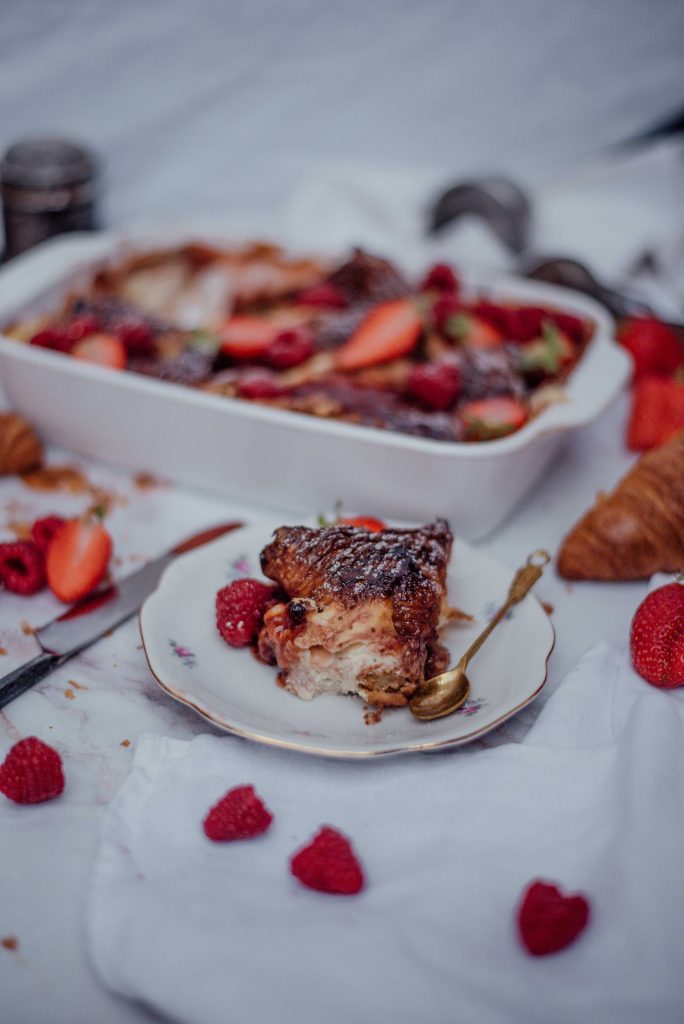
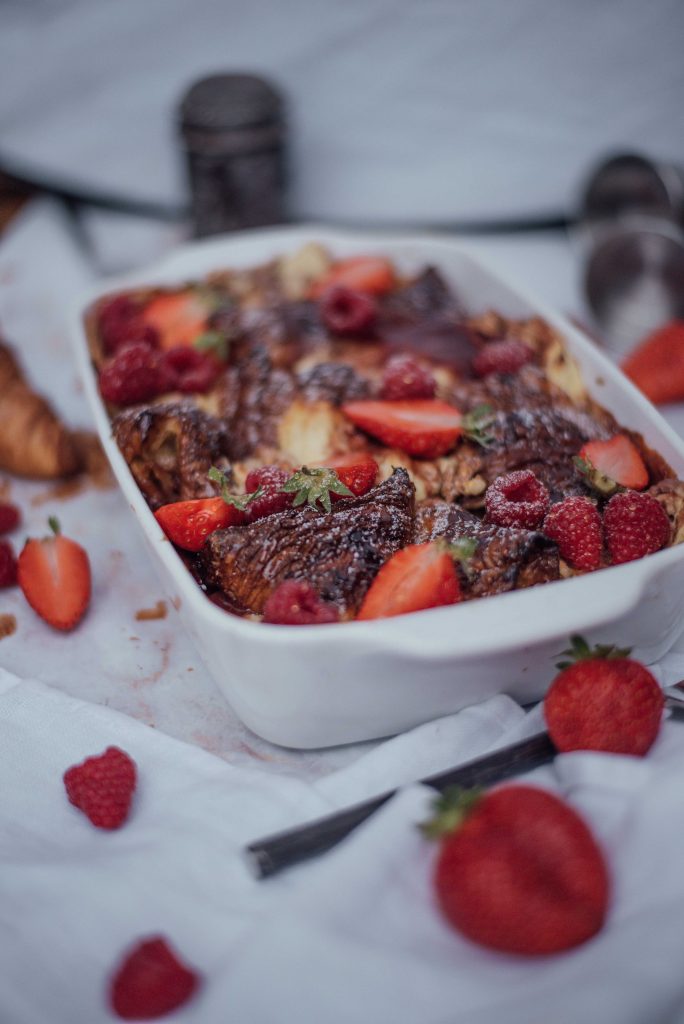
                      Best french toast casserole with cream cheese

                      The best french toast casserole with cream cheese_

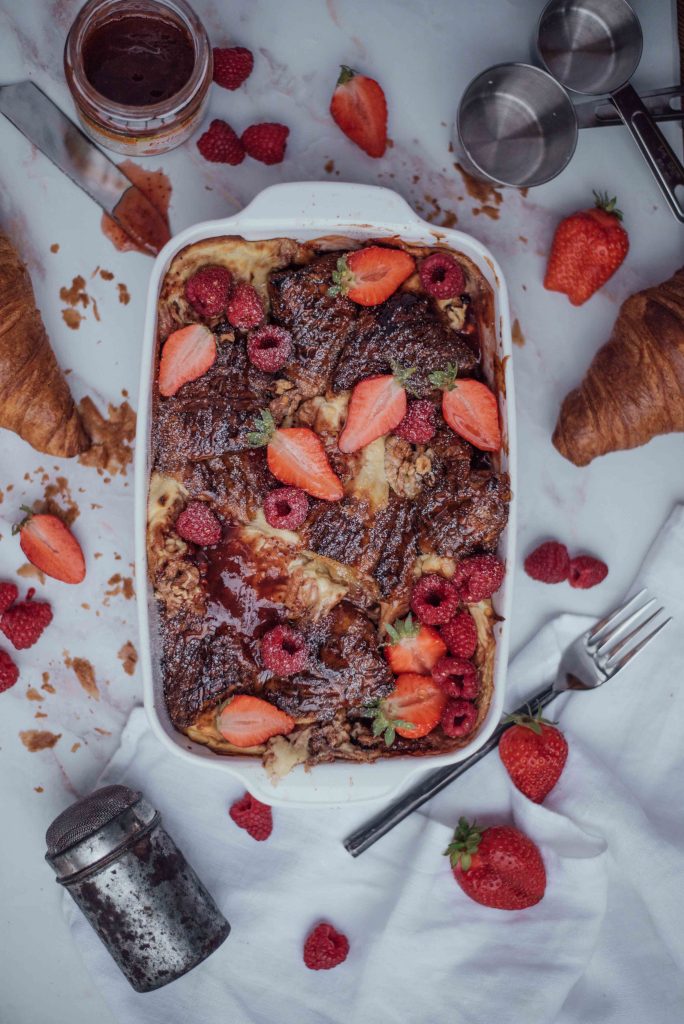
                      Get ready for the best french toast casserole ever made! Golden, crisp and fluffy croissants blended with smooth cream cheese and fruity strawberries simply make the perfect combo. Wouldn’t you agree? 

                      Jump to recipe

                      Healthy french toast casserole 

                      This is actually a healthy french toast casserole since it is completely sugar-free as well! If you are a regular visitor of my blog you know that I like to take conventional recipes and make them healthy (healthier). I believe a lot of traditional recipes have a lot of unnecessary sugar in them and some ingredients can always be swapped for healthier ones. This is exactly what I did with this french toast casserole with cream cheese. Instead of using refined sugar I used Xylit which has 40% less calories than regular sugar. I substituted conventional cream cheese for low fat cream cheese to save some extra calories and also used sugar-free fruit jam to make a healthier french toast casserole! 

                      best french toast casserole with cream cheese

                      Ways to adapt the recipe

                      There are actually multiple ways you can make this recipe. You can make this dish french toast casserole blueberry style or use raspberries instead of strawberries. I found all kinds of berries work perfectly, but it also tastes super yummy if you use apples and apple sauce! You also don’t necessarily need to use croissants either. You can, for example, also make a brioche french toast casserole by using brioche bread or any other type of sweet rolls or toast!

                      What I love about this decadent french toast casserole is that it is a great way to make use of hard, old bread. Before you throw it away this is a great dish to make with it. Yay to less food waste!

                      Tip: If you are actually using older, harder bread make sure to really let it soak up enough liquid before putting it into the baking pan. Otherwise it will not get soft in the oven. Also, make sure this breakfast bake is served while it is still hot/warm. It will not taste nearly as good when it is cold. If you want to go a little crazy you can add a scoop of ice cream. Which obviously makes it less healthy again. 

                      best french toast casserole with cream cheese

                      Recipe french toast casserole with cream cheese

                      Let’s get into the details of this berry french toast casserole!

                      The best french toast casserole with cream cheese

                      A sweet breakfast bake for weekend brunches!
                      Gericht Breakfast
                      Länder & Regionen American
                      Keyword breakfast casserole, french toast
                      Vorbereitungszeit 5 Minuten
                      Zubereitungszeit 15 Minuten
                      Arbeitszeit 20 Minuten
                      Portionen 8

                      Zutaten

                      • 3 eggs
                      • 80 ml of milk
                      • 2 tb Xylit icing sugar or regular icing sugar
                      • 1 tb Xylit or coconut sugar, honey, or sugar
                      • Juice 1/2 lemon
                      • 1 teaspoon cinnamon
                      • 5 croissants
                      • 200 g low fat cream cheese
                      • 100 g sugar-free strawberry jam
                      • 100 g fresh berries
                      • 1 tbsp honey

                      Anleitungen

                      Cut the croissants apart in half. In a bowl, mix the eggs with the milk, cinnamon and Xylit icing sugar. Soak the halved croissants briefly in the mixture by turning them from side to side. Place them in a casserole dish. Pour the remaining egg mixture over it.

                        In a second bowl, stir the cream cheese with the Xylit and lemon juice and place different scoops of it on the casserole. Then put the jam on top of it.

                          Bake the casserole in the oven at 180 degrees. Decorate with berries, drizzle with the honey and a bit of Xylit icing sugar.

                            I really hope you enjoyed the sweet breakfast casserole recipe. It truly is super yummy. I made it for a family brunch one weekend and it was gone in an instant and my family members were begging me to make it more often. Yes, that’s how addicting it was! 

                            best french toast casserole with cream cheese best french toast casserole with cream cheese

                            Here are a few more sweet but healthy recipes I absolutely love from my blog: 

                            I you want you can also sign up for my free Clean & Lean E-Book. I will send it to you per email and you will have 35 awesome recipes to make that are healthy and delicious! 

                            Did you make this recipe? 

                            Did you make this recipe?

                            Tag  @carina_berry and use the Hashtag #carinaberry to get the possibility for a shoutout on my Instagram! 

                            I always love to see your wonderful creations and it makes me so happy to see you guys actually making my recipes. 

                            xoxo,

                            Make sure to save this recipe to your Pinterest board: 

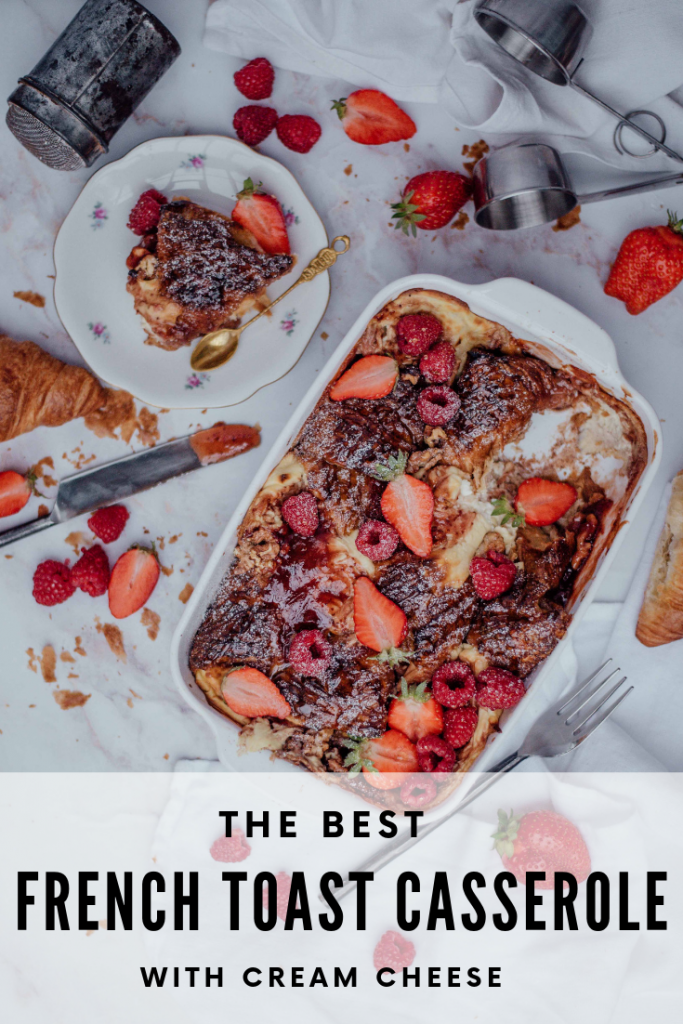
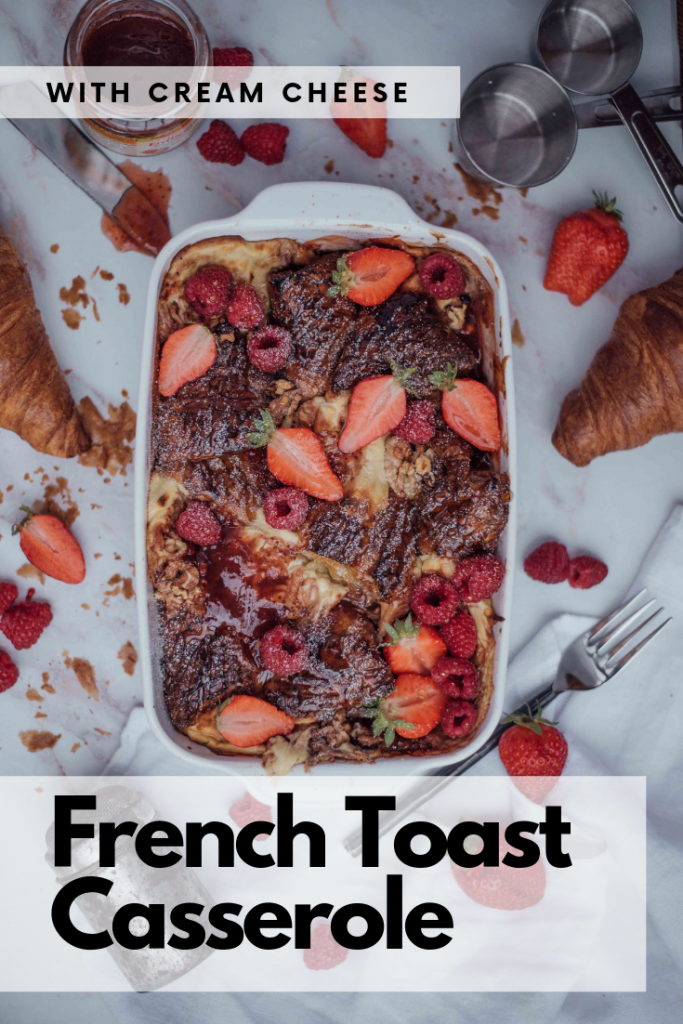
                            french toast berry casserole french toast berry casserole french toast berry casserole

                            Weiterlesen

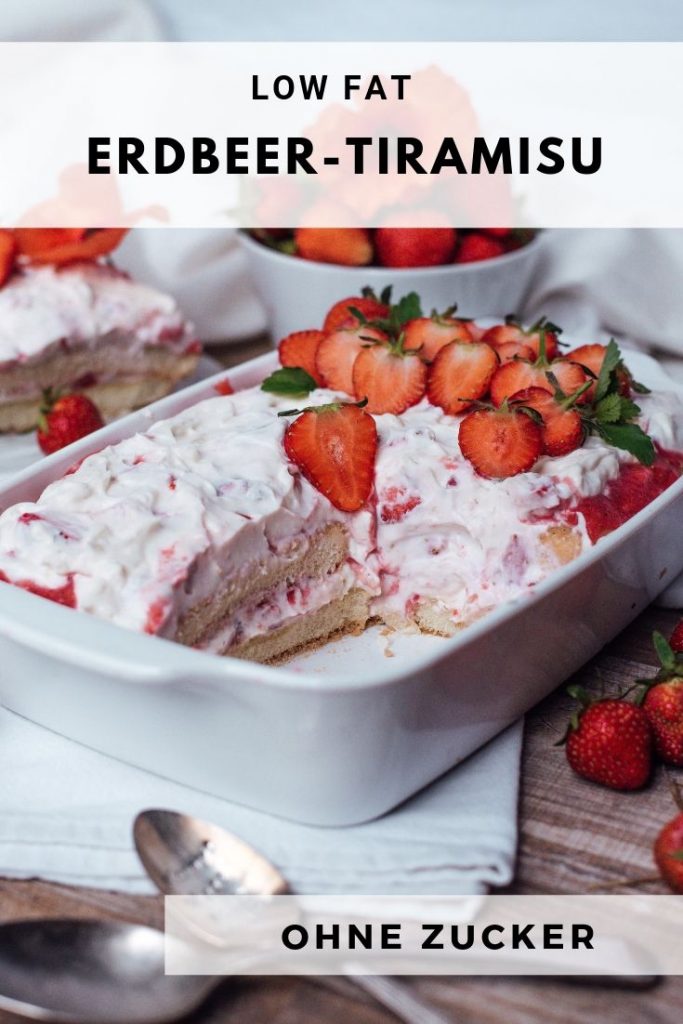
                            Gesundes Tiramisu mit Erdbeeren – kalorienarm & ohne Zucker

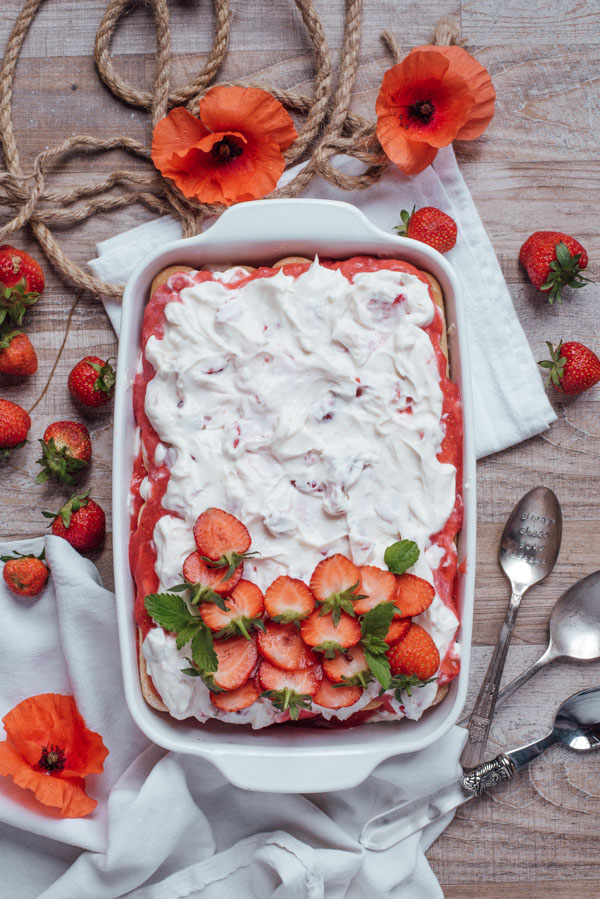
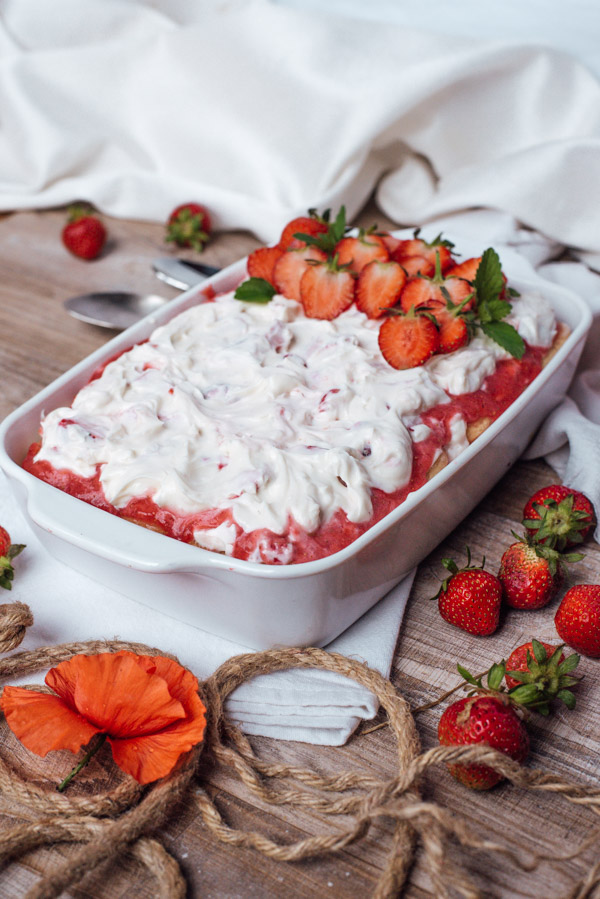
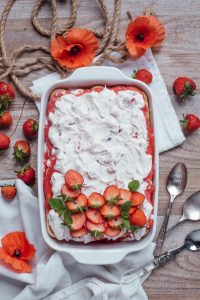
                            Erdbeer-Tiramisu ohne Zucker in Auflaufform

                            Lust auf Sommer? Heute zeige ich dir wie du aus der italienischen Kalorienbombe ein wahres Fitness Dessert zaubern kannst. Mein leichtes, gesundes und einfach super leckeres Erdbeer-Tiramisu passt perfekt zur Erdbeersaison und packt euch die Frucht auf den Teller! 

                            Springe zum Rezept

                            So wird die Kalorienbombe zum Fitness Dessert

                            Wer schon mal so mutig war und nachgesehen hat wie viele Kalorien eine Portion Tiramisu hat, hat dann wohl verschreckt die Gabel beiseite gelegt und das Tellerchen von sich weg geschoben. Tiramisu ist nämlich eigentlich eine richtige Kalorienbombe mit um die 500kcal pro Stück. Dies ist zum Großteil auf die fetthaltige Mascarponecreme zurück zuführen. Ich erkläre euch nun wie ich mein Erdbeer-Tiramisu Schritt für Schritt von einem ungesunden Dessert zum Fitness Food optimiere. 

                            Erdbeer Tiramisu ohne Zucker

                            Alternativprodukte für Mascarpone

                            Bevor ich dieses Rezept begonnen habe, verbrachte ich einiges an Zeit herauszufinden wie ich die fettreiche Mascarpone durch etwas kalorienärmeres ersetzen kann. Ich habe im Supermarkt light Mascarpone gefunden (gab es sogar beim Diskonter), was ja schon mal ein guter Anfang war. Bei light Mascarpone (235kcal pro 100g) spart man sich schon mal die HÄLFTE an Kalorien verglichen mit dem herkömmlichen Produkt (420kcal pro 100g). Für ein Tiramisu benötigt man aber normalerweise 500g!!! Mascarpone. Das wären eigentlich 2100kcal allein nur von der Mascarpone – und da ist der Löffelbiskuit und Zucker noch gar nicht dabei. Ihr seht also warum herkömmliches Tiramisu eine absolute Kalorienbombe ist. 

                            Mir waren 1175kcal für das Tiramisu allein für die Creme immer noch zu viel. Deshalb habe ich das ganze noch weiter runter reduziert und die Hälfte der light Mascarpone (250g) mit light Frischkäse (66kcal pro 100g) ersetzt. Somit war ich für die Tiramisucreme nur mehr auf insgesamt 753kcal statt anfänglichen 2100. Das ist ja schon mal ein großer Unterschied, oder nicht? Erdbeer-Tiramisu kalorienarm also 😉

                            Erdbeer Tiramisu gesund und ohne Zucker_-7

                            Erdbeer-Tiramisu ohne Zucker

                            Als nächstes ging ich dem Zucker an den Kragen. Seit Jahren verwende ich ja keinen normalen Haushaltszucker mehr und mache alles mit Xylit oder Erythrit. Birkenzucker (oder Xylit) hat nämlich um 40% weniger Kalorien als Haushaltszucker. Hier kann man also weiter sparen. Noch effektiver ist es wenn man Erythrit als Zuckeralternative verwendet. Erythrit ist komplett kalorienfrei, basiert auf natürlichen Rohstoffen, ist zahnfreundlich und für Diabetiker geeignet. Ich verwende immer Xucker Light. Es gibt ihn übrigens in allen möglichen Ausführungen von Staubzuckerersatz zu Ersatz für braunen Zucker. Absolut genial – ich kann es euch nur stark empfehlen! 

                            Erdbeer-Tiramisu ohne Zucker in Auflaufform


                            Gesundes Tiramisu

                            Um meinem gesunden Erdbeer-Tiramisu nun noch das Fitnesskrönchen aufzusetzen, geben wir einfach noch ein paar Esslöffel Proteinpulver dazu. Ihr könnt das Proteinpulver entweder unter das Erdbeerpüree mischen, oder in die Mascarpone/Frischkäsecreme. Ich kann euch Erdbeerprotein empfehlen, falls ihr es unter die Fruchtsoße mischen wollt und Vanilleprotein falls es unter die Creme kommen soll. Somit können wir den Eiweißgehalt im Dessert deutlich aufbessern. Übrigens ist dieses gesunde Tiramisu auch low carb! 

                            Erdbeer Tiramisu ohne Zucker


                            Ihr könnt das Ganze übrigens auch als Himbeer-Tiramisu machen. Ganz einfach die Erdbeeren überall mit Himbeeren ersetzen. Im Juli wenn bei unserem Marillenbaum die Früchte reif sind möchte ich es auch unbedingt mal als Marillen-Tiramisu versuchen! 
                            Als weitere Alternative könnt ihr mein Erdbeer-Tiramisu im Glas statt in der Auflaufform machen. 

                            Dieses Erdbeer-Tiramisu mit Löffelbiskuit ist ohne Kaffee, da ich ehrlich gesagt Kaffee so gar nicht mag und lieber eine fruchtige Note habe. Das gesunde Tiramisu ist zwar ohne Ei, aber leider aufgrund der Mascarponencreme nicht vegan. 

                            Möchtest du mehr über gesunde Ernährung lernen?

                            Seit kurzer Zeit ist nun mein erster Fitness Food Online Kurs gestartet! Mit 140 Minuten Videomaterial, 9 Kapiteln und 6 Kochlektionen lernst du im Selbststudium die Basics zu Clean Eating und gesunder Ernährung. Wir kochen zusammen verschiedene, leckere Fitnessrezepte! Außerdem findest du Expertenwissen von staatlich geprüften Ernährungstrainern und ganz viele PDF’s, Rezeptkarten und Fact Sheets zum Ausdrucken! 

                            Fitness Food Online Kochkurs

                            Zubereitung und Erdbeer-Tiramisu Rezept

                            Ihr werdet sehen wie wundervoll einfach dieses Erdbeer-Dessert ist. Innerhalb von 15 Minuten ist es auch schon fertig. Es muss allerdings für ein paar Stunden kalt gestellt werden, damit der Löffelbiskuit schön weich wird. 

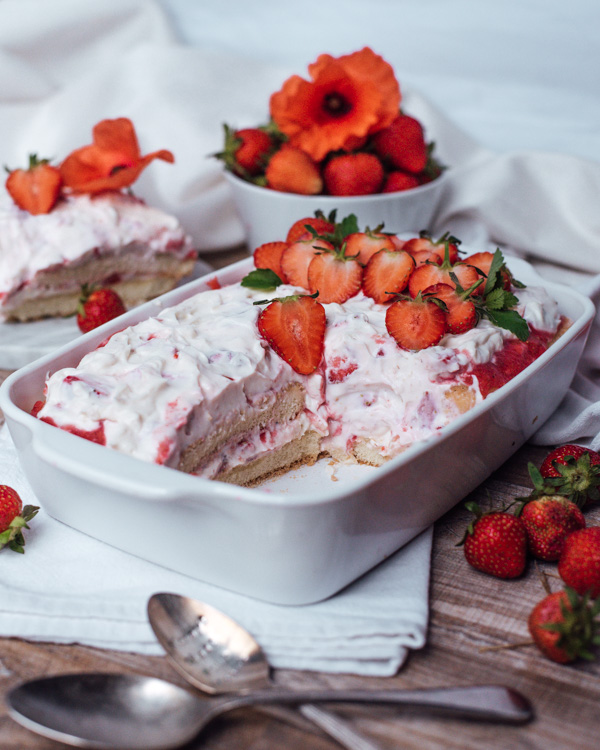
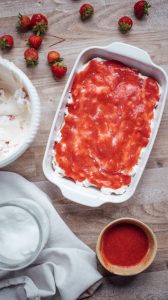
                            Anhand der Fotos könnt ihr nun sehen wie man das Erdbeer-Tiramisu schichtet:

                            Erdbeer-Tiramisu ohne Zucker in Auflaufform
                            5 von 1 Bewertung
                            Drucken

                            Erdbeer-Tiramisu

                            Ein leichtes Sommerdessert für die Erdbeersaison!
                            Gericht Dessert
                            Länder & Regionen Italian
                            Keyword Erdbeer-Tiramisu
                            Vorbereitungszeit 5 Minuten
                            Zubereitungszeit 10 Minuten
                            Arbeitszeit 15 Minuten
                            Portionen 8
                            Kalorien 208 kcal

                            Zutaten

                            • 500 g Erdbeeren
                            • 250 g Frischkäse alternativ Magertopfen oder griechisches Joghurt
                            • 250 g

                              Mascarpone Light


                            • 50 g Xylit
                            • 150 g Biskotten
                            • Saft einer Zitrone
                            • 2 EL Proteinpulver (optional)

                            Anleitungen

                            1. 200g Erdbeeren pürieren und beiseite stellen. Die restlichen Erdbeeren in kleine Stücke würfeln und zusammen mit Xylit, Mascarpone light und dem Magertopfen zusammen mischen. 

                              Falls erwünscht kann man nun das Proteinpulver in die Mascarponecreme mit dazu mischen. 

                              Eine Auflaufform mit Biskotten auslegen und mit Zitronensaft beträufeln. Eine Schicht der Mascarponencreme auftragen. Danach eine Schicht Erdbeerpüree. Dann wieder Biskotten darüber schichten und noch einmal Erdbeerpüree und zum Schluss Mascarponecreme. Falls gewünscht noch mit ein paar Erdbeerscheiben und Minzblättern dekorieren.

                            Rezept-Anmerkungen

                            1671kcal - 208 pro Portion (8 Stück) 234g carbs - 63g Protein - 61g fat

                            Gesundes Tiramisu geht also super schnell und schmeckt dazu noch richtig lecker! Ich hoffe dir hat dieses leckere Erdbeer-Dessert gefallen und ich verlinke dir hier noch zwei meiner weiteren absoluten Lieblingsdesserts! Solltest du nach mehr leckeren Erdbeer- oder vielleicht auch Rhabarberrezepten sein kann ich dir diese zwei sehr empfehlen: Rharbarber Curd und Erdbeer-Rhabarber Marmelade

                            Falls du dir in Zukunft weniger Gedanken darüber machen möchtest welche Lebensmittel „fitness approved“ sind und welche nicht, habe ich hier etwas ganz besonderes für dich. Du kannst dich jetzt für meine Clean Eating Shopping Liste anmelden! Auf der Einkaufsliste habe ich alle meine liebsten, gesunden Zutaten in drei Kategorien Fett-Protein-Kohlenhydrate zusammengefasst. Einfach die Liste mit zum Einkaufen nehmen und so kann gar nichts mehr schief gehen! 

                            Hast du das Rezept nachgemacht?

                            Dann markiere mich mit @carina_berry auf Instagram oder verwende den Hashtag #carinaberry

                            Ich teile immer wieder nachgemachte Rezepte auf meiner Instastory  <3

                            xoxo,

                            Möchtest du dieses Rezept pinnen? Hier ein paar Pinterest Grafiken für dein Sommer/Erdbeerboard:

                            Erdbeer-Tiramisu gesund und ohne Zucker Erdbeer-Tiramisu gesund und ohne Zucker Gesundes Tiramisu

                            Weiterlesen

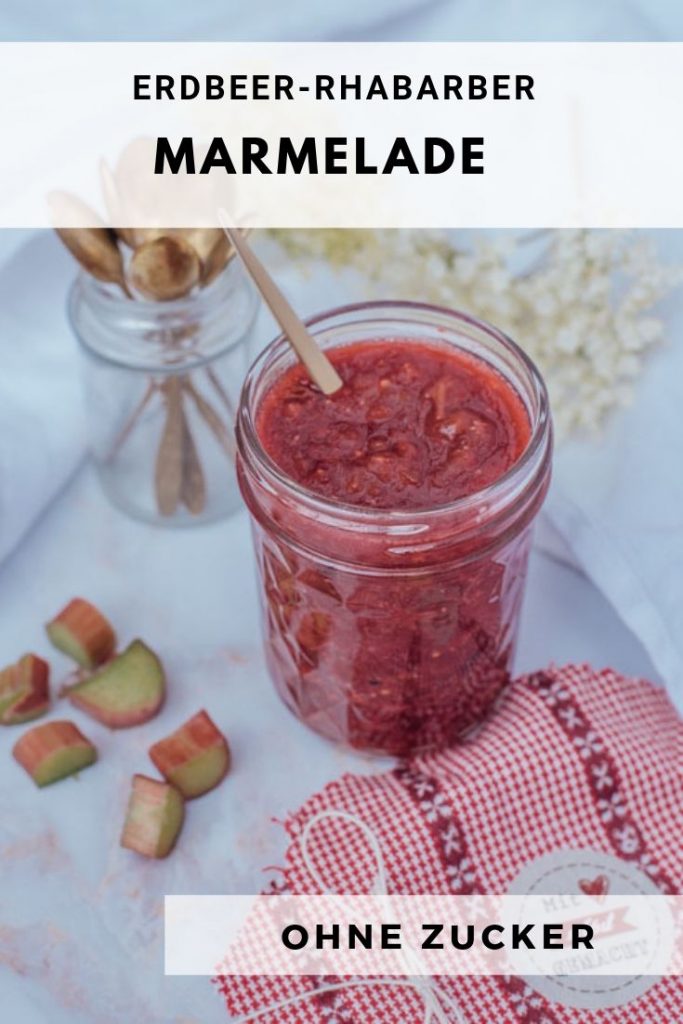
                            Erdbeer-Rhabarber Marmelade ohne Zucker

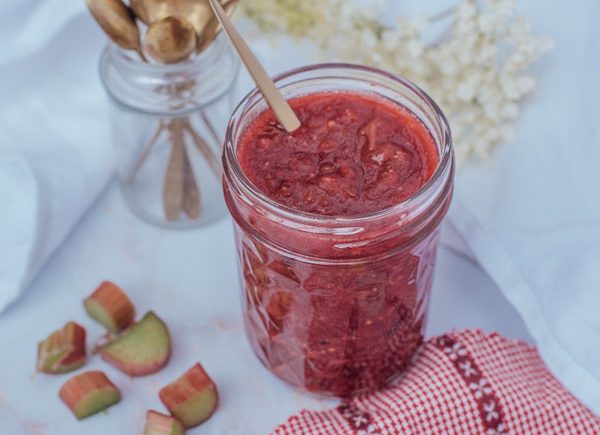
                            Erdbeer-RhababerMarmelade

                            Der Sommer steht vor der Tür, die Erdbeerfelder eröffnen im ganzen Land, die Hollunderblüten duften und im Garten wächst schon fleißig der Rhabarber. Perfekt um den Sommer ins Glas zu packen und eine leckere Erdbeer-Rhabarber Marmelade ohne Zucker einzukochen! 

                            Springe zu Rezept

                            Ich habe dieses einfache Rezept für die Erdbeer-Rhabarber Marmelade erst diese Woche entwickelt und es ist wohl schon zu meinem neuen Lieblingsfruchtaufstrich am Morgen geworden. Ich habe meine drei liebsten vor-sommerlichen Zutaten zu einer leckeren Marmelade ohne Zucker kombiniert!

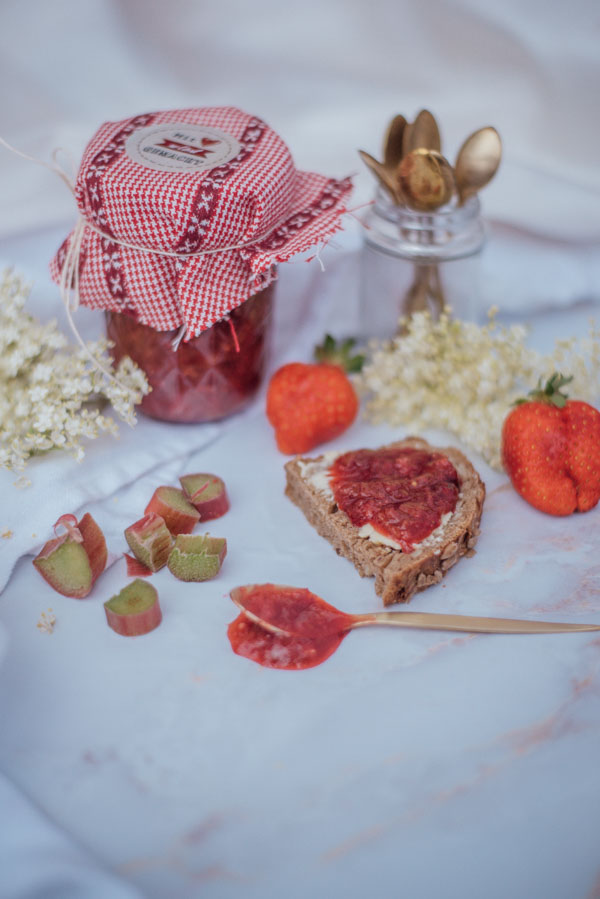
                            Erdbeer-Rhabarber Marmelade mit Hollunder und ohne Zucker

                            Erdbeeren – Rhabarber und Hollunder vereint

                            Ich bin ja wirklich ein großer Hollunderfan und mache mir im Juni immer gerne ein Detoxwasser mit den Hollunderblüten oder tauche die Dolden in Pancake Teig zum Frühstück. Rhabarber verwende ich auch gerne für fein, säuerliche Rezepte wie zum Beispiel meinem Wrapped Rhubarb Cake, oder verschiedenen Crumble Cakes und Becherkuchen. Ach und Erdbeeren liebe ich sowieso. Nicht ohne Grund heiß dieser Blog Carina BERRY! Es ist wohl meine Lieblingsfrucht und ich mixe sie in so ziemlich alle Rezepte im Moment mit rein. 

                            Es war also naheliegend diese drei Zutaten zu einer herrlich, leckeren Marmelade ohne Zucker zu vereinen.

                            Fruchtmarmelade ohne Zucker

                            Der zuckerfreie Aspekt ist mir bei diesem Marmeladenrezept sehr wichtig, da ich finde, dass die herkömmlichen Marmeladen immer viel zu süß sind und das extra Kalorien sind, die niemand wirklich braucht. Früchte haben von Natur aus schon einen wunderbaren Fruchtzucker und man braucht hier gar nicht mehr viel nachsüßen um ein geschmacksvolles Ergebnis zu erzielen. 

                            Ich verwende bei meiner zuckerfreien Erdbeer-Rhabarber Marmelade Xylit als Geliermittel. Dieser hat um 40% wenige Kalorien wie gewöhnlicher Haushaltszucker. Für alle Rezepte, welche ich zu Hause mache, verwende ich Xylit oder Erythrit. Ich kann mich gar nicht mehr erinnern wann ich das letzte Mal richtigen Rohrzucker verwendet habe, weil man ihn so genial gut mit diesen Zuckeralternativen ersetzen kann. Birkenzucker entsteht ganz natürlich aus der Rinde der Birke in welcher Xylose zu Xylit verstoffwechselt wird. Erythrit hingegen ist wirklich komplett kalorienfrei, basiert auf natürlichen Rohstoffen, ist zahnfreundlich und für Diabetiker geeignet. Ich verwende immer Xucker Light. Es gibt ihn übrigens in allen möglichen Ausführungen von Staubzuckerersatz zu Ersatz für braunen Zucker. Absolut genial, dass es jetzt auch Gelierzucker mit Xylit gibt. Ich habe für dieses Rezept diesen 3:1 Gelierxucker verwendet. (Amazon Affiliate Links)

                            Ich kann euch die Produkte wirklich von Herzen empfehlen, da ich sie mittlerweile schon jahrelang bei allen meinen Rezepten als Zuckerersatz verwende und auf Herz und Nieren getestet habe. Mein kleiner Clean Eating Küchengeheimtipp quasi 😉 

                            Erdbeer-Rhabarber Marmelade mit Hollunder und ohne Zucker

                            Erdbeer-Rhabarber Marmelade Rezept

                            Das Schönste ist wirklich die Einfachheit des Rezeptes. Ich hatte es in 15 Minuten fertig. Da ich es für mich alleine gekocht habe ist die Portionsangabe für 1 Glas. Erhöht sie gerne je nachdem wie viele Gläser ihr machen wollt. 

                            Ich finde der säuerliche Rhabarber harmoniert so fantastisch mit dem süßen Hollunder. Es ist wirklich eine einzigartige Kombination und ich bin jetzt schon gespannt wie ihr das Rezept findet. Schreibt mir gerne in die Kommentare eurer Feedback nachdem ihr es ausprobiert habt. Würde mich sehr interessieren, ob ihr es genauso toll findet wie ich! 

                            Hier nun das einfache Erdbeer-Rhabarber Marmelade Rezept für euch: 

                            Erdbeer-RhababerMarmelade
                            5 von 1 Bewertung
                            Drucken

                            Erdbeer-Rhabarber Marmelade ohne Zucker

                            So packt man den Sommer ins Glas!

                            Gericht Breakfast
                            Keyword erdbeeren, Rhabarber
                            Vorbereitungszeit 5 Minuten
                            Zubereitungszeit 5 Minuten
                            Arbeitszeit 10 Minuten
                            Portionen 2 Personen
                            Kalorien 110 kcal
                            Autor Carina Berry

                            Zutaten

                            • 5 Stück Erdbeeren
                            • 100 g Rhabarber
                            • 4 Stück Hollunderblütenstiele
                            • 3 EL Gelierzucker
                            • 150 ml Wasser
                            • 1 TL Zimt

                            Anleitungen

                            Die Erdbeeren und den Rhabarber klein schneiden. In einem Topf mit dem Wasser, Holunderblütenstiele, Zimt und Gelierzucker aufkochen. Etwa 4 Minuten unter ständigem rühren köcheln lassen. Die Holunderstiele danach wieder herausnehmen und noch im heißen Zustand in ein Einmachglas füllen.

                              Hast du gewusst, dass ich eine tolle Rezeptemail Liste habe? Hier sende ich per Email wundervolle, gesunde und einfache Rezepte direkt in deine Inbox – ohne zu spammen! #promise 
                              Du kannst dich gerne dafür hier anmelden:

                              Hast du das Rezept nachgemacht?

                              Dann markiere mich mit @carina_berry auf Instagram oder verwende den Hashtag #carinaberry

                              Ich teile immer wieder nachgemachte Rezepte auf meiner Instastory  <3

                              xoxo,

                              Pinne dieses Rezept auf dein liebstes Pinterest Board:

                              Erdbeer-Rhabarber Marmelade Erdbeer-Rhabarber Marmelade Erdbeer-Rhabarber Marmelade

                              Weiterlesen

                              Inspirational Interview with Jess from Choosing Chia

                              Jess Inspirational Interview

                              Inspirational Interview with Jess from Choosing Chia

                              With this blog post I am starting my new blogging series: Inspirational interviews! I strongly believe in always thriving to learn more and improve upon oneself. I do this a lot by finding mentors and talking to experts in a specific niche. Through my inspirational interview series I am going to start speaking to some of the people that inspire me the most and share their valuable insights with you! 

                              Why Jess inspires me:

                              For my first inspirational interview I  talked to one of my biggest food blogging inspirations since day 1: Jessica Hoffman.
                              She is the beautiful face behind the vibrant food blog Choosing Chia. Jess is from Canada and such a lovely person inside and out. She was one of the first people I followed on Instagram and has been a huge inspiration ever since.

                              The photos you find on Choosing Chia are magnificent and I love the professional look and feel of everything Jess does. Jess grew her blog to 60.000 monthly sessions this year and is one of the few food bloggers, who shares her knowledge regarding how to grow a blog, work with Pinterest and gives photography tips. I recently attended her Food Blogging Bootcamp, which was a 4 week blogger course where she taught us everything about systems, workflows, SEO, social media marketing and monetization. 

                              It meant a lot to me to finally be able to sit down with her for an interview and ask Jess some important questions regarding food blogging, personal development and fitness. 

                              With Choosing Chia Jess shows her readers easy, yet delicious vegetarian recipes that focus on fresh ingredients. A lot of her recipes are plant-based and suitable for a clean eating diet. Have a look at Jess‘ Instagram account if you don’t know it already. 

                              Let’s jump into the interview. I divided it up into three different sections: food blogging, personal development and finally healthy lifestyle. 

                              Choosing Chia Interview

                              Talking about food blogging

                              How did you get into food blogging and why?

                              I grew up in a family where everyone loved to cook a lot. By the time I was 20 I really got into Yoga and did my yoga instructor certification in India. When I got back from my trip I realized how much I loved healthy, plant-based cooking and eating. That’s when I really started to get into blogging. 

                              I set up my blog in 2015, but was only posting sporadicly. Only after my trip to India in 2016 I really started to post constantly and grew my Choosing Chia blog ever since. 

                              How did you come up with your blog name Choosing Chia? 

                              I sat down and realized I need a name for the blog – something healthy. So, I set down with a pen and paper and a little note book. I started to write out different names and combination of words. Then I found the word chia, which I found could be cute and chia seeds were starting to become popular at the time. Then I tried to figure out what could sound good with that and then somehow found Choosing Chia. 

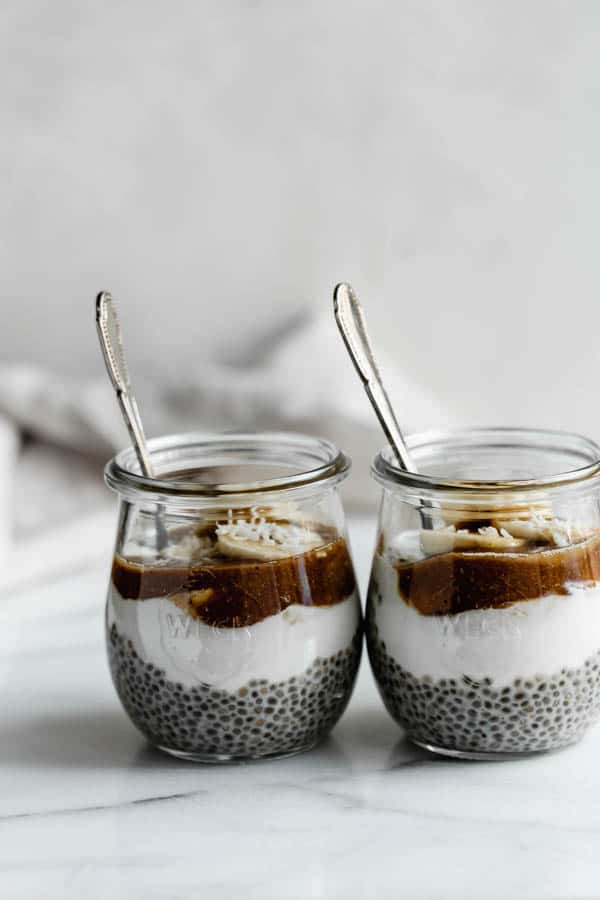
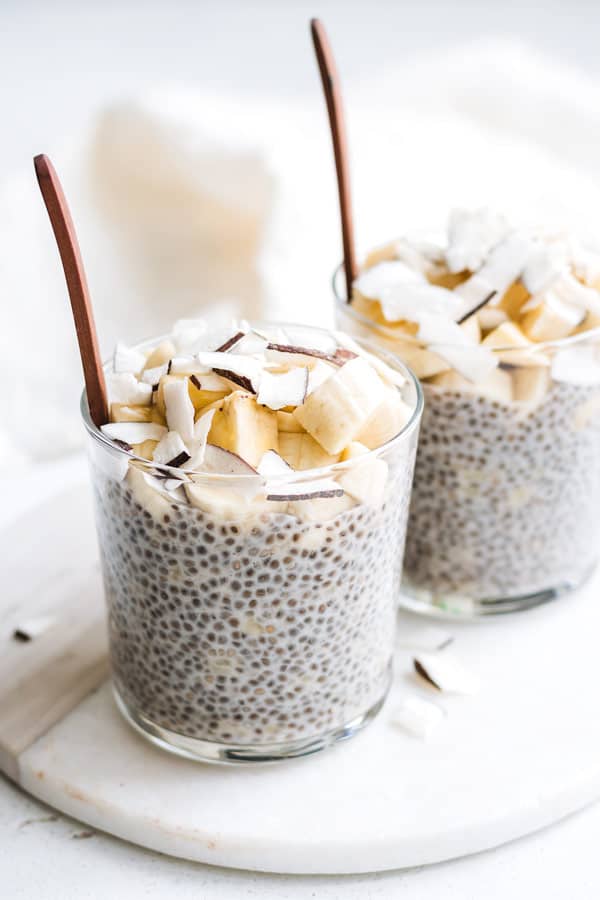
                              Banoffee-pie-chia-pudding-2

                              Looking at recipe development – how long does it take you from the first step into the kitchen until the uploaded post on your blog? 

                              These are the steps I usually take:

                              • getting the groceries
                              • recipe testing
                              • making the final recipe
                              • taking the photos
                              • editing the photos
                              • writing the blog post
                              • uploading and publishing it

                              If I had to put an actual time on the whole process I would say at least 4 hours. It would be around one hour for recipe testing, another hour for the final recipe, an hour to shoot and edit the photo and another hour to prepare the blog post. I used to do this in one flow, but I recently started to do batch working more.

                              Instead of jumping from place to place I now started to batch work a lot more. So I will do recipe testing in one day, then I’ll take a nice cloudy day to shoot all of them, edit them on the next and finally write out the blog posts. So I can always be focused on one task. 

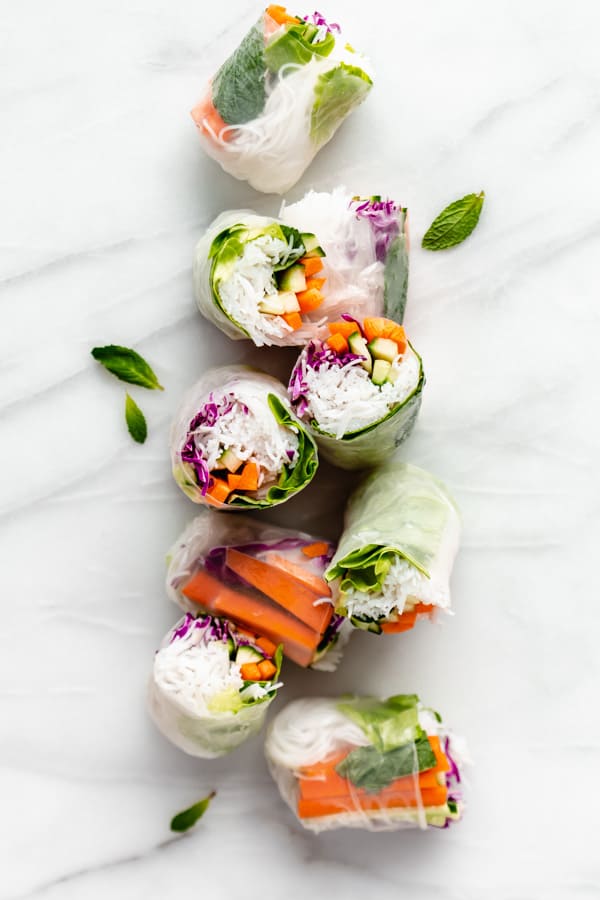
                              Vietnamese-fresh-spring-rolls-8

                              What is your favorite recipe out of all the ones you have created?

                              My banana cream pie chia pudding. I love the recipe, I love the photos, it really fits my brand and its simply so yummy. It’s my favorite chia pudding. 

                              banana-cream-pie-chia-pudding-3

                              What was your biggest blogging accomplishment so far?

                              I think it would have to be launching the food blogging bootcamp. Being at a place with my blog and business where I can teach other people and help them on their blogging journey to grow their blog. 

                              Now looking back at your blogging journey. What piece of advice would you have given your 21 year old self, when you started out blogging?

                              I would have to say having a process, system and schedule in place and sticking to it.

                              When I started out and would randomly post one week and then didn’t post anything for the next weeks I didn’t see any growth. Only once I started to get a content calendar, blocked off time in my schedule it made a big difference. If you really want to see growth and want to make something out of your blog you also have to block off time and make it a priority. It’s also less stressful, because you know when things are happening. 

                              You can check this blog post from Jess to sign up for a free content calendar template!

                              time-management-tips-for-productivity_


                              Finding out more about personal development

                              Would you mind sharing a little bit about your morning routine?

                              I start my day at 7 o’clock in the morning and have a coffee. Then I work out for an hour around 8 o’clock. Like a cardio or yoga workout or a combination of both. After the workout I like to meditate for 10 minutes.

                              Then I like to take the dog for a walk and finally get ready for the day and make my bed. I always make my bed in the morning. Then I have breakfast, I love to drink a green smoothie or have something nourishing, especially after working out in the morning. Then I sit down and start my workday around 9.30am. I just find it very important to exercise in the morning and get outside to get some fresh air. 

                              Tri-lanka

                              Who has inspired you in your life and why?

                              A person who has recently inspired me a lot is Marie Furleo. She puts her videos online every Tuesday, is a published author and does a lot of work with women. She has been a really big inspiration to me to turn my blog more into a business and branching out to do something like a bootcamp or start online courses. 

                              How important is reading to you and what’s your best book recommendation?

                              One of my favorite books is „you are a badass“ from Jen Sincero. It’s a great book for personal development and being a better, more successful and confident person. I also love to listen to audio books. I can cook and shoot my photos while listening. 

                              10-must-read-books-for-creative-entrepreneurs

                              Who are your role models and why?

                              Jamie Oliver is someone I have always looked up to in the food industry who has really built his own food empire.

                              Ella from deliciouslyella inspires me as well. She is one of the first foodies that I have followed and who really built something for herself, beyond just having a food blog. She has products in grocery stores now and has built something really big with that. 

                              Jenna Kutcher who does online course creations. She is another female entrepreneur who built an empire out of nothing. She has the goal digger podcast. I listen to her podcast every week. 

                              And of course Marie Furleo, who I have already mentioned. 

                              What is the next big goal?

                              My biggest goal is to really grow the blog into a big platform where I can transform it into a whole community. I would love to launch an online course and eventually turn the bootcamp into an online course. I would love to put out the course for other people to grow their blog and get to the same place where I am today, or even surpass where I am today. 

                              Speaking of health and well-being

                              Being a blogger means to be very connected all the time. Do you ever take off time from social media?

                              I started doing digital detox more this year. I feel so much more recharged when I take a social media break. Sometimes I try to implement it more and take at least 48 hours (or a weekend) off. No Instagram, no email, no checking the Choosing Chia blog.

                              When I do it I feel so much more recharged and energetic not looking at my phone for a period of time and simply taking in the moment. It is definitely something I would recommend for everyone to do. Especially if you want to make it your full time job. Taking breaks and recharging is equally important as working. 

                              Tri-lanka

                              How do you keep a balanced lifestyle and take care of your body and health?

                              I always make sure to take time to exercise. (at least 5 times a week) Sometimes it’s also just yoga or a long walk with the dog. It’s important to me to stay physically active. I make sure to eat overall healthy and have green smoothies, vegetables and salads, but then also indulge in ice cream and french fries if I want to. I think finding that balance is important. I’m not saying to myself that any foods are off limits.

                              I simply try to overall eat healthy and be active. I actually block that time off in my calendar. Having time on the weekend to do things I love also helps me to stay balanced. 

                              This was my inspirational interview with Jess. I hope you really loved this interview with Jess from Choosing Chia and learned some things along the way. It was such an honor to interview her and Jess is really such an inspiration! Make sure to check her social channels and blog for more inspiration! 

                              Are you looking for more helpful food blogging content? Check some of my other blog posts concerning this topic: 

                              Let me know in the comments if you like this new inspirational interview series and if you have any suggestions on who to interview next!

                              xoxo,

                              Weiterlesen

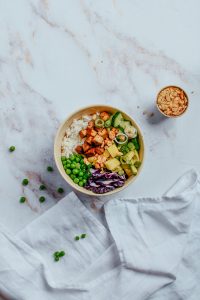
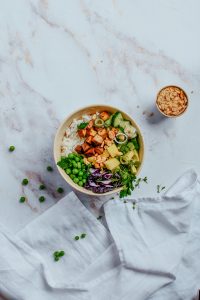
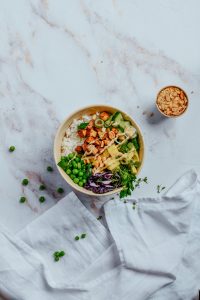
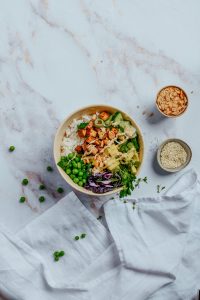
                              Poke Bowl mit Tofu – vegan und vegetarisch

                              Poke Bowl mit Tofu vegetarisch vegan

                              Poke Bowl ist das Trend Food aus den USA und wird nun auch bei uns immer beliebter. Das hawaiiansiche Gericht ist vollgepackt mit gesunden Vitaminen, Mineralstoffen, Protein, energieliefernden Kohlenhydraten und ungesättigten Fettsäuren. Absolutes Fitness Food also! In diesem Blogpost zeige ich euch in einem kleinen Fotoguide wie ihr einen Poke Bowl mit Tofu „baut“ und was es sonst noch so für alternative Zusammenstellungen gibt. 

                              Springe zu Rezept

                              Was bedeutet Poke und was ist ein Poke Bowl eigentlich?

                              Poke heißt auf Hawaiianisch „schneiden“. Das kommt daher, dass man den Fisch in würfelige Stücke schneidet und dann als Topping auf den Bowl gibt. Es gibt verschiedene Arten von Poke Bowls in Hawaii. So wird etwa der Ahi Poke Bowl mit mariniertem Thunfisch gemacht und das He’e Poke mit Octopus! Poke ist eine kulinarische Verschmelzung mit japanischen und amerikanischen Einflüssen. Die Basis für dieses hawaiianische Gericht ist immer Reis, auf welche dann verschiedene Toppings und roher Fisch kommt. 

                              In den USA wurde der Poke Bowl in den 1970’er Jahren beliebt. Der Trend hat es aber erst im letzten Jahr nach Österreich geschafft. Seit kurzem eröffnen immer mehr Poke Bowl Restaurants in Wien. Ich selbst habe schon einige getestet. Sesamöl, roher Fisch und Soja Sauce zeichnen einen Poke Bowl aus. Es gibt aber ganz viele verschiedene Arten diesen zuzubereiten und es können alle Geschmacksrichtungen und Ernährungsformen damit abgedeckt werden. 

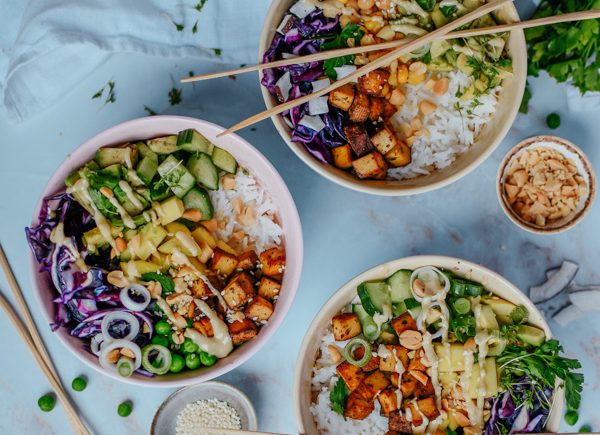
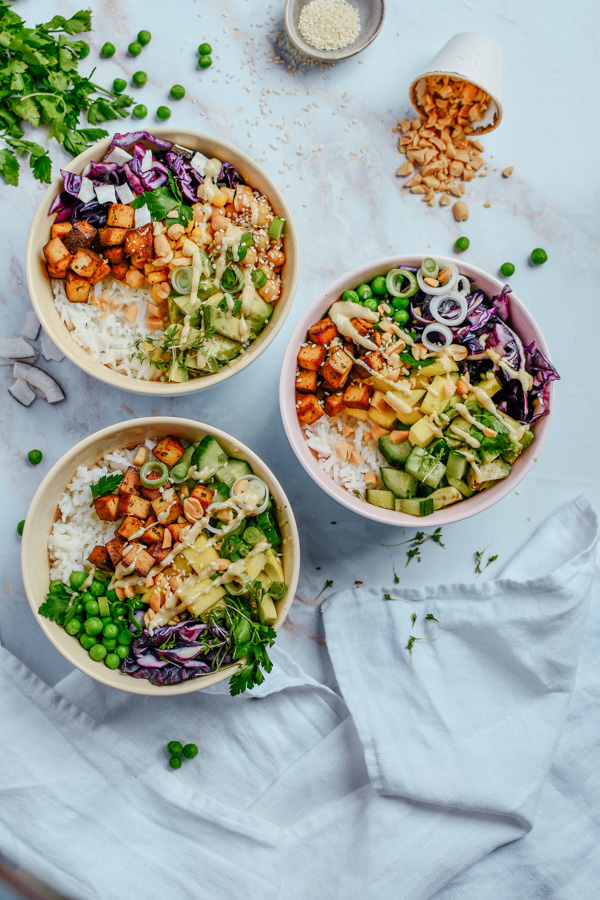
                              Vegetarischer Poke Bowl mit Tofu. #pokebowl #carinaberry

                              Absolutes Fitness Food

                              Ich selbst bin ein großer Poke Bowl Fan und mache mir diese oft als gesundes Lunch Rezept. Es ist ein wahres Powerfood Gericht und ich erkläre euch jetzt warum: 

                              Ihr deckt damit ganz viele Vitamine und Mineralstoffe ab und habt vollwertige, frische Lebensmittel in eurem Gericht. Der Fisch liefert euch gesunde Fette und viel Eiweiß. Im Fisch sind die hochwertigen Omega 3 Fettsäuren die man sonst nicht so leicht durch die Nahrung aufnehmen kann.

                              Der Reis dient als Sattmacher und gibt euch dank der Kohlenhydrate viel Energie. Natürlich ist hier brauner Wildreis etwas besser aufgrund seiner komplexen Kohlenhydraten die länger Energie abgeben, aber ich persönlich finde den Poke Bowl geschmacklich mit dem weißen Sushi Reis einfach besser. 

                              Zu guter Letzt habt ihr dann noch die Toppings die voller Vitamine sind. Frisches Obst und Gemüse versorgt euch somit mit vielen Vitalstoffen. Wenn ihr den Bowl dann noch mit Sesam oder Mandelmus toppt habt ihr auch noch gesunde pflanzliche Fette dabei. 

                              Am liebsten hab ich meinen Poke Bowl mit Lachs, Erdnüssen, Edamame und Frühlingszwiebeln. Aber seit kurzem esse ich ihn auch ganz oft in der veganen Variante mit Tofu! 

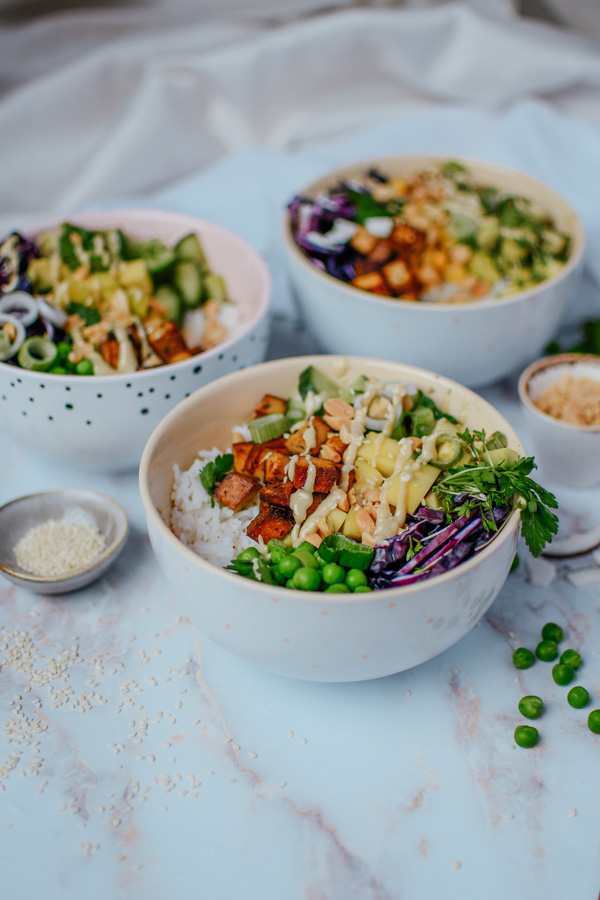
                              Vegetarischer Poke Bowl mit Tofu. #pokebowl #carinaberry

                              Fitness Food Online Kochkurs

                              Bevor wir weiter ins Rezept und zu verschiedenen Poke Bowl Varianten schauen wollte ich noch schnell die aktuellen Neuigkeiten mit dir teilen! Seit kurzer Zeit ist nun mein erster Fitness Food Online Kurs gestartet! Mit 140 Minuten Videomaterial, 9 Kapiteln und 6 Kochlektionen lernst du im Selbststudium die Basics zu Clean Eating und gesunder Ernährung. Wir kochen zusammen verschiedene Fitnessrezepte, du findest Expertenwissen von staatlich geprüften Ernährungstrainern und ganz viele PDF’s, Rezeptkarten und Fact Sheets zum Ausdrucken! 

                              Fitness Food Online Kochkurs

                              Poke Bowl Variationen 

                              Es gibt wirklich unzählig viele Möglichkeiten einen Hawaiianischen Poke Bowl zuzubereiten. Ich möchte euch nun ein paar Inspirationen geben. 

                              Ihr fragt euch nun was für Zutaten ihr für euren Poke Bowl benötigt. Hier ist eine kleiner Guide wie ihr am besten euren perfekten Poke Bowl zusammenstellen könnte. Einfach von jeder Kategorie etwas auswählen. Zum Beispiel: 1x Base + 1x Protein + 4 Toppings + 1 Add-on 

                              Basis:

                              Protein:

                              • Lachs
                              • Thunfisch
                              • Oktopus
                              • Garnelen
                              • Tofu/Seitan
                              • Rindfleisch 

                              Toppings:

                              • Edamame
                              • Erbsen
                              • Gurke
                              • Frühlingszwiebel
                              • Avocado
                              • Mango
                              • Rotkraut
                              • Kichererbsen
                              • Radieschen

                              Add-ons:

                              • gehackte Erdnüsse
                              • gehackter Koriander
                              • Sesam 
                              • Mandelmus 

                              Ihr könnt so zum Beispiel einen Ahi Poke Bowl mit mariniertem Thunfisch machen oder den klassischen Poke Bowl mit Lachs, einen vegetarischen mit Tofu oder Seitan oder sogar einen Low Carb Poke Bowl mit Zoodles statt Reis! 

                              Zutaten für einen vegetarischen Poke Bowl

                              Schritt für Schritt zum perfekten Poke Bowl

                              Mit diesem kleinen Fotoguide möchte ich euch nun kurz zeigen wie ich schnell und einfach einen Poke Bowl zubereitet. Sobald ihr den Reis gekocht habt und die Toppings geschnitten, geht das ganze eigentlich recht rasch. 

                              Man beginnt damit den Reis in eine Schüssel zu geben. Verwendet am besten Sushi Reis der klebt richtig schön. Danach immer eine Handvoll Toppings eurer Wahl auf den Bowl setzen. Ich nehme meistens nicht mehr als 4-5 Toppings, da es sonst zu viel wird. 

                              Zum Schluss streue ich gerne noch gehackte Erdnüsse, Sesam und Koriander auf den veganen Sushi Bowl. 

                              Veganes Tofu Bowl Rezept

                              Wie ihr schon aus dem Fotoguide entnehmen könnt ist es wirklich kein kompliziertes Rezept. Jetzt nochmal das genaue Rezept fur den Poke Bowl mit Tofu mit allen Grammangaben:

                              Vegetarischer Poke Bowl mit Tofu. #pokebowl #carinaberry
                              5 von 2 Bewertungen
                              Drucken

                              Poke Bowl mit Tofu

                              Veganes Powerfood

                              Gericht Main Course
                              Länder & Regionen American
                              Keyword Poke Bowl
                              Vorbereitungszeit 15 Minuten
                              Zubereitungszeit 10 Minuten
                              Arbeitszeit 25 Minuten
                              Portionen 1
                              Kalorien 450 kcal
                              Autor Carina Berry

                              Zutaten

                              Basis

                              • 150 g Sushi Reis

                              Toppings

                              • 150 g Tofu
                              • 50 ml Soja Sauce
                              • 30 g Avocado
                              • 50 g Erbsen
                              • 40 g Rotkraut
                              • 1 Stange Frühlingszwiebel
                              • 30 g Mango

                              Add-ons

                              • 1 EL Sesam
                              • 1 EL gehackte Erdnüsse
                              • 1 EL Mandelmus
                              • 1 EL gehackter Koriander

                              Anleitungen

                              Den Sushi Reis in der dreifachen Menge gesalzenem Wasser aufkochen.

                                Das Tofu würfeln und in einer Pfanne mit Sojasauce anbraten.

                                  Die Zutaten für das Topping klein schneiden.

                                    Den Reis in eine Schüssel geben und im Uhrzeigersinn die Toppings darauf platzieren.

                                      Sesam, Koriander und Erdnüsse darüber streuen und einen Esslöffel Mandelmus darauf setzen.

                                        Hier findet ihr auch noch ein kleines Video was alles nochmal im Bewegbild zusammenfasst.

                                        Tipps für die beste vegetarische Bowl

                                        • Für das beste Geschmackserlebnis die Tofu Bowl wirklich ganz durchmischen. Wenn man alles einzeln isst kann das ganz schön fad schmecken.
                                        • Falls du im Supermarkt kein Edamame finden kannst, kannst du auch einfach Erbsen verwenden. 
                                        • Den Reis unbedingt salzen damit er einen besseren Geschmack hat
                                        • Nicht zu viele Toppings auf einmal auf die vegane Poke Bowl geben, da sich sonst die Aromen zu sehr vermischen

                                        Ich hoffe du wirst dieses Tofu Bowl Rezept bald ausprobieren. Bist du auf der Suche nach einem anderen gesunden Fitness Rezept? Schau doch mal bei meinem Low Carb Flammkuchen oder bei bei meinen gefüllten Avocados vorbei.

                                        Hast du das Rezept nachgemacht?

                                        Dann markiere mich mit @carina_berry auf Instagram oder verwende den Hashtag #carinaberry

                                        Ich teile immer wieder nachgemachte Rezepte auf meiner Instastory  <3

                                        xoxo,

                                        Möchtest du dieses Rezept auf dein Pinterest board pinnen? Here you go: 

                                        Poke Bowl mit Tofu Poke Bowl mit Tofu Poke Bowl mit Tofu

                                        Weiterlesen

                                        Low Carb Flammkuchen – Keto Rezept

                                        Low Carb Flammkuchen keto-5

                                        Auf der Suche nach einem gesundheitsbewussten Rezept fürs Mittag- oder Abendessen? Man mag es kaum glauben, aber dieser low carb Flammkuchen schmeckt wie das Original – nur ohne Kohlenhydrate! Also unbedingt gleich ausprobieren. 

                                        Dieses Rezept habe ich mit den Teilnehmern meines letzten Fitness Food Kochkurses gemeinsam gemacht. Wir haben hier ein paar verschiedene Varianten gebacken. Einmal den typischen Elsässer Flammkuchen, einmal mit Feta Käse, Tomaten sowie Spinat und da gerade Bärlauchzeit war haben wir es auch mit Bärlauch probiert. Der low carb Flammkuchen hat auf jeden Fall in allen Varianten echt herrlich geschmeckt und alle Teilnehmer waren richtig begeistert von der Einfachheit des Rezeptes. 

                                         Springe direkt zum Rezept

                                        Low Carb Flammkuchen keto-5

                                        Dieses einfache low carb Flammkuchen Rezept ist innerhalb von einer viertel Stunde zubereitet, denn der Teig ist wirklich super simpel und besteht nur aus drei Zutaten. Danach muss es noch eine kurze Weile im Rohr gebacken werden und fertig ist das gesunde Mittag- oder Abendessen! 

                                        Das Rezept ist kohlenhydratarm, proteinreich und auch für eine ketogene Ernährung gut geeignet. 

                                        Low Carb Flammkuchen keto-5

                                        Wie belegt man einen Flammkuchen?

                                        Ihr könnt euren Flammkuchen mit Feta und Spinat, so wie ich auf den Bildern machen, oder etwas anderes ausprobieren. Es gibt so viele weitere Möglichkeiten! Ich habe wie oben schon kurz erwähnt bereits einige andere Toppings ausprobiert. Sobald ihr mal die Base habt könnt ihr euren low carb Flammkuchen wirklich nach Lust und Laune belegen! Als Base empfehle ich immer gerne Frischkäse. Der passt einfach für alle Variationen super gut. Ich habe es auch schon oft mit Kräuterfrischkäse probiert. Hier bekommt ihr nochmal ne extra Portion an Geschmack ins Rezept. Nehmt auch gerne die low-fat Option damit ihr noch ein paar Kalorien sparen könnt. 

                                        Hier ein paar Toppingvarianten für euch: 

                                        • Spinat, Cherry Tomaten und Feta
                                        • Frühlingszwiebel, Speck
                                        • Lachs und Dille 
                                        • Hokkaido Kürbis, Pfirsich und Walnüsse 
                                        • Ziegenkäse und Feigen
                                        • Zucchini und Kürbiskerne 

                                        Low Carb Flammkuchen keto-5

                                        Ihr könnt dann auch entscheiden, ob ihr die Toppings einfach so am Teig backen wollt, oder lieber noch etwas Mozzarella oder Gouda darüber streut um einen richtig schön saftig käsigen keto Flammkuchen zu bekommen. 

                                        Andere low carb Rezepte zum Ausprobieren: 
                                        Low Carb Flammkucnen Rezept

                                        Ihr werdet überrascht sein wie einfach dieses Rezept ist. Den Boden macht man schon allein mit 3 Zutaten und dann braucht ihr meist nur noch 3 mehr für den Belag. 

                                        Low Carb Flammkuchen keto-5
                                        4 von 1 Bewertung
                                        Drucken

                                        Low Carb Flammkuchen

                                        Ein einfaches low carb Rezept!

                                        Gericht Main Course
                                        Keyword flammkuchen, low carb
                                        Arbeitszeit 20 Minuten
                                        Portionen 2
                                        Autor Carina Berry

                                        Zutaten

                                        • 3 Stück Eier
                                        • 250 g Topfen
                                        • 100 g geriebener Käse
                                        • 1 Brise Salz und Pfeffer

                                        Belag A

                                        • 200 g Frischkäse
                                        • 100 g Feta
                                        • 100 g Spinat
                                        • 100 g Cherry Tomaten

                                        Belag B

                                        • 200 g Frischkäse
                                        • 100 g Speckwürfel
                                        • 1 Stück Frühlingszwiebel

                                        Anleitungen

                                        1. Das Backrohr auf 180 Grad vorheizen.

                                        Für den Teig die Eier mit dem Topfen, Käse und Gewürzen mischen. Die Masse rund auf ein ausgelegtes Backblech ausbreiten. Im Ofen für etwa 15 Minuten backen.

                                          Mit Frischkäse einstreichen und mit Toppings belegen. Bei Belag B ist es wichtig, dass der Spinat vorher kurz in einer Pfanne mit etwas Öl angebraten wurde.

                                            Für weitere 15 Minuten im Ofen lassen und dann warm genießen.

                                              Viel Spaß beim Backen! Wenn du dich für gesunde fitnessbewusste Rezepte interessierst kannst du dich für meinen Fit Food Newsletter eintragen, dann werden dir regelmäßig tolle Rezeptideen direkt in deinen Posteingang geschickt! 🙂


                                              Did you make this recipe? 

                                              Did you make this recipe?

                                              Tag  @carina_berry and use the Hashtag #carinaberry to get the possibility for a shoutout on my Instagram! 

                                              I always love to see your wonderful creations and it makes me so happy to see you guys actually making my recipes. 

                                              xoxo,

                                              Pinne dieses Rezept auf dein Pinterest Board: 

                                              Low Carb keto Flammkuchen

                                              Weiterlesen

                                              Basic Food Blogging Equipment – what you need as a food blogger

                                              Food Blogging Equipment

                                              In today’s blog post I want to give you an overview over the basic food blogging equipment you need in order to start out as a food blogger. 

                                              At first, beginning a food blog can be quite a big and daunting task at first. You have this big vision of taking awesome food pics and sharing your wonderful recipes? However, you are unsure of the equipment you need? Then look no further! In this blog post I have summarized all the basic things you need in order to start taking amazing pictures of your recipes. Food photography hacks included! 

                                              We will look at topics like camera equipment, props, kitchenware and decoration items. I will only mention the essential food blogging equipment. Everything you need in order to start out. Nothing super fancy or advanced – just the basics to get you startet. 

                                              How to photograph for your food blog

                                              First things first. Let’s talk about camera equipment. When you are just starting out you might want to take photos with your camera. That is okay for the beginning. Most phone cameras have a „depth of field“ or „portrait“ mode already. Try using these as it will make the background blurry, which will look more professional. 

                                              However, if you want to become serious about your food photography you should consider switching to a DSLR camera. It made all the difference for me and was a real game changer! For over three years I have been shooting with Nikon already and can highly recommend their cameras. Currently I am working with the Nikon D7500 which is a great camera also for beginners. Regarding the lens I am using a 35mm 1.8 lens. I like this lens because you can be pretty close to your dish and get a very nice blurry background. 

                                              Here are some food photography tips for beginners: 

                                              • Shoot with natural, diffuse light
                                              • Using a flash for food photography is something I would not recommend as it distorts the colors in the picture.
                                              • Shoot on automatic mode until you become comfortable trying the manual mode
                                              • Use a portrait lens to get a nice bouquet effect
                                              • Invest in a reflector and tripod – this is the reflector and tripod that I am using

                                              Food Blogging Camera equipment

                                              Food Blogging Props

                                              You will want to acquire a little selection of different kitchenware. Buy some nice plates, bowls, platters, forks, knifes, glasses and jars. Try to stay consistent with the style and color of the props you buy. When taking food photos it is always nice to have different props to choose from. There is nothing more boring than always using the same plate and same set of silverware on every photo you take! 

                                              I have probably up to 30 different plates, around 20 glasses, more little tea spoons than I can count and a couple different marble platters. This gives me a good choice to always arrange my food picture in a different style. Here are some of the spoons that I have ordered online:

                                              Basic Food Blogging Equipment-2

                                              Kitchen Towels and Background Fabrics

                                              A range of different colored kitchen towels can’t be missed in your food photography equipment! Placing some kind of fabric on the area you are shooting makes it look smoother and blends together with the dish and the background. I like using kitchen towels for that. In the background I usually put a very smooth, silky white fabric to make the background blur out. 

                                              Background fabrics for food photography

                                              Food Blogging Equipment – Backdrops 

                                              Having a nice surface to place your dish upon is very important when it comes to successful food blogging. That is why I bought varies backgrounds for my photos. I recommend to get a darker and a lighter one. Marble and wood work really well for food pictures. 

                                              A great food photography tip is to go into your local hardware store and ask them for floor samples. These usually come in different awesome wood optics and I always ask them if I can take some samples home. Like this I have free background surfaces for my photos in different styles! 

                                              Here are a couple links to some background papers that I have bought on Amazon, which are very practical because you can roll them up and take with you when traveling: 

                                              Basic Food Blogging Equipment Backdrop paper

                                              Decoration items

                                              I believe that you can make the most boring chia pudding look incredible with the art of food styling. In order to be able to make your creations look unique I suggest you get some fun decoration items to add more layers of interest to your photo! Sprinkles, flowers or coconut flakes work great. I also bought some tiny little cookie cutters to decorate my dishes with. 

                                              I recommend you also get seasonal decoration items to include in your food blogging equipment. For Easter I bought a couple of little Easter eggs, for Christmas I have golden stars and for Valentines Day heart postcards. 

                                              Here are two deco items that I have ordered and like very much:
                                              Basic Food Blogging Equipment-4

                                              This post contains affiliate links. All products & services recommended in this post are ones that I’ve personally used for my blog.

                                              Do you want to take your food photography to the next level?

                                              Finally I wanted to leave you with some more great support material on your way to becoming the next great food blogger out there.  I have many more other articles on how to grow and develop your food blog! Make sure to have a look at my top ten food blogging tips for Instagram growth! There is also a YouTube video on it!

                                              I also have my own food photography online course. It is a full fletched food blogging course that will teach you everything you need to know to kickstart your food blogging career! 

                                              You can sign up to my food blogging email list where I am sharing free cheat sheets and amazing food blogging tips from time to time. Definitely don’t miss out on this great opportunity:

                                              I hope you found this basic food blogging equipment blog post helpful and that you will be putting some things you learnt today into practice. Let me know in the comments if you still have questions! 

                                              Course for food bloggers

                                              xoxo,


                                              Weiterlesen