Abnehmen mit Intervallfasten – 16:8 Erfahrungsbericht

Effektives Abnehmen Intervallfasten

Stressfrei abnehmen mit Intervallfasten. Seit einem halben Jahr praktiziere ich nun schon intermittierendes Fasten und habe damit die tollsten Erfolge erzielt. Ich liebe es und könnte mir nichts besseres mehr vorstellen. Seitdem ich Intervallfasten mache habe ich keine Gewichtsprobleme mehr und habe endlich mein Traumgewicht erreicht. In meinem heutigen Blogpost möchte ich meine Erfahrungen mit euch teilen und meine top Tipps weitergeben! 

Was ist Intervallfasten?

Intervallfasten, intermittierendes  oder Teilzeitfasten ist keine klassische Fastenkur. Es besteht aus Phasen des kompletten Verzichts und Phasen in welchen man essen kann. Im Prinzip geht es darum tägliche Essenspausen einzuführen und für eine gewisse Zeitdauer zu fasten. 

Es gibt verschiedene Modelle wie zum Beispiel 5:2 (5 Tage essen, 2 Tage fasten), alternierend (1 Tag fasten, 1 Tag essen) oder das zeitbegrenzte Fasten (16:8) Seit einigen Monaten praktiziere ich nun schon die 16:8 Methode weil sie für mich einfach am nachhaltigsten ist und am meisten Sinn macht! Dabei hat man ein Zeitfenster über Nacht von 16 Stunden in welchem man nichts isst und tagsüber binnen acht Stunden kann man Mahlzeiten zu sich nehmen. 

Es gibt ganz viele Beiträge im Internet, welche euch erklären wie sich Intervallfasten auf den Körper auswirkt und wie der sogenannte Authopagie Prozess, der dadurch entsteht, eine Art Recycling-Programm der Zellen sein kann. Wer fasten möchte sollte das aber auf jeden Fall vorher mit seinem Arzt besprechen. Gerade junge Frauen können durch fasten Hormonprobleme bekommen, sollten sie dafür prädestiniert sein. Da ich nicht in der Position bin euch medizinische Ratschläge zu geben möchte ich mich in diesem Blogpost vielmehr auf meine persönlichen Erfahrungen mit Teilfasten fokussieren und euch meine Tipps mit auf den Weg geben. Eventuell mache ich auch manches anders als es in den Schulbüchern steht – aber wie gesagt ich teile hier einfach meine persönliche Sichtweise und Ergebnisse mit Intervallfasten. 

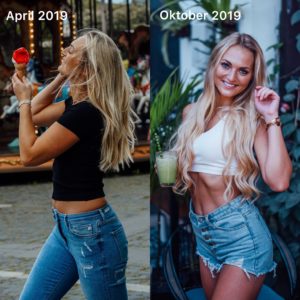
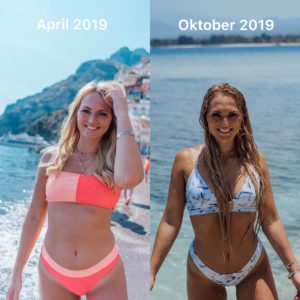
Vorher – Nachher Ergebnis Intervallfasten

Ich habe mit intermittierendem Fasten super einfach, nachhaltig und gesund innerhalb von 5 Monaten 6kg abgenommen. Eine Summe die für mich wirklich ein Wahnsinn ist, da ich mir generell extrem schwer tue beim Abnehmen. Gestartet habe ich im April mit 69kg und hatte Ende September nur mehr 63kg. Ein Gewicht mit dem ich mich einfach so wahnsinnig wohl fühle!

Man muss natürlich auch anmerken, dass ich mit 170cm und 69kg schon relativ schlank war als ich begonnen habe. Jemand der mit 170cm und 90kg beginnt wir proportional noch viel größere Erfolge sehen als ich – da bin ich mir sicher. 

Intervallfasten Vorher Nachher Intervallfasten Vorher Nachher

So funktioniert Intervallfasten

Effektiv abnehmen ohne Diät? Meiner Meinung nach geht das am besten mit Intervallfasten. Ich habe schon viele Diäten ausprobiert und nur die wenigstens haben dauerhaft etwas gebracht. Die meisten kann man einfach nicht über eine lange Zeit durchhalten und sie schränken einen viel zu sehr ein. Ich bin deshalb so ein großer Fan vom Abnehmen mit Intervallfasten weil man sich wirklich gar nicht einschränken muss. Klar man hat eine bestimmte Anzahl an Stunden wo man einfach nichts isst, aber dann kann man wie sonst auch ganz normal alles essen auf was man eben Lust hat! 

Gerade auch weil man so streng für gewisse Stunden nichts isst, macht das alles auch viel einfacher. Ich weiß von 20.00-12.00 esse ich nichts und zwischen 12.00 und 20.00 kann ich essen worauf ich Lust habe. That’s it. So einfach – keine Einschränkungen, kein Kalorien zählen, nichts abwiegen, keine „verbotenen“ Lebensmittel.  Ich habe das Intervallfasten aber auch etwas abgeändert und für mich angepasst, da in den „Schulbüchern“ eigentlich steht man soll nur 2 Mahlzeiten in den 8 Stunden zu sich nehmen und dazwischen nur Wasser oder Tee. Ich mache das etwas anders weil es für mich so einfach realistischer und dauerhaft umsetzbar ist. 

two blonde girls eating vegan burgers at flower burger in rome

Abnehmen mit Intervallfasten funktioniert einfach deshalb so gut weil du dir kontinuierlich, jeden Tag um die 300-500kcal von deinem Frühstück sparst! Das macht das ganze so simpel. Über ein, zwei oder drei Monate summiert sich das Ganze und das Kaloriendefizit machte sich durch Gewichtsverlust bei mir bemerkbar. Ich persönlich habe noch keine andere Diät gefunden – und ich habe wirklich schon viel ausprobiert – bei welcher man so einfach und unkompliziert jeden Tag seine 300+ Kalorien einsparen kann. 

My simple math

Ich bin zum Beispiel ein Mensch der bei 1600-1700kcal sein Gewicht hält, bei 1800kcal zunimmt und bei 1500kcal abnimmt. Ich esse jeden Tag mit intermittent fasting 1400-500kcal, würde ich da aber mein Frühstück drauf rechnen käme ich auf 1850 und würde effektiv jeden Tag etwas zunehmen wenn ich ganz normal weiter essen würde ohne Kalorien zu tracken. Mit Intervallfasten kann ich essen was ich will, brauche keine Kalorien zählen und weiß, dass ich die 1800kcal Marke nicht erreichen werde – es sei denn ich esse Pizza zu Mittag und Burger am Abend, aber das mache ich generell nie weil ich healthy food einfach liebe. 

Ergebnisse Intervallfasten

Kein Frühstück? Wie soll das gehen?

Ich war früher immer die Person die ohne sofortiges Frühstück nach dem Aufstehen nicht leben konnte. Mein Magen hat gegrummelt, ich bekam richtiges Bauchstechen und mir wurde zum Teil richtig schlecht wenn ich nicht in der ersten Morgenstunde nach dem Erwachen etwas gegessen hatte. Frühstück war für mich unumgänglich – egal ob um 06.00 Früh oder 09.00 – es musste einfach sofort was in den Magen. Damals hätte ich es nie für möglich gehalten den ganzen Morgen zu fasten und erst Mittags etwas zu essen. Also wenn ihr der Meinung seit, dass ihr ohne Frühstück nicht könnt dann verstehe ich das total weil es mir damals genauso ging! Aber lasst mich euch erzählen, dass es mittlerweile wirklich gar kein Problem mehr ist. Ich komme locker bis 14.00 ohne Frühstück aus und werde euch jetzt genau erklären wie ich es gemacht habe und was mein Geheimtipp ist. 

Zu Beginn war die Umstellung schon etwas heftig und ich habe begonnen einfach mein Frühstück um die Hälfte zu reduzieren. Oft isst man eh einfach viel zu viel und etwas weniger genügt auch schon. Ich wollte einfach „etwas im Magen haben“ also habe ich statt meinen 40g Haferflocken Porridge nur mehr 20g aufgekocht. Danach habe ich diese Mahlzeit mit einer heißen Schokolade oder Golden Milk ersetzt. Ich liiiiebe ja Heißgetränke – Kaffee trinke ich gar nicht – und somit ist für mich eine heiße Schokolade oder Chai Latte immer ein besonderer Treat! Durch das reichhaltige Milchgetränk hatte ich immer noch das Gefühl etwas zu mir zu nehmen und siehe da es hat mir wirklich bis zu den Mittagsstunden perfekt geholfen, um nicht allzu hungrig zu sein. 

golden Milk-Turmeric tea

Im letzten Schritt habe ich dann die heiße Latte durch einen English Breakfast Tea (ich verlinke ihn dir hier mal) mit Milch und Honig ersetzt. Das trinke ich nach wie vor fast jeden Tag in der Früh. Durch einen Schuss Milch und einen Teelöffel Honig fühlt es sich einfach mehr an als nur heißes Wasser mit Geschmack zu trinken und füllt meinen Magen in der Früh gleich mal mit einem halben Liter Wasser an – ich habe ein ziemlich großes Tee Häferl 😀 Das wäre theoretisch im Fastenfenster nicht erlaubt, aber who cares – it works for me! Laut Schulbuch unterbricht man den Fastenprozess (und somit auch die Authopagie – Zellerneuerung) sobald der Körper wieder Kalorien verwertet, aber mir geht es prinzipiell darum jeden Tag 300+ Kalorien beim Frühstück einzusparen und ich sehe das dann einfach nicht so streng wie manch anderer. 

Effektives Abnehmen Intervallfasten

Viel Trinken ist generell mein Tipp. Immer wenn Hunger aufkommt in der Fastenperiode dann einfach viel trinken. Am besten Wasser oder Tee. Für alle Coffee Lovers: ihr könnt meinen English Breakfast Tea ja mit einem Cappuccino am Morgen austauschen, das müsste genauso gehen 🙂 

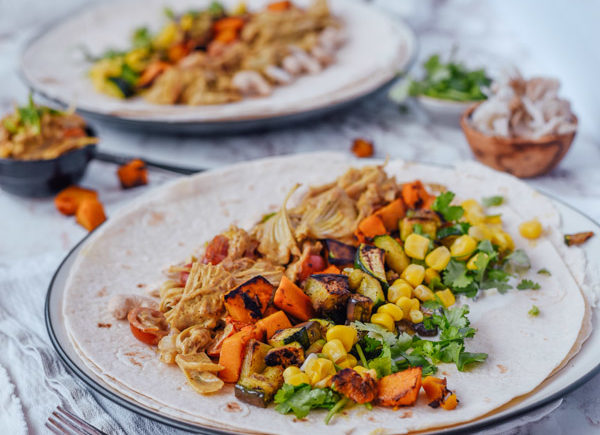
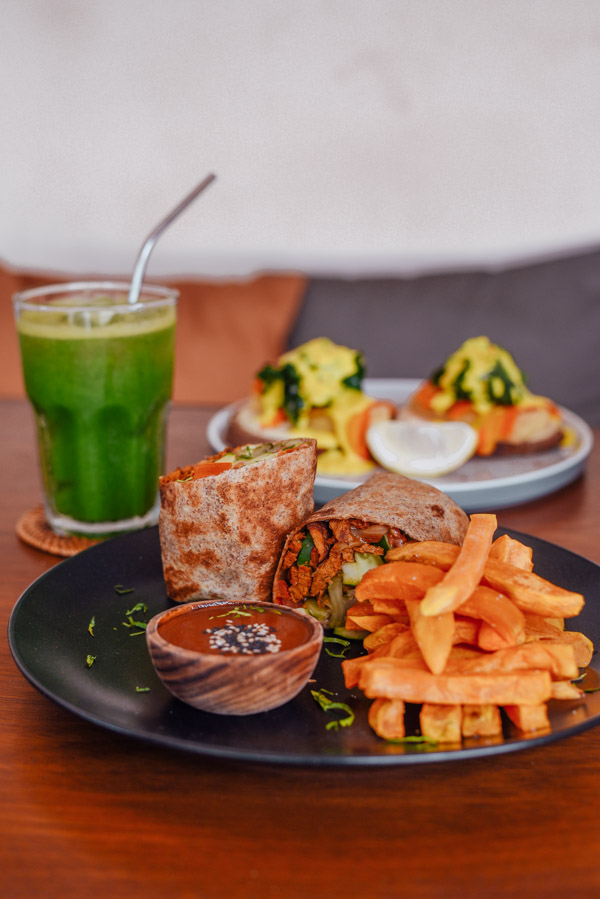
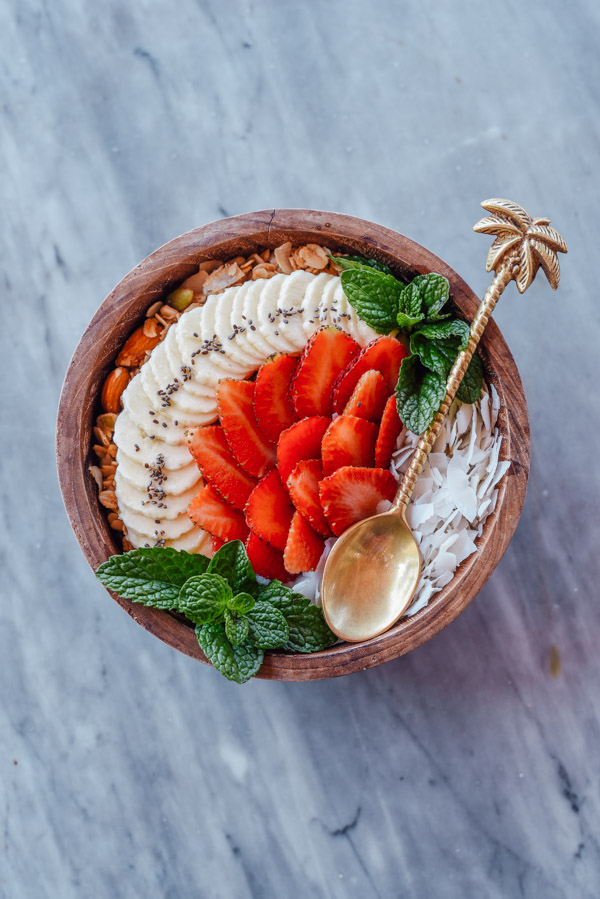
Ich starte dann Mittags meistens nicht mit Frühstücksessen sondern direkt mit Mittagessen. Da aber Frühstücksgerichte wie Porridge, Pancakes, Chia Pudding und ähnliches einfach zu meinen liebsten Speisen gehören und ich nicht darauf verzichten möchte, esse ich das manchmal als kleines Dessert am Abend. Breakfast for dinner oder so 😉

Lieblingsprodukte beim Intervallfasten

Wie oben schon kurz erwähnt starte für mich kein Tag ohne meinen geliebten English Breakfast Tee. Ich verlinke dir hier die Marke die ich mir immer auf Amazon aus England bestelle. Ich habe schon so viele Sorten ausprobiert, aber der ist mit Abstand der beste! Bin ich selbst in England packe ich den halben Koffer am Heimflug immer voll mit diesem Tee 😀 

Ansonsten bin ich ein großer Fan davon Eryhtrit zum Süßen von meinem Tee vor und nach meinem Nahrungsfenster zu verwenden. Es hat keine Kalorien und beeinflusst den Blutzuckerspiegel deshalb auch nicht. So kann man trotzdem am Morgen oder am Abend Getränke süßen, ohne Kalorien und Chemie! 

Fehler beim Abnehmen mit Intervallfasten

Beim Abnehmen mit Intervallfasten kommt es oft zu Fehlern die gemacht werden. Hier ein paar Tipps die ich euch aufgrund meiner persönlichen Erfahrung geben kann:

Don’t compensate

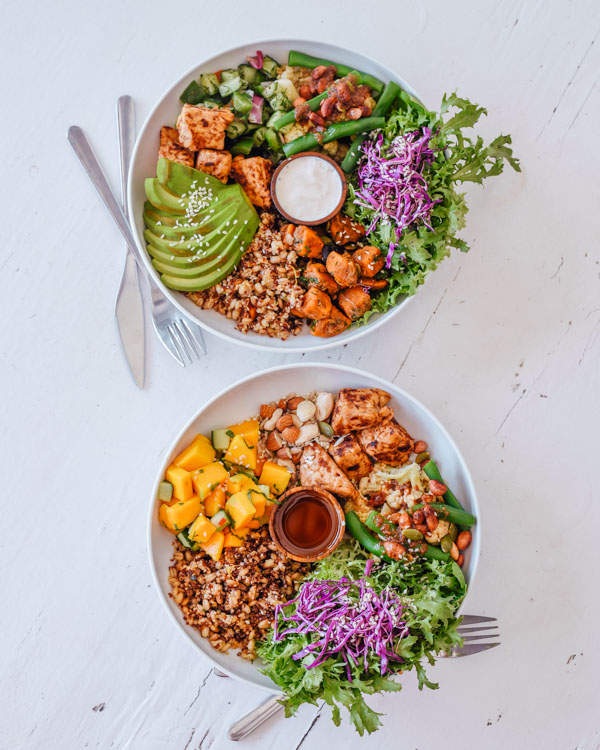
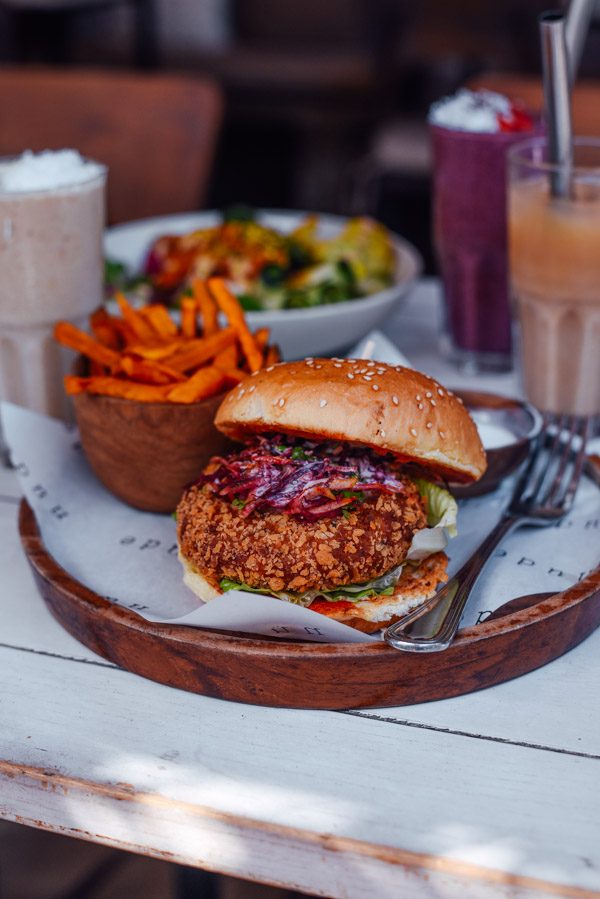
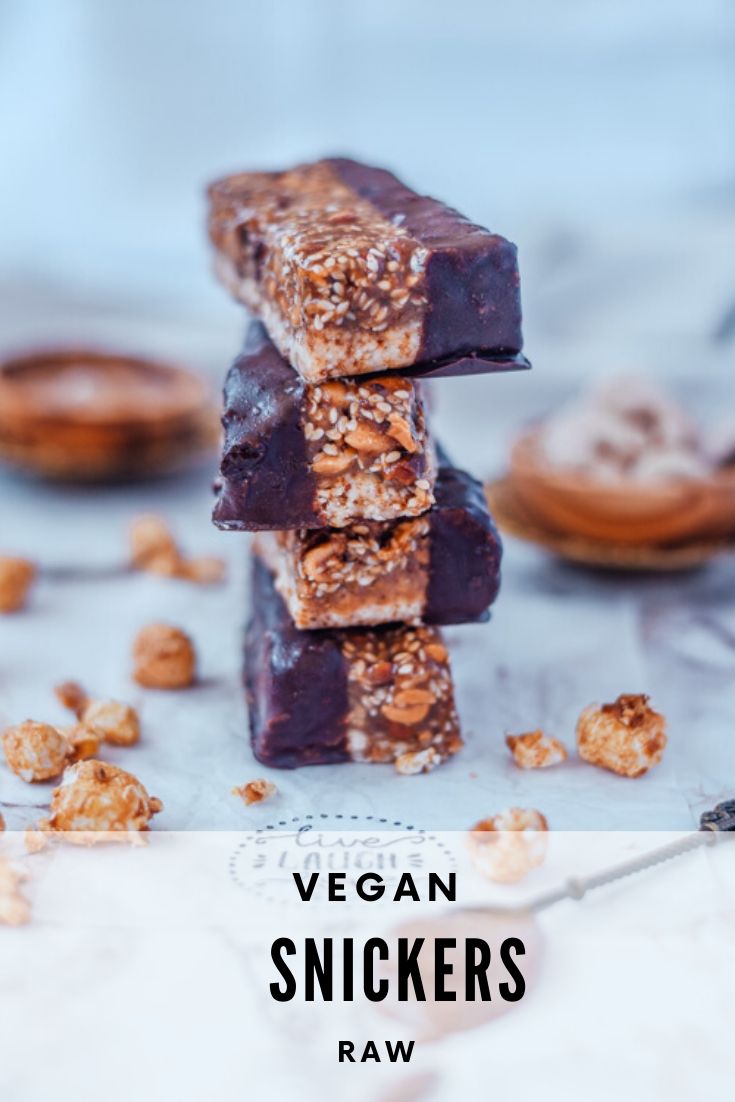
Was man beim Intervallfasten natürlich nicht machen sollte ist in der Zeit wo man essen darf dann total über die Strenge zu schlagen und „extra“ mehr zu essen für die Stunden wo man dann nichts essen soll. Ich esse wirklich zu 100% genauso wie ich normalerweise auch essen würde. Ich sage nach wie vor „nein“ zu dem ungesunden Stück Kuchen und greife lieber zu einer raw vegan bar oder einem Proteinriegel. Auch während meines Zeitfensters in welchem ich esse, achte ich darauf mich gesund zu ernähren und nicht bis zum Anschlag zu essen. Sollte man versuchen das no-food Zeitfenster mit Essen zu kompensieren dann hat das Ganze natürlich absolut keinen Sinn, aber das sagt euch wohl der Hausverstand. 

The loft . canggu smoothie bowl

Finde deinen Zeitplan

Ich persönlich esse von 12.00-20.00 weil das für mich am angenehmsten ist. Ich liebe es mir am Abend noch etwas zum Essen zu machen und mich dann damit vor meine Lieblingsserie zu setzen. Irgendwie brauche ich am Abend einfach eine Beschäftigung und das ist meistens das Kochen. Am Morgen bin ich super produktiv und arbeite meistens. Da reicht es mir vollkommen einfach meinen Breakfast Tea neben mir zu haben. Ich brause damit durch die Morgenstunden bis Mittags und denke gar nicht wirklich ans Essen. 
Bei meiner Schwester ist es zum Beispiel anders. Die muss um 06.00 Morgens aufstehen und steht dann bis Mittags als Lehrerin in der Schule. Sie braucht ein Frühstück um einfach bei Kräften zu sein. Deshalb isst sie dann lieber nach 17.00 Abends nichts mehr und fastet dann bis zum nächsten Morgen. 

Somit kann jeder seinen eigenen Zeitplan finden, solange ihr +/- 16 Stunden nichts esst und 8 stunden esst. Manchmal esse ich auch erst um 21.00 Uhr Abends. Das ist dann auch kein großes Drama, aber je genauer man in den 8 Stunden bleibt, desto besser natürlich. 

Wasser trinken

Immer wenn ihr hungrig werdet einfach trinken. Oft verwechselt man Durst mit Hunger und das Ganze legt sich nach einem großen Glas Wasser. Ich habe am Vormittag immer ein große Glas Wasser neben mir um meinen Körper mit ausreichend Flüssigkeit zu versorgen. 

Being a couch potato

Ein weiterer Fehler der oft gemacht wird ist beim intermittierenden Fasten dann einfach komplett auf den Sport zu verzichten. Je mehr Sport ihr noch dazu macht, desto schneller werdet ihr auch Ergebnisse sehen. Es ist jetzt überhaupt nicht notwendig 5x die Woche ins Fitnessstudio zu gehen, aber einfach aktiv zu sein kann enorm helfen um eure Ziele zu erreichen! 

Hier ein paar Content Pieces von mir die euch im Bezug auf Sport helfen können: 

Yoga übung

Warum ich Intervallfasten so liebe

Ich persönlich finde man kann einfach mit Intervallfasten ohne Stress dauerhaft abnehmen. Die Kilos purzeln fast wie von selbst, ohne dass man sich sonderlich dafür anstrengen muss oder sich enorm im Bezug auf seine Ernährung einschränken muss. Für mich ist dieser Ernährungstrend absolut nachhaltig und ich kann jeden nur empfehlen es einmal selbst auszuprobieren.

Solltet ihr noch konkrete Fragen zum Abnehmen mit Intervallfasten haben, schreibt es mir gerne in die Kommentare! Hättet ihr Interesse daran, dass ich meinen gewöhnlichen Ernährungsplan für einen Tag Intervallfasten mit euch teile? Wenn ja lasst es mich auch gerne in den Kommentaren wissen. 

Übrigens könnt ihr euch auch mein YouTube Video zu diesem Thema ansehen und mich einen Tag lang bei einem „Full Day of Intermittent Fasting“ begleiten: 

Du kannst dir auch gerne mein Clean & Lean Kochbuch mit leckeren Fitnessrezepten hier gratis herunterladen. Ich schicke es dir direkt in deine Inbox: 

xoxo,

Weiterlesen

Cashew cheesecake with pink pitaya

Raw vegan cheesecake with cashew and pink pitaya-2

Take a moment and think of biting into smooth and creamy cashew cream in the shades of baby pink with a crunchy crust. Wouldn’t that be lovely? Yes? Well then, I recommend you go and make this raw vegan cashew cheesecake to experience the deliciousness of this plant-based dessert yourself!

Springe zu Rezept

Natural food coloring – pink pitaya

I think by now we all know how amazing pink pitaya or the “dragon fruit” is. It is such a powerful natural food coloring and is filled with vitamin C and antioxidants. It is the only thing I use now to color my food and tint it into the most wonderful shades of pink.

The first time I discovered dragon fruit was actually on my travels through Indonesia 12 years ago with my family. We took a boat trip with a local guide and for lunch on the water he brought some of these vibrant pink fruits, cut them open for us and I remember just being so amazed and astonished by the vivid color of the flesh of the fruit. That was in 2008 when the term “superfood” was still unheard of and a lot of tropical fruit not yet sold in Austrian supermarkets.

Raw vegan cheesecake with cashew and pink pitaya-2

Last year I came back to Indonesia and spent 2 months working and living in Bali, where I got to explore the local food scene in much greater detail this time. Pink Pitaya was still used in almost every restaurant and sold on every market. So I started to make a lot of recipes with it myself, like this raw vegan cheesecake that I am sharing with you now!

By itself pink pitaya is actually very neutral tasting. Don’t try making pink pitaya shakes just out of the dragon fruit itself – it won’t taste great. It doesn’t have a lot of flavor on its own, which is also awesome as it simply lends its color to the meals you add it to. The more you use of it the deeper pink to almost purple it will get. If you only use a bit you will get soft shades of baby pink! Be careful not to get it into your clothes though. The color is quite hard to get out.

There is also a white dragon fruit. It obviously has less qualities as food coloring and tastes very neutral as well. However, it looks great if you use it for decoration. I love to cut little stars or hearts out and put them as a topping on my nicecream bowls. A guaranteed wow effect!

Raw vegan cheesecake with cashew and pink pitaya-2

Healthy raw vegan cashew cheesecake

The pink cashew cheesecake is probably one of the easiest recipes you will ever make. It is raw – which means you don’t even have to bake this cake, so no need for an oven.

This recipe requires only a handful of ingredients, but a little waiting time. Dates and cashews need to soak and the finished cake needs to set in the freezer. This raw vegan cheesecake with pink pitaya is made up of two layer. The date and almond crust and the pink cashew cream filling.

Raw vegan cheesecake with cashew and pink pitaya-2

I like to substitute sugar for Erythrit as it is a natural sugar alternative without calories. If you don’t have this at home feel free to use whatever sweetener you prefer or fits your dietary needs.

So lets have a more detailed look at the recipe and what you need for this raw vegan cheesecake:

Cashew Cream Cheesecake

Smooth pink cashew cream with a crunchy crust!
Gericht Dessert
Keyword pink pitaya cheesecake, raw vegan cheesecake
Zubereitungszeit 45 Minuten
Resting time 7 Stunden
Portionen 8

Zutaten

Filling

  • 200 g cashews
  • 1 / 2 tbsp pink pitaya alternatively powder is also possible
  • 3 tbsp coconut milk
  • 3 tbsp xylitol

Crust

  • 100 g dates
  • 2 tbsp peanut butter
  • 80 g oatmeal
  • 1 tbsp xylitol

Anleitungen

  1. Cover the dates and the cashews in two different bowls with water overnight and let them soak.
  2. Strain the next day and drain.
  3. Mix all ingredients well for the crust and press on the bottom of a small round silicone mold.

  4. The crust should be about 1/2 cm thick and can go a bit further up at the edge.

  5. Puree the cashews with the pink pitaya, coconut milk and sweetener for the filling.
  6. The mass should be as fine as possible. If you use pink pitaya powder you will probably need a little more coconut milk.
  7. Put the filling on the crust and then best freeze the silicone mold.

  8. Before slicing, flip the cake out of the mold and wait 10 minutes until you can cut it perfectly into pieces.

  9. It should then be eaten relatively quickly because it collapses when exposed to room temperature for a long time.

Rezept-Anmerkungen

Once you take it out of the freezer and let it thaw you should serve it quite quickly.

Raw vegan cheesecake with cashew and pink pitaya-2

More recipes for the raw, vegan fans out there

I really hope you enjoyed this recipe. Feel free to check some of my other raw, vegan desserts:

If you want you can sign up for my clean & lean fitness cookbook. I will send you 35 amazing fitness recipes straight to your inbox:

Did you make this recipe?

Did you make this recipe?

Tag  @carina_berry and use the Hashtag #carinaberry to get the possibility for a shoutout on my Instagram! 

I always love to see your wonderful creations and it makes me so happy to see you guys actually making my recipes. 

xoxo,

Cashew cheesecake with pink pitaya Cashew cheesecake with pink pitaya Cashew cheesecake with pink pitaya

Weiterlesen

Healthy avocado brownies – sugar-free, no flour or butter

healthy avocado brownies keto

Healthy chocolate brownies made out of avocado! Who would have thought to put avocado in brownies? Well, if you haven’t tried it yet you should give this avocado brownies a go. Each bite is super fudgy, comforting and yummy. This recipe doesn’t use any sugar, flour or butter, which makes it a true fitness recipe! 

Avocado is a true superfood

With avocados you would probably not immediately think of brownies, but whoever will try this brilliant combination is guaranteed to become a fan of it. Avocado is usually known for its savory dishes such as salad bowls, spreads or guacamole. However, avocado is actually very neutral regarding its taste and therefore can be also used for desserts.  Avocado mousse is particularly popular, but it can also be used for decadent chocolate avocado brownies, like in my recipe. The avocado is a true super fruit and contains a lot of healthy, unsaturated fatty acids and delivers the body a good amount of energy. 

Fun fact: Did you know that the perennial avocado tree belongs to the laurel family and thus its fruits are assigned to the berries? So basically it means that the avocado is not a vegetable, as many might thing, but rather a fruit! So why not make a yummy dessert with it?

healthy avocado brownies keto

According to my research scientific research even proves the health effects of avocados. They are known to very nutritious and have a crazy amount of nutrients like vitamins, potassium and folate. Avocados are high in fiber which can help with weight loss and metabolic health. Their antioxidants are said to be able to support eye protection and last but not least I have found out that avocados can lower cholesterol and triglyceride levels in the body, which your blood levels can benefit from. If all of this is 100% true I am not an expert enough to say, but I believe that incorporating fresh fruit and veggies into your daily diet is definitely a good thing! 🙂 

healthy avocado brownies keto

The inspiration for this recipe

Last year I traveled through Panama for a whole month. A country full of avocados and cocoa plantations. I wanted to implement this recipe for a long time because it simply combines both ingredients perfectly into chocolatey fitness brownies. I actually get a lot of inspiration for my healthy fitness recipes while traveling. Exploring new cultures and different cuisines always sparks my interest in new foods and I like to try new innovative recipes with local ingredients. 

Check out these unique recipes I created due to my travels abroad: 

Avocado brownies recipe

Now let’s jump into the recipe. It is actually fairly easy. You simply mix all the wet ingredients together first and then add the dry ingredients. Regarding equipment you will need a blender and baking mold. 

Fudgy brownies with no added sugar

I always try to keep my recipes as simply as possible and this one will only take you a couple of minutes to prepare and 25 minutes in the oven. I try to make my recipes as healthy as possible and didn’t use any regular flour, butter or sugar for this one. If you like you can add an extra scoop of protein to make the macros of this recipe even better! 

The recipe is leaning towards a low carb and keto brownie recipe since we are not using traditional flour and sugar. You can make it even more low carb/keto, by exchanging the honey with Erythrit. 

Healthy avocado brownies

Fudgy brownies with a very special ingredient!
Gericht Dessert
Keyword avocado brownies, healthy brownies, low carb brownies
Vorbereitungszeit 15 Minuten
Baking time 25 Minuten
Portionen 10

Zutaten

  • 1 large avocado
  • 2 tbsp eggs
  • 30 g coconut blossom sugar
  • 50 g honey
  • 1 tbsp coconut oil
  • 1 tbsp peanut butter
  • 30 g raw cocoa powder
  • 70 g almond flour
  • 1 teaspoon baking powder
  • 1 pinch of salt
  • 60 g dark chocolate

Anleitungen

  1. Preheat the oven to 180 degrees.
  2. In a bowl, stir the eggs with the coconut blossom sugar and honey until creamy.
  3. Puree the avocado together with the peanut butter using a hand blender. Now add the coconut oil and egg to the mixture.

  4. Mix together almond flour, baking powder, salt and cocoa powder in a second bowl.
  5. Now fold the dry ingredients slowly into the moist mass.
  6. Roughly chop dark chocolate and stir into the mixture.

  7. Transfer the dough into a silicone baking dish and bake at 180 degrees for 25 minutes.
  8. Only cut into pieces when the brownies have cooled down.

Rezept-Anmerkungen

At best, eat the brownies as soon as possible, because they will dry out fairly quick!

Did you make this recipe?

Tag  @carina_berry and use the Hashtag #carinaberry to get the possibility for a shoutout on my Instagram! 

I always love to see your wonderful creations and it makes me so happy to see you guys actually making my recipes. 

xoxo,

Feel free to pin this recipe to your Pinboard: 

healthy chocolate brownies low carb sugar-free brownies keto brownies low carb

Weiterlesen

Vegane Snickers – Rohkost Riegel ohne Zucker

Rohkost Riegel - vegane Snickers

Heute teile ich mit euch mein Rezept für vegane Snickers Riegel, die einfach nur hochwertige und gesunde Zutaten enthalten! Dieses Rezept wird euch ganz sicherlich begeistern, da es bestimmt eines der besten hier auf diesem Blog ist! Inspiriert von der veganen Küche in Bali enthalten diese pflanzenbasierten Rohkostriegel weder Zucker, Butter noch Mehl. 

Springe zu Rezept

Die Inspiration für dieses Rezept

Während meiner zwei Monate in Bali war ich regelmäßiger Kunde in einem Organic Health Store namens Bali Buda. Bei Bali Buda gibt es nur nachhaltige Lebensmittel zu kaufen und im eigenen Café werden viele vegane Köstlichkeiten verkauft. Schon in der zweiten Woche haben wir dort roh-vegane Snickers Riegel entdeckt und waren von da an fast täglich wieder im Store um neue Rohkostriegel zu kaufen. Es ist wirklich schwer vorstellbar wie lecker diese Riegel sind wenn man sie nicht selbst probiert hat! 

roh vegane Snickers Riegel

Unsere vegane Snickers Riegel Sucht ist in der letzten Woche in Bali etwas ausgeartet und wir haben teilweise den ganzen Vorrat des Cafés im Tresen aufgekauft, da wir so besorgt waren die leckeren Köstlichkeiten nach unserer Heimreise nicht mehr essen zu können. Als ich dann wieder zurück in Österreich war habe ich es mir zum Ziel gesetzt diese Rohkost Riegel genauso nachzumachen wie in Bali! 

Nach zahlreichen Versuchen habe ich es nun endlich geschafft und das perfekte Rezept für die Bali Buda Snickers Riegel nachgemacht! Ihr werdet sie lieben 🙂 

Rohkost Kochkurs

Passend zum Thema vegane Rezepte wollte ich dir noch eine Neuigkeit mitteilen:

Seit kurzer Zeit ist nun mein brandneuer Rohkost online Kurs online! Dieser Einsteigerkurs mit vielen leckeren veganen Rezepten gibt dir einen tollen Einblick in die Welt der Rohkost. Der Kurs inkludiert ganz viele Videomaterial, Rezeptkarten sowie ein gratis E-book für die perfekte Frühstückswoche. 
Mit dem Code RAW25 kannst du dir jetzt hier -25% auf den Kurs holen! Aber nur für kurze Zeit, also schnell vorbei schauen <3

Online Kochkurs Rohkost

Was kommt in die Rohkost Riegel?

Für dieses Rezept braucht ihr sogar nicht mal kochen oder backen weil die Riegel roh sind und somit auch viel schneller zubereitet als andere Rezepte. Grundsätzlich besteht es eigentlich nur aus einer Handvoll Zutaten. Die Hauptzutaten sind Datteln, Haferflocken und Erdnüsse. Die Zutaten sind nicht schwierig zu bekommen, jedoch doch etwas teuerer. Es ist leider kein super günstiges Rezept, da Datteln, Nüsse, Samen, Nussbutter und hochwertige dunkle Schokolade einfach mehr kosten, aber es wird den Preis garantiert wert sein – versprochen! 

roh vegane Snickers Riegel

Das Rezept besteht aus drei verschiedenen Schichten: 

  • Haferflocken Nougat Boden
  • Dattel Karamell Schicht
  • Salty Chocolate Überzug 

Diese drei Schichten bilden wirklich die perfekte Kombination. Als erstes beißt man in den knackigen Schokoladenüberzug und dann in die fudgy Karamellschicht. Das Dattelkaramell ist wirklich eine geniale Erfindung und so dekadent und lecker. Der eher neutrale, bissfeste Haferboden gibt den Riegel halt und lässt die Aromen wunderbar verschmelzen. Der weiße Sesam sorgt für das gewisse Etwas im Riegel und die Erdnüsse für das Crunchy Feeling.

Okay also wenn euch jetzt noch nicht das Wasser im Mund zusammengelaufen ist dann weiß ich auch nicht weiter! 😀

roh vegane Snickers Riegel

Worauf muss man bei diesem Rezept achten

Das Rezept ist wirklich nicht schwierig, allerdings doch etwas Zeit intensiv, da man beim mixen der Datteln etwas Geduld benötigt.
Hier ein paar Tipps fürs vegane Snickers Riegel Rezept:

  • Die Datteln in einem guten Standmixer vermixen und alle paar Sekunden gut umrühren damit der Mixer nicht heiß läuft. 
  • Bevor die Riegel geschnitten und der Schokoladenüberzug gemacht werden kann müssen die Riegel angefroren sein. 
  • Wer keinen Sesam mag kann diesen auch weglassen. Ich finde aber er passt hervorragend in das Rezept. 
  • Das Salz ist in diesem Rezept ausschlaggebend, also auf gar keinen Fall weglassen. Unbedingt fein körniges Salz (wie z.B Himalaya Salz) verwenden und auf gar keinen Fall feines Speisesalz. 

Vegane Snickers Riegel Rezept

Ich will euch nun nicht länger auf die Folter spannen. Hier nun das beste roh-vegane Rezept, welches ich je entwickelt habe: 

Vegane Snickers Riegel

Die besten veganen Rohkost Riegel!
Gericht Snack
Keyword vegane Riegel, vegane Snickers Riegel
Resting Time 1 Stunde 15 Minuten
Arbeitszeit 30 Minuten
Portionen 8

Zutaten

Dattel-Karamell Schicht

  • 400 g Datteln (Gewicht mit Kernen) am besten Medjool
  • 4 TL weißer Sesam
  • 60 g

    Erdnussbutter


  • 100 g geröstete Erdnüsse
  • 1/2 TL Salz

Nougat Schicht

  • 100 g Hafermehl (man kann auch Haferflocken fein mixen)
  • 15 g Kokosöl
  • 80 g Dattel Karamell von oben

Überzug

  • 70 g dunkle Schokolade 75-85%
  • 1/4 TL grob körniges Salz

Anleitungen

  1. Die Datteln entkernen und in einer großen Schüssel mit Wasser bedecken und 10 Minuten quellen lassen.

  2. Falls du kein Haferflockenmehl zu Hause hast einfach die Haferflocken 40-60 Sekunden mixen bis feines Mehl entsteht.

  3. Datteln abseihen und abtropfen lassen. Die relativ feuchten Datteln dann in den Mixer geben und zusammen mit der Erdnussbutter fein pürieren. Den Mixer immer wieder abstellen und per Hand umrühren bis eine dicke, aber glatte Masse entsteht. Dieser Prozess kann etwas dauern.
  4. Das Dattel-Karamell aus dem Standmixer nehmen. Mixer nicht ausspülen und gleich wieder 80g vom Dattel-Karamell zurück geben und mit den Haferflocken und dem geschmolzenen Kokosöl durch mixen. Es sollte eine bröckelige Masse entstehen die sich mit den Fingern zusammendrücken lässt.

  5. Die Haferflockenmasse nun in einen kleinen Behälter circa 5mm dick füllen und gut festdrücken. Ich lege gerne Frischhaltefolie unter um die Bars danach besser aus der Form zu bekommen.

  6. Erdnüsse, Sesam und Salz unter das restliche Dattel-Karamell mischen. Die Dattelmasse auf das Haferflockennougat im Behälter auftragen. 
Alles für mindestens eine Stunde in den Gefrierschrank stellen, bis alles fest ist.
  7. Die fast gefrorene Füllung aus dem Behälter nehmen und mit einem scharfen Messer in Riegel schneiden.
  8. Während die Schokolade geschmolzen wird den Behälter wieder in den Kühlschrank stellen, damit die Riegel kalt bleiben.
  9. Nachdem die Schokolade geschmolzen ist sie vom Herd nehmen und das Salz untermischen. Nun die Riegel mit einer Seite in die Schokolade eintauchen und auf einem Backpapier ablegen. Die fertigen Riegel wieder für 15 Minuten in den Gefrierschrank geben. Danach kann man die Riegel im Kühlschrank bis zu 4 Tage aufbewahren.

Rohkost Riegel

Share the snickers love with me!

Falls ihr diese Riegel nachmacht würde es mich wirklich wahnsinnig freuen wenn ihr mir in den Kommentaren eurer Feedback zukommen lässt. Bin so gespannt wie ihr die veganen Snickers findet und ob sie euch auch so begeistert haben wie mich! 

Hier noch ein paar weitere roh-vegane Rezepte: 

Last but not least habe ich das Rezept auch nochmal als Video für dich zusammen gefasst damit es noch leichter ist den Schritten zu folgen: 

Wenn du möchtest kann du dir gratis mein Clean & Lean E-book herunterladen mit weiteren gesunden Fitnessrezepten: 

Hast du das Rezept nachgemacht?

Dann markiere mich mit @carina_berry auf Instagram oder verwende den Hashtag #carinaberry

Ich teile immer wieder nachgemachte Rezepte auf meiner Instastory  <3

xoxo,

Rohkost Riegel Roh vegane Snickers Riegel Roh vegane Snickers RiegelL

Weiterlesen

Best Instagram photo spots in Bali 2020

Best Instagram photo spots in Bali oneeighty

Are you looking for those picture perfect photo spots in Bali? Welcome to this blog post sharing the most Insta-worthy photo spots in Bali. I have spent two month on this beautiful island and have visited many breathtaking places that I will share with you in this article. As a full time blogger I really wanted to share some beautiful photos from my stay in Bali with my followers and will include the ones I took at each spot here. So lets get into the best Instagram photo spots in Bali:

Insta Hype in Bali

Very much in Bali evolves around taking the perfect shot. We can argue if that is a good thing or not. I have seen so many people waiting in line forever to just snap a quick photo and then leave without even taking an actual look at what they came to see. In the north of Bali whole selfie parks have been constructed for visitors to get their Insta pictures. At the rice terraces they build a ton of swings just to charge a ridiculous amount of money if you actually want to swing on it. Sometimes you even have to buy selfie tickets that give you a couple of minutes in front of a landmark. It is a crazy world over there and a lot evolves around the perfect Instagram picture.

I was actually thinking for a long time if I should even write a blog post about the best photo spots in Bali because I don’t want people to plan their whole trip based on where to take the best photos. In the end I decided this blog post could actually be very helpful because it share some of the prettiest and most amazing destinations in Bali. Since I have lived there for two months and was able to get to know the island quite well I simply wanted to share my favorite spots in this list of best Instagram photo spots in Bali! 

Handara Gate, Bali, Indonesia

You probably have heard of the famous „gate to heaven“ in Bali. The Lempuyang Gate is beautiful, but be ready to wait in line 2-3 hours for a picture. It is absolutely crazy. That is why I recommend you go to this smaller gate up north in Bali. It is actually the entrance of a golf course, but has a beautiful setting with the mountains in the background and lush green jungle. 

You will have to buy a „selfie ticket“ for a couple of euros that will give you 5 minutes to take photos in front of the gate. Yes, it is a bit crazy and people actually come there just to stand in line, take a photo and then leave again because there is not much else to do.  When I was there it took like 30 minutes of waiting time until we had the spot for ourselves. Make sure to bring an airy dress that will look good on photos. Hot pants and crop tops usually don’t look that amazing for this shot. 

View this post on Instagram

Have you ever planned a vacation solely based on where to take the best Insta photos? I’ve been to Bali for three weeks now and have seen how much this platform has changed the island. I have been here already 12 years ago before Insta was even a thing and now talked to many locals and they all told me that ever since Instagram became so big a lot of things are different. So many people come here with the quest of taking their perfect instagram pictures. They form lines in front of landmarks so everyone gets their shot without anyone else on it (at some places I have heard you need to wait 3 hours to get a photo), sell selfie tickets that give you 5 minutes in front of a sight to take photos and have constructed whole selfie parks for people to capture their insta shots. Bloggers have brought so much tourism here over the last four years according to locals and so many restaurants are trimmed to serve exactly that audience with their hipster vibe, stylish interior and food blogger dishes. It’s a crazy place and I’m not sure if I’m 100% okay with this approach. I love Bali and the last month here has been absolutely amazing because honestly I simply fit perfectly in that Bali blogger cliche, but for non-Instagrammers coming here this must be a very abstract world and I have gotten very sceptical if people actually still come to Bali to really enjoy going on vacation and to recharge or rather go on a crazy exhausting photo hunting spree here…I’m aware of the fact that I’m also a driver in this space and slowly I am understanding the impact we can have on this world, which means we can also potentially change our behavior and therefore change the impact we have on the people who follow us as well. My main reason of coming to Bali was not to take one perfect shot after another, but more to enjoy the gorgeous island, get focused work done here and to meet new, like-minded people and if some awesome pics like this one come out of it – even better ?

A post shared by Carina Berry I Fitness Food (@carina_berry) on

Kanto Lampo Waterfall

I am a huge waterfall fan! During my time in Bali I tried to see as many as possible and I love that they are all a bit different. Kanto Lampo is about a 1h drive from Canggu – which is where we were staying. The waterfall actually looks bigger than it was in real life. It is actually pretty harmless to stand in the middle of it because the water is not as intense as it might look.

However, you are definitely going to get wet for this Insta shot! Be there as early as you can because towards lunch time buses will drop a bunch of tourists and it will be hard to get the spot to yourself. When you take the photo adjust your shutter speed to get the flowy, mystical look of the water! 

Munduk Moding Plantation

Pool Goals! If you are looking or that perfect infinity pool you should visit Munduk Moding Plantation. It is a hotel up north and has beautiful villas. We were there for 2 nights and were therefore able to wake up early to catch the sunrise by the pool. There were actually already a lot of bloggers waiting to take their shots as well. The beautiful, soft light is only in the morning. It also looks good for sunset, but you will be very dark on the photo.

I am not sure if you can come to this hotel if you are not a guest. You might be able to eat in the restaurant for dinner and take this shot at sunset. We never really had a clear day when we were there, but I was told they view has to be absolutely spectacular and you are able to see very far! 

Uluwatu Cliffs

The high cliffs south of Bali are breathtaking and absolutely stunning. There are multiple beach clubs you can visit like Omnia, Single Fin or the Sundays Beach club. I however have a very special and less crowded recommendation for you. Going to One Eighty is definitely worth a visit. It is more pricey than the other clubs and you will have to pay an entrance fee (around 30 Euros, of which you can use around 25 euros for food and drinks), but in my opinion it also has the best view and the greatest atmosphere.

Hier noch ein zweiter Shot von der Pool Area: 

Leke, Leke Waterfall

This waterfall is by far my favorite one. It is so mystical and hidden with lush green leaves and so many plants in the middle of the jungle. It is a 15 minute walk to the waterfall. Depending on the season you will encounter more or less water running down. We got there pretty early and ran into a few other bloggers taking their Insta shot there. The later it gets the more tourists will come so I can definitely recommend being there as early as sunrise to get the spot for yourself. 

Banyumala Twin Falls

Since checking out all the waterfalls was on top of my list when I came to Bali, I need to share this one for my best Instagram photo spots in Bali as well. What I love about waterfalls is that they are simply so diverse and unique. Each one is completely different. Banyumala has two bodies of water coming down and a lot of lush greens around the pool. The hike down was quite steep and going up was really exhausting to be honest. I can also advise you to take good shoes for the hike and not to do it in flipflops. 

Kelingking Beach, Nusa Penida

Even though this spot is in Nusa Penida and not directly on the main island I had to include it in my list of best Instagram photo spots in Bali. It is probably the most breathtaking view you will ever get. Cristal blue water, powerful waves hitting the shore and rough cliffs overlooking the water.

Certainly, you will find a long line waiting to the the infamous Kelingking beach shot that you have probably already seen a billion time on Instagram. It is super beautiful – but please be careful. Every year people die because they fall down the cliffs taking selfies. It is really dangerous since you are really standing on the edge of the cliff. 

View this post on Instagram

View goals! ?This was one of the most amazing spots I have ever visited! The water reflected every shade from dark blue to turquoise and the waves were so loud and powerful ? however, this place is also super dangerous and a lot of people have died here. My main message today is: Never Risk Your Life For Content! Every time I am taking photos I am super careful and mindful to not do anything stupid. One wrong step and you are history! People have died here taking selfies plummeting down the cliffs or trying to take photos of them playing with the waves and having their spine cracked in half. We didn’t even go down to the beach because we saw how strong the waves were and how unpredictably close they came to the beach. #bettersafethansorry

A post shared by Carina Berry I Fitness Food (@carina_berry) on

Diamond Beach, Nusa Penida 

If you are already on Nusa Penida, visiting Diamond beach is a must as well! It reminded me a bit of Big Sur in California and I could have stayed there forever just looking down on the beach and watch the waves rolling in. I actually didn’t go down all the way since I have heard it is really steep and dangerous if you don’t have the right footwear. So we sadly just went there to take the photo, enjoyed the view a bit and went back since the sun was already setting. 

Rumah pohon

If you are visiting Diamond beach, this spot is not far away from Diamond beach. We actually discovered that there is a small trail alongside the cliffs from Diamond Beach to Rumah Pohon. It was such a cool walk. We even saw some monkeys and had the best views with the setting sun. If you were to take the scooter you would need to go all the way back to the main street and then back to the cliffs since there is no direct street connecting Diamond Beach and Rumah Pohon. It would take around 50 minutes with scooter, but only 20 minutes if you walk along the cliffs on the trail.

Again – you need to be very careful here because you are walking quite literally super close to the edge of the cliff and there are no security ropes. At Rumah Pohon you can see Diamond Beach from the other side. Rumah Pohon is a cute little tree house that has been instagrammed already way too many times as well, but simply makes a really good photo opportunity. The locals know this and will charge you around 3.5 euros per person if you wan to take a photo in front of it. 

Best Instagram photo spots in Bali

I hope you enjoyed these tips for the best Instagram photo spots in Bali. I loved visiting those places. If you go and have your photo, please don’t forget to actually enjoy the spots and put away your phone for a little while to just soak in the experience. Way too many people only go there to take the perfect insta shot and then leave without even really enjoying what they came to see! 

Check out my Bali food guides if you are looking for the best food recommendations in Bali: 

I also have a whole Instagram highlight with all my best tips for Bali. Check it out on my account here!

xoxo,


Weiterlesen

Wellnesshotel in München – das Almdorf Spa vom Hotel Erb

Was gibt es schöneres als bei kalten Temperaturen in ein Wellnesshotel zu fahren? In der warmen Sauna zu sitzen wenn es draußen schneit und sich in sein Zirbenkissen zu kuscheln wenn es draußen minus Grade hat. Das Hotel Erb bei München ist für mich ein großartiger Ort der Entspannung und ich möchte euch in diesem Blogpost den Wellnessbereich im Almdorf Spa näher vorstellen. 

Nach insgesamt drei Aufenthalten dieses Jahr im Hotel Erb Best Western Plus konnte ich wirklich einen guten Einblick in das Hotel gewinnen und finde es einfach absolut großartig. Neben dem grandiosen Alm Grill hat auch das Almdorf Spa neu eröffnet. Ein Ort der Entspannung und Ruhe! 

Das Almdorf Spa

Wenn ihr auf der Suche nach einem Wellnesshotel in der Nähe von München seit, kann ich euch für entspannte Tage das Hotel Erb empfehlen. Das neu angelegte Almdorf Spa bietet eine Vielzahl an Entspannungsmöglichkeiten und ist einfach der perfekte Ort um mal so richtig abzuschalten. Als Hotelgast kann man richtig entspannt gleich mit dem Bademantel von seinem Zimmer ins Spa gehen.

Allerdings muss man nicht unbedingt ein Hotelgast sein um Zutritt zum hoteleigenen Spabereich zu bekommen. Es gibt auch Tageskarten, 10er und Jahreskarten für externe Gäste. Hier gibt es extra Umkleidekabinen und abschließbare Schränke. 

Saunabereich Almdorf Spa

Die Saunen

Das Almdorf Spa zeichnet sich durch 5 verschiedene Saunen und ein Dampfbad aus. Somit ist für wirklich jeden die richtige Sauna dabei!

Sauna Guide im Hotel Erb:

  • Finnische Hüttensauna: Einer meiner Favoriten ist die finnische Hüttensauna. Bei 80 Grad kommt man so richtig ins Schwitzen. 
  • Salzsteinsauna: Das Sole-Inhalat regt die Tätigkeit der Flimmerzellen an, löst aktiv den Schleim und lässt die Nasenschleimhaut abschwellen. Somit werden die natürlichen Reinigungsmechanismen der Atemwege unterstützt. Perfekt also wen man verkühlt ist! 
  • Bio Zirbensauna: Die Zirbensauna hat eine deutlich höhere Luftfeuchtigkeit (40-50%) und somit kommt man viel schneller ins Schwitzen. Bei dieser Sauna mit etwas niedriger Temperatur wird Herz-Kreislaufsystem weniger beansprucht als bei der klassischen Finnsauna.
  • Kräutersauna: Mein absoluter Saunafavorit im Hotel Erb ist die Kräutersauna!  Eine sanfte Variante der finnischen Sauna die sich hervorragend für kreislaufschwächere oder hitzesensiblere Saunagäste eignet. Kräutersaunen gelten im Allgemeinen als hautpflegend und gesundheitsfördernd und wenn man reingeht riecht es einfach richtig gut! 
  • Aromadampfbad: Das Dampfbad ist vor allem für jene Saunagäste geeignet, die von hohen Temperaturen in der finnischen Sauna stark beansprucht werden. Angenehme 60 Grad erlauben entspanntes und längeres Schwitzen. Wechselnde Aromen helfen bei der Entspannung.
  • Medizinische Salzinhalation: Sole hilft bei unterschiedlichen Atemwegs- und Hauterkrankungen und dient zur allgemeinen Regeneration des Organismus. Die erzeugten negativen Ionen erhöhen die Sauerstoffaufnahme des Blutes und stärken die Abwehrkräfte. 

Saunabereich Almdorf Spa

Was ich so an dem Saunabereich schätze ist, dass er jeden Tag bis 24.00 Uhr offen hat. Somit kann man auch nach dem Abendessen noch einige entspannte Stunden darin verbringen. Wer noch mehr Wellness möchte findet übrigens Europas größte Therme – die Therme Erding – nur ein paar Kilometer vom Hotel entfernt. 

Aqua Peeling-Salze

Gratis für alle Spagäste stehen Aquapeelings im Almdorf Spa zur Verfügung. Das hat mich vor allem sehr beeindruckt, da man oft dafür in Thermen separat zahlen muss.  Die anregenden Körperpeelings wechseln täglich im Duft und so hab ich schon Mango, Eukalyptus, Aloe Vera und Limette probiert. Es hilft die Haut in Balance zu bringen, den Körper zu vitalisieren und den Geist zu verwöhnen.  Die Aqua Peeling-Salze von Prof. Dr. Biener haben natürliches Urmeersalz als Basis. Es fördert sanft die Durchblutung der Haut und macht sie seidenweich und strahlend. Ich habe die Aquapeelings vor allem gerne in der Zirbensauna verwendet, da man hier besonders schwitzt. 

Saunabereich Almdorf Spa

Infrarot Liege

Nach einem anstrengenden Tag kann ich euch auch die neue Infrarot Liege im Almdorf Spa empfehlen. Pure Entspannungsgarantie einfach! Infrarotstrahlung ist nämlich das beste Mittel, um dem Körper Wärme zuzuführen. Sie arbeitet berührungslos und wird daher auch als besonders angenehm empfunden. Jede Infrarotstrahlung wird in der Haut in Wärme umgewandelt. Ich habe die Liegen täglich vorm Schlafen gehen verwendet. Gerade jetzt im Winter wo es so kalt draußen ist haben sie mir das schönste, wärmende Gefühl gegeben! 

Gesunde Snacks

Im Saunabereich gibt es eine kleine Snacking Area mit warmen Kräutertee, getrockneten Früchten und Nüssen sowie frischem Wasser. Auch hier bleibt das Hotel Erb seinem „no plastic“ Konzept treu und verwendet keine Plastikbecher, was ich sehr zu schätzen weiß! Gerne habe ich mir die Snacks nach ein paar intensiven Saunagängen dann in den Ruheraum mitgenommen und dort vernascht.

Saunabereich Almdorf Spa

Die Stille Alm

Saunieren, Peelen oder Trainieren kann anstrengend werden. Ausgiebige Ruhe in schöner Umgebung gehört zu einem Wellnessaufenthalt dazu, nicht wahr? Nach ausgiebigen Saunieren findet man im Ruheraum in ruhiger Atmosphäre einen Ort für Entspannung. Die Liegen sind wahnsinnig bequem und alles ist top durchgestylt. Des öfteren bin ich dort eingeschlafen weil man einfach perfekt runterkommt und in der stillen Alm richtig abschalten kann. 

Saunabereich Almdorf Spa

Saunabereich Almdorf Spa

Fitnessstudio

Um sich während des Hotelaufenthaltes auch sportlich betätigen zu können, gibt es ein Fitnessstudio mit neusten Technogym Geräten. Laufbänder, Crossträner und Fahrräder sorgen für ein gesundes Training. Es gibt auch genug Gewichte um Kraftraining zu machen und auch die wichtigsten Maschinen für den Muskelaufbau. Nach einem intensiven Workout kann man sich dann direkt in das Almdorfspa schwingen. Handtücher werden übrigens vom Hotel zur Verfügung gestellt. 

Fitnessstudio Hotel Erb

Wellness am Zimmer

Wellness im Hotel Erb hört nicht im Almdorf Spa auf sondern geht weiter bis zum eigenen Hotelzimmer. Dort gibt es hochwertige Produkte der Firma L´Occitane für das eigene Wohlbefinden. Duschgel, Bodylotion sowie Handseife werden jedem Hotelgast bei Besuch zur Verfügung gestellt. 

Kissenmenü

Man kann sich im Hotel Erb sogar beim Schlafen noch etwas gutes tuen. Mir hat die Idee des Kissenmenüs sehr gut gefallen. Man kann sich für einen ganz individuellen Duft entscheiden und einfach mal etwas anderes probieren. 5 verschiedene Kissen stehen zur Auswahl. Ich habe das Zirben- sowie das Rosenkissen während meines Aufenthalts getestet.

Kissenmenü Hotel Erb

Hochzeitssuite und Romantikzimmer

Diesmal habe ich auch einen Blick in die Hochzeitssuite geworfen. Ein wirklich charmantes Zimmer mit wunderschönem Himmelbett. In so einem Zimmer lässt es sich bestimmt schöne Stunden verbringen. Des weiteren wurden mir vom Hotelpersonal die Romantikzimmer gezeigt.

Romantikzimmer Hotel Erb

Seit neuestem gibt es beim Hotel Erb die Möglichkeit ein Romantik Package zu buchen. Hier findet man schon bei der Eingangstür Rosenblätter, welche den Weg zum Bett weisen und dort in einem Herzen enden. Es werden kleine Häppchen sowie eine Flasche Sekt zum Anstoßen bei der Ankunft am Zimmer bereitgestellt. Beim Abendessen gibt es dann einen besonders gedeckten Tisch und man genießt seine Speisen in trauter Zweisamkeit bei Kerzenlicht. Wirklich eine schöne Idee wenn man seinem Liebsten mal eine besondere Freude machen möchte!

Romantikzimmer Hotel Erb

Ein Aufenthalt im Hotel Erb garantiert Entspannung und ich kann euch das Hotel sehr empfehlen. Schaut doch gerne auch mal bei meinen anderen beiden Blog Posts vorbei, bei welchen ich meinen Lesern das Alm Grill Restaurant und den Nachhaltigkeitsaspekt im Hotel Erb näher bringe!

xoxo, 

Weiterlesen

Jackfruit pulled pork from scratch – vegan

vegan Jackfruit pulled pork wrap

The first time I tried jackfruit pulled pork was in Indonesia. During my two months in Bali, which is probably the food capital of the world, I learnt to love this amazing vegan meat substitute. The consistency is so authentic and you can barely tell a difference in taste. Just looking at it without knowing would be hard to tell wether its real meat or not. It really fascinated me since it was so delicious and so I decided to try it myself.

Making pulled jackfruit from scratch

When making pulled jackfruit there are a couple very important things to know. I had to make this recipe a couple of times in order to really get it right.

Here is my quick jackfruit story:

Here in Bali are so many jackfruit trees and I kept seeing them on the markets and on trees. So, one day I decided to buy a package of jackfruit and wanted to make pulled jackfruit wraps at home for dinner. What I didn’t know is that you are only supposed to use green, young jackfruit for this kind of recipe. I had bought the sweet, ripe fruit in the supermarket. After two bites of my wrap I had to put it aside as it simply tasted so sweet and did not really match the taste of the other ingredients.I didn’t want to give up on the project just yet though! So I talked to our Indonesian house keepers and they started laughing and told me that I used the wrong kind of jackfruit. It’s like using green banana for banana bread – just the opposite way around! 

Green jackfruit & Oil

They showed me a jackfruit tree right outside of our apartment and were kind enough to cut a small, young one down for me. Here I was again with my green jackfruit on a mission to make my vegan pulled pork yet again! I was told to put oil on the knife when cutting the jackfruit open, which obviously I forgot to do and ended up with super sticky fingers and a sticky knife. The jackfruit produces some kind of natural glue and it is so hard to get off. In the end I had to wash my hands with sunflower oil to get the glue off. 

Once you managed to cut the huge fruit open you need to cut off the peel and chop it into smaller pieces. Then cook them for about 30 minutes. After that you can finally pull the strings from the fruit and end up with your jackfruit pulled meat! 

vegan Jackfruit pulled pork

Where to buy green jackfruit?

So you see it was quite a journey to get to the final product. Therefore, if you want to make your life a whole lot easier I recently just found out that you can also buy cooked green jackfruit in Asian supermarkets and also online! But in this blog post I wanted to teach you how it is done by scratch with your own real jackfruit. It is a fun experiment and if you ever get the chance to try it, totally go for it!

The taste of jackfruit meat

Once you have it everything becomes much easier. You might want to know what does jackfruit meat taste like? The jackfruit „meat“ itself tastes very neutral and will absorb just any flavor you put on it. That is why marinating the jackfruit is the most important part. You will want to make sure to use it with a tasty salsa or sauce. And please make sure you are working with a young, green jackfruit.

vegan Jackfruit pulled pork
Marinated jackfruit vs. plain jackfruit

Most people use it for vegan bbq jackfruit pulled pork sandwiches or burritos. For this blog post I made wraps with some leftover veggies I still had at home. But no matter what you use it for as long as you marinate it really well it will taste amazing on everything. Here in Bali I have seen it as a topping on Poke Bowls, in burgers and on salads. 

Pulled jackfruit wraps

Below you find the recipe for making pulled jackfruit from scratch and marinating the fake meat. 

Pulled jackfruit wraps

The perfect vegan alternative for pulled pork.

Gericht Main Course
Keyword jackfruit pulled pork, pulled jackfruit, vegan meat
Vorbereitungszeit 1 Stunde
Zubereitungszeit 15 Minuten
Portionen 6 Personen
Autor Carina Berry

Zutaten

Pulled jackfruit

  • 1 small young, green jackfruit or 1 can green jackfruit in water
  • 1 cloves garlic
  • 200 ml coconut milk
  • 1 tbsp curry powder
  • 1 dash of salt and pepper

For the wraps

  • 6 pcs tortilla wraps
  • 1 small can sweet corn
  • 2 pcs tomato
  • 200 g of Hokaido pumpkin
  • 1 handful chopped cilantro
  • 50 g chopped cashews

Anleitungen

  1. Put oil on a knife and cut the young, green jackfruit in half. Use more oil to cut off the peel and into smaller pieces.

  2. Boil the jackfruit until tender. This should take around 30 minutes.

  3. Rinse with cold water and shred with your fingers or a fork. This is where you also start the recipe using canned jackfruit.

  4. In a pan let the jackfruit meat simmer together with the coconut milk, chopped garlic and spices. Stir for 5 minutes occasionally.

  5. In the meantime you can chop the tomatoes, cilantro and pumpkin for the filling.

  6. Fry the pumpkin pieces until well done and put them together with the pulled jackfruit and the other ingredients as a filling in the wrap.

If you make this recipe….

I am really curious to hear what you guys think of this recipe. In case you try making jackfruit pulled pork yourself, please come back here and share your experience in the comments with me. 

Looking for more healthy, vegan recipes? Why not check out my Tom Kha Gai soup or  vegan bagels. You can also sign up for more fitness recipe and get my E-book delivered straight to your inbox: 

Did you make this recipe?

Did you make this recipe?

Tag  @carina_berry and use the Hashtag #carinaberry to get the possibility for a shoutout on my Instagram! 

I always love to see your wonderful creations and it makes me so happy to see you guys actually making my recipes. 

xoxo,

Weiterlesen

30 Tage vegan Challenge – ein Monat keine tierischen Produkte

30 Tage lang auf tierische Produkte zu verzichten – eine vegan Challenge die ich mir für den November gesetzt habe! In diesem Blog Post möchte ich euch meine Erfahrung mit pflanzenbasierter Ernährung für ein Monat schildern.

Alles began mit der Dokumentation “Game Changers” in welcher es darum geht, dass der Mensch eigentlich gar nicht so viel Protein benötigt wie immer angenommen wurde und pflanzenbasierte Ernährung eigentlich viel gesünder ist. Motiviert von der Doku haben mein Freund und ich kurzerhand entschieden den nächsten Monat komplett vegan zu essen.

Ich habe ja schon immer sehr Pflanzenreich gekocht und viele meiner Rezepte waren bereits vegan. Aus diesem Grund dachte ich mir, dass eine komplette Umstellung wohl nicht so schwer sein würde. Falsch gedacht!

30 Tage vegan challenge

Hier nun ein kleines wöchentliches Update von meiner vegan Challenge im November:

Woche #1

Wir haben die Challenge in Singapur gestartet, was bestimmt keine gute Idee war. Noch dazu hatten wir unser Hotel in Chinatown und hier waren die veganen Optionen wirklich sehr limitiert. Ich bin am Food Market zu 7 verschiedenen Verkäufern gegangen und habe gefragt, ob sie etwas veganes haben. Alle sahen mit verdutzt an und ich bekam wirklich den Eindruck sie hatten das Wort “vegan” noch nie zuvor gehört. Im Endeffekt aßen wir dann zwei Tage nur Beilagen bestehend aus Reis und Gemüse.


Danach ging es nach Ubud und das war wirklich eine andere Welt. Ubud ist die Hochburg des Veganismus in Bali. Hier findet man ein “plant-based” Restaurant nach dem anderen und sogar die keinen lokalen Essensstände haben vegane Optionen. Es gab sogar ganze “raw vegan” Cafes, in welchem alle Speisen nicht nur vegan, sondern auch roh zubereitet werden. Hier übrigens mein Blogpost zum besten healthy vegan food in Ubud. Somit war der Rest der ersten Woche eigentlich ganz einfach.


Körperlich haben wir bemerkt, dass wir sehr müde und erschöpft waren. Wir haben auf einmal mehr Schlaf als normalerweise benötigt. Außerdem ist mir aufgefallen, dass ich schon am Morgen einen aufgeblähten Bauch hatte. Das war höchstwahrscheinlich vom vielen rohen Essen in der ersten Woche.

30 Tage Vegan Challenge

Woche #2:

In dieser Woche haben wir eine Reise zu den Gili Inseln und Nusa Penida gemacht. Zwei Inselgruppen, welche nicht recht entwickelt sind und wenig Infrastruktur haben. Hier waren die veganen Optionen natürlich wieder sehr eingeschränkt und wir mussten uns mit demselben Frühstück und denselben Snacks für 4 Tage zufrieden geben. Unser Essen bestand aus einem Fruchtteller und einer Banana Pancake am Morgen, Oreos und Erdnüsse als Snacks sowie Vegan Curry am Abend.

Hier haben wir bemerkt wie viel “ungesünder” – zumindest in unseren Augen – wir uns auf einmal ernähren. Obwohl wir soviel Cheat food wie Pancakes und Cookies aßen hatten wir die ganze Zeit Hunger. Selten hatte ich so oft über den Tag verteilt Hunger wie in dieser Woche. Ich kann mir das nur aufgrund vom schnellen Zucker erklären, der den Insulinspiegel in die Höhe treibt und dann relativ rasch wieder abfallen lässt. Aber vielleicht liege ich hier auch falsch. Ich habe auch bemerkt, dass ich in dieser Woche mega viele Pickel bekommen habe. Ich habe sonst immer reine Haut und nie Probleme mit Pickeln. Das war für mich also auf jeden Fall ein Anzeichen von schlechter Ernährung. Nach der zweiten Woche muss ich also sagen, dass ich noch nicht überzeugt bin, ob vegane Ernährung meinem Körper wirklich so gut tut.

30 Tage vegan challenge

Woche #3:

Die dritte Woche haben wir in Canggu verbracht, wo ein vegan Hipster Café das andere jagt. Es war also nicht schwer auswärts vegan zu essen, sondern machte sogar richtig Spaß. Die Auswahl war riesig und es gibt einige komplett vegane Restaurant. Das machte alles viel einfacher, da man gar nicht mehr überlegen muss was man auf der Speisekarte essen darf und was nicht. Nun hatte ich auch endlich wieder eine eigene Küche und konnte mich so richtig austoben. Seit langem wollte ich verschiedenste vegane Rezepte probieren und habe “Pulled Jackfruit” ausprobiert und ganz viel mit Tempe gemacht. Es war richtig spannend verschiedenste Formen von Fleischersatz zu testen und alle Gerichte waren einfach unglaublich lecker.

Körperlich ist mir nach wie vor aufgefallen wie schlapp und matsch ich bin. Ich habe definitiv weniger Energie als sonst und hätte jeden Tag bis 10.00 schlafen können. Meine Haut war nach wie vor schlecht und ich dachte mir trotzdem zuzunehmen, obwohl ich nun sogar selbst gekocht habe und wieder intermittent fasting praktiziert habe. Ich hatte mittlerweile einfach die Vermutung, dass mein Körper Kohlenhydrate nicht so gut verstoffwechselt wie Protein und Fett. Interessanterweise hatte ich in dieser Woche auch meine Tage bekommen – fast 10 Tage zu Früh! Dies lag bestimmt auch an der Ernährungsumstellung.

30 Tage vegan challenge

Woche#4:

Diese Woche war sehr ähnlich wie Woche drei. Ich war weiterhin sehr geschwächt und müde. Die unreine Haut war auch weiterhin noch vorhanden. Ich habe mir extra ein paar “all vegan” Restaurants herausgesucht, was das auswärts essen wieder um einiges erleichtert hatte. Alles was ich gegessen habe war einfach wirklich richtig köstlich. Ich glaube ich hatte den ganzen Monat kein einziges Gericht, welches mir nicht geschmeckt hat. Veganes Essen ist einfach richtig lecker und jeder der was anderes sagt hat sich noch nicht richtig damit beschäftigt. Was ich so toll finde ist wie bunt man isst! Es kommen so viele frische Früchte und Gemüsesorten auf den Teller und es sieht immer so aus als würde man einen Regenbogen essen.

In dieser Woche habe ich auch ein YouTube Video zum Thema „Full day of eating vegan“ geteilt. Schaut doch mal hier vorbei. 

30 Tage vegan challenge

Ausnahmen:

Eigentlich habe ich die Challenge ja nicht zu 100% bestanden da ich ein paar Ausnahmen gemacht habe, die ich hier auch ehrlich ansprechen möchte. Ich habe ein paar Mal Milch getrunken weil es nicht anders ging und einige Male einen Proteinriegel statt ungesunden veganen Keksen gegessen. Mein Freund war hier etwas konsequenter und hat wirklich den kompletten November nichts tierisches angerührt. Unsere Ergebnisse der Challenge waren allerdings die selben, weshalb ich davon ausgehe, dass die geringen Menge an Tierprodukten keinen Einfluss auf mein Körpergefühl hatten.

Resümee meiner vegan Challenge

Generell macht man sich bei so einer Challenge einfach richtig viele Gedanken zu seiner Ernährung und bemerkt erst einmal wo eigentlich überall Tierprodukte drinnen sind. Es war schön einfach mal zu hinterfragen was in den Speisen eigentlich alles drinnen ist und bewusst nach Alternativen zu suchen. Körperlich konnte ich in den 4 Wochen vegan Challenge die Vorteile von einer pflanzenbasierten Ernährung leider noch nicht erkennen. Dafür habe ich es bestimmt auch nicht lang genug gemacht, da mir ganz viele meiner Follower geschrieben haben, dass die Umstellung länger dauert. Es war auf jeden Fall ein richtig spannendes Projekt und ich hatte großen Spaß so bunt, bewusst und vielseitig zu essen. Ich hätte mir auch keinen besseren Ort für die vegan Challenge als Bali aussuchen können.

best bowls in Canggu

Wie geht es jetzt weiter?

Eigentlich noch nie viel Fleisch gegessen und kaufe mir selbst eigentlich auch nie eines. Ich mache ab und an Ausnahmen wenn ich wo eingeladen bin oder in einem Restaurant bin, aber möchte mich hier nicht total einschränken. Ich finde es geht eher darum sich vor allem pflanzenreich und gesund zu ernähren. Das ist mir persönlich lieber, als komplett vegan zu sein und dann aber auf ungesunde Alternativen weil es eben oft auch nicht anders geht (vor allem beim Reisen oder im noch sehr vegan unfreundlichen Österreich) zurückgreifen zu müssen.

Mir ist einfach bewusst geworden wo meine Prioritäten liegen und ich würde clean vor vegan vorziehen. Warum ich dennoch so sehr an veganer Ernährung festhalte ist der Umweltaspekt. Durch pflanzliche Ernährungen kann so viel Wasserverbrauch und CO2 Ausstoß verhindert werden. Würden einfach alle Menschen etwas weniger Fleisch essen wäre schon so viel geholfen!

Ich denke ich kann mich mit dem Begriff “Flexitarier” sehr gut identifizieren. In Zukunft nehme ich mir vor einen sanftem Veganismus zu praktizieren und wenn möglich die tierfreie Option zu wählen. Ich werde versuchen möglichst wenig Fleisch und wenn, dann sehr bewusst und ausgewählt zu essen.

Hoffentlich haben euch meine persönlichen Erfahrungen geholfen und es inspiriert den einen oder anderen unter euch vielleicht auch einmal eine vegan Challenge zu machen!

Solltet ihr nun motiviert sein vegan zu essen verlinke ich euch nun noch ein paar meiner liebsten Rezepte am Blog:

Probiert diese Rezepte einmal aus. Ihr werdet sie lieben <3

xoxo,

Weiterlesen

The best healthy vegan chocolate mousse (with Aquafaba)

Aquafaba vegan chocolate mousse

Looking for a healthy alternative to regular mousse au chocolat? Why not try this healthy vegan chocolate mousse then! It is made with Aquafaba – the new trend in the vegan cuisine and besides being vegan it will also safe you a lot of calories as well! Add a dash of cinnamon and you will have your perfect Christmas dessert!

What is Aquafaba?

Who would have ever thought that you can turn the thick leftover water from beans or chickpeas into a vegan form of egg whites ?! Ever since I’ve tried it though, I’m a big fan of it. It’s so incredibly easy, vegan, raw, gluten-free and low in calories. Like this you will never need to throw away the cooking water in the cans again, but rather use it for amazing mousse au chocolat! 

In vegan circles Aquafaba is handled as a protein substitute. When cooking the legumes, the starch and the soluble proteins and other substances pass into the cooking water. For this reason, when whisking the cooking water of legumes like beans or chickpeas, it gets a similar fluffy and foamy consistency as egg white. 

Aquafaba vegan chocolate mousse

Tips for preparation

  • When I tried to make Aquafaba Mousse for the first time, I made the mistake of only whipping the liquid for 2-4 minutes. At first glance, everything looked very firm, but then quickly collapsed and became liquid again. It is important that you whip the mousse for at least 10 minutes. Best if you do it with a food processor. It is really not possible to  „overmix“ it, like with egg whites.
  • For the best result, you can let the vegan chocolate mousse rest in the fridge for a few hours. Then you can decorate it wonderfully as the surface will be hard enough to put toppings on it. 
  • Chocolate: the darker the chocolate the less carbs and sugar it will have. I love to use anything above 70% for this vegan chocolate mousse.

Aquafaba vegan chocolate mousse

Aquafaba Variations

The simplest and most basic Aquafaba recipe is just whisking the boiling water of beans / chickpeas and then adding some kind of sweetener. Instead of sugar, I like to use xylitol or erythitol, because I can save some extra calories that way. After that you can decide for yourself which flavor you want to give your mousse. Fruity, sweet or chocolaty?

Since I am writing this blog post at the end of November and Christmas season is coming up, why not add a dash of gingerbread spice or at least some cinnamon to the vegan chocolate mousse to make it more christmassy? Yes, its that easy! 🙂 

In the summer time you can make this recipe with fresh raspberries or blackberries. It gives the mousse a beautiful bright pink and purple color. Check out my berry mousse here

Does it taste like chickpeas?

There are certainly some of you wondering now whether the finished dessert tastes like chickpeas or beans since we used the draining water of them to make the mousse. Personally, I do not think so. If you wouldn’t know, you would probably think it’s just like any other delicious dessert mousse.
Of course, the Aquafaba mousse has a slightly different taste than 100% neutral egg whites, but by no means a negative one. It just tastes a little different. That’s why it’s important that you sweeten the mousse and add a different flavor through the chocolate.

vegan chocolate mousse

Aquafaba Chocolate Mousse

A vegan alternative for mousse au chocolat!

Gericht Dessert
Zubereitungszeit 10 Minuten
Portionen 6

Zutaten

  • 240 ml Aqufaba chickpea water - the leftover water when draining chick peas from a can
  • 120 g dark vegan chocolate 80%
  • 3 tbsp Xylit or Erythrit
  • 1 tsp cinnamon

Anleitungen

  1. Drain the chickpeas from its water and you will get the Aquafaba.
  2. With an electric mixer beat the Aquafaba water until whipped and stiff peaks form.
  3. This should take around 7-10 minutes. Make sure you really beat it that long, otherwise the the mousse will not last long.
  4. Add the sweetener of your choice (Xylit or Erythrit).
  5. Melt the chocolate in the microwave and whisk with a small spoon until all the chunks have fully dissolved. Add the cinnamon. Mix the chocolate into the mousse and fill into small glasses. Allow the mousse to set for 3 hours in the fridge.
  6. Decorate with chocolate sprinkles and enjoy!

In case you speak German you can also check out my Aquafaba berry mousse, which is pretty similar to this recipe, just with berries instead of chocolate. If you are looking for more vegan recipes head over to my favorite vegan and raw caramel slices

Also, I wanted to let you know that you can sign up for my free fitness grocery shopping list. It will make it so much easier for you to only pick the healthy options in the supermarket! 

Did you make this recipe?

Did you make this recipe?

Tag  @carina_berry and use the Hashtag #carinaberry to get the possibility for a shoutout on my Instagram! 

I always love to see your wonderful creations and it makes me so happy to see you guys actually making my recipes. 

xoxo,

vegan chocolate mousse with Aquafaba vegan chocolate mousse with Aquafaba vegan chocolate mousse with Aquafaba


Weiterlesen

Best healthy restaurants in Seminyak with Instagram worthy food!

Balibola Seminyak best healthy food

Seminyak offers a variety of different blogger places and Insta worthy restaurants. In this blog post I want to show you the best healthy restaurants in Seminyak with the most colorful Insta food spots. All restaurants mentioned will also offer a great selection of vegetarian and vegan food! So here we go! 

As a full time food blogger I am always on the lookout for new healthy restaurants and trendy cafés. I love to discover the secret spots of a city and will share my favorite places in Seminyak with you now. Since I really like to eat healthy and mostly vegan I will be sharing only fitness approved restaurants that offer a great amount of vegan, raw, vegetarian and fitness food choices. All of them are super cute and an absolute recommendation. Go and check them out while you are visiting Seminyak. Most places are open for breakfast, lunch and dinner. 

I’ll be linking their Instagram account. Make sure to check them out as they are all doing an amazing job with their feed and it’s simply so beautiful to look at all the colorful food. I usually always check out the account and then decide from there what I want to order because you get a better impression of how your food will look like than just reading it on the menu. 

Balibola

It can’t get any more colorful than Balibola. This place is basically designed for Instagrammers and bloggers. They even have their own photo wall and an icon on the menu that indicates which dishes are „instagrammable.“ Snapping your perfect Instagram food picture won’t get any easier than at this beautiful place. All the dishes are decorated in such a creative and beautiful way. We had the best vegan burgers of our entire time in Bali there. I can really recommend the burger with the vegan cheese sauce. A lot of dishes are plant-based and most of them are vegetarian. Balibola has a flexitarian approach which they explain in the menu. I thought that was really cool as well. 

The „cheese sauce“ was made out of carrots and one of the tastiest things I have ever tried in my life! We also had the WTF waffles. As you can see on the picture above they were absolutely crazy! I have never seen anything like this before. Huge recommendation for insta worthy, but also healthy food in Seminyak 

Balibola best healthy restaurants in Seminyak

Eat Play and Love

When listing the most colorful restaurants with the best food in Seminyak Eat Play Love has to be on the list! It is brand new and you can tell how much love and detail the owners put into this restaurant. It is quite big with a downstairs und upstairs area. On the roof top upstairs you will also find and are with aircon, which makes it nice to eat when it is very hot outside. I went with a couple of friends in October and we had such a feast there ordering so many delicious meals and shakes. They have some korean inspired dishes, which I thought was very creative. I also loved the pink latte with beetroot! The smoothie bowl was great and so was the french toast! It is a great place to hang out and enjoy a delicious, nutritious meal. 

Kynd

Looking for a place where you can get your Instagram handle in tiny papaya letters put into your smoothie bowl? Yes, thats what they actually do at Kynd café! This is another top spot for everyone looking to take that perfect food shot. Beautiful smoothie bowls, ice cream scoops with mermaid tails in it and yummy vegan bowl options is what you will find at Kynd. They have a huge Instagram account and I believe most well known bloggers have been there already. 

best healthy restaurants in Seminyak

You can either sit down in their cute garden area or get something quick on-the-go in their creamery. In my opinion, definitely one of the best healthy restaurants in Seminyak. Outside the creamery is a colorful wall with a nice writing. Another fun picture spot you shouldn’t miss! 

best healthy restaurants in Seminyak

Coffee Cartel

This is a place I was unfortunately not able to visit myself, since I ran out of time in the end and couldn’t make it there anymore. I had it on my list for the longest time and have only heard good things about it! If you are a coffee lover this is a must see for you. They make the most artistic coffee foam creations you will ever see. 

Copyright @laura.herde Instagram page

So if you are looking for the best healthy restaurants in Seminyak, please make sure to check some of these places out. It’s just such a unique dining experience and you will be eating so colorful and delicious! 

If you are traveling around Bali make sure to also have a look at my other food guides from Ubud and Canggu. Especially the one in Canggu is very detailed, as I have spent 2 months there and really got to try all of the places there. 

xoxo,

Weiterlesen