Best healthy food in Cape Town – vegan & vegetarian

best healthy food in cape town

Are you looking for the best healthy food in Cape Town while visiting this beautiful city? I summarized my favorite healthy food options, including everything from raw vegan cafés to fitness food restaurants. Have fun with my selection of clean eating places in Cape Town! 

So to start off, South Africa is not really known for it’s cuisine and after having lived here for a couple of months I still have troubles finding traditional restaurants and dishes because there is so much influence here from so many different countries. Healthy food in Cape Town is also still not as established as in other big cities around the world and there are only a handful of restaurants and cafés that I would recommend. One thing I noticed that is really big here are freshly pressed juices! You will find them in almost all restaurants and cafés and its just so healthy and wonderful! 

best healthy food in cape town

As a full time fitness food blogger I sampled my way through the cities restaurant sphere and picked my favorite places to include them for you here in this blog post:

Poke Co.

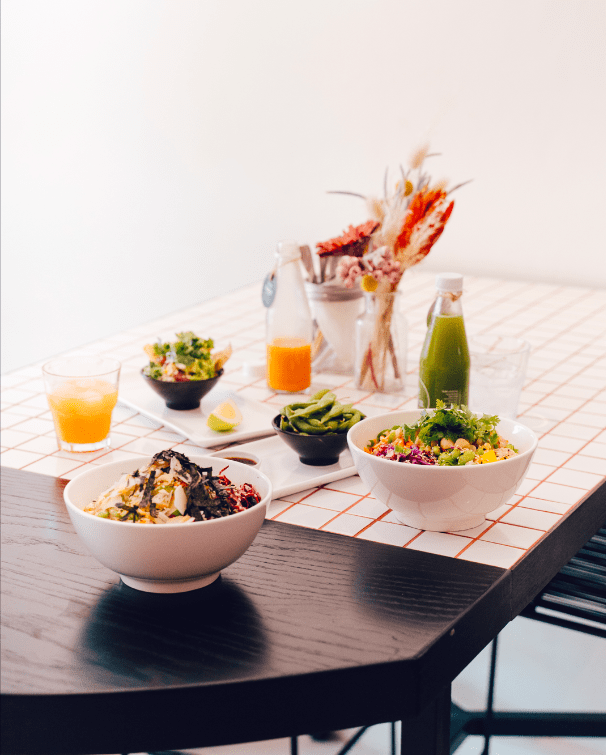
A new healthy place that is getting more and more popular is Poke Co. They just opened their third location on Kloof Street and I had probably the best Poke Bowl of my life there! I actually built my own Poke bowl, but you can also choose some of the especially designed variations on the menu. You will find stylish interior and surfer vibes at every location. If you are looking for healthy food in Cape Town this is definitely a place you should visit. We spent quite some time talking to Andrew, the owner, who is a very friendly and welcoming guy. At Poke Co you can also get healthy smoothie bowls and delicious fresh pressed juice! They are also on Uber Eats – so if you are too lazy to go there yourself you can also order yourself a healthy poke bowl straight to your apartment. 

Poke Co Capetown

Wildsprout

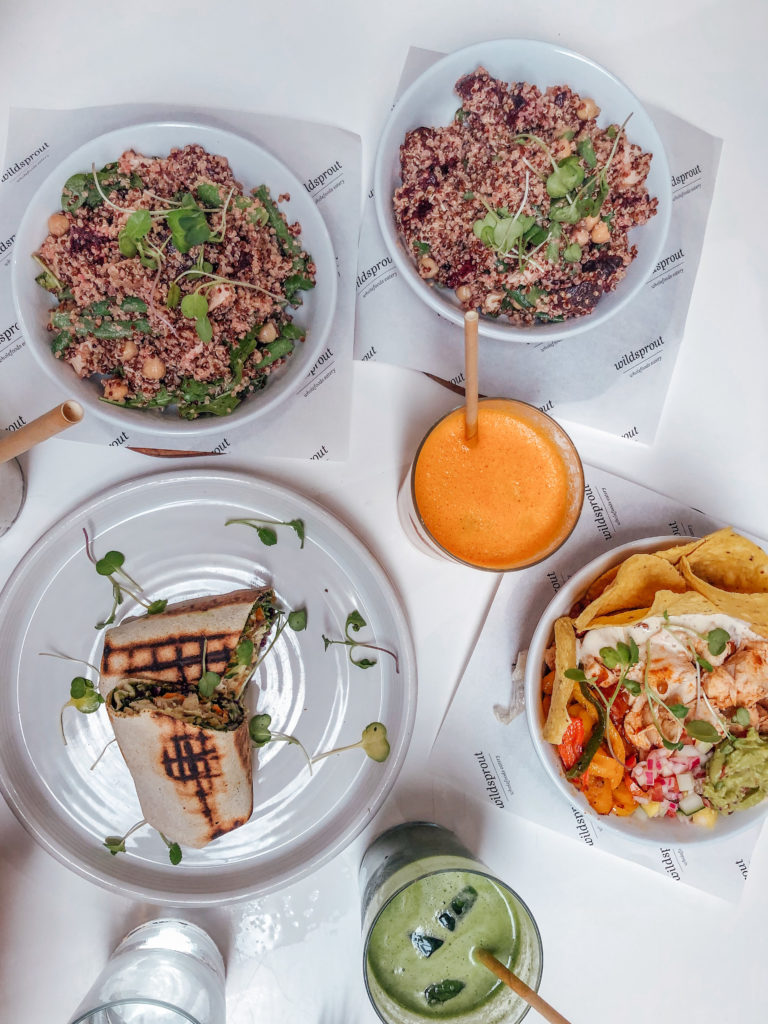
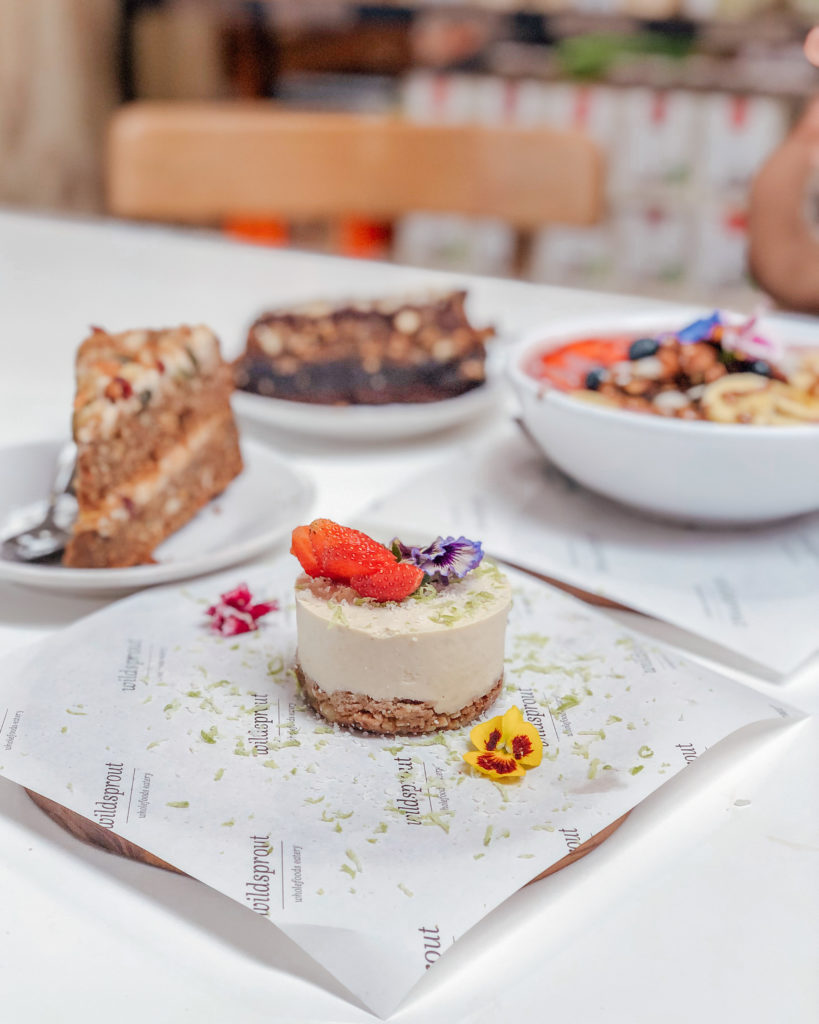
This concept store is located a bit outside the bustling city center. It is a gluten free, wholefoods Cafè situated in the heart of the suburbs! Wildsprout includes a healthy food store in their restaurant. All the ingredients are locally sourced and partially grown on their own farm outside of Cape Town. This is really a top foodie choice for healthy food in Cape Town. I had the quinoa bowl, which I probably would not order again since it was a bit too bland for my taste. We tried a variety of desserts when we were there and the carrot cake was so delicious!

Wildsprout healthy food cape town

If you are looking for a quiet café away from the noise that is really focused on whole ingredients and sustainable sourcing you should definitely go to Wildsprout. They are really focused on the health aspect and all the meals are wholesome and good for your body! However, solely judging by the taste of the food I would prefer the other places in this blog post. But this is definitely the healthiest one of all!Wildsprout healthy food cape town

Nourish’d

If you are looking for Bali vibes go to Nourish’d. Walking in reminded me of sitting in my favorite beach Café in Canggu. There are a lot of tropical plants all around and the interior gives you so many good picture spots! It has such a nice, chilled atmosphere and you pretty much only see cool, hip and young people walking in and out of that place. 

Nourish'd Cape town healthy
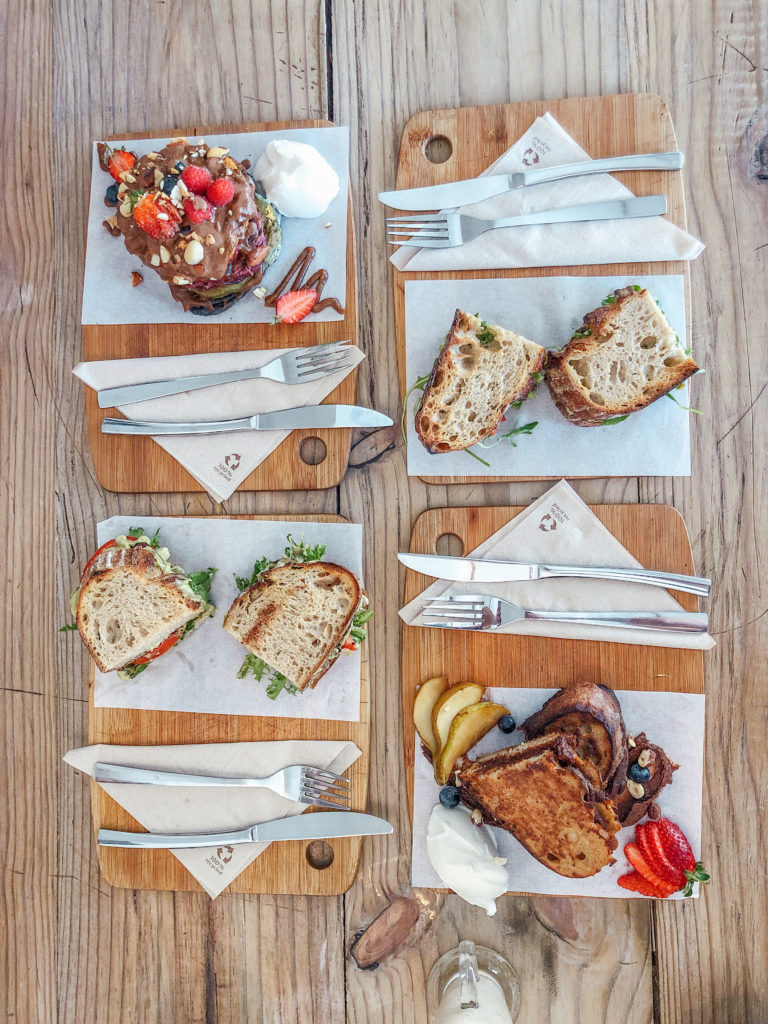
There are two different locations. The one at observatory is much bigger and has a bigger menu choice. I can really recommend you try the rainbow flapjacks. Its a super yummy and fudgy pancake tower. You can also buy raw, vegan Ferrero Rocher balls at Nourish’d, which are mind-blowingly awesome! I actually decided to go for the french toast filled with decadent homemade hazelnut spread. Also very delicious, but very calorie rich at the same time. 

Nourish'd Cape town healthy

Raw and Roxy

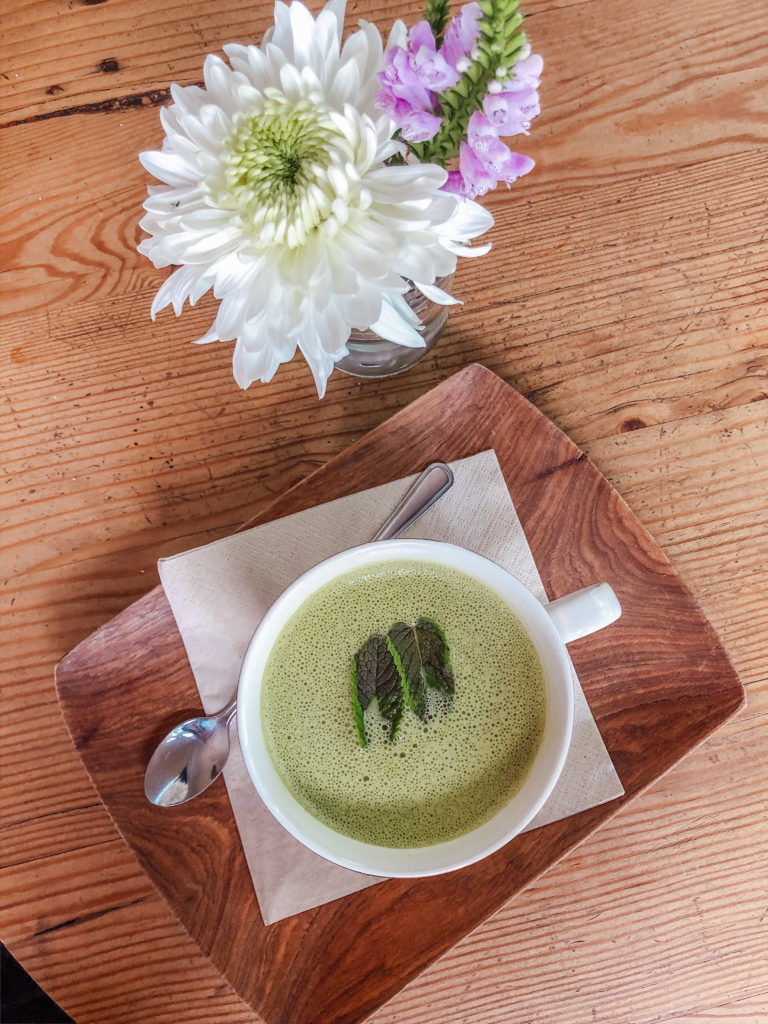
This vegan healthy café is pretty new in the city of Cape Town. It offers delicious vegan food, tea creations, fresh juices and smoothies. I was there on a day where I didn’t feel very well I was unfortunately not able to try any of their food. But I enjoyed the warm matcha latte – which was a special creation with mint – and got a big beetroot kickass juice to go! The interior is really nice and I loved the flower arrangement everywhere. It’s quite big and a lovely spot to spend a couple hours chatting over coffee. Speaking of coffee – make sure to try their raw coffee. It’s a blend of different spices and superfoods and simply so dense and delicious.

raw and roxy cape town raw and roxy cape town

I was actually positively surprised because I looked the place up on Instagram before and was a little underwhelmed by the pictures and account in general. So I actually wasn’t sure to expect of it, but was positively surprised when I got there. Its a really nice café and probably one of my favorite spots for healthy food in Cape Town. 

Scheckters Raw 

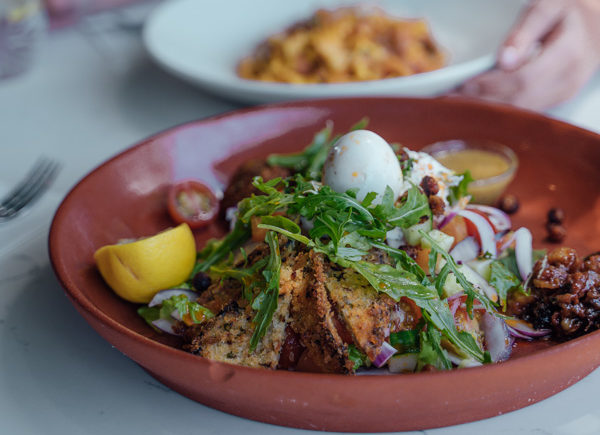
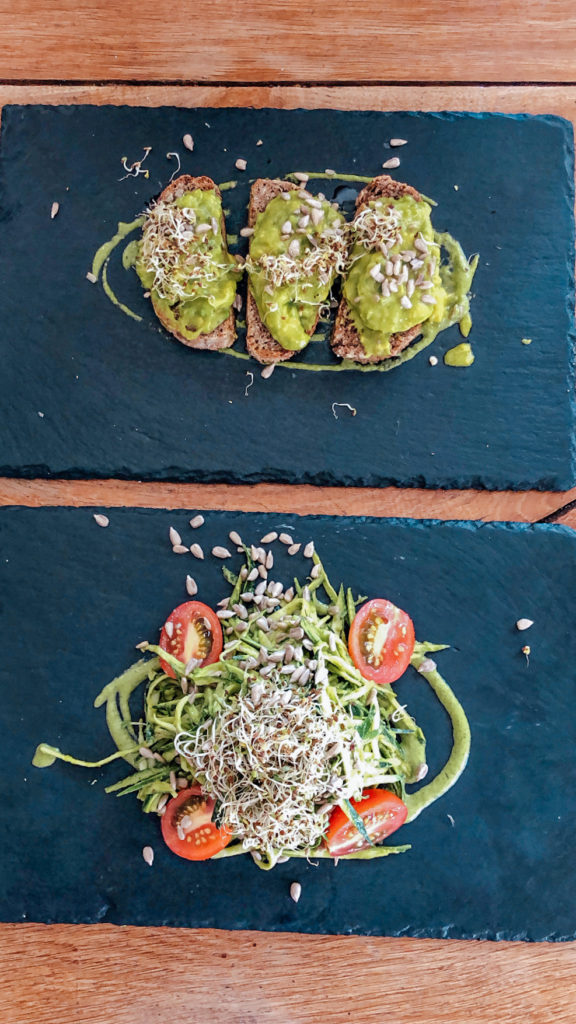
If you are looking for healthy food in Cape Town going to Scheckters Raw is a must. They are based in Seapoint and have a really nice, chill restaurant. You can choose from a lot of different things on the the menu. I for example ordered zucchini pasta! They are famous for their healthy, vegan pumpkin based donuts. I obviously had to try it and they are really a yummy. Scheckters also has a stand at the Oranjezecht Farmers market at the Waterfront. So you can try their food at the market on Wednesday, Saturday and Sunday as well. 

best healthy food in cape town scheckters raw

Just like the other superfood places in Cape Town, they have a big selection of freshly pressed juice! 

The Strangers Club

The Strangers Club is probably my favorite healthy food place in Capetown. It is owned by a 23 year old entrepreneur called Adam, who started with his first business when he was 18. He opened Strangers Club giving local designers a voice and offering them to showcase their products at the restaurant. Its a very cool concept store and the setting is just lovely. It is so hidden I walked by 2 times when I went there the first time. The menu is short but sweet and everything is made fresh. The Nutty smoothie bowl is supposed to be the best in Cape Town! 

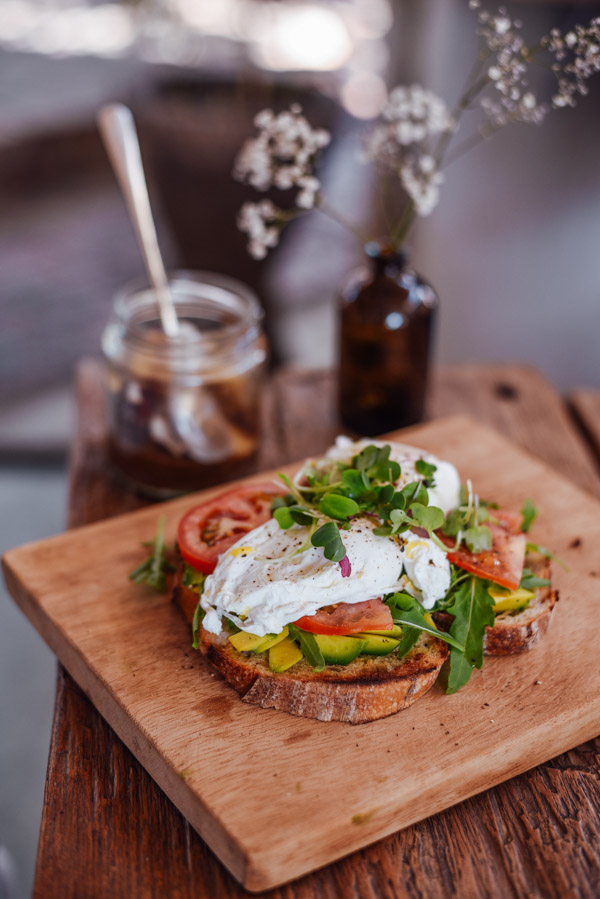
Avocado Toast strangers club
Poached Egg on Avocado Toast with Cinnamon Chia Pudding in the background

This was the first café I noticed people coming in with their laptops doing some work from the café. The place was packed and it had a good mix of tourists and locals. Definitely check it out when you are in Capetown. 

More food guides

I really hope you enjoyed this guide on best healthy food in Capetown. There are not as many healthy food places as in other cities, but you can tell they are up and coming. Clean food, vegan options and raw desserts definitely still seems to be quite new to Capetown, but the few places they have a really great! 

Check out my other city food guides for more healthy eateries abroad:

I hope you enjoyed this guide for healthy food in Cape Town!

xoxo, 

Weiterlesen

Valentine’s day cookies – love letter recipe

Valentine's day cookies recipe love letters-2

Adorable Valentine’s day cookies for your sweetheart. These stunning little love letters are the perfect gift for your loved one! It’s a thoughtful token of appreciation on this special day. 

Valentine’s day cookies made out of shortcrust pastry with a twist

If you are a regular visitor of my blog you surely know how much I love easy and fast recipes. This one is especially simple. I used my grandma’s Austrian „Mürbteig“ recipe, which is German for shortcrust pastry. Since I am a fitness food blogger I always try to substitute unhealthy ingredients in recipes with better options. This recipe made it a bit hard for me because the original literally consists of butter, flour and sugar. Basically my worst fitness food enemies all combined in one recipe 😀 

Valentine's day cookies

However, I found a solution to substitute at least parts of this recipe with healthier options. Did you know that there is a calorie free sugar alternative to icing sugar? Have you ever worked with powdered Erythrit? It actually looks like sugar and you can use it exactly the same way without the calories though! Amazing right?! This is the brand I use. Erythrit does not affect your blood sugar levels and therefore is also suitable for diabetics. 

You can substitute the white flour with wholemeal spelt flour or just use the regular one if you want bright cookies. There is unfortunately not really an alternative for the butter in the Valentine’s day cookies recipe. We need it for the consistency. 

Valentine's day cookies

How to make love letter cookies

It is actually very simple once you have the dough. It’s best if you have a big square shaped cookie cutter or you make yourself a template out of paper. Cut a square (about 5cm each side) out of white paper and place it over the dough before cutting. Once you have your square shaped pieces of dough you can look for bottle cap to place in the middle of the dough. Fold the left edge of the square and the right side together over the cap in the middle then place the bottom edge on top of it. Now you should already see the letter shape. If you have a tiny heart cookie cutter you can now cut out a little heart at the top or where the edges in the middle come together. 

Now you can bake them in the oven at 180 degrees for 10 minutes. When you take them out immediately remove the bottle cap from the cookie before it cools down. 

Valentine's day cookies recipe love letters-2

How to fill the Valentine cookies

For the filling I recommend you use red berry jam. I love the color red for Valentines Day. Try to find a jam that has a really red/pinkish color. There are some strawberry jams that look quite brown, which is not the best option for this kind of cookie. You can also fill this cookie with protein cream, nutella or whatever else comes to your mind! Put some more of the powdered Erythrit over it before you serve it and enjoy! 

If you are into cookies you might also want to check out my healthy protein cookie skillet recipe over here

Full recipe recap

Here is the print out recipe for these lovely Valentine’s day cookies for you: 

Valentine's Day Cookies Love Letters

Cute tokens of appreciation for your loved ones!
Gericht Dessert
Keyword valentine cookies, valentine's day
Zubereitungszeit 30 Minuten
Resting Time 30 Minuten
Portionen 12 Love Letters

Zutaten

Dough

  • 300 g flour plain
  • 200 g butter
  • 100 g powdered Erythrit or Icing Sugar
  • 1 egg

Filling

  • Red berry jam

Anleitungen

  1. Press a hole into the middle of the flour and add the egg and icing sugar/ powdered Erythrit.

  2. Cut the cold butter into small pieces. Knead the cold butter into the mixture until you get a smooth dough.
  3. Form a big ball of dough and wrap in saran wrap before you place it for 30 minutes in the fridge.
  4. Roll the dough out till about 0.5cm thick.
  5. Place a 5x5cm square template or square shaped cookie cutter over the dough and cut squares out of the mass.
  6. Place them on a baking sheet with baking paper. Find a bottle cap to place in the middle of the cookie.
  7. Fold the left and the right edge together in the middle over the bottle cap. (not plastic!! - glass, metal or aluminium)
  8. Fold the bottom edge up over the middle.
  9. If you have a little heart cookie cutter, cut a small heart out in the top edge.
  10. Bake at 180 degrees for 10 minutes and immediate remove the cap.
  11. Once cold fill with red berry jam and sprinkle with more powdered sugar.

I hope you enjoyed this recipe. Make sure to tag me in your IG stories if you end up making it!

Valentine cookies

Did you make this recipe?

Did you make this recipe?

Tag  @carina_berry and use the Hashtag #carinaberry to get the possibility for a shoutout on my Instagram! 

I always love to see your wonderful creations and it makes me so happy to see you guys actually making my recipes. 

xoxo,

Make sure to save this recipe to your Pinterest board so you can find it again next year: 

Valentine's day cookies recipe Love letter cookies Valentine sugar cookies

Weiterlesen

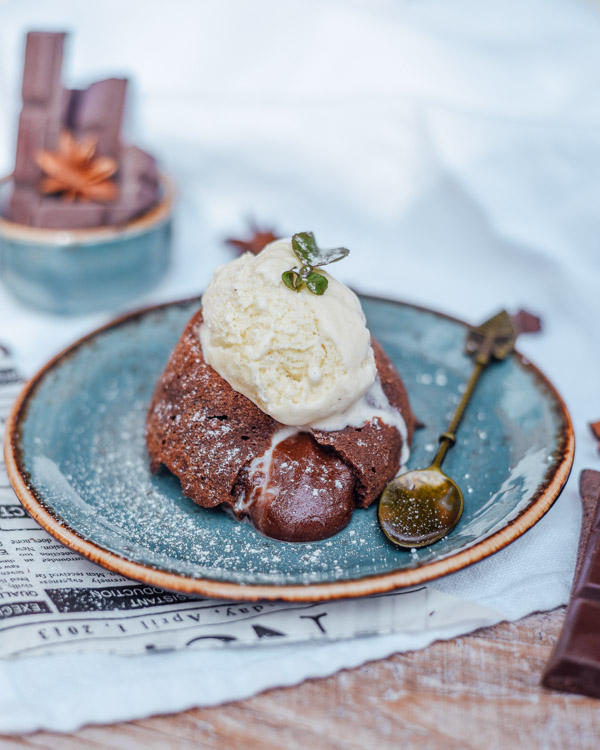
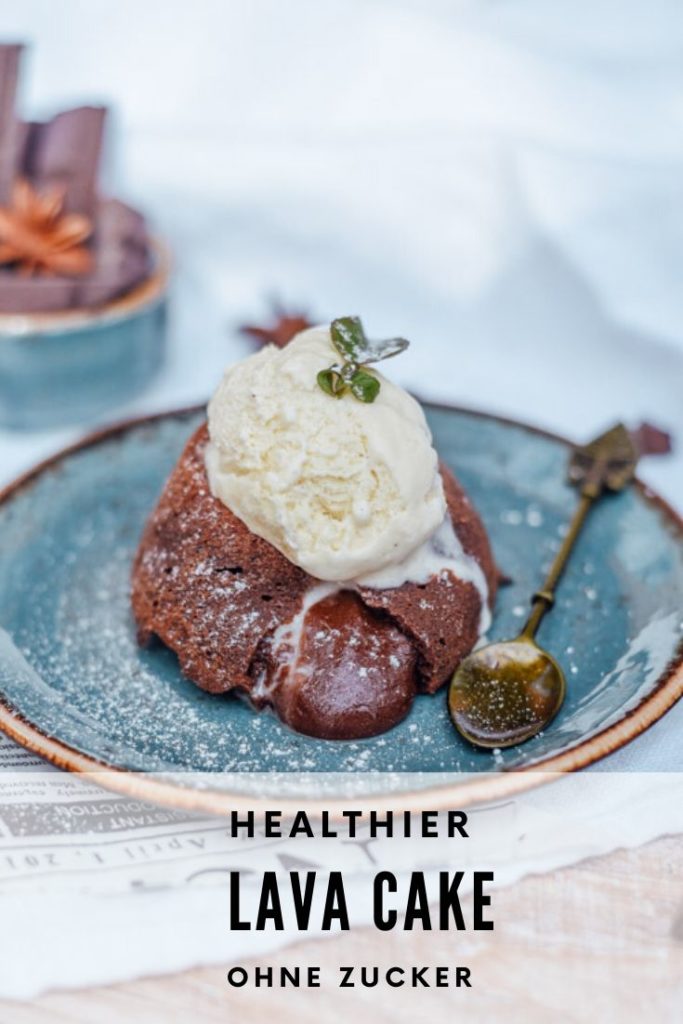
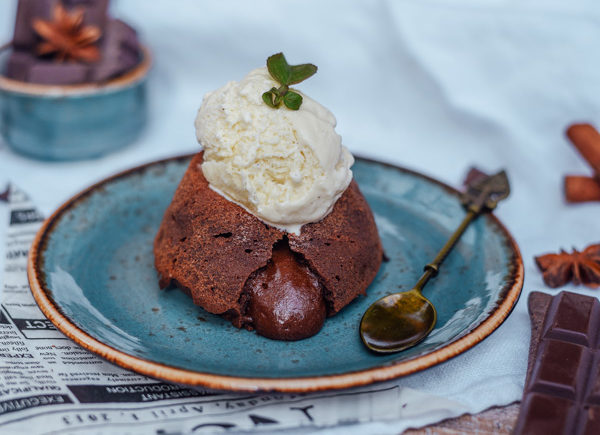
Lava Cake ohne Zucker, Butter und Weizenmehl

Healthy Lava Cake

Ein duftender, warmer Schokokuchen mit flüßigem Kern ist ein Genuss bei jedem Bissen. Dieser Lava Cake ohne Zucker, Butter und Weizenmehl ist die gesundheitsbewusstere Alternative des beliebten Klassikers. 

Springe zu Rezept

Die Inspiration für dieses Rezept

Lava Cake ist wohl mein absolutes Lieblingsdessert! Während meines Auslandssemesters in Frankreich habe ich sie zum ersten Mal gegessen und war sofort süchtig danach. Kurz danach hat mir mein Freund sein Lava Cake Rezept gezeigt, welches er für seine Kochabschlussprüfung absolvieren musste. Das Rezept war einfach so unglaublich lecker, aber eben auch extrem kalorienreich. Ich habe nun versucht die Zutaten so geht es geht auszutauschen und eine etwas „gesündere“ Version von dem bekannten Klassiker zu zaubern. So ist ein Lava Cake ohne Zucker entstanden, der trotzdem total genial und schokoladig schmeckt! 

Lava Cake ohne Zucker

Substitute für Zucker, Butter und Mehl

Mehl

Statt Weizenmehl habe ich mich für ein Bio Dinkelvollkornmehl entschieden. Dies beinhaltet alle wichtigen Nährstoffe vom gesamten Korn und versorgt den Körper über längere Zeit mit Energie als weißes Weizenmehl es tuen würde.

Butter

Statt der Butter, welche über viele gesättigte Fettsäuren verfügt verwenden wir für dieses Rezept Kokosöl. Gesättigte Fettsäuren sollten nur in Maßen zu sich genommen werden, da diese Art von Fett den Stoffwechsel verlangsamen und für einen höheren Cholesterinspiegel sorgen. Das Herzinfarktrisiko kann somit steigen. Gesättigte Fettsäuren findest du in gehärteten Pflanzenölen, Milchprodukten, Fleisch, Wurstwaren und eben der Butter. Da wir aber Kokosöl für den Lava Cake ohne Zucker verwenden tauschen wir die gesättigten mit ungesättigten Fettsäuren, welche besser für den Körper sind. 

Zucker

Für den Lava Cake ohne Zucker verwenden wir Eryhtrit. Erythrit ist eine kalorienfreie Zuckeralternative die aus natürlichen Stoffen hergestellt wird. Es beeinflusst den Blutzuckerspiegel nicht und ist deshalb auch für Diabetiker geeignet. Eryhtrit gibt es online und in jedem größeren Supermarkt zu kaufen. Du kannst dir hier mein Blogpost über Eryhtrit und Xylit durchlesen. 

Lava Cake ohne Zucker

Bei der Wahl der Schokolade ist es dann noch wichtig eine dunkle Bitterschokolade zu nehmen. Diese hat weitaus weniger Kohlenhydrate und einfachen Zucker als vergleichbare Milchschokoladen. 

Du siehst also wie einfach man die „schlechten“ Zutaten für „gute“ substituieren kann! 

Hier kommt nun das Rezept für den Lava Cake ohne Zucker: 

Lava Cake ohne Zucker

Die gesündere Variante des klassischen Schokosoufflés!
Gericht Dessert
Keyword Lava cake
Vorbereitungszeit 15 Minuten
Zubereitungszeit 15 Minuten
Portionen 6 Portionen

Zutaten

  • 3 Eier
  • 50 g Puderxucker Staubzucker aus Erythrit
  • 10 g Germ
  • 100 g Dinkelvollkornmehl
  • 150 g dunkle Schokolade
  • 120 g Kokosöl

Anleitungen

  1. Backofen auf 190 Grad Umluft vorheizen.

  2. Eier trennen. Dotter mit Puderxucker und Germ schaumig schlagen.

  3. Schokolade und Kokosöl gemeinsam schmelzen und unter die Dottermischung rühren.

  4. Schnee schlagen. Abwechselnd Schnee und Mehl unter die Mischung rühren.

  5. In kleine Lava Cake Formen füllen und 8 Minuten im Ofen backen.

  6. Mit einem Zahnstocher hineinstechen. Die Mitte sollte noch flüssig sein und der Rand durch.

  7. Die Formen gleich auf das Teller stürzen (der Teig härter sonst aufgrund der Hitze schnell aus in der Forund bei Bedarf mit Proteineis und Beeren dekorieren.

Hier ein paar weitere Rezepte die dir gefallen könnten: 

Hast du das Rezept nachgemacht?

Dann markiere mich mit @carina_berry auf Instagram oder verwende den Hashtag #carinaberry

Ich teile immer wieder nachgemachte Rezepte auf meiner Instastory  <3

xoxo,

lava cake ohne zucker lava cake ohne zucker lava cake ohne zucker


Weiterlesen

Digital minimalism – use social media mindfully

Digital Minimalism turn off notifications

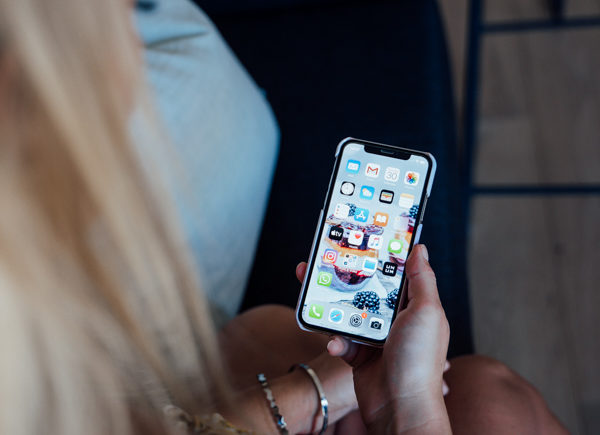
As a full time blogger I spend a lot of time on social media since it is my main working tool. Posting on Instagram, recording videos on Tiktok, pinning recipes on Pinterest, interacting with comments on my blog or uploading videos on YouTube – no matter which channel, I basically have to use them every single day. However, I am very careful about using my time on social media wisely. Digital minimalism is something that keeps getting more and more important for a balanced lifestyle. Today I am here to give you tips on how to use social media mindfully in our world of continuous distractions.  

For me there are two types of people: content creators and content consumers. Which type are you?

In my opinion it is really hard to be both at the same time. Me as a blogger, I put content out there all the time for others to consume. This might sound a bit selfish, but I rarely consume content myself. You will never see me checking my Insta home feed for more than 2 minutes or watching random stories longer than a couple of snaps. I simply decided that I don’t have the time to create content and then at the same time also consume it. Of course I do it a little bit, but more for research purpose to find out what the current trends of the industry are or what other bloggers are up to and talking about.

Digital Detox how to use social media mindfully

1. Set a daily limit

So, I know not all of us are content creators and that is perfectly fine. If you decide you are a content consumer then it is super important to really be mindful of the time you spend on social media. Decide on how much time of your day you really want to dedicate to social media. On Instagram you can check your average time spent on the app under the „daily activity“ section. You can also set yourself daily reminders to manage your time in the app better. It will send you a reminder once you have reached the time that you have set for yourself. There are also apps like Moment that will track your phone activity and the amount of times you pick it up during the day. It will give you helpful advice on how to use it less. 

Another good tip is to stop using the mobile app and instead access social media through your web browser. Like this it will be harder to randomly check your phone on the go when you could be doing more meaningful things instead! 

2. Follow accounts that inspire you instead of dragging you down

Do you ever feel stressed out and overwhelmed after checking your Instagram feed? Then you need to read this part carefully. I think this point is crucial when using social media mindfully. I hear this so often that people actually feel worse when they consume social media. They look at other peoples lives and compare it to their own. It drags them down because they think their own life is not as fun and exciting as what is posted from friends and bloggers online. 

digital minimalism how to mindfully consume social media-4

No one really shares the bad stuff

First of all let me tell you – I have been in this game for 4 years now and I know people 99% of the time only post the good, the funny, the positive and the exciting. Rarely ever someone will share bad news, horrible days or bad experiences online. Simply because thats not what we are „supposed“ to share. So when you are having a bad day don’t beat yourself up thinking your favorite blogger is always happy and in a good mood. I can most certainly say that also that person is having their own issues, which he/she is simply not sharing online. 

Change your relationship with social media

Secondly, I believe it is absolutely crucial to only follow people that truly inspire you, that you can learn from and influence you on a positive level. I see so many people having the wrong relationship with social media. It stresses them out and consuming content actually makes them unhappy and unsatisfied. I don’t use social media to watch other people living a better life than I do. I use social media to discover people that inspire me to eat healthier, be more active, work harder for my dreams, add a certain kind of value to my life and encourage me to try new things.

Those are the kind of accounts you should follow as well. Be very mindful about who you choose to follow on your channels. You might know the saying: „You become the average of the 5 people you spend the most time with.“ Watching someones stories and consuming their content is spending time with them! So, make sure this time you spend with them is beneficial for you. 

My boyfriend actually has a really interesting YouTube video on the 10 most inspirational Instagram accounts you can check out here

3. Mute is the new unfollow

But let’s get real. I am sure you have these accounts you follow where you know they are actually not good for you?
Think of them right now. I can tell someone is already popping up in your mind. They drag you down and make you feel bad about yourself , isn’t that right? Their content simply is a bad influence for you, but for some reason you can’t unfollow them because of a certain reason?

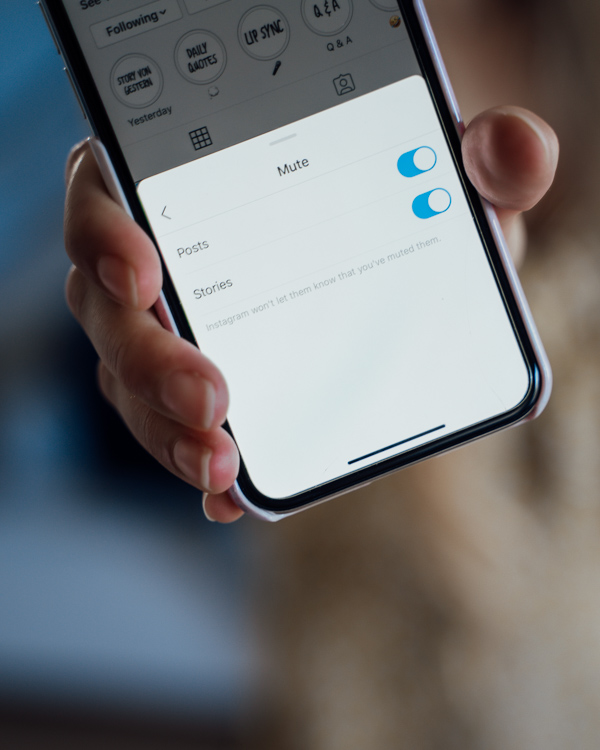
Maybe its a „friend“ that would get really upset if you were to unfollow or other people would think something is up if you would. I know that feeling. It’s happening in the blogging niche as well. I have these certain people I kind of follow not because I particularly want to, but because of outside pressure or because it would be weird not to. Do you know what I do with these accounts? I mute them. It’s the best trick ever. Did you know that you can mute peoples stories and posts on Instagram? So when I decide that persons content is not beneficial for me and doesn’t add any value I mute their content – all of it. They won’t get a notification and you are technically still following them. 

how to mindfully consume social media-4

4. Turn off notification

When trying to implement digital minimalism and use social media mindfully this one is a MUST. There is nothing more distracting than having new notifications pop up on your phone every couple minutes. As a full time blogger working on various channels with thousands of followers I would never get any work done if I would constantly get distracted by my notifications.

Are those notifications important? Some of them maybe, but I only check them when I want to. I dedicate certain times of the day to actually checking my socials and then react to the new messages or comments. This puts me in the position of control to decide when I want to consume new content.  I won’t get distracted by red little buttons popping up on my apps or lock notifications already distracting me when I even just want to check the time.  

5. Digital Detox 

Digital minimalism also means consciously create time away from social media. A practice I have been implementing for years now is taking digital detox days. These are days where I don’t use any digital devices like phone, laptop, camera, TV or similar. This digital cleanse feels so good every once in a while. It simply calms me down and helps me to get grounded again. Consuming social media mindfully is also about talking breaks from it and doing activities without your phone in your pocket or laptop in your bed. When was the last time you went to the supermarket or for a walk without your phone? Do more of that on your social media free days. I try to do these digital detox days ever second week or at least once a month. 

How to learn a language fast on your own

Set boundaries

On other days I like to set myself boundaries to implement digital minimalism. For example my daily rule is to not check social media before 9am and after 9pm. Like this I create a 12h window away from work and my social media. Even though I am sleeping mostly during this time it still gives me the most important hours right when I wake up in the morning and before I go to bed without checking my phone.

This one is so important that I need to repeat it again. Please don’t let the phone be the last thing you check before going to sleep or the first thing you check right when you wake up. This is poison and starts/ends the day exactly the wrong way. Here is another rule for you: don’t use your phone when talking to people or when having food at the table with friends or family.

Your action items for digital minimalism

I would like to conclude this digital minimalism blog post by summarizing how you can use your time on social media mindfully. These are your actions items you should from now on put into practice to consume content consciously: 

  • Set yourself a daily limit on how much time you want to spend online. Set up a daily reminder. 
  • Go through your follows and unfollow people that are not a good influence. Mute the people you can’t manage to unfollow. 
  • Turn off all your social media notifications. 
  • Plan your first digital detox day away from your electronic devices. 
  • Implement some general social media rules for your daily life. 

I genuinely hope that this blog post was helpful for you. Social media can make our life in better in so many ways. However, it can also steal your time and partly your happiness. Start using social media mindfully. Implement some of these digital minimalism techniques to really make the best of the time you spend online. 

xoxo, 


Weiterlesen

5 tips for bloggers – beginner guide on how to increase blog traffic

tips for bloggers

In this blog post I am sharing my 5 most valuable tips for bloggers that are just starting out. If you are a beginner looking to grow your blog traffic then you found the right article.  The advice I am giving you in the blog post is priceless and has helped me grow my monthly impressions continuously.

1. Do keyword research before you write a blogpost

A big mistake I made for a very long time when I started out with blogging was not researching keywords before I wrote my blog posts. I would think of a recipe, cook it, shoot it and write a blog post about it using a random keyword that came to my mind. No wonder I didn’t get any blog traffic in the beginning. My blog traffic exponentially grew once I started to do proper keyword research before shooting the actual recipe. It saved me so much work as well. Now I only shoot recipes that I know will rank and are searched for on Google. Guys – this tip is a game changer for your blogging statistics.
Some tools I can recommend for keyword research are:

Simply plug your keyword in and find out if you are going to be able to rank for it. If you are just starting out and have a small blog I would recommend you try to go for keywords of about 700-1900 searches per month. These are not too competitive and you will be able to rank on the first page faster.

2. Have a content calendar

Every first of the month I sit down and plan the content for the new month. I do this by printing out a calendar that shows me exactly the days and dates. For example I dedicate every Thursday for uploading a new blog post. Every Tuesday and Wednesday I schedule my content creation days in the mornings. That is when I record Youtube videos, Tiktoks, shoot food pics and do photoshoots.

tips for bloggers beginner guide

I also add to the calendar special promotion events that I want to do for my followers like for example last weekend I did an Instagram live cooking class or next week I am planning a fitness shoutout day. Doing this really helps me to spread out my content and stay consistent with my postings across all platforms. It also helps me to not forget about new, exciting I ideas I have for my followers and put them into action.

tips for bloggers

3. Website loading speed

Google likes fast websites. So make sure your page is loading fast. How do you do this?
By optimizing your content for it. In the beginning I exported my Lightroom file in the best quality possible to make sure they are perfect for my blog. One image often had over 20MB in size – which is a humongous file size! After some time I checked my website speed online and was flabbergasted by how slow my page was loading. Now looking back I know why. My images were too big. When you upload images make sure to keep them under 150kb. This means when you export images you need to reduce them in size. These are my specifications I use for my blog images when I export them from Lightroom:

Export for blog in Lightroom

4. Link to Pinterest

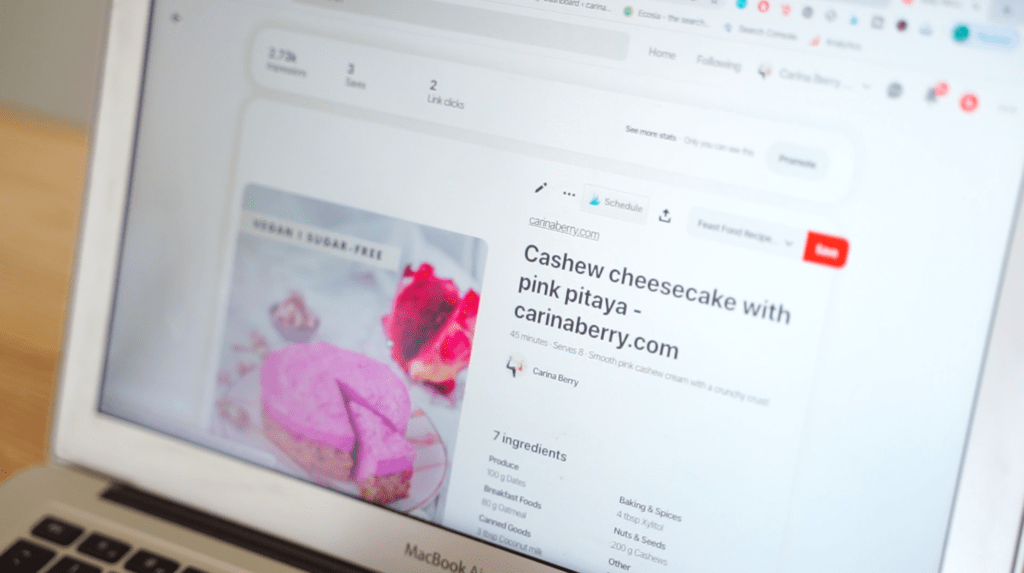
Starting to use Pinterest resulted in much more traffic on my blog. Now I am always pinning the photos on my blog posts to my Pinterest account. Each individual photo is linked to my blog. So if someone is looking for a healthy low carb breakfast, finds my photo and clicks on it that person lands directly on my blog. For example last month I got 113,809 impressions on my blog just from people who found my pins on Pinterest.
Also make sure to shoot your recipes vertically and not horizontally. Pinterest doesn’t like horizontal photos. 

Blogging tips

Regarding tips for bloggers I can recommend Tailwind (affiliate link) to schedule your pins.   It makes it so much easier and takes a lot of work off your hands since it is pinning automatically for you. I sit down one hour every week to plan my pins on Tailwind (affiliate link) and then I’m good to go for an entire week. Once I started to use this tool I saw such a tremendous growth of blog traffic. It makes life so much easier. 


5. Optimize text for SEO

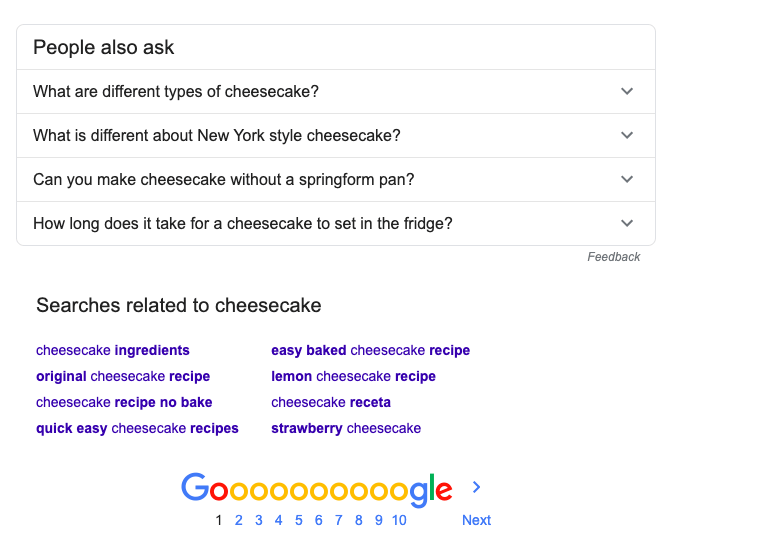
Make sure the text you write for your blog post is optimized for search engines. Define a keyword and use that keyword throughout your paragraphs. Use variations of that keyword to enhance chances of getting found on Google. I find related keywords by typing my main search term into google and then checking out “searches related to keyword” section at the bottom of the first page. You also find a “people ask” section there. I try to incorporate answers to these questions in my blog postings.

finding related keywords on google

Don’t use complex word structures or long sentences. Use paragraphs to make it easier to read the text and define a meta description.

My recommendation: If you are using WordPress install the free YOAST Plug-in. It will give you useful tips of how to optimize and improve your text.

More resources

If you want you can watch my YouTube video about this topic as well: 

Here are some other helpful blogging articles I have written in the past: 

I also have a food blogging success online course in case you are a passionate foodie wanting to kickstart your food blogging career: 

Course for food bloggers

And last but not least you can sign up for my blogging bootcamp where I summarize my best blogging content for you in an email series: 

I really hope you found these tips for bloggers helpful! 

xoxo,

Weiterlesen

Keto Mugcake zuckerfrei mit Erythrit

Keto Mugcake zuckerfrei

Ein fluffiger, low carb Schokoladenkuchen in der Tasse ohne Mehl, Butter und Zucker? Hört sich zu gut an um wahr zu sein? Falsch gedacht! Mit meinen genialen Geheimzutaten zeige ich euch wie ihr dieses kohlenhydratreduzierte Keto Mugcake Rezept bald selbst zu Hause nachmachen könnt und stelle euch im Zuge von diesem Beitrag auch eine ganz besondere Firma vor.

Es freut mich wahnsinnig euch nun auch auf diesem Wege meinen neuen Kooperationspartner vorzustellen. Seit Anfang des Monats arbeite ich nun gemeinsam mit Xucker zusammen, ein Unternehmen hinter welchem ich zu 100% stehe und ein großer Fan derer Produkte bin, da ich sie einfach selbst bei fast jedem Rezept seit Jahren verwende. Erythrit und Xylit sind oft der Kern meiner Rezepte und ausschlaggebend für die besseren Nährwerte meiner Fitness Desserts und Frühstückskreationen. Im Gegensatz zu Zucker haben sie viel weniger oder sogar keine Kalorien und wirken sich deshalb auch weniger oder auch im Falle von Erythrit gar nicht auf den Blutzuckerspiegel aus.

Xucker Keto Mugcake

Unterschiede und Gemeinsamkeiten von Erythrit und Xylit

Xucker differenziert Xylit und Erythrit mit zwei verschiedenen Linien. Xucker Light steht für Eryhtrit. Hier fallen die Produkte Puderxucker, Bronxe und der Klassiker Light hinein. Xylit wird durch Xucker Premium und Basic vertreten. Was ist aber nun der genaue Unterschied zwischen den beiden?

Xylit hat um 40% weniger Kalorien als normaler Zucker und einen glykämischen Index von 10 (Zucker hat 60). Erythrit ist komplett kalorienfrei und hat demnach auch einen glykämischen Index von 0 und beeinflusst den Blutzuckerspiegel deshalb auch nicht.

Bezüglich der Süßkraft kann man Xylit genauso verwenden wie normalen Zucker. Einfach die gleiche Menge Zucker durch Xucker Premium ersetzen. Erythrit hat nur 70% der Süßkraft, was man bei der Zubereitung der Rezepte beachten sollte.

Beide Produkte werden aus natürlichen Stoffen hergestellt und sind für Diabetiker geeignet. Sie hemmen die Bildung von Karies, da die Bakterien im Mund daraus keine Milchsäure bilden können, welche die Zähne angreift.

Keto Mugcake zuckerfrei

Die Produkte von Xucker

Xucker steht für Zuckeralternativen die Sinn machen. Ihr habt bestimmt oft im Supermarkt schon diverse “light” Produkte gesehen, welche mit künstlichen Süßstoffen wie Acesulfam, Aspartam oder Sucralose gesüßt sind. Hier spart man sich zwar die Kalorien, aber tut seinem Körper und der Umwelt bestimmt nichts Gutes. Künstliche Süßstoffe können das Gehirn angreifen und alles mögliche mit dem Körper anstellen. Es macht viel mehr Sinn Produkte zu wählen, welche süßen wie Zucker, aber ohne dessen Nachteile. Genau das sind die Produkte von Xucker, weshalb ich so begeistert davon bin und seit Jahren nichts anderes mehr für meine Rezepte verwende.

Man kann ganz genauso damit kochen und backen, spart sich aber gleich mal jede Menge an Kalorien, Achterbahnfahrten mit seinem Blutzuckerspiegel und tut sogar seinen Zähnen auch noch was Gutes. Win-win also!

Keto Mugcake zuckerfrei

Low carb & Keto Mugcake

Zum Kooperationsstart mit Xucker wollte ich euch gleich ein Hammer Rezept liefern, welches low carb ist, richtig gut schmeckt und ein paar der genialen Produkte zu einer dekadenten Mischung vereint. Ich habe für das Rezept Xucker Light, Xucker Kakaopulver und die Schokodrops für den extra Schokokick verwendet. Gemacht habe ich damit einen fast kohlenhydratfreien Mug Cake. Das Rezept kommt nur auf 3g Kohlenhydrate pro Keto Mugcake und ist somit für eine ketogene Ernährung geeignet. 

Keto Mugcake zuckerfrei

Wie oben kurz erwähnt enthält das Keto Mugcake Rezept weder herkömmliche Butter, Zucker oder Mehl. Hier sind meine Substitute für diese Produkte:

  • Mehl = statt kohlenhydratlastigem und glutenhaltigem Mehl verwende ich ganz fein gemahlene Mandeln
  • Butter = anstelle kalorienreicher Butter verwende ich einen Esslöffel Sauerrahm und das Mandelmehl dient auch als gesunde Fettquelle
  • Zucker = gewöhnlicher Kristallzucker wird mit kalorienfreien Xucker Light substituiert

Keto Mugcake Rezept

Werfen wir nun einen detaillierten Blick auf das Keto Mugcake Rezept und seine Zubereitung:

Keto Mugcake

Ein einfaches Low Carb Rezept.
Gericht Dessert
Zubereitungszeit 15 Minuten
Portionen 1
Kalorien 225 kcal

Zutaten

  • 1 EL Xucker Light
  • 30 g Mandelmehl
  • 1 EL Sauerrahm
  • 1 EL Xucker heiße Schokolade
  • 5 g Backpulver
  • 1 Ei
  • 1 EL Xucker Schokodrops optional
  • Puderxucker zum Bestreuen optional

Anleitungen

  1. In einer Tasse zuerst den Sauerrahm und das Ei verquirlen.
  2. Das Mandelmehl, Kakaopulver, Xucker Light sowie das Backpulver nach und nach einmischen bis eine samtige Masse entsteht. Optional nun die Schokodrops untermischen.
  3. Nun entweder die Tasse für 50 Sekunden in die Mikrowelle stellen oder für 15 Minuten im Backofen bei 180 Grad backen. Optional mit Puderxucker bestreuen und warm genießen.

Ohne die Schokodrops (welche optional sind) kommt das Rezept auf 225 kcal pro Cake. Hätte ich Zucker und Mehl verwendet wäre ich bei dem Rezept auf 323 Kalorien gekommen und 39 g Kohlenhydrate statt wie jetzt nur 3 g! Ihr seht also wie groß der Unterschied ist wenn man manche Produkte ganz einfach und unkompliziert austauscht. 

Weitere Informationen und Tipps zum Backen mit Xucker Light findet ihr hier

Keto Mugcake zuckerfrei

Ich hoffe ihr seit schon beim Lesen Fan von den Xucker Produkten und diesem low carb Rezept geworden! So könnt ihr tagtäglich wirklich einiges an Kalorien einsparen, was, zumindest mir, immer extrem beim Erreichen meiner Fitnessziele und Abnehmen hilft!

Ich verlinke euch hier noch ein paar weitere low carb/keto Rezepte auf meinem Blog, falls ihr zu diesem Dessert noch eine kohlenhydratfreie Hauptspeise sucht:

xoxo,

Weiterlesen

Buddha Bowl Rezept vegan mit Tofu

Buddha Bowl Rezept vegan

Man sieht sie überall auf Instagram und Pinterest – die Buddha Bowls! Bowls gefüllt mit farbenfrohen Zutaten sind ein absoluter Hingucker an welchem man sich fast nicht satt sehen kann. Heute zeige ich euch ein Buddha Bowl Rezept mit Tofu, komplett vegan und gesund, aber keinesfalls langweilig! 

Was ist ein Buddha Bowl und wo liegt dessen Ursprung?

Die schönen Bowls vereinen das ganze Gericht in einer Schüssel und bestehen aus Getreide, Samen, Gemüse, einem Dressing und einer gewissen Art an Protein – wobei hier auch Bohnen, Tofu, Tempeh oder Linsen gemeint sind. Es wird gesagt, dass der Buddha Bowl die Prinzipien der Chinesischen und Japanischen Medizin vereint und ein ganzheitlich, gesundheitsbewusstes Gericht bilden soll. Unter der veganen Community wird der asiatische Bowl als eines der Lieblingsgerichte gehandhabt, da es alle Sinne anspricht! 

Jeder Buddha Bowl ist ein kleines Meisterwert, da die Zutaten auf dem Basisgetreide immer künstlerisch angeordnet werden und die hübschen Schüsseln auch jedes Mal anders aussehen! 

Buddha Bowls mit Tempeh

Trend Food Bowls – welche Bowls gibt es sonst noch?

In gewisser Weise kann man den Buddha Bowl auch mit dem Poke oder Nourish Bowl vergleichen. Der wesentliche Unterschied liegt allerdings daran, dass ein Buddha Bowl immer vegan oder zumindest vegetarisch sein sollte und die ausschlaggebende Zutat bei einem Poke Bowl der gewürfelte Fisch ist. Ein Nourish Bowl ist dem Buddha Bowl sehr ähnlich, allerdings kann dieser die komplette Dosis Protein durch Hähnchen, Rind oder Meeresfrüchten enthalten! 
Weiteres Bowl Trend Food sind dann natürlich die Smoothie Bowls. Hier unterscheidet man zwischen Açai Bowls, welche die vitaminreiche Açai Beere enthalten, und Nicecream Bowls, welche einfach pürierte, gefrorene Bananen enthalten. 

So jetzt seit ihr Bowl Experten! 😉

Rainbow Buddha Bowl
Regenbogen Buddha Bowl

Dein Buddha Bowl Baukasten

Im Prinzip entscheidest du was in deinen healthy Bowl hinein kommt. Hier für dich ein kleiner Blueprint für das perfekte Buddha Bowl Rezept: 

  1. Körner – als Sattmacher
    Brauner oder weißer Reis, Quinoa, Amaranth, Kamut, Hirse, Bulgur
  2. Veggies – für den Vitamkick
    Bohnen, Hülsenfrüchte, Gurke, Rotkohl, Kürbis, Süßkartoffeln, Broccoli, Spinat, Avocado, Radieschen, Mango, Ananas 
  3. Protein – für die Plant Power
    Tempeh, Tofu, (optional: Hähnchen, Rind, Garnelen)
  4. Sauce – für die extra Dosis Geschmack
    Citrus Tahini Dressing, Erdnusssauce oder lieber Chili Lime Vinaigrette – jeder nach seinem Geschmack und persönlichen Präferenzen
  5. Samen & Nüsse – als finale Verfeinerungen und Crunch Faktor
    Kürbiskerne, Sonnenblumenkerne, Sesam, Leinsamen, gehackte Nüsse (Cashews, Erdnüsse oder Mandeln) 
  6. Finishing Touches
    Gehackter Koriander, Kokosflocken oder Microgreens über den fertigen Bowl gestreut gibt dem Ganzen einfach das extra Asian Buddha Feeling!

Also holt euch eure Portion Zen mit diesem Buddha Bowl Rezept mit Tofu! 

Buddha Bowl Rezept vegan mit Tofu

Buddha Bowl Rezept mit Tofu

Obwohl es ein absoluter Food Trend gerade ist muss ich sagen, dass ich persönlich ein großer Fan geworden bin! Sie sind gesund, richtig lecker und sehen dabei auch noch wunderschön aus. Was will man also mehr? Hier nun das Buddha Bowl Rezept für euch – ganz vegan mit Tofu! 

Buddha Bowl Rezept mit Tofu

Gesund, lecker und wunderschön anzusehen!

Gericht Main Course
Länder & Regionen Chinese
Keyword buddha bowl, nourish bowl, Poke Bowl
Vorbereitungszeit 15 Minuten
Zubereitungszeit 15 Minuten
Portionen 1 Portion
Autor Carina Berry

Zutaten

Basis

  • 150 g gekochter Quinoa

Bowl Zutaten

  • 100 g Hokaido Kürbis oder Süßkartoffel
  • 70 g Tofu alternativ Tempeh
  • 30 g Avocado
  • 40 g Rotkohl
  • 50 g Gurke
  • 70 g Blumenkohl

Toppings

  • 1/2 TL Sesam weiß oder schwarz
  • 1 TL gehackter Koriander
  • 5 Stk. gehackte Mandeln

Cashew Dressing

  • 2 EL Cashewmus optional Erdnuss- oder Mandelmus
  • 1 EL Olivenöl
  • 1/2 TL Senf
  • 1 Stk. kleine Knoblauchzehe
  • 1 EL Wasser
  • 1 Brise Salz & Pfeffer

Anleitungen

  1. Alle Zutaten für den Bowl klein schneiden.

  2. Das gewürfelte Tofu sowie den geschnittenen Kürbis anbraten. Den Blumenkohl kochen.

  3. Den gekochten Quinoa in eine Schüssel geben und alle Zutaten im Uhrzeigersinn schön angerichtet darauf platzieren.

  4. Für das Dressing das Cashewmus mit dem Wasser, Öl und Senf vermischen. Die Knoblauchzehe hineinpressen und mit Salz sowie Pfeffer abschmecken. Das Dressing über den Bowl geben.

  5. Mit den Toppings bestreuen.

Rezept-Anmerkungen

Der Bowl schmeckt am besten wenn man ihn in der Schüssel komplett durchmischt sodass sich alle Zutaten untereinander gut verteilen. 

Hier ein schnelles Video damit ihr sehen könnt wie ich den Bowl zusammen „baue“: 

Hast du das Rezept nachgemacht?

Dann markiere mich mit @carina_berry auf Instagram oder verwende den Hashtag #carinaberry

Ich teile immer wieder nachgemachte Rezepte auf meiner Instastory  <3

xoxo,

Buddha bowl rezept mit tofu Buddha bowl rezept vegan die besten veganen Buddha Bowls

Weiterlesen

Keto Frühstück ballaststoffreich mit Floh- und Leinsamen

Keto Frühstück ballaststoffreich

Schon mal was von Noatmeal gehört? Noats steht für no carb oats, also ein pures keto Frühstück ohne Kohlenhydraten dafür mit ganz vielen wichtigen Ballaststoffen dank der Lein- und Flohsamen im Rezept! Wenn ich jetzt deine Neugierde geweckt habe dann lass dich von diesem ketogenen Rezept inspirieren und spare dir jede Menge an Kohlenhydraten schon beim Frühstück. 

Was ist ketogene Ernährung? 

Ketogene Ernährung – kurz keto – ist eine extreme Form der Low Carb Ernährung. Normalerweise isst ein Durchschnittsmensch 200g Kohlenhydrate pro Tag. Bei Keto wird die Kohlenhydratzufuhr auf nur 30-50g pro Tag stark reduziert. Hingegen bei der gewöhnlichen Low Carb Ernährung isst man etwa 100g Kohlenhydrate. Keto ist also extremer und somit nochmal um mehr als die Hälfte weniger Kohlenhydrate. Das hat natürlich auch einen Sinn und Nutzen. Nach einigen Tagen hat man genug Ketone im Körper um in Ketose zu kommen – ein Zustand in welchem man optimal Fett verbrennt, da der Körper nicht mehr Kohlenhydrate sondern Fette zur Energiegewinnung verwendet. Ich habe in der Vergangenheit schon einige Male keto gemacht und immer total gute Ergebnisse bei der Fettabnahme gesehen. 

Keto Frühstück ballaststoffreich mit Flohsamen-4

Ich persönlich liebe low carb weil es mir beim Abnehmen hilft und mich nicht wie bei high carb Ernährung aufbläht. Für mich ist Low Carb jetzt keine Diät sondern einfach eine andere Art der Ernährung so wie es vegetarisch oder vegan jetzt auch eben ist. Keto würde ich persönlich schon als Diät einstufen, einfach da es einem schon sehr einschränkt und in meinen Augen auch nicht langfristig durch zu halten ist. 

Keto ist oft leichter als man denken würde. Meistens lässt man einfach die Beilage weg und isst nur das Fleisch mit Gemüse. Bei Frühstücksrezepten ist das allerdings etwas anderes, da einem außer Eiergerichten schnell nichts kreativeres mehr einfällt. Aus diesem Grund möchte ich euch heute ein geniales keto Frühstück vorstellen. Ein Rezept, welches sogar noch gut für eure Verdauung ist da es reich an Ballaststoffen ist. 

Keto Frühstück ballaststoffreich mit Flohsamen-4

Ballaststoffe durch Lein- und Flohsamen 

Mein heutiges keto Frühstück kann man von der Konsistenz her ein bisschen mit Chia Pudding vergleichen. Ihr werdet eine Art Frühstückspudding bekommen, der aber in gewisser Weise sehr einem Haferflockenbrei ähnelt. Dieses keto Frühstück besteht eigentlich so gut wie nur aus Superfoods und ich möchte euch die einzelnen Inhaltsstoffe nun etwas genauer vorstellen: 

  • Leinsamen: Quelle von Omega 3 Fettsäuren und Ballaststoffen
  • Flohsamenschalen: 8x mehr Ballaststoffe als Haferflocken, gut für die Verdauung
  • Chiasamen: reich an Protein und Magnesium, 5x mehr Kalzium als Milch
  • Protein Pulver: enthält große Mengen an verschiedenen Aminosäuren welche zum Muskelerhalt, Muskelaufbau und der Muskelregeneration beitragen
  • Eryhtrit: ist eine natürliche, kalorienfreie Zuckeralternative
  • Kokosmilch: enthält gesunde Fette und so gut wie keine Kohlenhydrate

Keto Frühstück ballaststoffreich mit Flohsamen

Das Rezept ist ziemlich schnell gemacht. Die Flohsamen quellen wahnsinnig schnell auf, die Chiasamen schon etwas langsamer und die Leinsamen brauchen am längsten. Je länger du den Brei stehen lässt desto weicher wird er werden. Zu Beginn sind die Leinsamen noch crunchy, weichen sich aber mit der Zeit auch auf. So kann man das Rezept etwa schon am Vorabend machen und dann über Nacht im Kühlschrank quellen lassen. Am nächsten Morgen braucht man es dann nur mehr mit Zutaten nach Wahl belegen und fertig! 

Keto Frühstück ballaststoffreich mit Flohsamen-2

Möchtest du mehr über gesunde Ernährung lernen?

Bevor wir weiter ins Rezept und zur genauen Zubereitung der Noats schauen wollte ich noch schnell die aktuellen Neuigkeiten mit dir teilen! Seit kurzer Zeit ist nun mein erster Fitness Food Online Kurs gestartet! Mit 140 Minuten Videomaterial, 9 Kapiteln und 6 Kochlektionen lernst du im Selbststudium die Basics zu Clean Eating und gesunder Ernährung. Wir kochen zusammen verschiedene Fitnessrezepte, du findest Expertenwissen von staatlich geprüften Ernährungstrainern und ganz viele PDF’s, Rezeptkarten und Fact Sheets zum Ausdrucken! 

Fitness Food Online Kochkurs

Keto Rezepte – ein einfaches Frühstück mit vielen Ballaststoffen!

Bevor wir jetzt gleich ins Rezept starten wollte ich noch kurz anmerken, dass du dich bei den Toppings wirklich total austoben kannst. Je nachdem wie streng du gerade mit deinen Kohlenhydraten bist kannst du den Bowl mit Früchten dekorieren, oder auch nur mit gehackten Nüssen und Nussbutter falls er keto bleiben soll! Ich habe für dieses Rezept griechisches Joghurt, Heidelbeeren, gehackte Mandeln, Erdnussbutter und Maracuja verwendet. 

Keto Frühstück ballaststoffreich
5 von 1 Bewertung
Drucken

Ballaststoffeiches Frühstück mit Lein- und Flohsamen

Ballaststoffreich und ketogen

Gericht Breakfast
Keyword ballasstoffreich, frühstück, keto, low carb
Zubereitungszeit 10 Minuten
Quellzeit 15 Minuten
Portionen 1 Portion
Kalorien 220 kcal
Autor Carina Berry

Zutaten

Noatmeal

  • 1 EL Flohsamenschalen
  • 1 EL Chiasamen
  • 1 EL Leinsamen
  • 1 EL Proteinpulver
  • 1 EL Eryhtrit
  • 3 EL Kokosmilch
  • 200 ml Wasser

Toppings

  • 1 TL Erdnussbutter
  • 5 Stück Mandeln
  • 1 EL griechisches Joghurt 10%
  • 30 g Heidelbeeren

Anleitungen

  1. Flohsamen, Chiasamen und Leinsamen zusammen mischen.

  2. Mit warmen Wasser aufgießen und gleich zügig umrühren.

  3. Die Masse kurz rasten lassen und alle paar Minuten wieder umrühren.

  4. Kokosmilch, Proteinpulver und Erythrit einrühren.

  5. Mit Joghurt, gehackten Mandeln, Erdnussbutter und Heidelbeeren dekorieren.

Des weiteren kann ich dir folgende keto Rezepte & ketogenes Frühstück noch auf meinem Blog empfehlen:

Keto Frühstück ballaststoffreich mit Flohsamen-2

Hier auch noch ein kleines Goodie von mir an dich: meine clean Eating Shopping Liste, damit du dir beim Einkaufen leichter tust nur „fitness approved“ Lebensmittel in den Korb zu geben.  

Hast du das Rezept nachgemacht?

Dann markiere mich mit @carina_berry auf Instagram oder verwende den Hashtag #carinaberry

Ich teile immer wieder nachgemachte Rezepte auf meiner Instastory  <3

xoxo,

Frühstück mit Leinsamen und Flohsamen Low Carb Frühstück mit Leinsamen Ballaststoffreiches Frühstück mit Leinsamen

Weiterlesen

Abnehmen mit Intervallfasten – 16:8 Erfahrungsbericht

Effektives Abnehmen Intervallfasten

Stressfrei abnehmen mit Intervallfasten. Seit einem halben Jahr praktiziere ich nun schon intermittierendes Fasten und habe damit die tollsten Erfolge erzielt. Ich liebe es und könnte mir nichts besseres mehr vorstellen. Seitdem ich Intervallfasten mache habe ich keine Gewichtsprobleme mehr und habe endlich mein Traumgewicht erreicht. In meinem heutigen Blogpost möchte ich meine Erfahrungen mit euch teilen und meine top Tipps weitergeben! 

Was ist Intervallfasten?

Intervallfasten, intermittierendes  oder Teilzeitfasten ist keine klassische Fastenkur. Es besteht aus Phasen des kompletten Verzichts und Phasen in welchen man essen kann. Im Prinzip geht es darum tägliche Essenspausen einzuführen und für eine gewisse Zeitdauer zu fasten. 

Es gibt verschiedene Modelle wie zum Beispiel 5:2 (5 Tage essen, 2 Tage fasten), alternierend (1 Tag fasten, 1 Tag essen) oder das zeitbegrenzte Fasten (16:8) Seit einigen Monaten praktiziere ich nun schon die 16:8 Methode weil sie für mich einfach am nachhaltigsten ist und am meisten Sinn macht! Dabei hat man ein Zeitfenster über Nacht von 16 Stunden in welchem man nichts isst und tagsüber binnen acht Stunden kann man Mahlzeiten zu sich nehmen. 

Es gibt ganz viele Beiträge im Internet, welche euch erklären wie sich Intervallfasten auf den Körper auswirkt und wie der sogenannte Authopagie Prozess, der dadurch entsteht, eine Art Recycling-Programm der Zellen sein kann. Wer fasten möchte sollte das aber auf jeden Fall vorher mit seinem Arzt besprechen. Gerade junge Frauen können durch fasten Hormonprobleme bekommen, sollten sie dafür prädestiniert sein. Da ich nicht in der Position bin euch medizinische Ratschläge zu geben möchte ich mich in diesem Blogpost vielmehr auf meine persönlichen Erfahrungen mit Teilfasten fokussieren und euch meine Tipps mit auf den Weg geben. Eventuell mache ich auch manches anders als es in den Schulbüchern steht – aber wie gesagt ich teile hier einfach meine persönliche Sichtweise und Ergebnisse mit Intervallfasten. 

Vorher – Nachher Ergebnis Intervallfasten

Ich habe mit intermittierendem Fasten super einfach, nachhaltig und gesund innerhalb von 5 Monaten 6kg abgenommen. Eine Summe die für mich wirklich ein Wahnsinn ist, da ich mir generell extrem schwer tue beim Abnehmen. Gestartet habe ich im April mit 69kg und hatte Ende September nur mehr 63kg. Ein Gewicht mit dem ich mich einfach so wahnsinnig wohl fühle!

Man muss natürlich auch anmerken, dass ich mit 170cm und 69kg schon relativ schlank war als ich begonnen habe. Jemand der mit 170cm und 90kg beginnt wir proportional noch viel größere Erfolge sehen als ich – da bin ich mir sicher. 

Intervallfasten Vorher Nachher Intervallfasten Vorher Nachher

So funktioniert Intervallfasten

Effektiv abnehmen ohne Diät? Meiner Meinung nach geht das am besten mit Intervallfasten. Ich habe schon viele Diäten ausprobiert und nur die wenigstens haben dauerhaft etwas gebracht. Die meisten kann man einfach nicht über eine lange Zeit durchhalten und sie schränken einen viel zu sehr ein. Ich bin deshalb so ein großer Fan vom Abnehmen mit Intervallfasten weil man sich wirklich gar nicht einschränken muss. Klar man hat eine bestimmte Anzahl an Stunden wo man einfach nichts isst, aber dann kann man wie sonst auch ganz normal alles essen auf was man eben Lust hat! 

Gerade auch weil man so streng für gewisse Stunden nichts isst, macht das alles auch viel einfacher. Ich weiß von 20.00-12.00 esse ich nichts und zwischen 12.00 und 20.00 kann ich essen worauf ich Lust habe. That’s it. So einfach – keine Einschränkungen, kein Kalorien zählen, nichts abwiegen, keine „verbotenen“ Lebensmittel.  Ich habe das Intervallfasten aber auch etwas abgeändert und für mich angepasst, da in den „Schulbüchern“ eigentlich steht man soll nur 2 Mahlzeiten in den 8 Stunden zu sich nehmen und dazwischen nur Wasser oder Tee. Ich mache das etwas anders weil es für mich so einfach realistischer und dauerhaft umsetzbar ist. 

two blonde girls eating vegan burgers at flower burger in rome

Abnehmen mit Intervallfasten funktioniert einfach deshalb so gut weil du dir kontinuierlich, jeden Tag um die 300-500kcal von deinem Frühstück sparst! Das macht das ganze so simpel. Über ein, zwei oder drei Monate summiert sich das Ganze und das Kaloriendefizit machte sich durch Gewichtsverlust bei mir bemerkbar. Ich persönlich habe noch keine andere Diät gefunden – und ich habe wirklich schon viel ausprobiert – bei welcher man so einfach und unkompliziert jeden Tag seine 300+ Kalorien einsparen kann. 

My simple math

Ich bin zum Beispiel ein Mensch der bei 1600-1700kcal sein Gewicht hält, bei 1800kcal zunimmt und bei 1500kcal abnimmt. Ich esse jeden Tag mit intermittent fasting 1400-500kcal, würde ich da aber mein Frühstück drauf rechnen käme ich auf 1850 und würde effektiv jeden Tag etwas zunehmen wenn ich ganz normal weiter essen würde ohne Kalorien zu tracken. Mit Intervallfasten kann ich essen was ich will, brauche keine Kalorien zählen und weiß, dass ich die 1800kcal Marke nicht erreichen werde – es sei denn ich esse Pizza zu Mittag und Burger am Abend, aber das mache ich generell nie weil ich healthy food einfach liebe. 

Ergebnisse Intervallfasten

Kein Frühstück? Wie soll das gehen?

Ich war früher immer die Person die ohne sofortiges Frühstück nach dem Aufstehen nicht leben konnte. Mein Magen hat gegrummelt, ich bekam richtiges Bauchstechen und mir wurde zum Teil richtig schlecht wenn ich nicht in der ersten Morgenstunde nach dem Erwachen etwas gegessen hatte. Frühstück war für mich unumgänglich – egal ob um 06.00 Früh oder 09.00 – es musste einfach sofort was in den Magen. Damals hätte ich es nie für möglich gehalten den ganzen Morgen zu fasten und erst Mittags etwas zu essen. Also wenn ihr der Meinung seit, dass ihr ohne Frühstück nicht könnt dann verstehe ich das total weil es mir damals genauso ging! Aber lasst mich euch erzählen, dass es mittlerweile wirklich gar kein Problem mehr ist. Ich komme locker bis 14.00 ohne Frühstück aus und werde euch jetzt genau erklären wie ich es gemacht habe und was mein Geheimtipp ist. 

Zu Beginn war die Umstellung schon etwas heftig und ich habe begonnen einfach mein Frühstück um die Hälfte zu reduzieren. Oft isst man eh einfach viel zu viel und etwas weniger genügt auch schon. Ich wollte einfach „etwas im Magen haben“ also habe ich statt meinen 40g Haferflocken Porridge nur mehr 20g aufgekocht. Danach habe ich diese Mahlzeit mit einer heißen Schokolade oder Golden Milk ersetzt. Ich liiiiebe ja Heißgetränke – Kaffee trinke ich gar nicht – und somit ist für mich eine heiße Schokolade oder Chai Latte immer ein besonderer Treat! Durch das reichhaltige Milchgetränk hatte ich immer noch das Gefühl etwas zu mir zu nehmen und siehe da es hat mir wirklich bis zu den Mittagsstunden perfekt geholfen, um nicht allzu hungrig zu sein. 

golden Milk-Turmeric tea

Im letzten Schritt habe ich dann die heiße Latte durch einen English Breakfast Tea (ich verlinke ihn dir hier mal) mit Milch und Honig ersetzt. Das trinke ich nach wie vor fast jeden Tag in der Früh. Durch einen Schuss Milch und einen Teelöffel Honig fühlt es sich einfach mehr an als nur heißes Wasser mit Geschmack zu trinken und füllt meinen Magen in der Früh gleich mal mit einem halben Liter Wasser an – ich habe ein ziemlich großes Tee Häferl 😀 Das wäre theoretisch im Fastenfenster nicht erlaubt, aber who cares – it works for me! Laut Schulbuch unterbricht man den Fastenprozess (und somit auch die Authopagie – Zellerneuerung) sobald der Körper wieder Kalorien verwertet, aber mir geht es prinzipiell darum jeden Tag 300+ Kalorien beim Frühstück einzusparen und ich sehe das dann einfach nicht so streng wie manch anderer. 

Effektives Abnehmen Intervallfasten

Viel Trinken ist generell mein Tipp. Immer wenn Hunger aufkommt in der Fastenperiode dann einfach viel trinken. Am besten Wasser oder Tee. Für alle Coffee Lovers: ihr könnt meinen English Breakfast Tea ja mit einem Cappuccino am Morgen austauschen, das müsste genauso gehen 🙂 

Ich starte dann Mittags meistens nicht mit Frühstücksessen sondern direkt mit Mittagessen. Da aber Frühstücksgerichte wie Porridge, Pancakes, Chia Pudding und ähnliches einfach zu meinen liebsten Speisen gehören und ich nicht darauf verzichten möchte, esse ich das manchmal als kleines Dessert am Abend. Breakfast for dinner oder so 😉

Lieblingsprodukte beim Intervallfasten

Wie oben schon kurz erwähnt starte für mich kein Tag ohne meinen geliebten English Breakfast Tee. Ich verlinke dir hier die Marke die ich mir immer auf Amazon aus England bestelle. Ich habe schon so viele Sorten ausprobiert, aber der ist mit Abstand der beste! Bin ich selbst in England packe ich den halben Koffer am Heimflug immer voll mit diesem Tee 😀 

Ansonsten bin ich ein großer Fan davon Eryhtrit zum Süßen von meinem Tee vor und nach meinem Nahrungsfenster zu verwenden. Es hat keine Kalorien und beeinflusst den Blutzuckerspiegel deshalb auch nicht. So kann man trotzdem am Morgen oder am Abend Getränke süßen, ohne Kalorien und Chemie! 

Fehler beim Abnehmen mit Intervallfasten

Beim Abnehmen mit Intervallfasten kommt es oft zu Fehlern die gemacht werden. Hier ein paar Tipps die ich euch aufgrund meiner persönlichen Erfahrung geben kann:

Don’t compensate

Was man beim Intervallfasten natürlich nicht machen sollte ist in der Zeit wo man essen darf dann total über die Strenge zu schlagen und „extra“ mehr zu essen für die Stunden wo man dann nichts essen soll. Ich esse wirklich zu 100% genauso wie ich normalerweise auch essen würde. Ich sage nach wie vor „nein“ zu dem ungesunden Stück Kuchen und greife lieber zu einer raw vegan bar oder einem Proteinriegel. Auch während meines Zeitfensters in welchem ich esse, achte ich darauf mich gesund zu ernähren und nicht bis zum Anschlag zu essen. Sollte man versuchen das no-food Zeitfenster mit Essen zu kompensieren dann hat das Ganze natürlich absolut keinen Sinn, aber das sagt euch wohl der Hausverstand. 

The loft . canggu smoothie bowl

Finde deinen Zeitplan

Ich persönlich esse von 12.00-20.00 weil das für mich am angenehmsten ist. Ich liebe es mir am Abend noch etwas zum Essen zu machen und mich dann damit vor meine Lieblingsserie zu setzen. Irgendwie brauche ich am Abend einfach eine Beschäftigung und das ist meistens das Kochen. Am Morgen bin ich super produktiv und arbeite meistens. Da reicht es mir vollkommen einfach meinen Breakfast Tea neben mir zu haben. Ich brause damit durch die Morgenstunden bis Mittags und denke gar nicht wirklich ans Essen. 
Bei meiner Schwester ist es zum Beispiel anders. Die muss um 06.00 Morgens aufstehen und steht dann bis Mittags als Lehrerin in der Schule. Sie braucht ein Frühstück um einfach bei Kräften zu sein. Deshalb isst sie dann lieber nach 17.00 Abends nichts mehr und fastet dann bis zum nächsten Morgen. 

Somit kann jeder seinen eigenen Zeitplan finden, solange ihr +/- 16 Stunden nichts esst und 8 stunden esst. Manchmal esse ich auch erst um 21.00 Uhr Abends. Das ist dann auch kein großes Drama, aber je genauer man in den 8 Stunden bleibt, desto besser natürlich. 

Wasser trinken

Immer wenn ihr hungrig werdet einfach trinken. Oft verwechselt man Durst mit Hunger und das Ganze legt sich nach einem großen Glas Wasser. Ich habe am Vormittag immer ein große Glas Wasser neben mir um meinen Körper mit ausreichend Flüssigkeit zu versorgen. 

Being a couch potato

Ein weiterer Fehler der oft gemacht wird ist beim intermittierenden Fasten dann einfach komplett auf den Sport zu verzichten. Je mehr Sport ihr noch dazu macht, desto schneller werdet ihr auch Ergebnisse sehen. Es ist jetzt überhaupt nicht notwendig 5x die Woche ins Fitnessstudio zu gehen, aber einfach aktiv zu sein kann enorm helfen um eure Ziele zu erreichen! 

Hier ein paar Content Pieces von mir die euch im Bezug auf Sport helfen können: 

Yoga übung

Warum ich Intervallfasten so liebe

Ich persönlich finde man kann einfach mit Intervallfasten ohne Stress dauerhaft abnehmen. Die Kilos purzeln fast wie von selbst, ohne dass man sich sonderlich dafür anstrengen muss oder sich enorm im Bezug auf seine Ernährung einschränken muss. Für mich ist dieser Ernährungstrend absolut nachhaltig und ich kann jeden nur empfehlen es einmal selbst auszuprobieren.

Solltet ihr noch konkrete Fragen zum Abnehmen mit Intervallfasten haben, schreibt es mir gerne in die Kommentare! Hättet ihr Interesse daran, dass ich meinen gewöhnlichen Ernährungsplan für einen Tag Intervallfasten mit euch teile? Wenn ja lasst es mich auch gerne in den Kommentaren wissen. 

Übrigens könnt ihr euch auch mein YouTube Video zu diesem Thema ansehen und mich einen Tag lang bei einem „Full Day of Intermittent Fasting“ begleiten: 

Du kannst dir auch gerne mein Clean & Lean Kochbuch mit leckeren Fitnessrezepten hier gratis herunterladen. Ich schicke es dir direkt in deine Inbox: 

xoxo,
Weiterlesen

Cashew cheesecake with pink pitaya

Raw vegan cheesecake with cashew and pink pitaya-2

Take a moment and think of biting into smooth and creamy cashew cream in the shades of baby pink with a crunchy crust. Wouldn’t that be lovely? Yes? Well then, I recommend you go and make this raw vegan cashew cheesecake to experience the deliciousness of this plant-based dessert yourself!

Springe zu Rezept

Natural food coloring – pink pitaya

I think by now we all know how amazing pink pitaya or the “dragon fruit” is. It is such a powerful natural food coloring and is filled with vitamin C and antioxidants. It is the only thing I use now to color my food and tint it into the most wonderful shades of pink.

The first time I discovered dragon fruit was actually on my travels through Indonesia 12 years ago with my family. We took a boat trip with a local guide and for lunch on the water he brought some of these vibrant pink fruits, cut them open for us and I remember just being so amazed and astonished by the vivid color of the flesh of the fruit. That was in 2008 when the term “superfood” was still unheard of and a lot of tropical fruit not yet sold in Austrian supermarkets.

Raw vegan cheesecake with cashew and pink pitaya-2

Last year I came back to Indonesia and spent 2 months working and living in Bali, where I got to explore the local food scene in much greater detail this time. Pink Pitaya was still used in almost every restaurant and sold on every market. So I started to make a lot of recipes with it myself, like this raw vegan cheesecake that I am sharing with you now!

By itself pink pitaya is actually very neutral tasting. Don’t try making pink pitaya shakes just out of the dragon fruit itself – it won’t taste great. It doesn’t have a lot of flavor on its own, which is also awesome as it simply lends its color to the meals you add it to. The more you use of it the deeper pink to almost purple it will get. If you only use a bit you will get soft shades of baby pink! Be careful not to get it into your clothes though. The color is quite hard to get out.

There is also a white dragon fruit. It obviously has less qualities as food coloring and tastes very neutral as well. However, it looks great if you use it for decoration. I love to cut little stars or hearts out and put them as a topping on my nicecream bowls. A guaranteed wow effect!

Raw vegan cheesecake with cashew and pink pitaya-2

Healthy raw vegan cashew cheesecake

The pink cashew cheesecake is probably one of the easiest recipes you will ever make. It is raw – which means you don’t even have to bake this cake, so no need for an oven.

This recipe requires only a handful of ingredients, but a little waiting time. Dates and cashews need to soak and the finished cake needs to set in the freezer. This raw vegan cheesecake with pink pitaya is made up of two layer. The date and almond crust and the pink cashew cream filling.

Raw vegan cheesecake with cashew and pink pitaya-2

I like to substitute sugar for Erythrit as it is a natural sugar alternative without calories. If you don’t have this at home feel free to use whatever sweetener you prefer or fits your dietary needs.

So lets have a more detailed look at the recipe and what you need for this raw vegan cheesecake:

Cashew Cream Cheesecake

Smooth pink cashew cream with a crunchy crust!
Gericht Dessert
Keyword pink pitaya cheesecake, raw vegan cheesecake
Zubereitungszeit 45 Minuten
Resting time 7 Stunden
Portionen 8

Zutaten

Filling

  • 200 g cashews
  • 1 / 2 tbsp pink pitaya alternatively powder is also possible
  • 3 tbsp coconut milk
  • 3 tbsp xylitol

Crust

  • 100 g dates
  • 2 tbsp peanut butter
  • 80 g oatmeal
  • 1 tbsp xylitol

Anleitungen

  1. Cover the dates and the cashews in two different bowls with water overnight and let them soak.
  2. Strain the next day and drain.
  3. Mix all ingredients well for the crust and press on the bottom of a small round silicone mold.

  4. The crust should be about 1/2 cm thick and can go a bit further up at the edge.

  5. Puree the cashews with the pink pitaya, coconut milk and sweetener for the filling.
  6. The mass should be as fine as possible. If you use pink pitaya powder you will probably need a little more coconut milk.
  7. Put the filling on the crust and then best freeze the silicone mold.

  8. Before slicing, flip the cake out of the mold and wait 10 minutes until you can cut it perfectly into pieces.

  9. It should then be eaten relatively quickly because it collapses when exposed to room temperature for a long time.

Rezept-Anmerkungen

Once you take it out of the freezer and let it thaw you should serve it quite quickly.

Raw vegan cheesecake with cashew and pink pitaya-2

More recipes for the raw, vegan fans out there

I really hope you enjoyed this recipe. Feel free to check some of my other raw, vegan desserts:

If you want you can sign up for my clean & lean fitness cookbook. I will send you 35 amazing fitness recipes straight to your inbox:

Did you make this recipe?

Did you make this recipe?

Tag  @carina_berry and use the Hashtag #carinaberry to get the possibility for a shoutout on my Instagram! 

I always love to see your wonderful creations and it makes me so happy to see you guys actually making my recipes. 

xoxo,
Cashew cheesecake with pink pitaya Cashew cheesecake with pink pitaya Cashew cheesecake with pink pitaya

Weiterlesen